A Mosaic Layout Gallery is an image gallery where photos use different sizes and span across rows and columns. It helps show images in an eye-catching way and improves visual storytelling on WordPress websites.
Let’s see how to create a Mosaic Layout Gallery in WordPress.
Adding the Mosaic Layout Gallery #
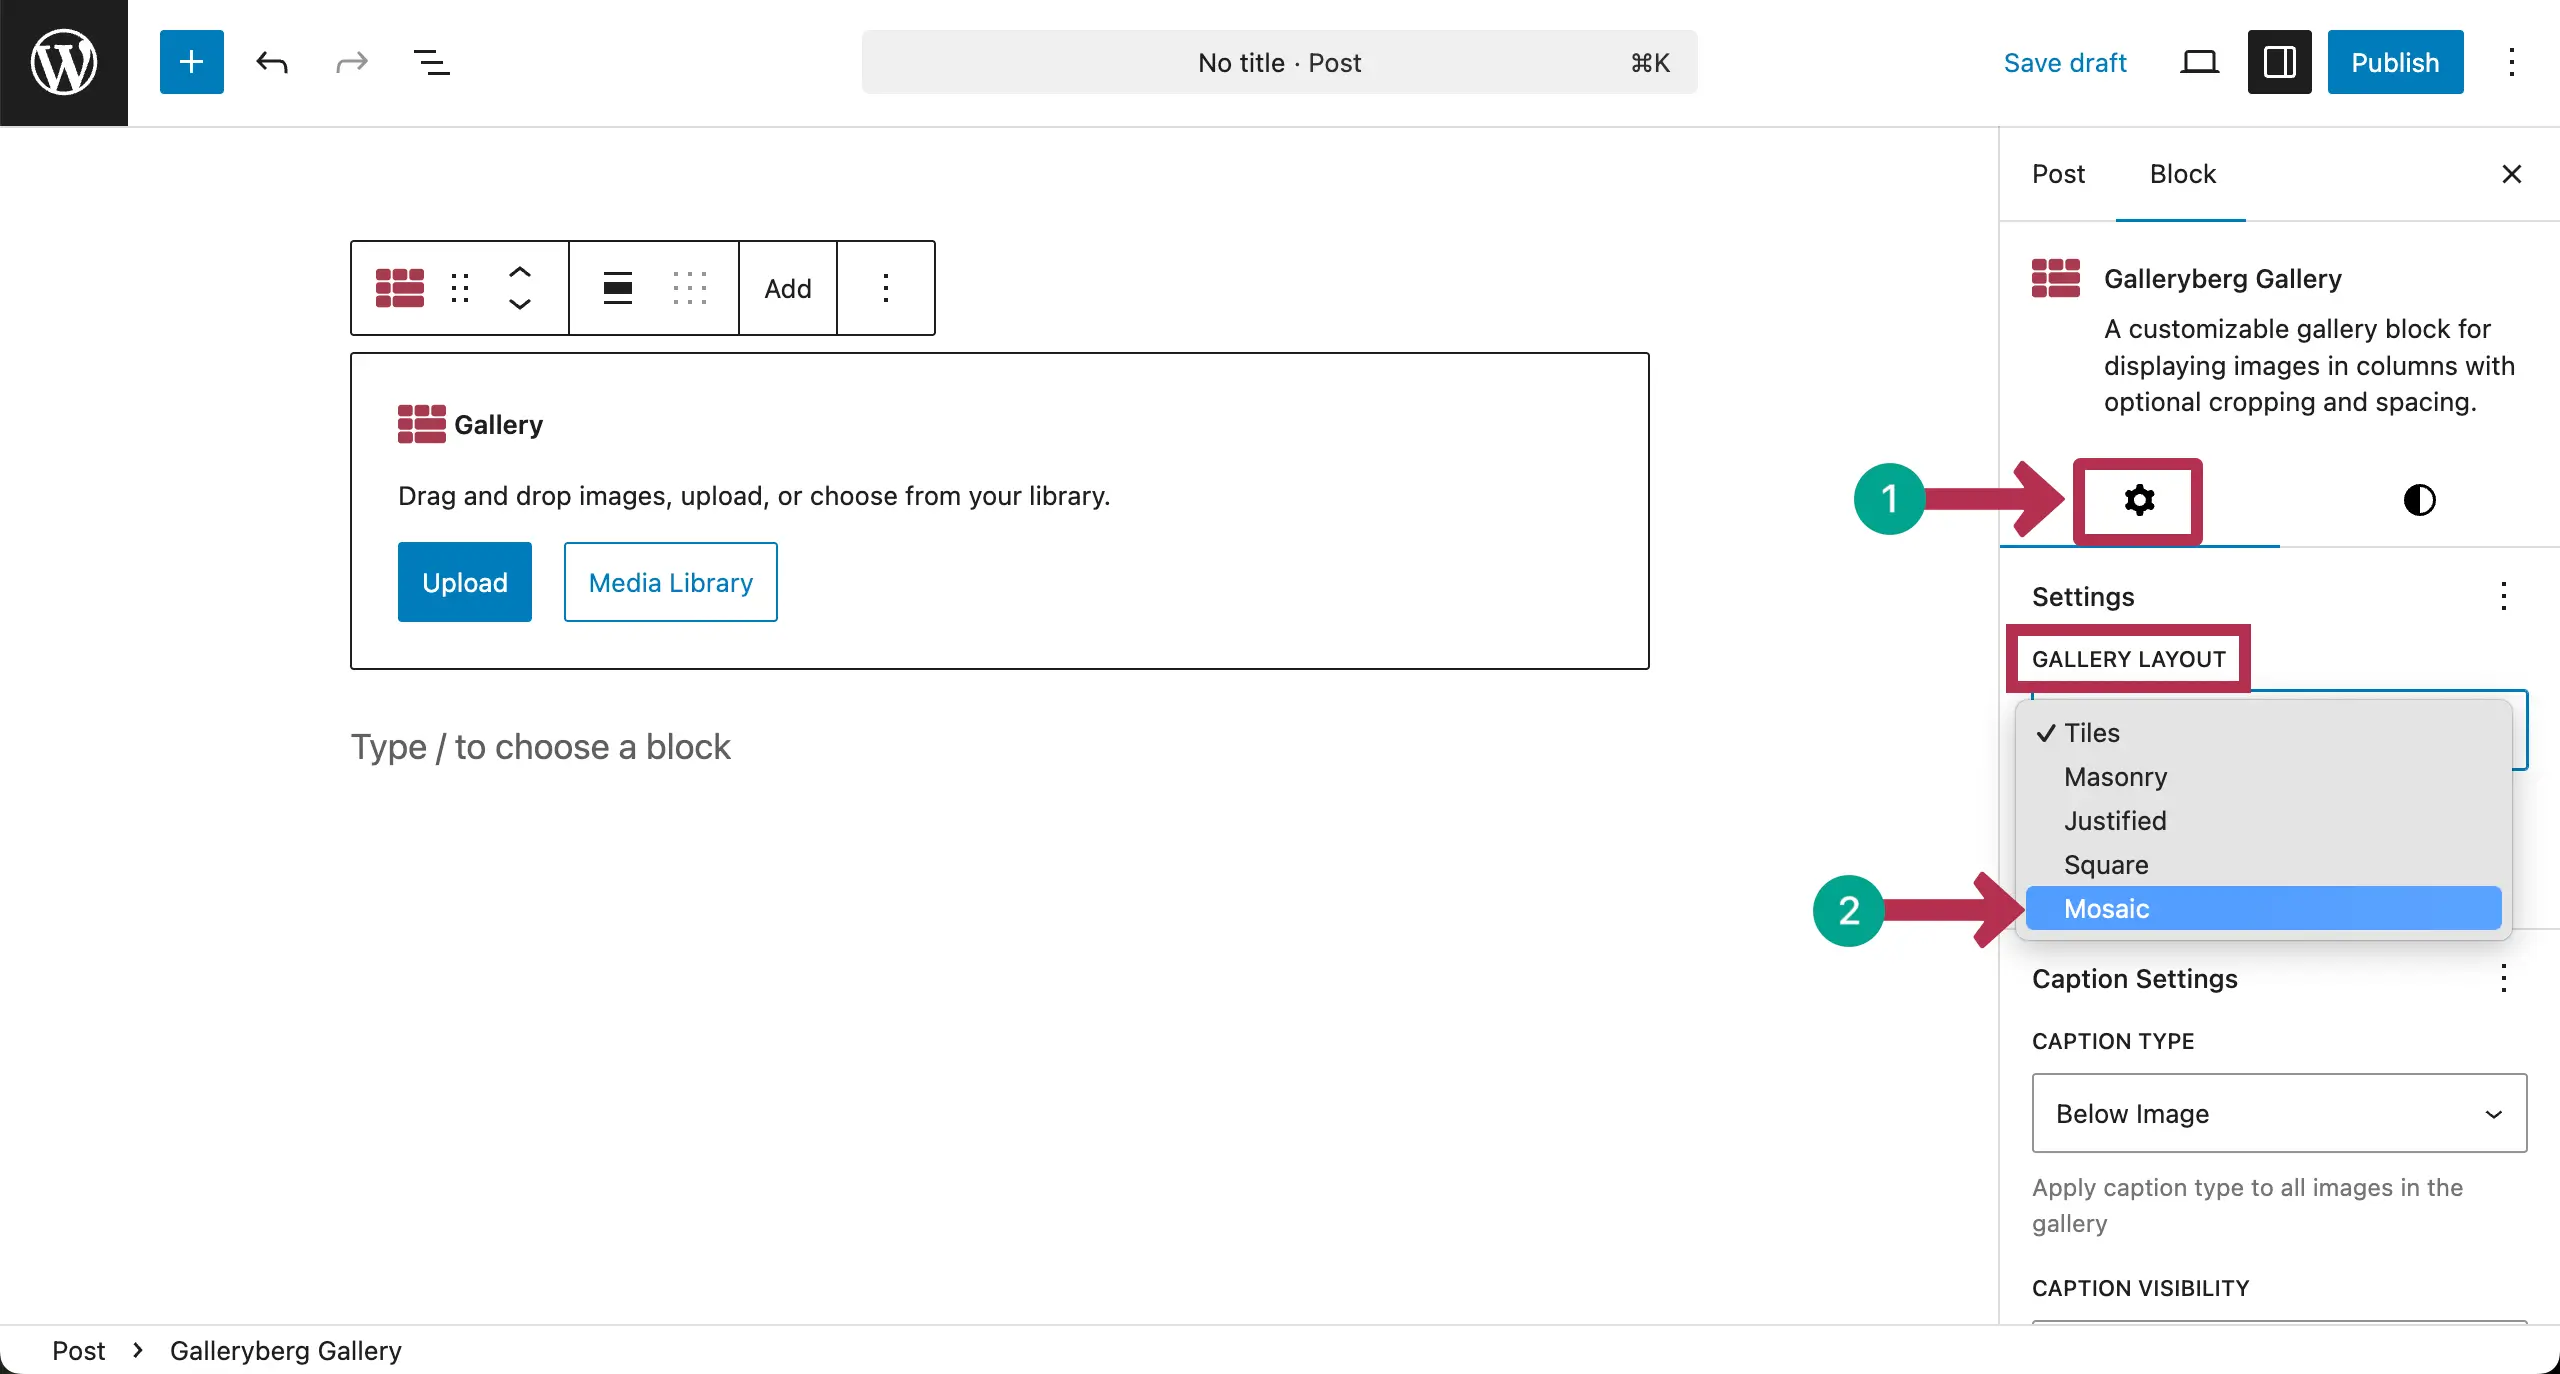
Open your WordPress editor. Add the Galleryberg block to the editor.

Once the block is added, come to the settings tab and choose the Mosaic gallery layout.
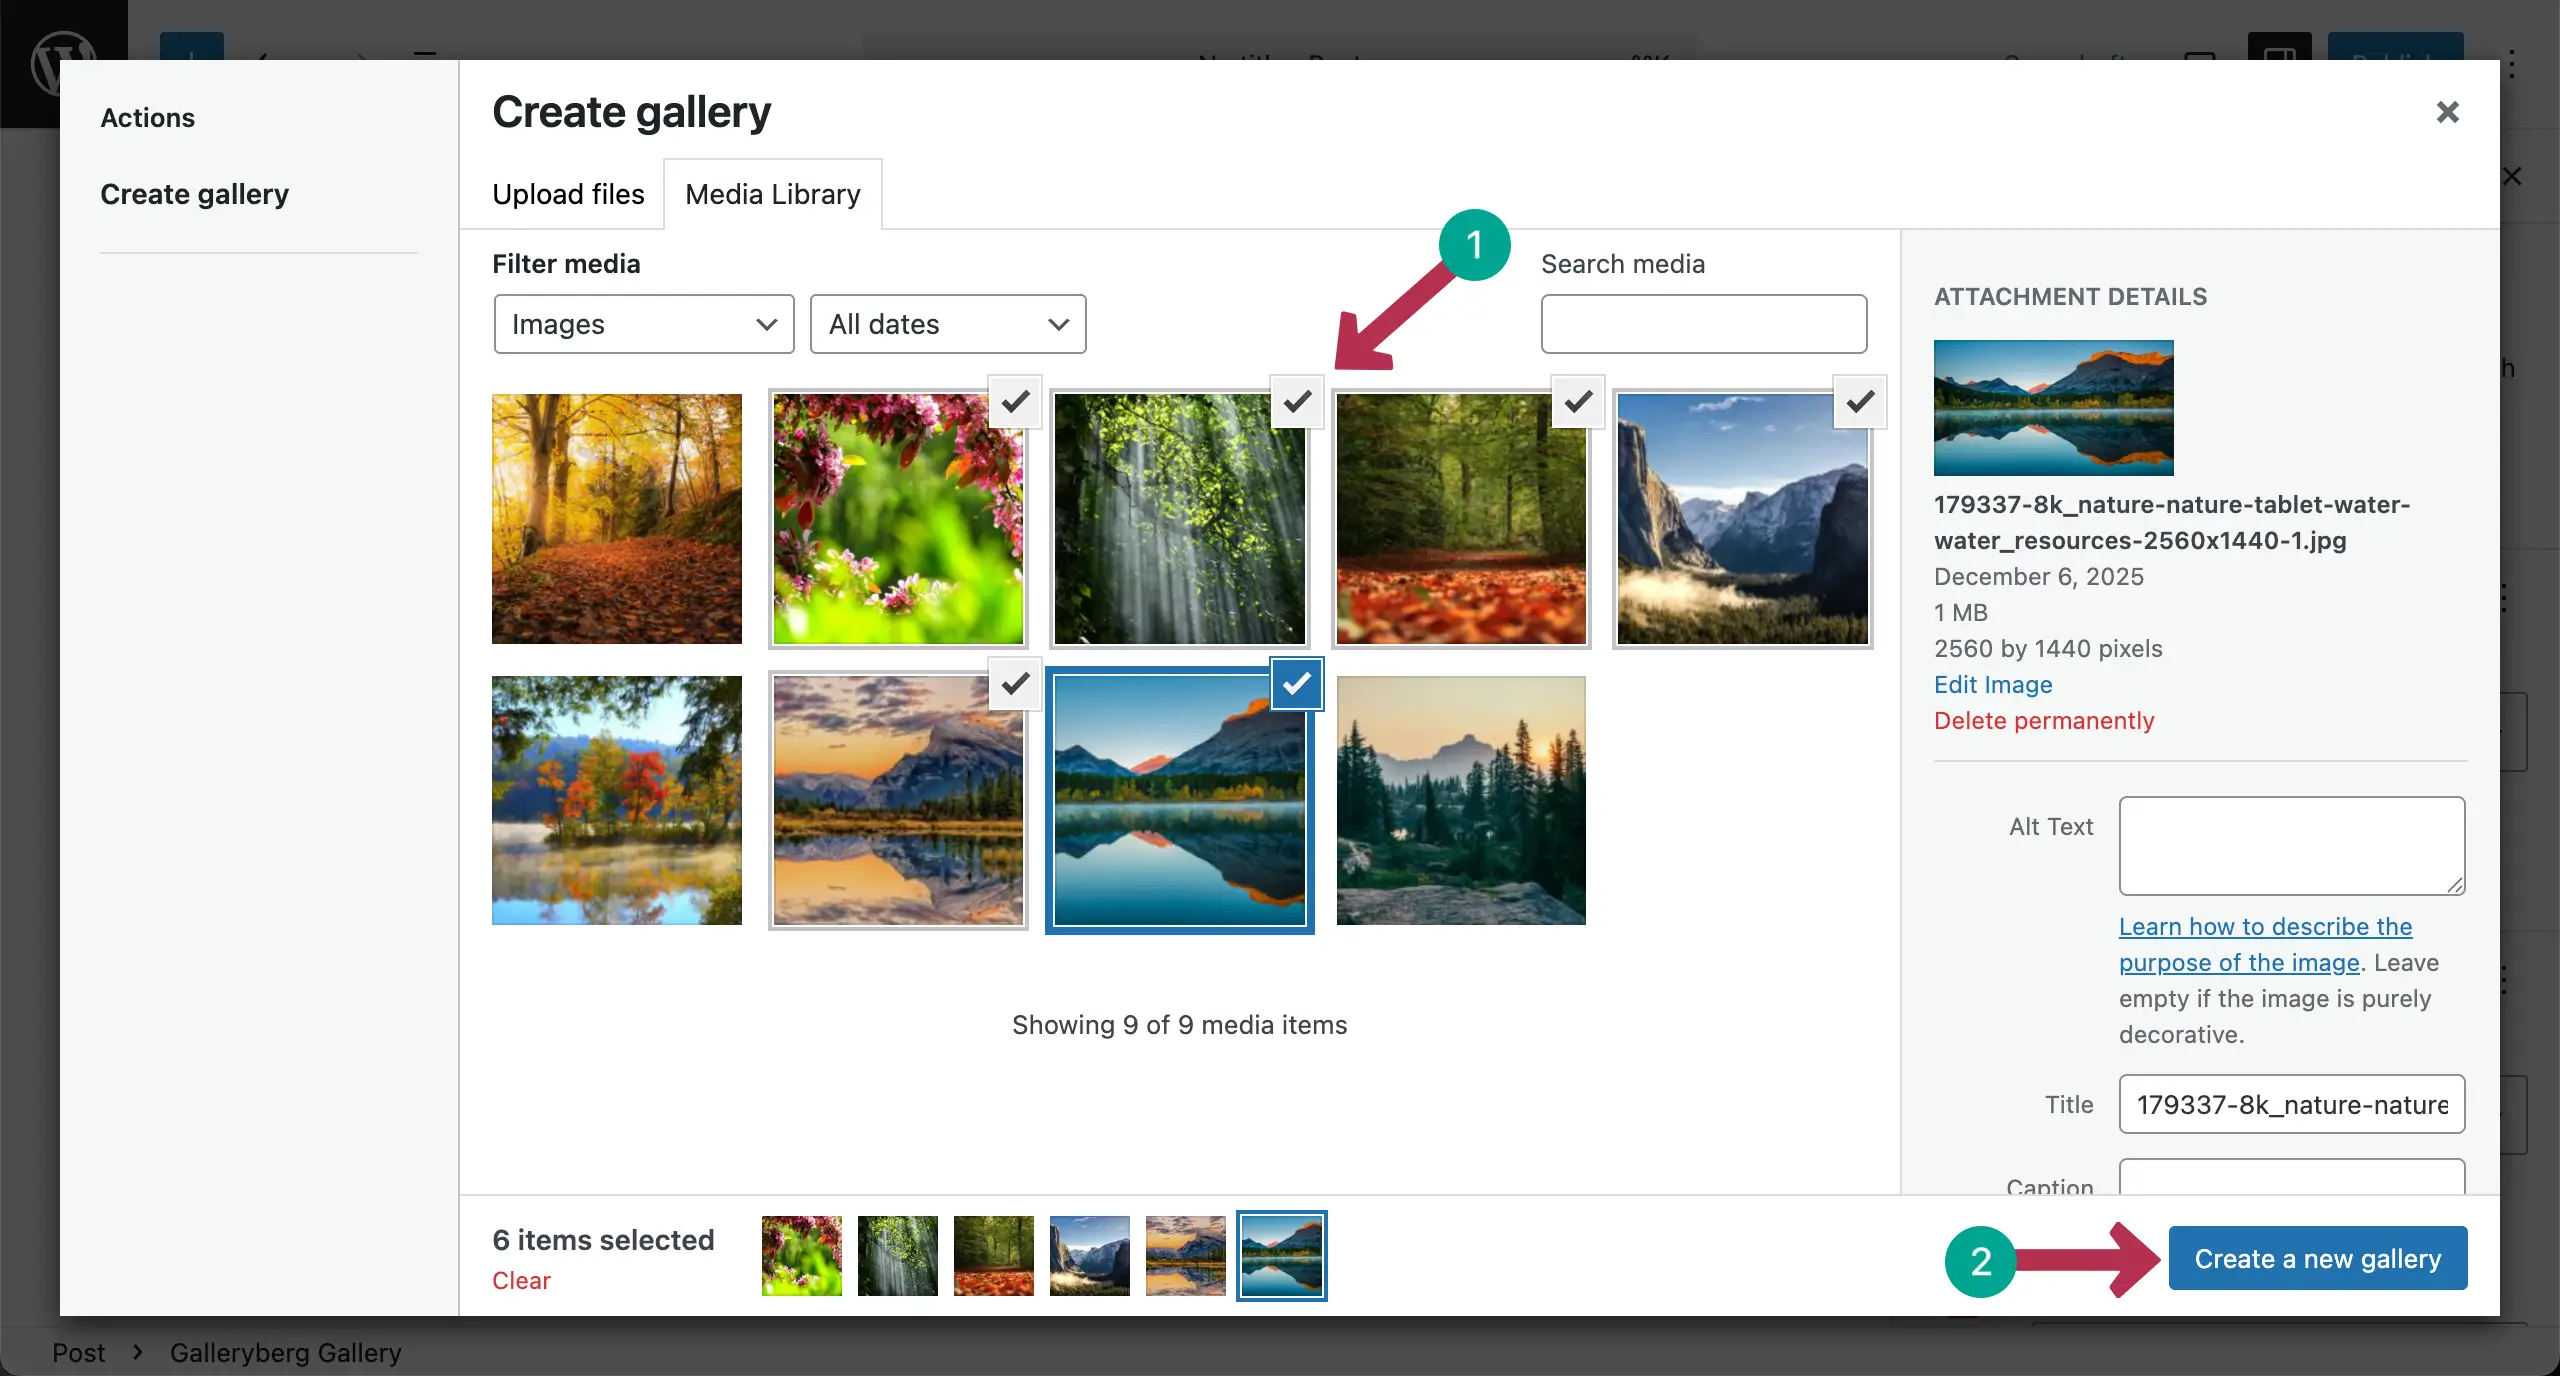
Now, choose a suitable option – whether you upload images from your local drive or add existing images from your media library.

Select images one by one that you want to add to the gallery. After that, click the Create a new gallery button.
If you want, you can add captions to the images at this stage by selecting them individually. Once done, click the Insert gallery button.

The mosaic gallery will be created right away.

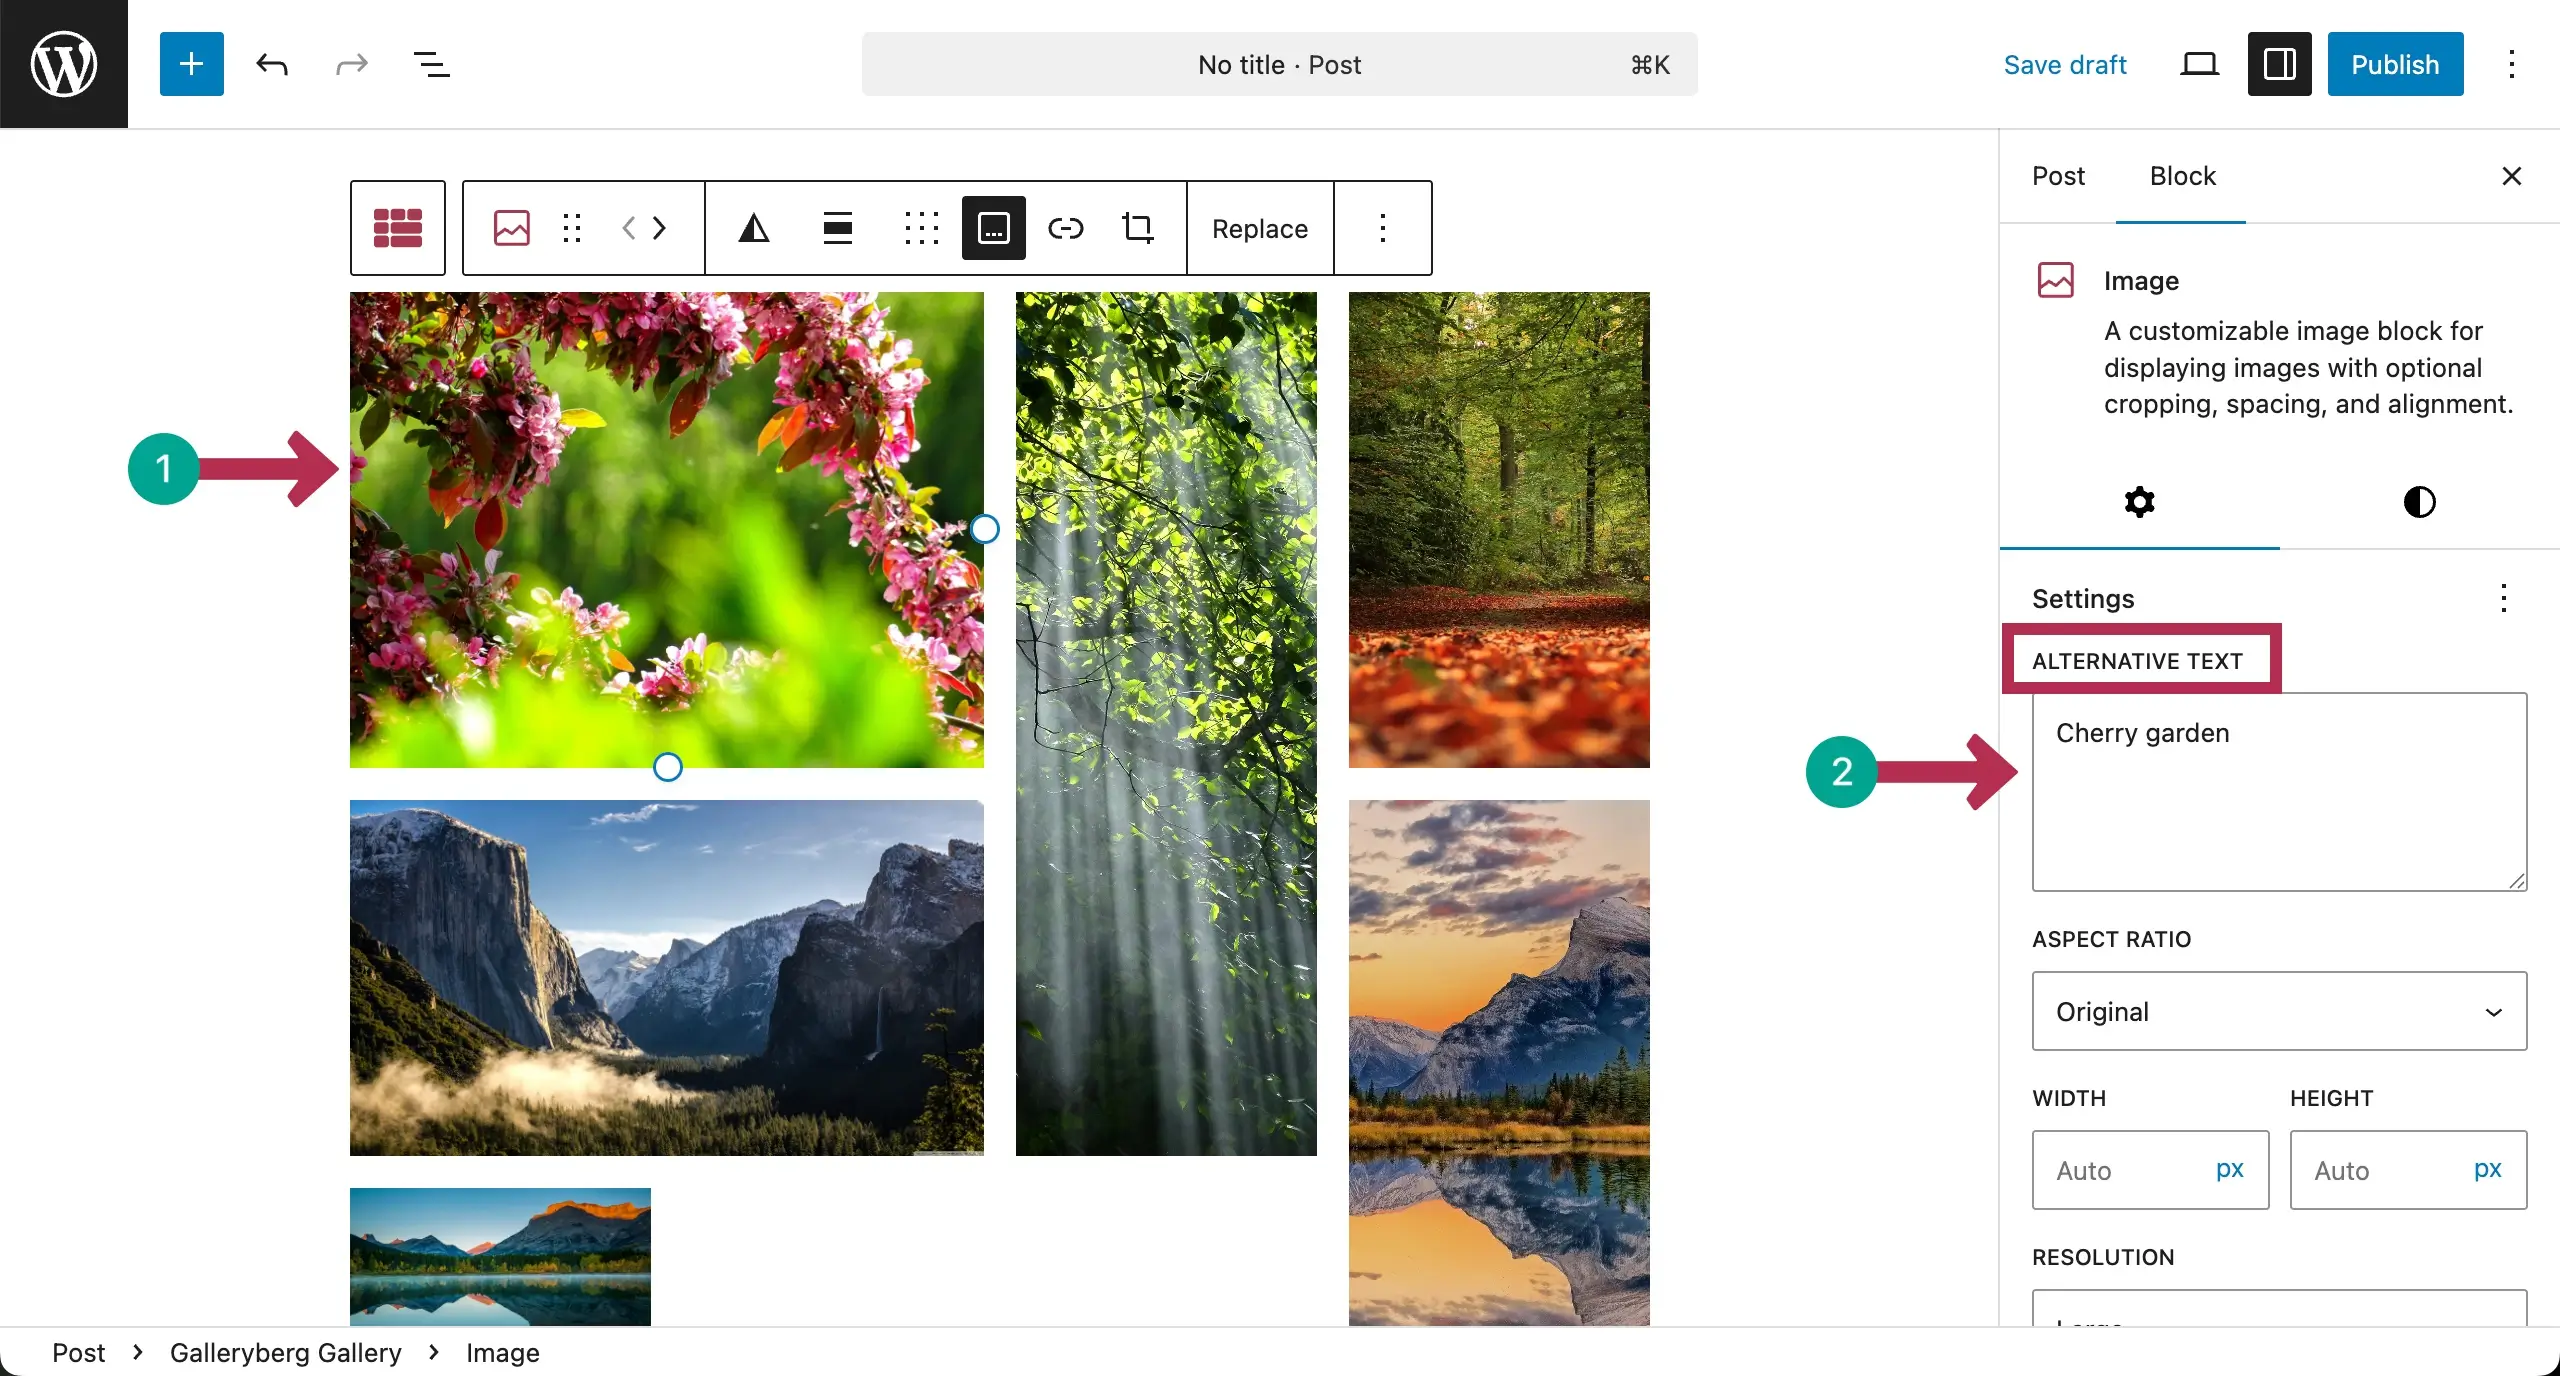
Now, you can add alternative texts to the images one by one.
Configuring General Settings #
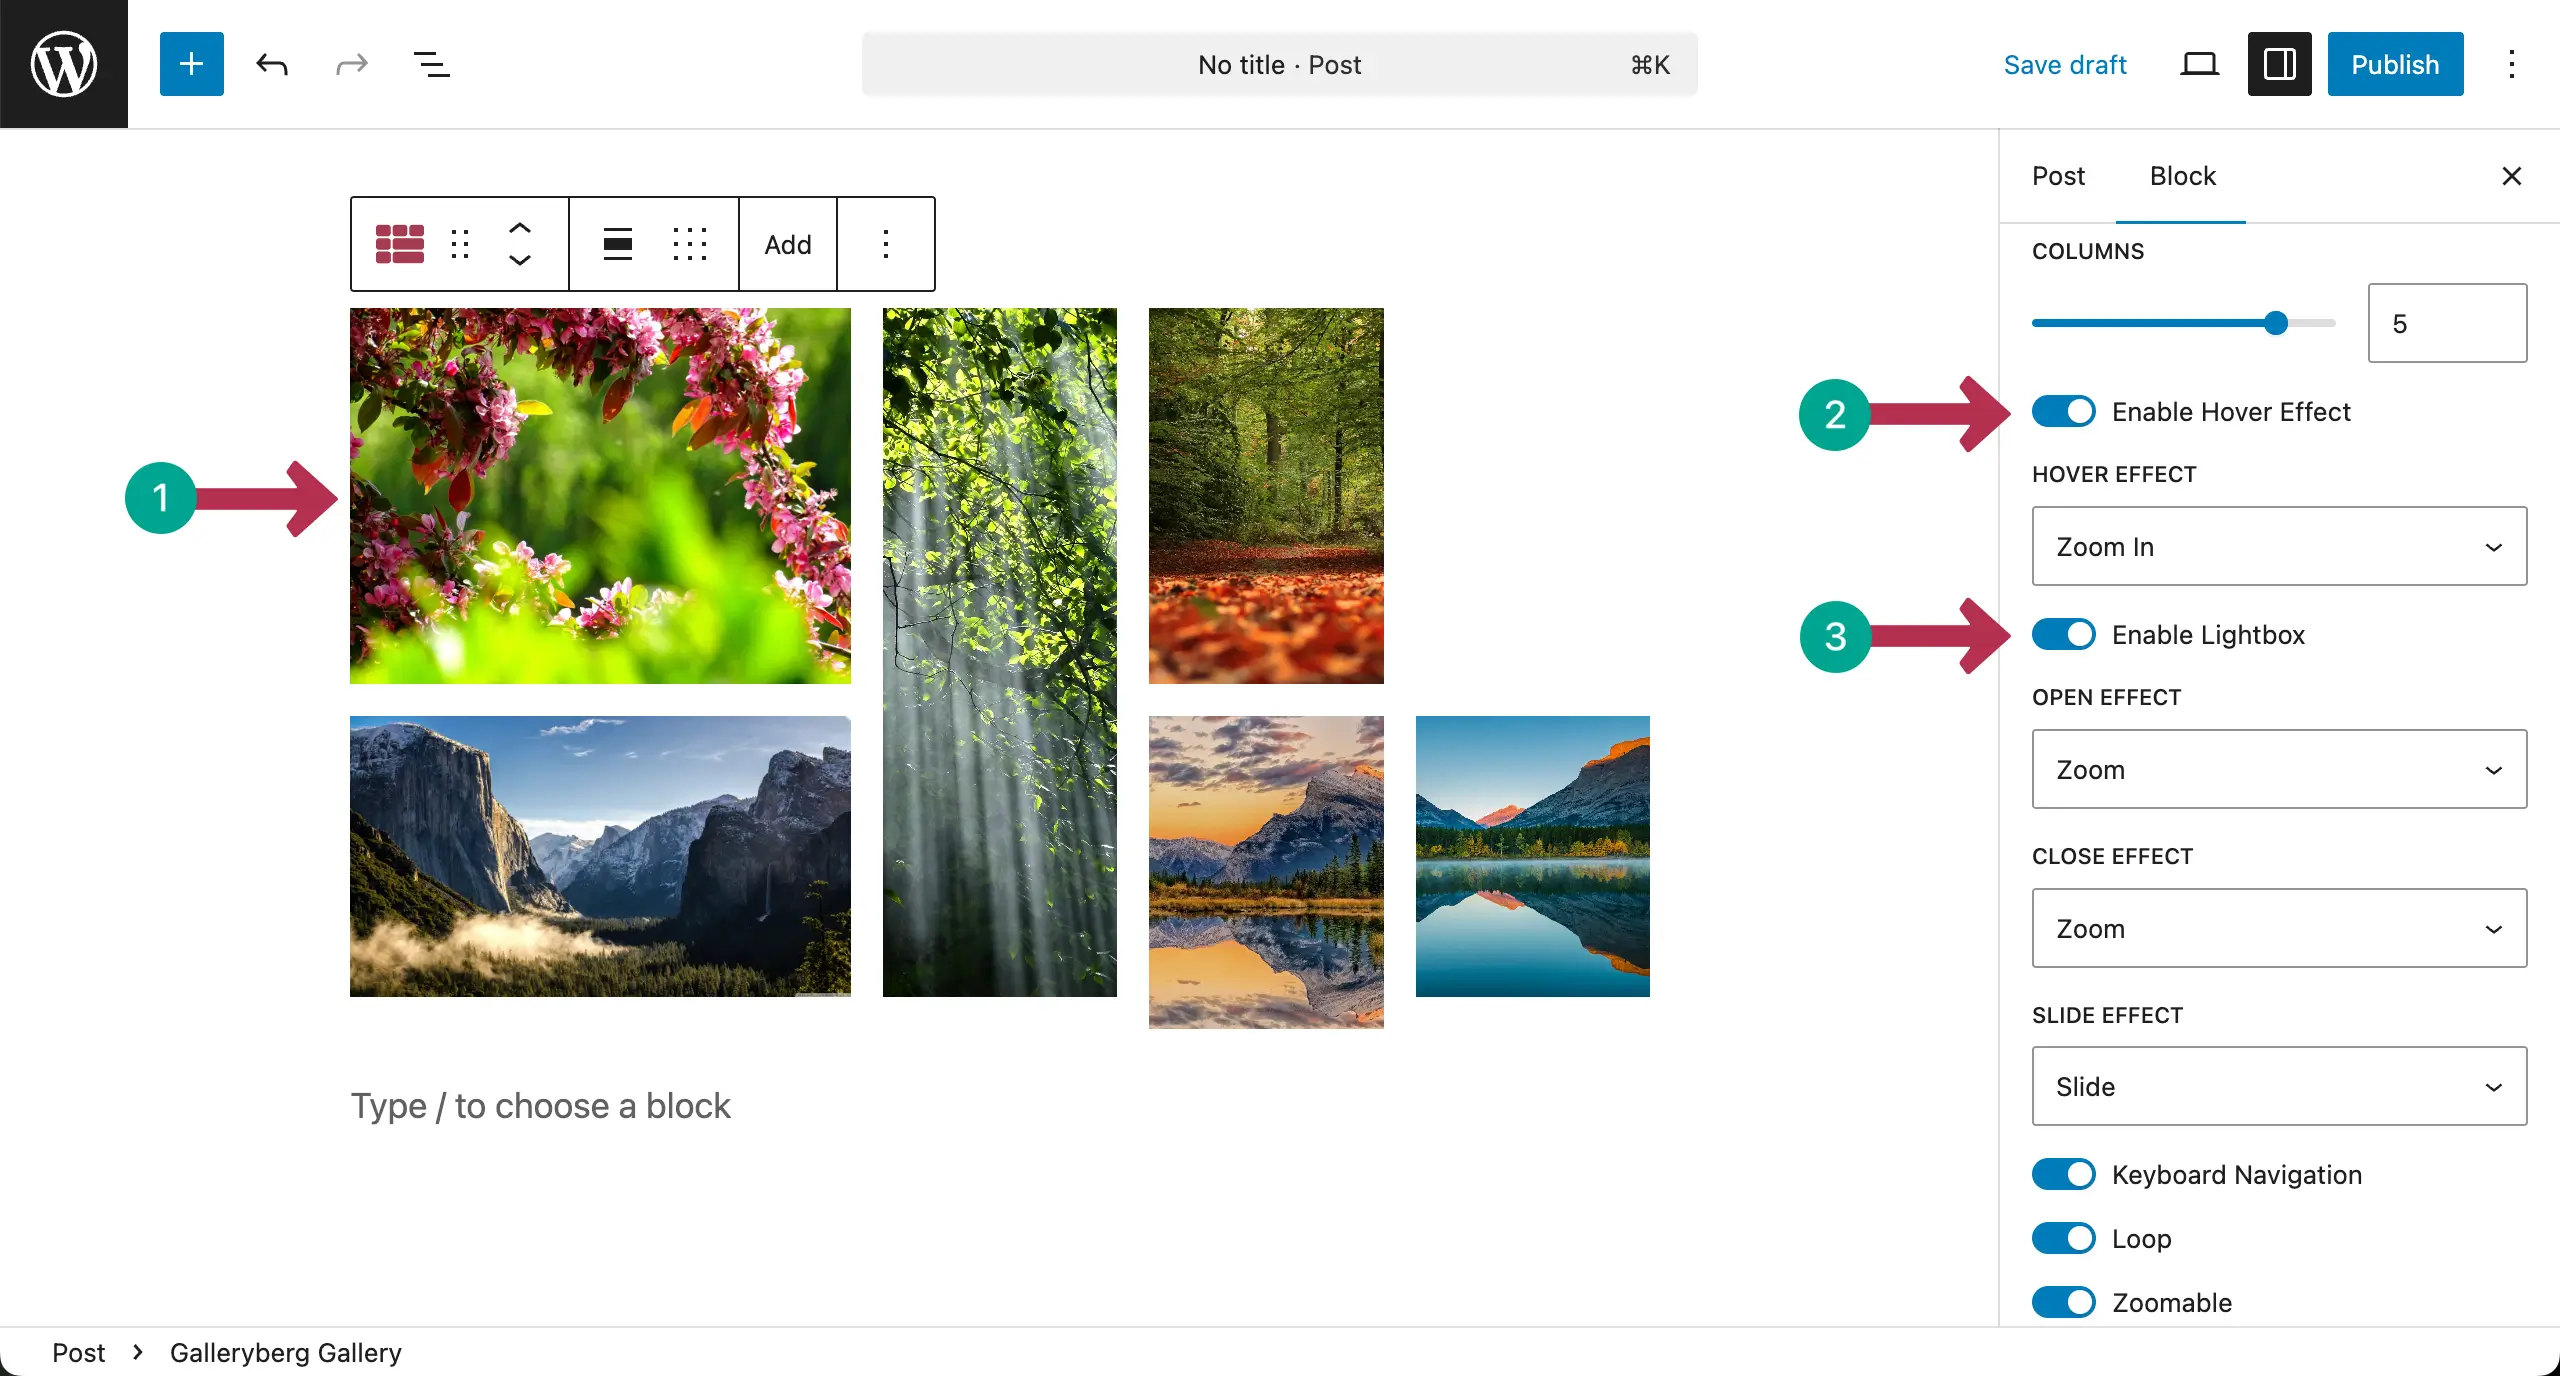
Select the entire mosaic gallery by clicking the Galleryberg icon on the toolbar. Come to the Settings tab on the right sidebar.
You can change the number of columns. Also, you can enable/disable the Hover Effect and Lightbox options.
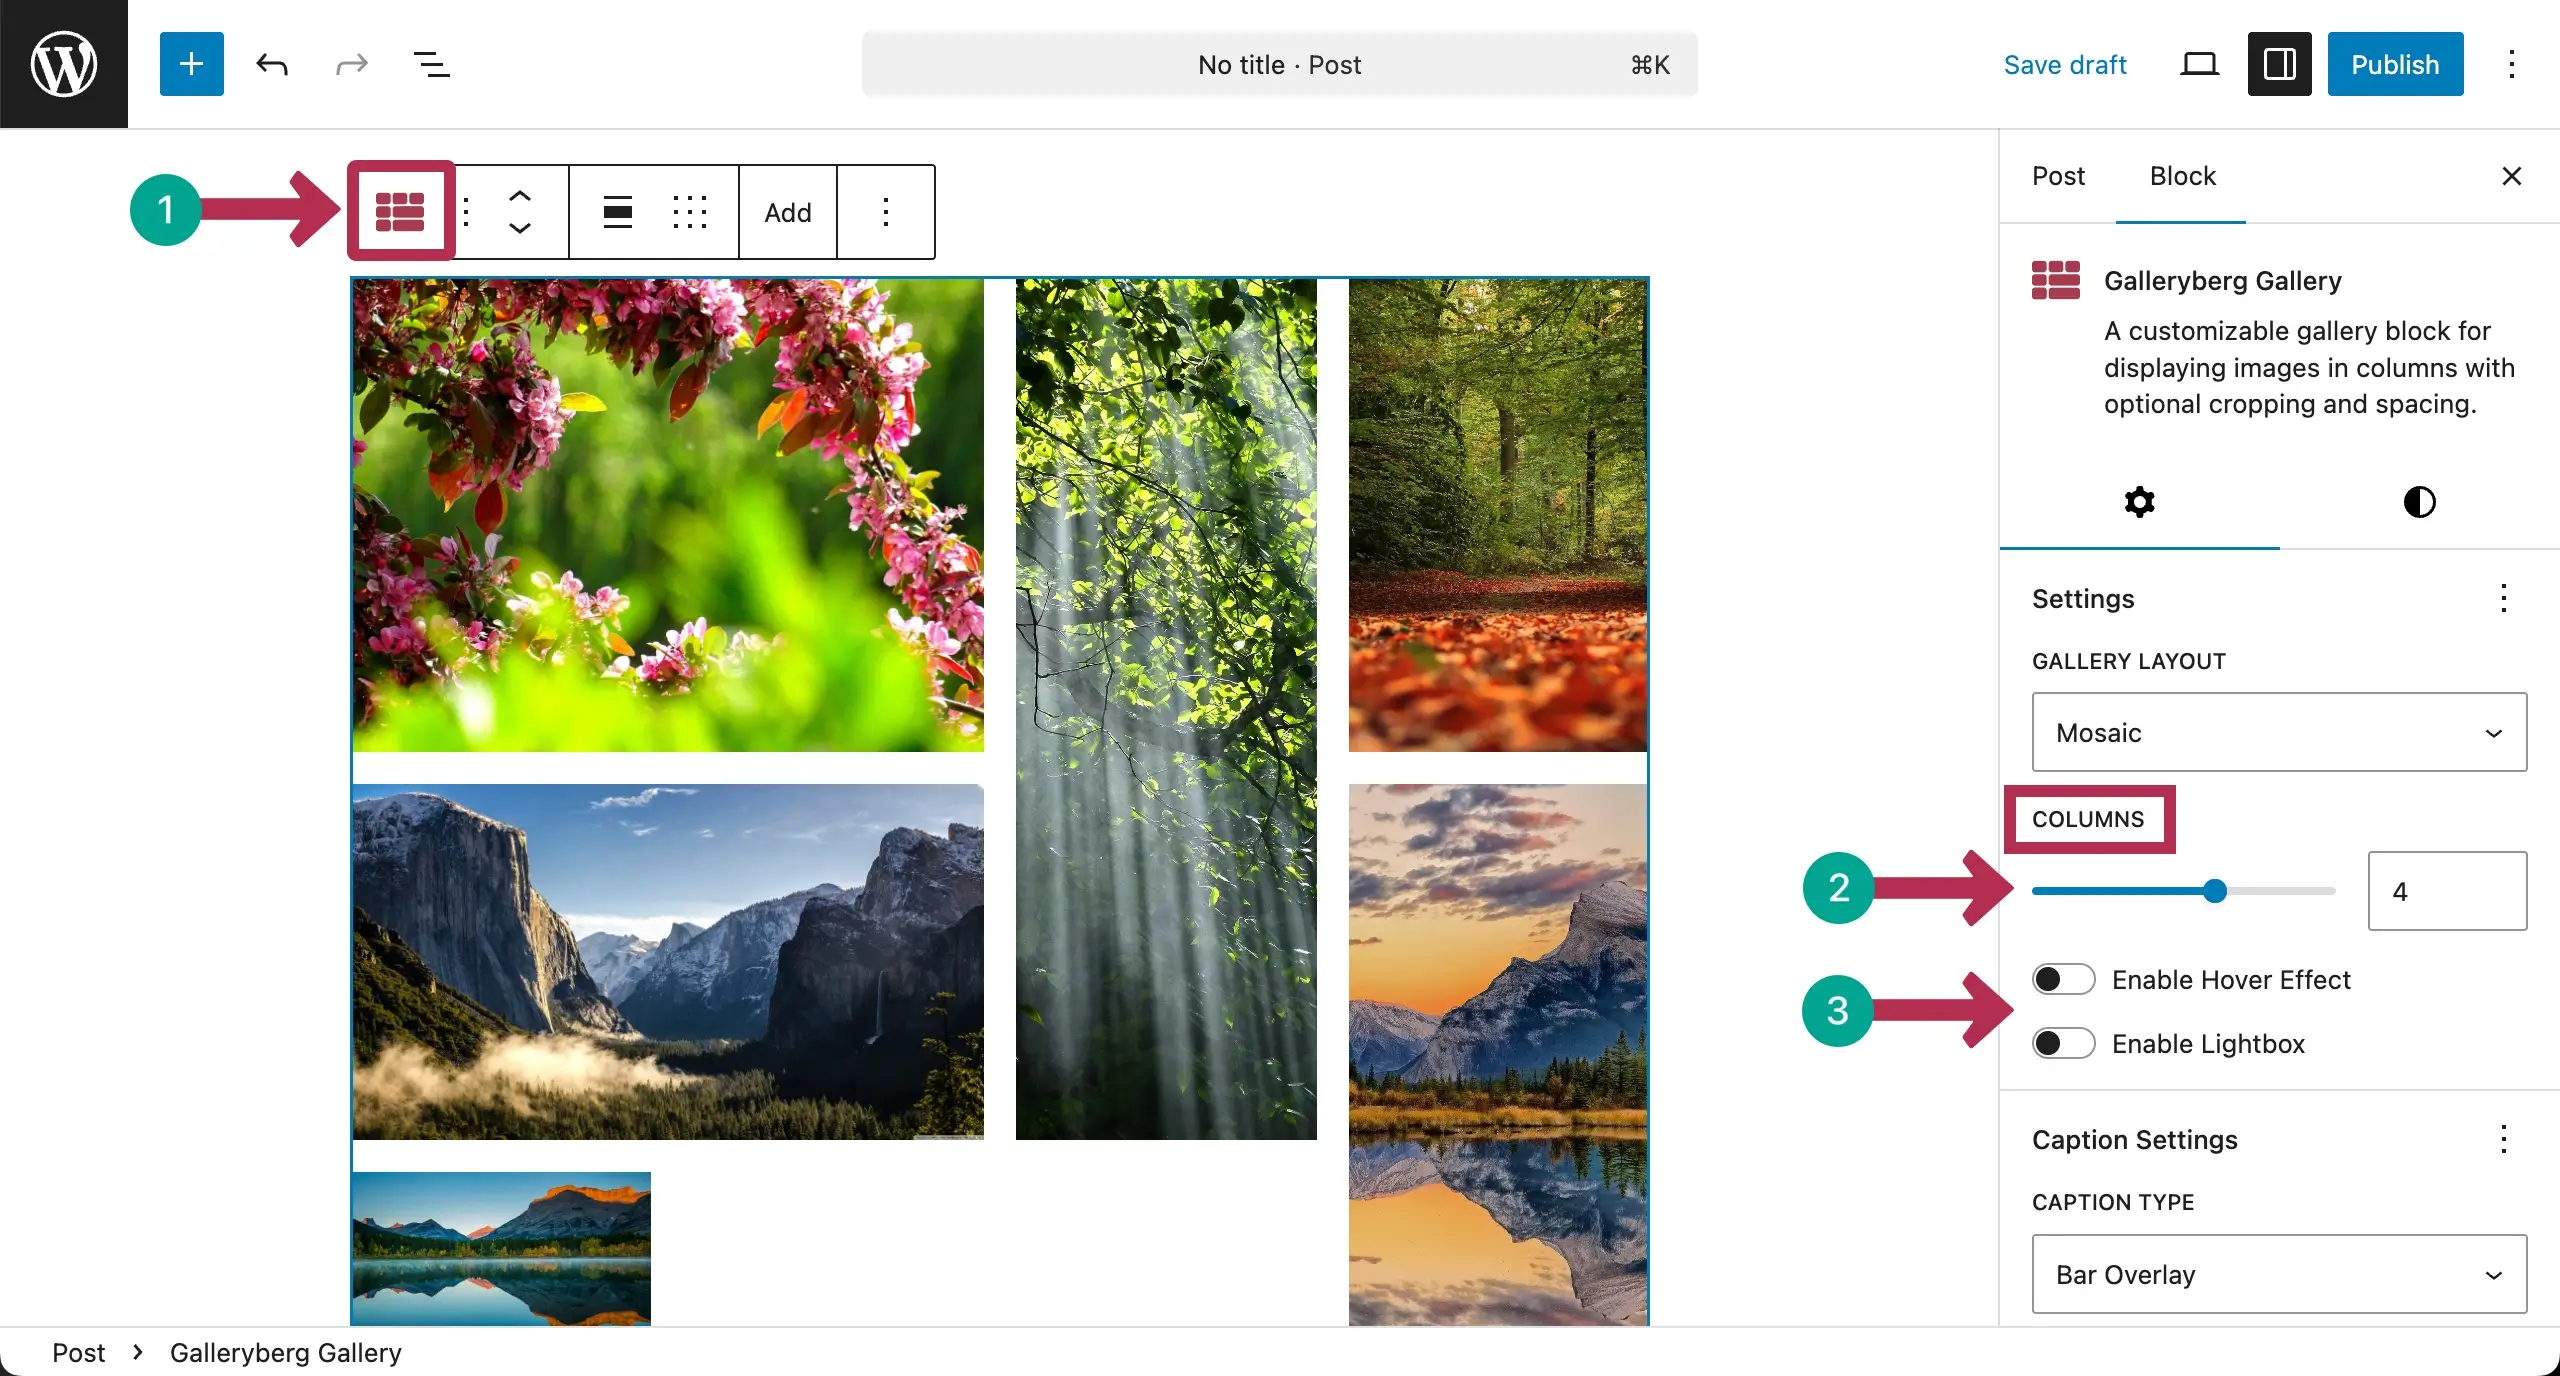
See that we have changed the number of columns for the gallery. Besides, once the Hover Effect and Lightbox options have been enabled, some more options have instantly been shown.
Hope you can explore and use them alone.
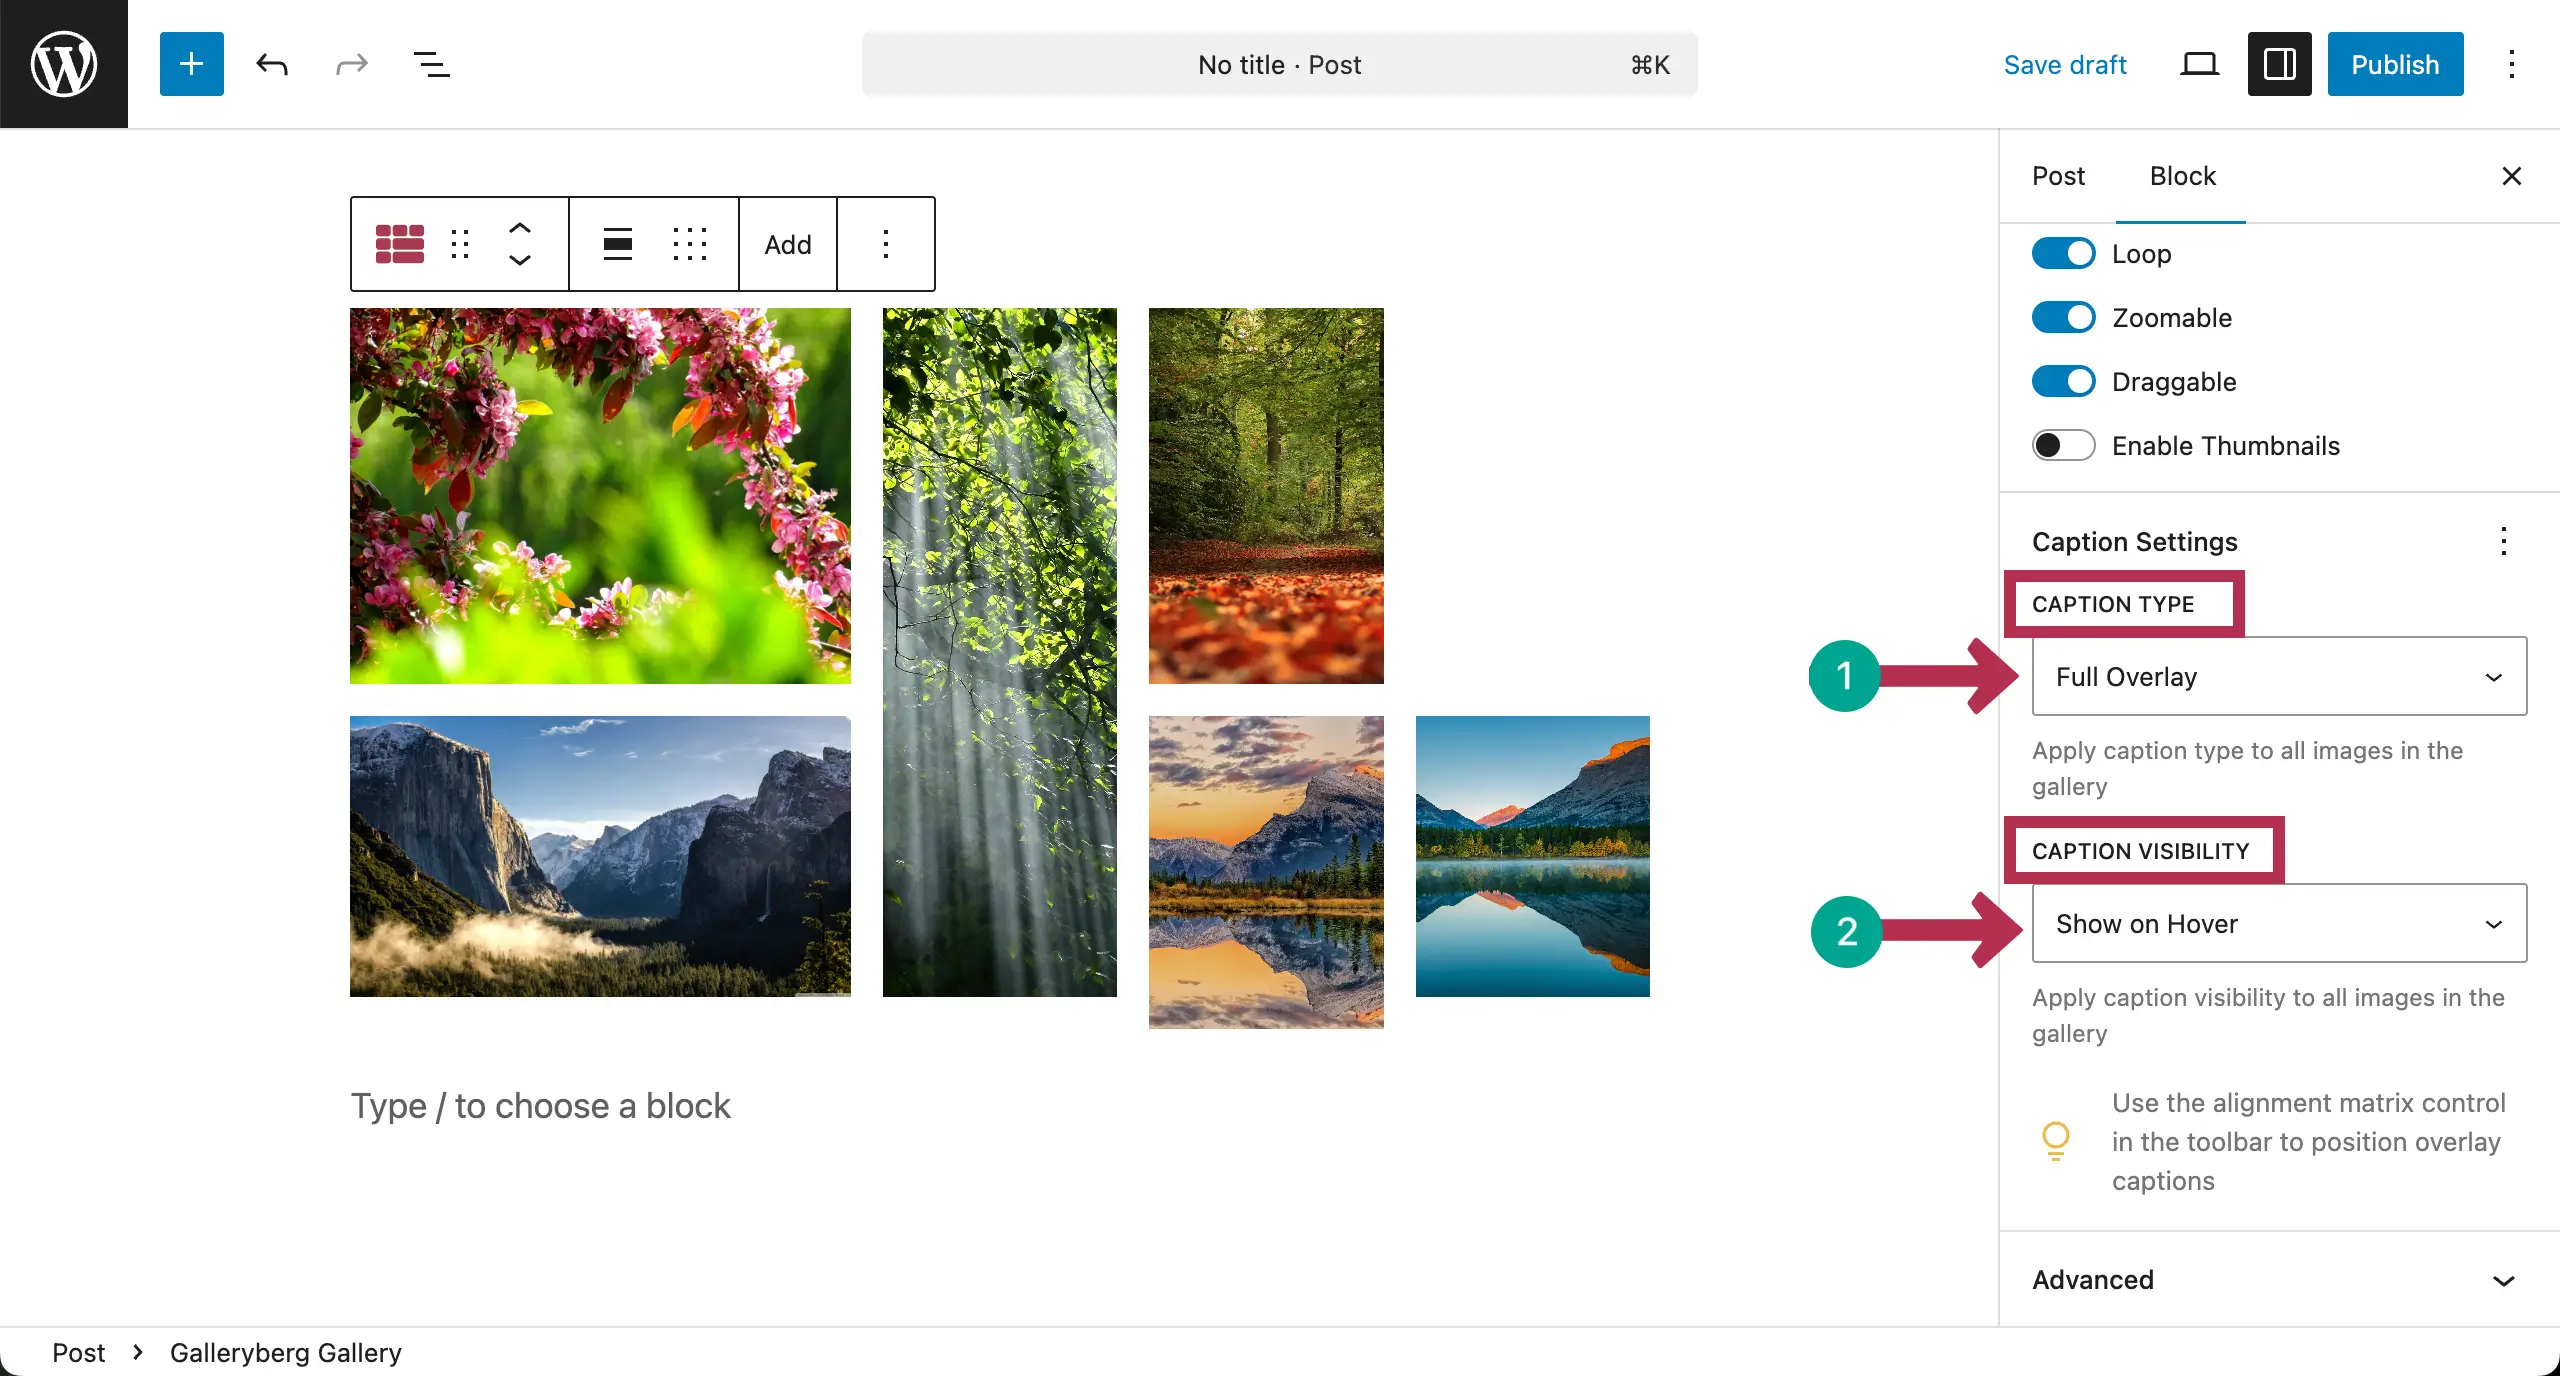
Scrolling down the tab, come to the Caption Settings. There are two setting types – Caption Type and Caption Visibility.
Caption Type lets you set where the caption will be displayed. It has three options: Below Image, Full Overlay, and Bar Overlay.
Caption Visibility allows you to configure how the caption will be displayed. This could be Always Visible, Show on Hover, or Hide on Hover.
Customization #
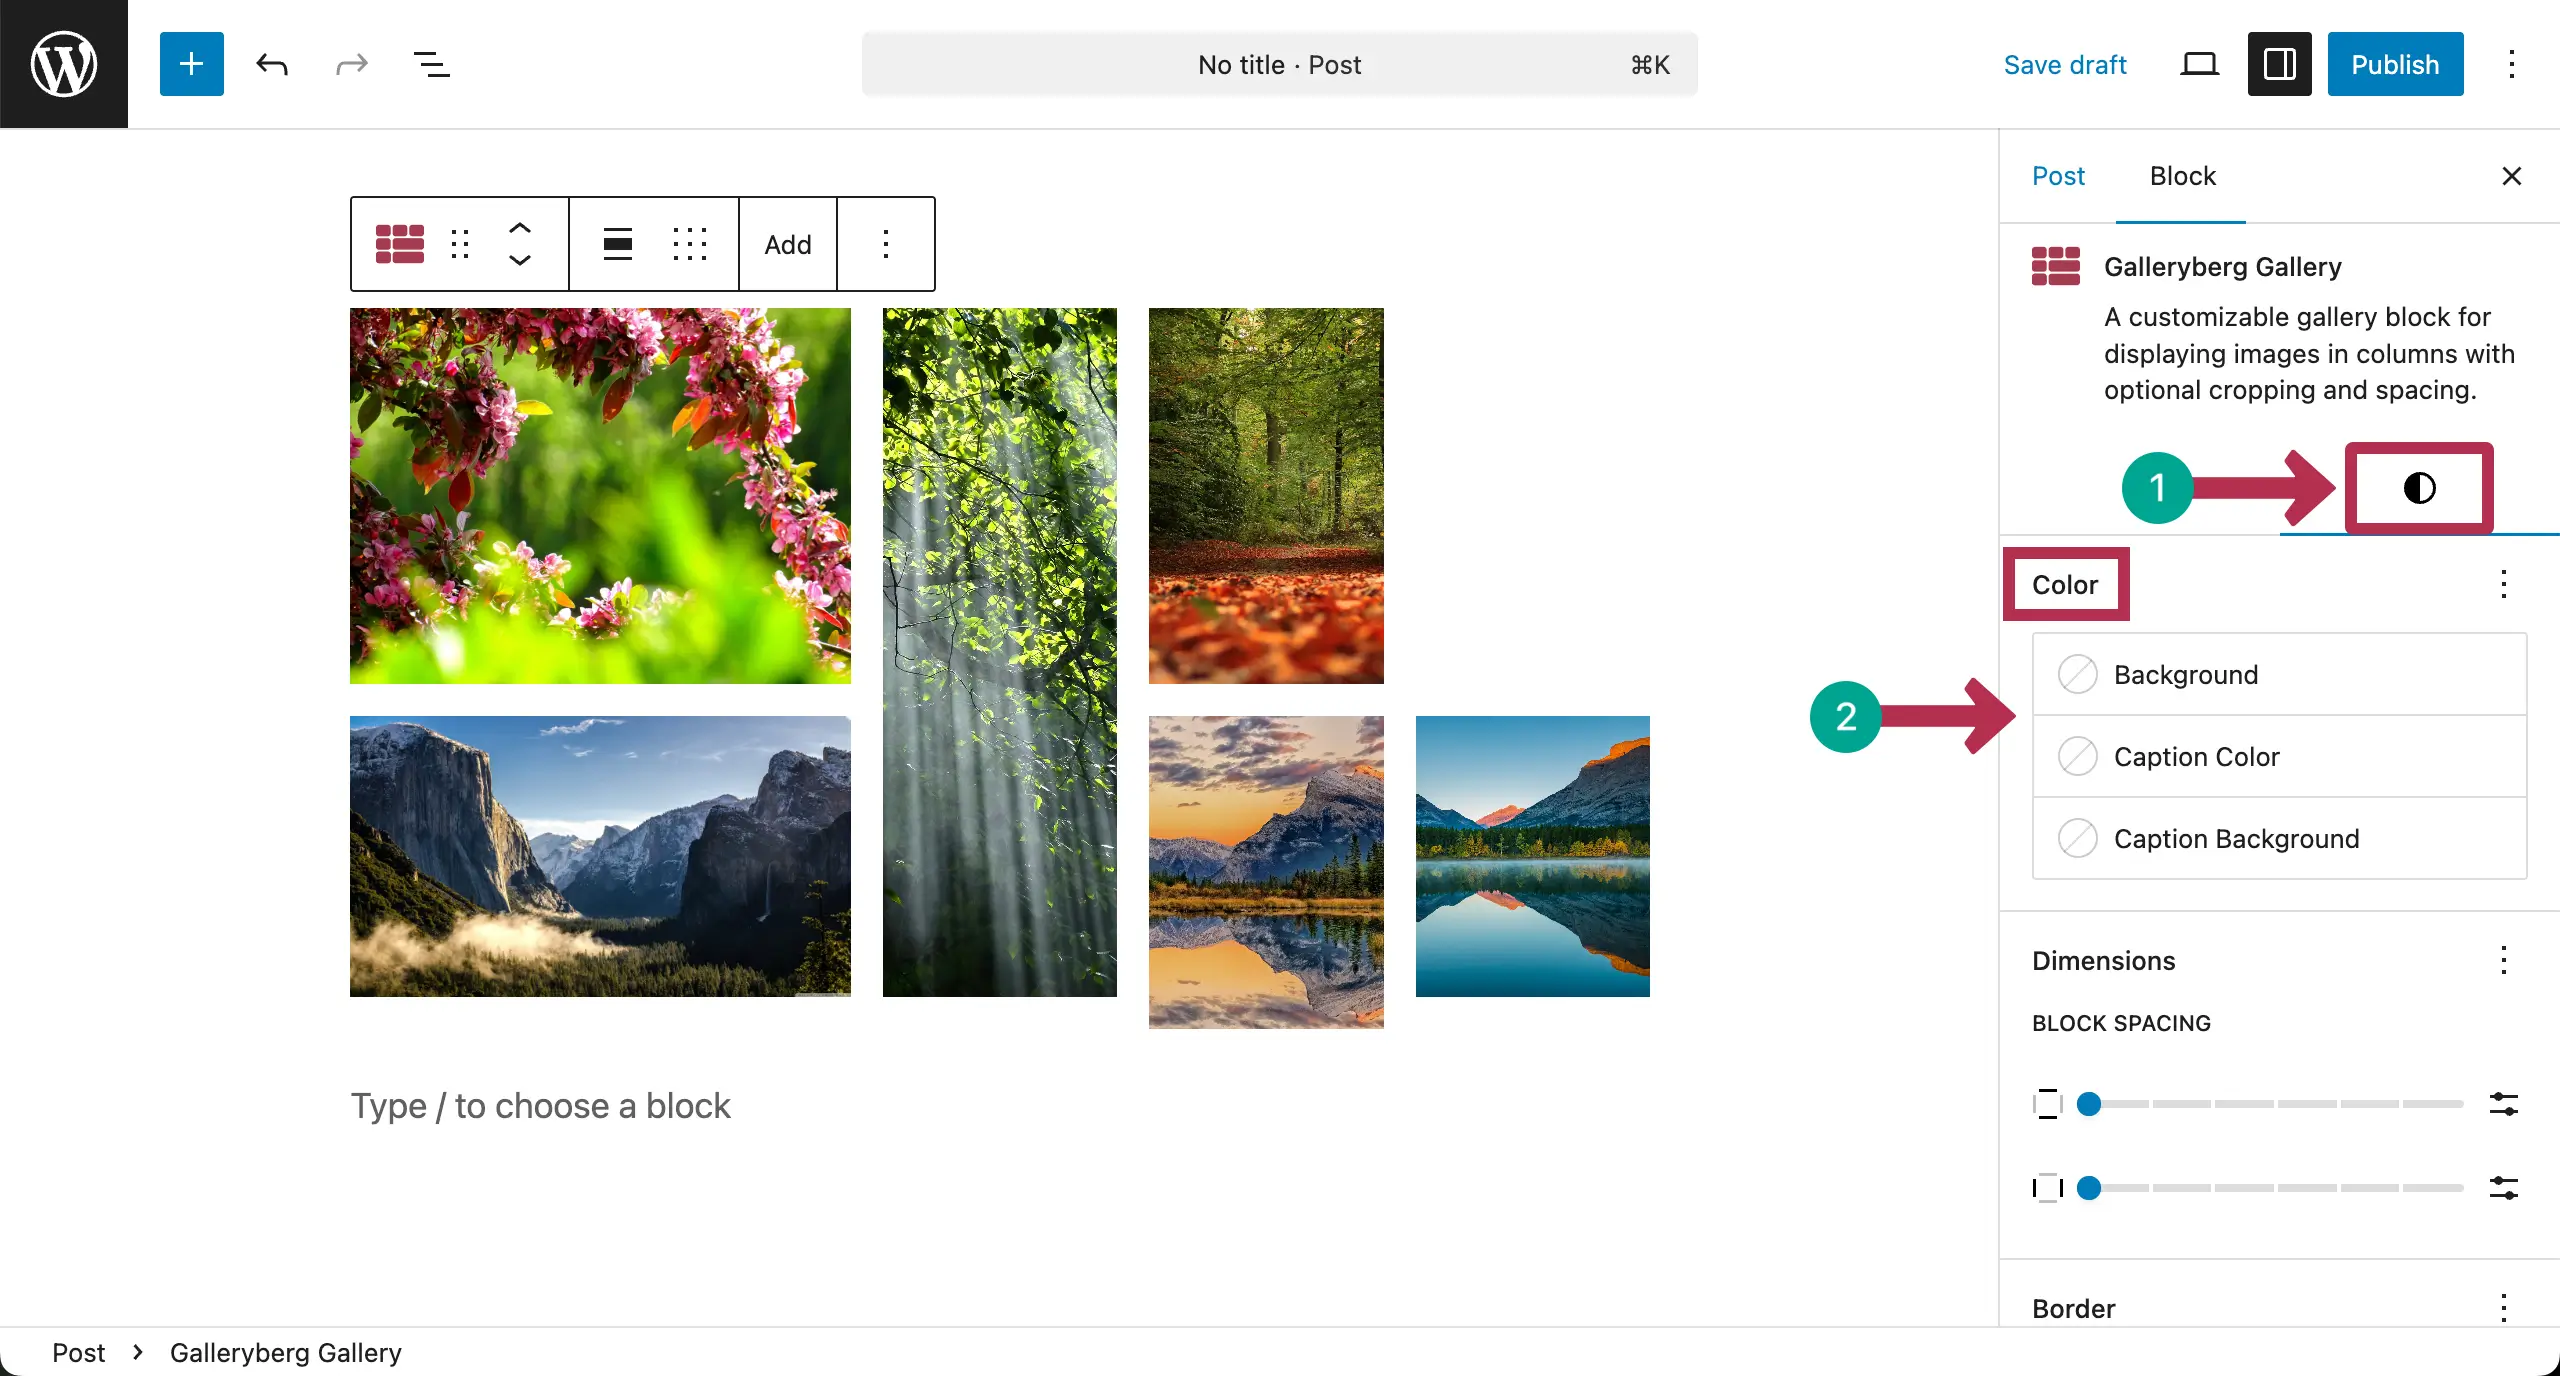
Now, come to the Styles tab.
From the Color section, you can set different colors for the Background, Caption, and Caption Background. Hope you can do these yourself.
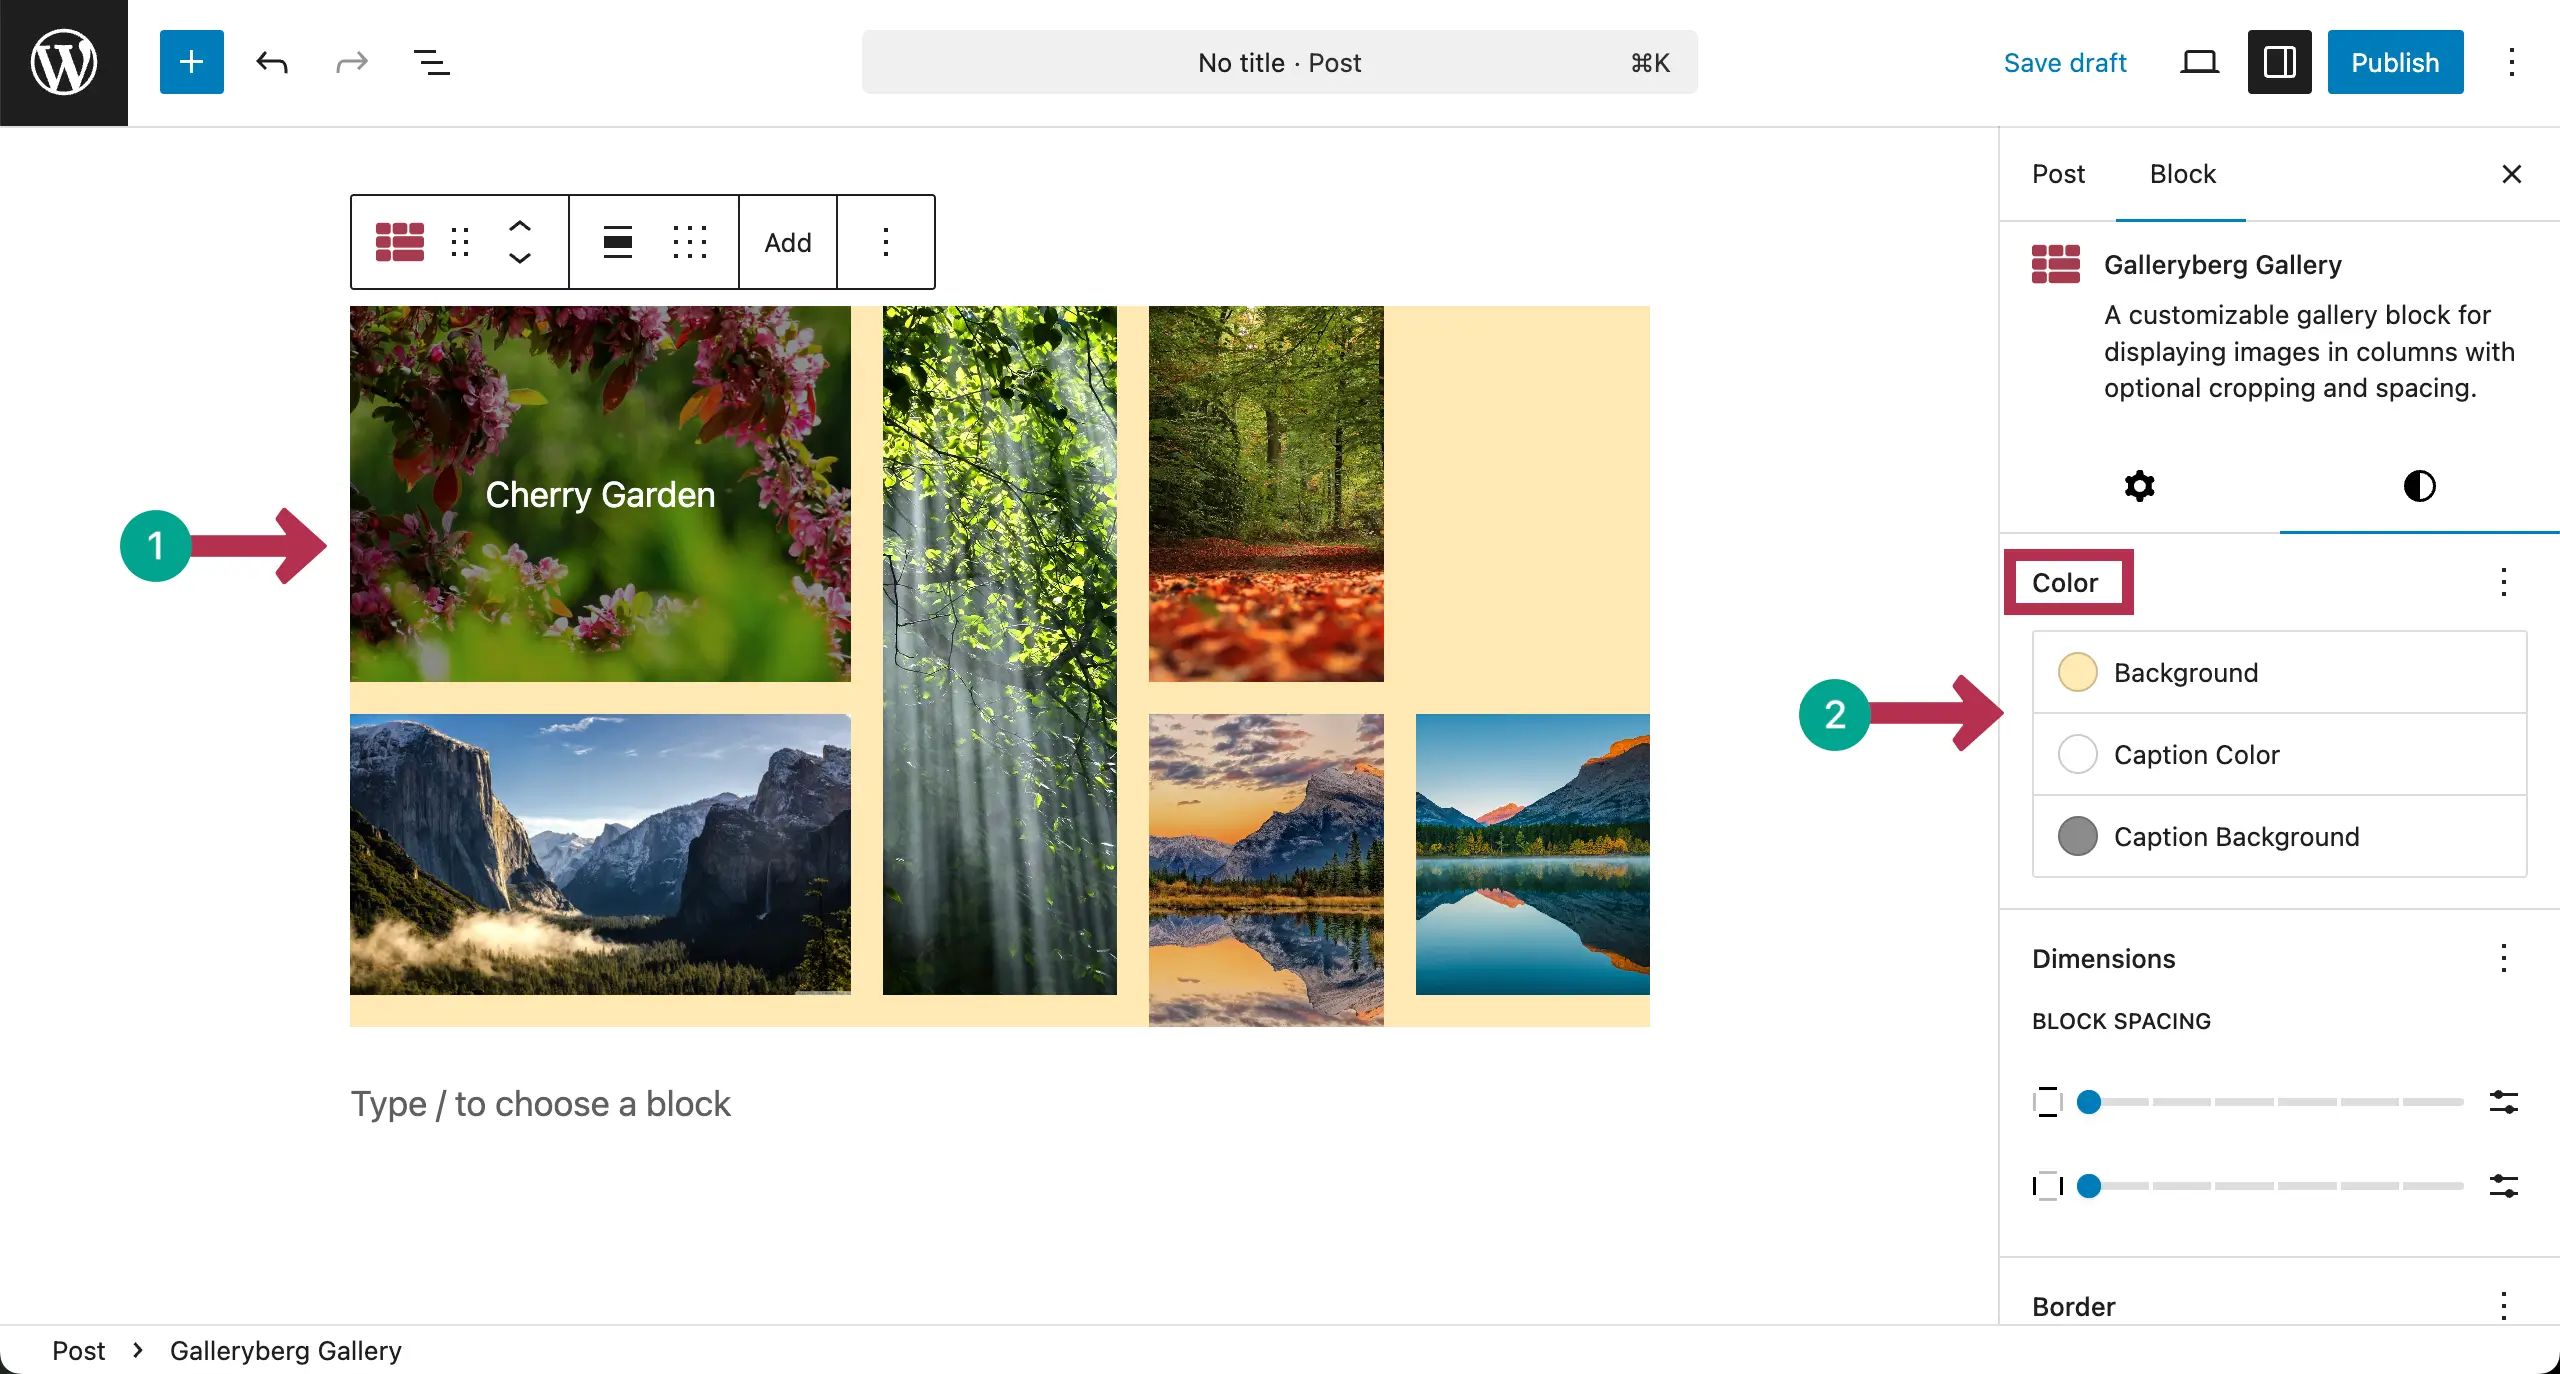
Take a look. We have changed the colors of the gallery for different options.
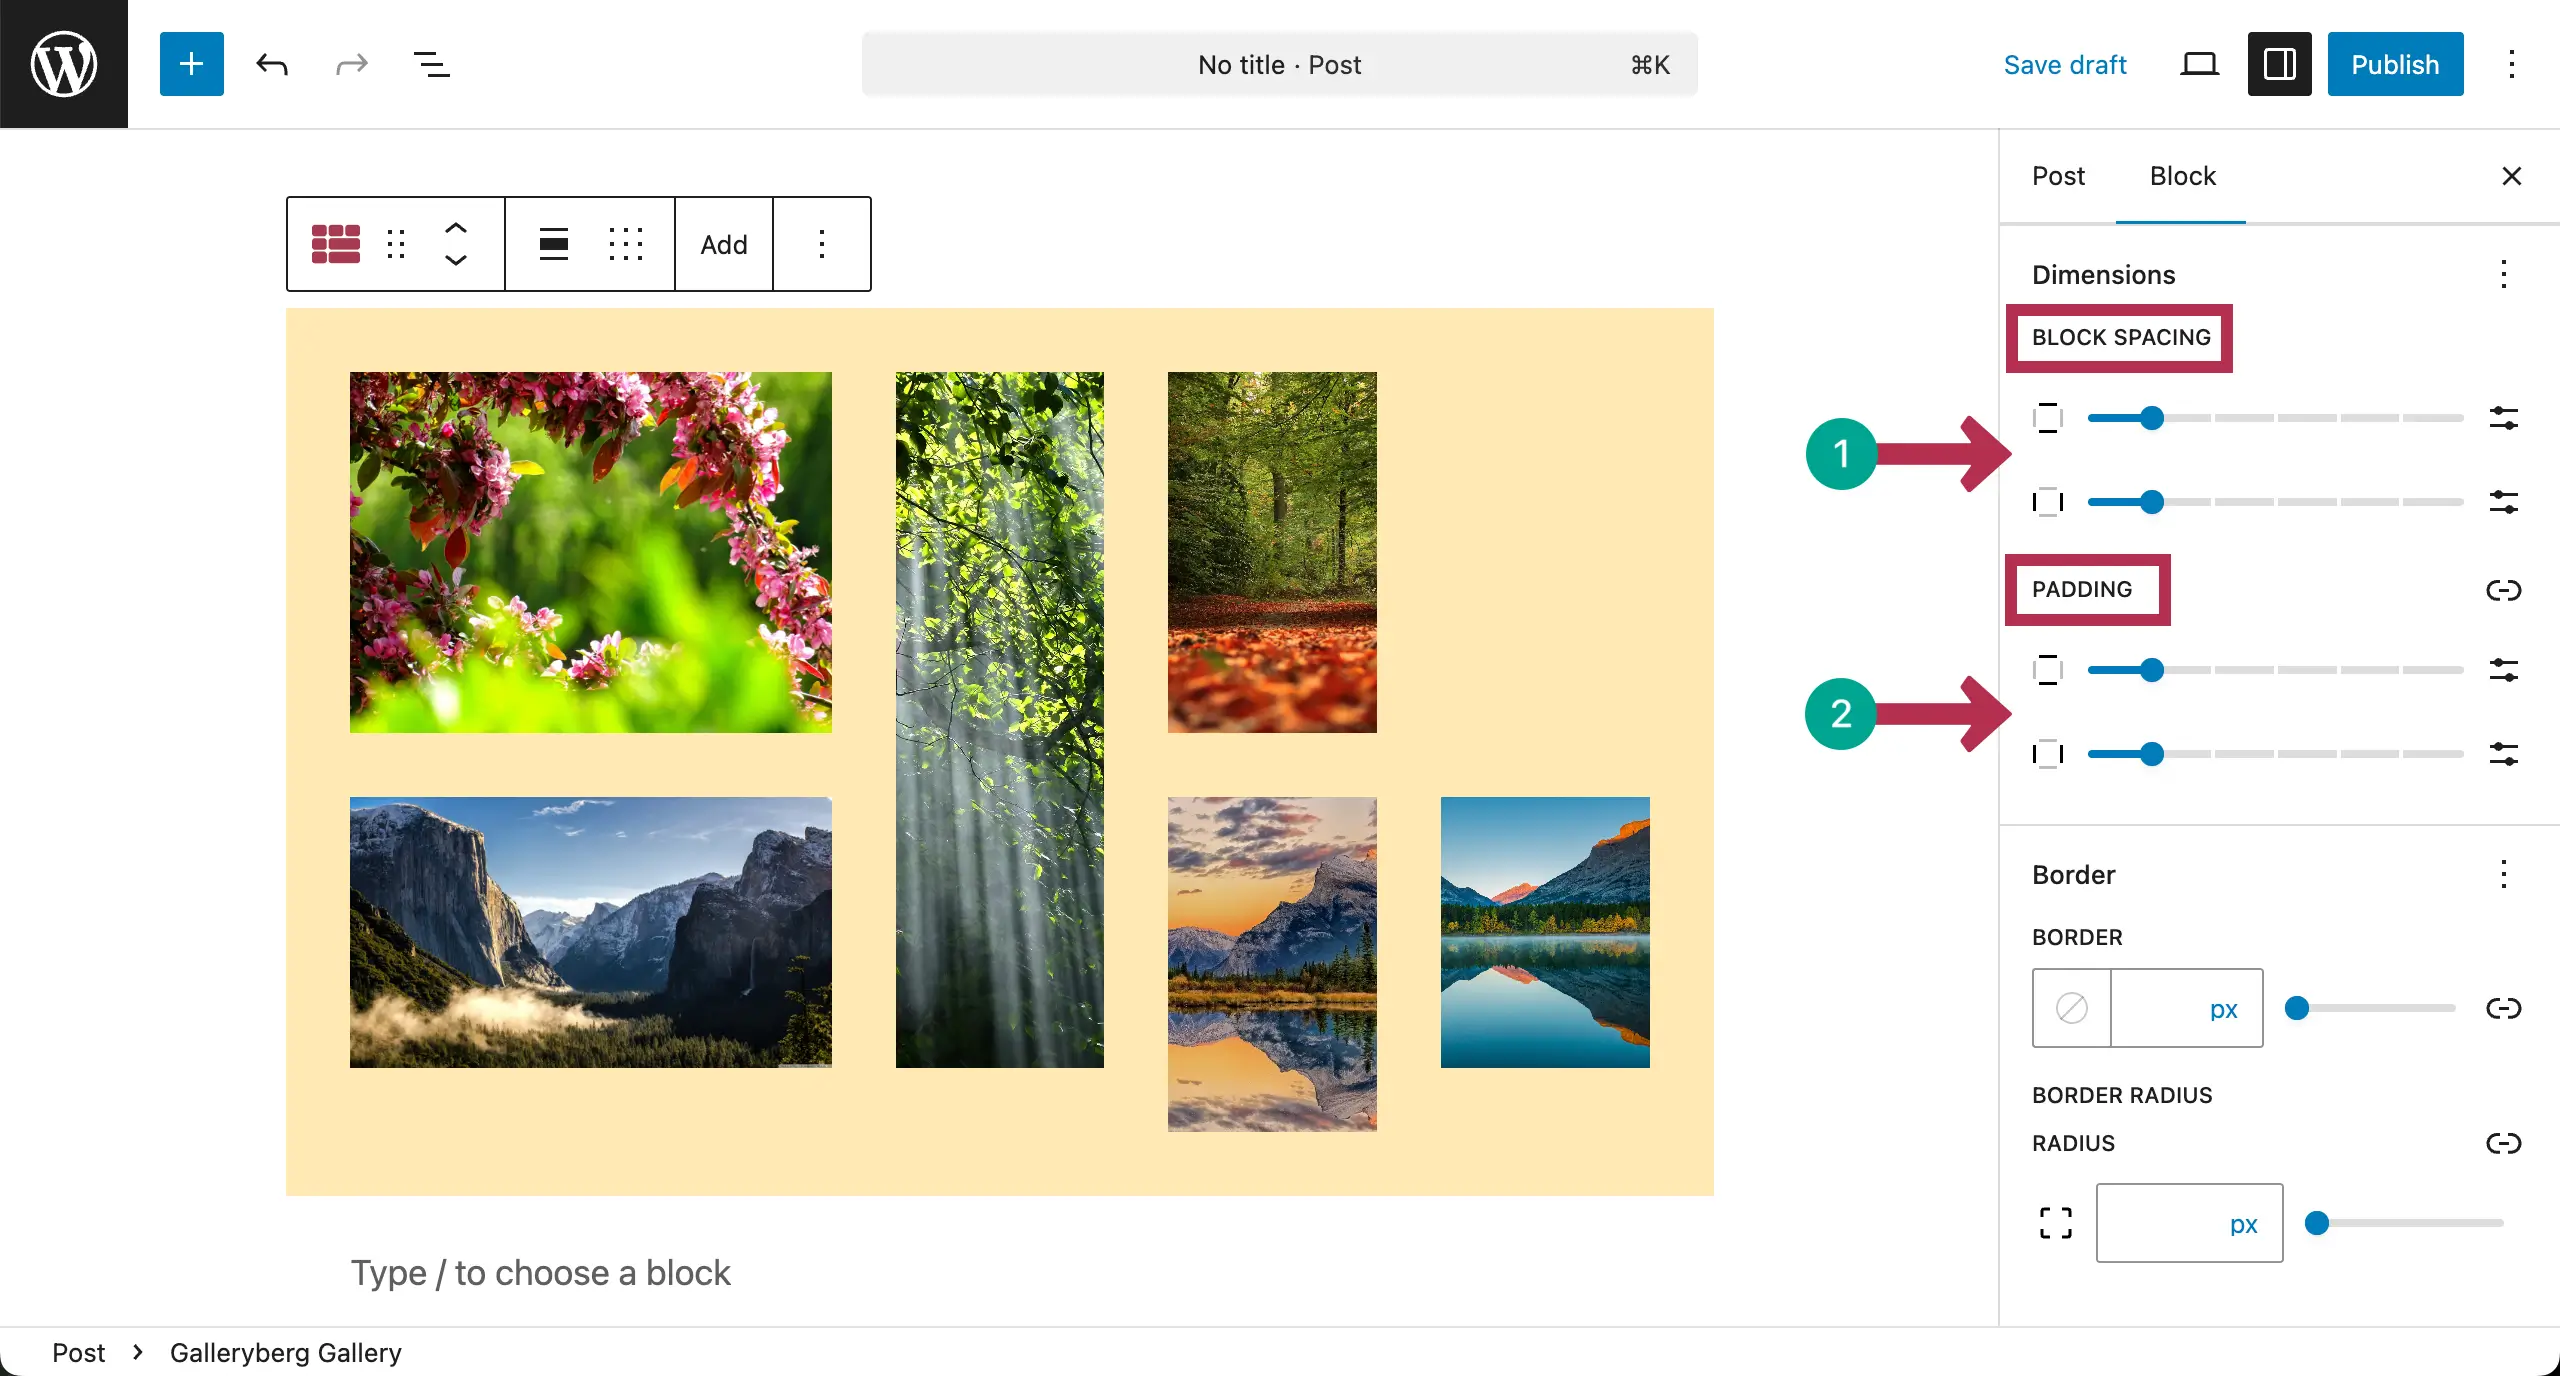
Come to Dimensions. By default, you’ll see the Block Spacing option there. To add more, click the three-dot icon.
A popup will appear where you will see Padding and Margin. By clicking, you can add them to the sidebar.
For the tutorial, we’ll add Padding to the sidebar.

Now, you can add value to Block Spacing and Padding to give your gallery the look you want.
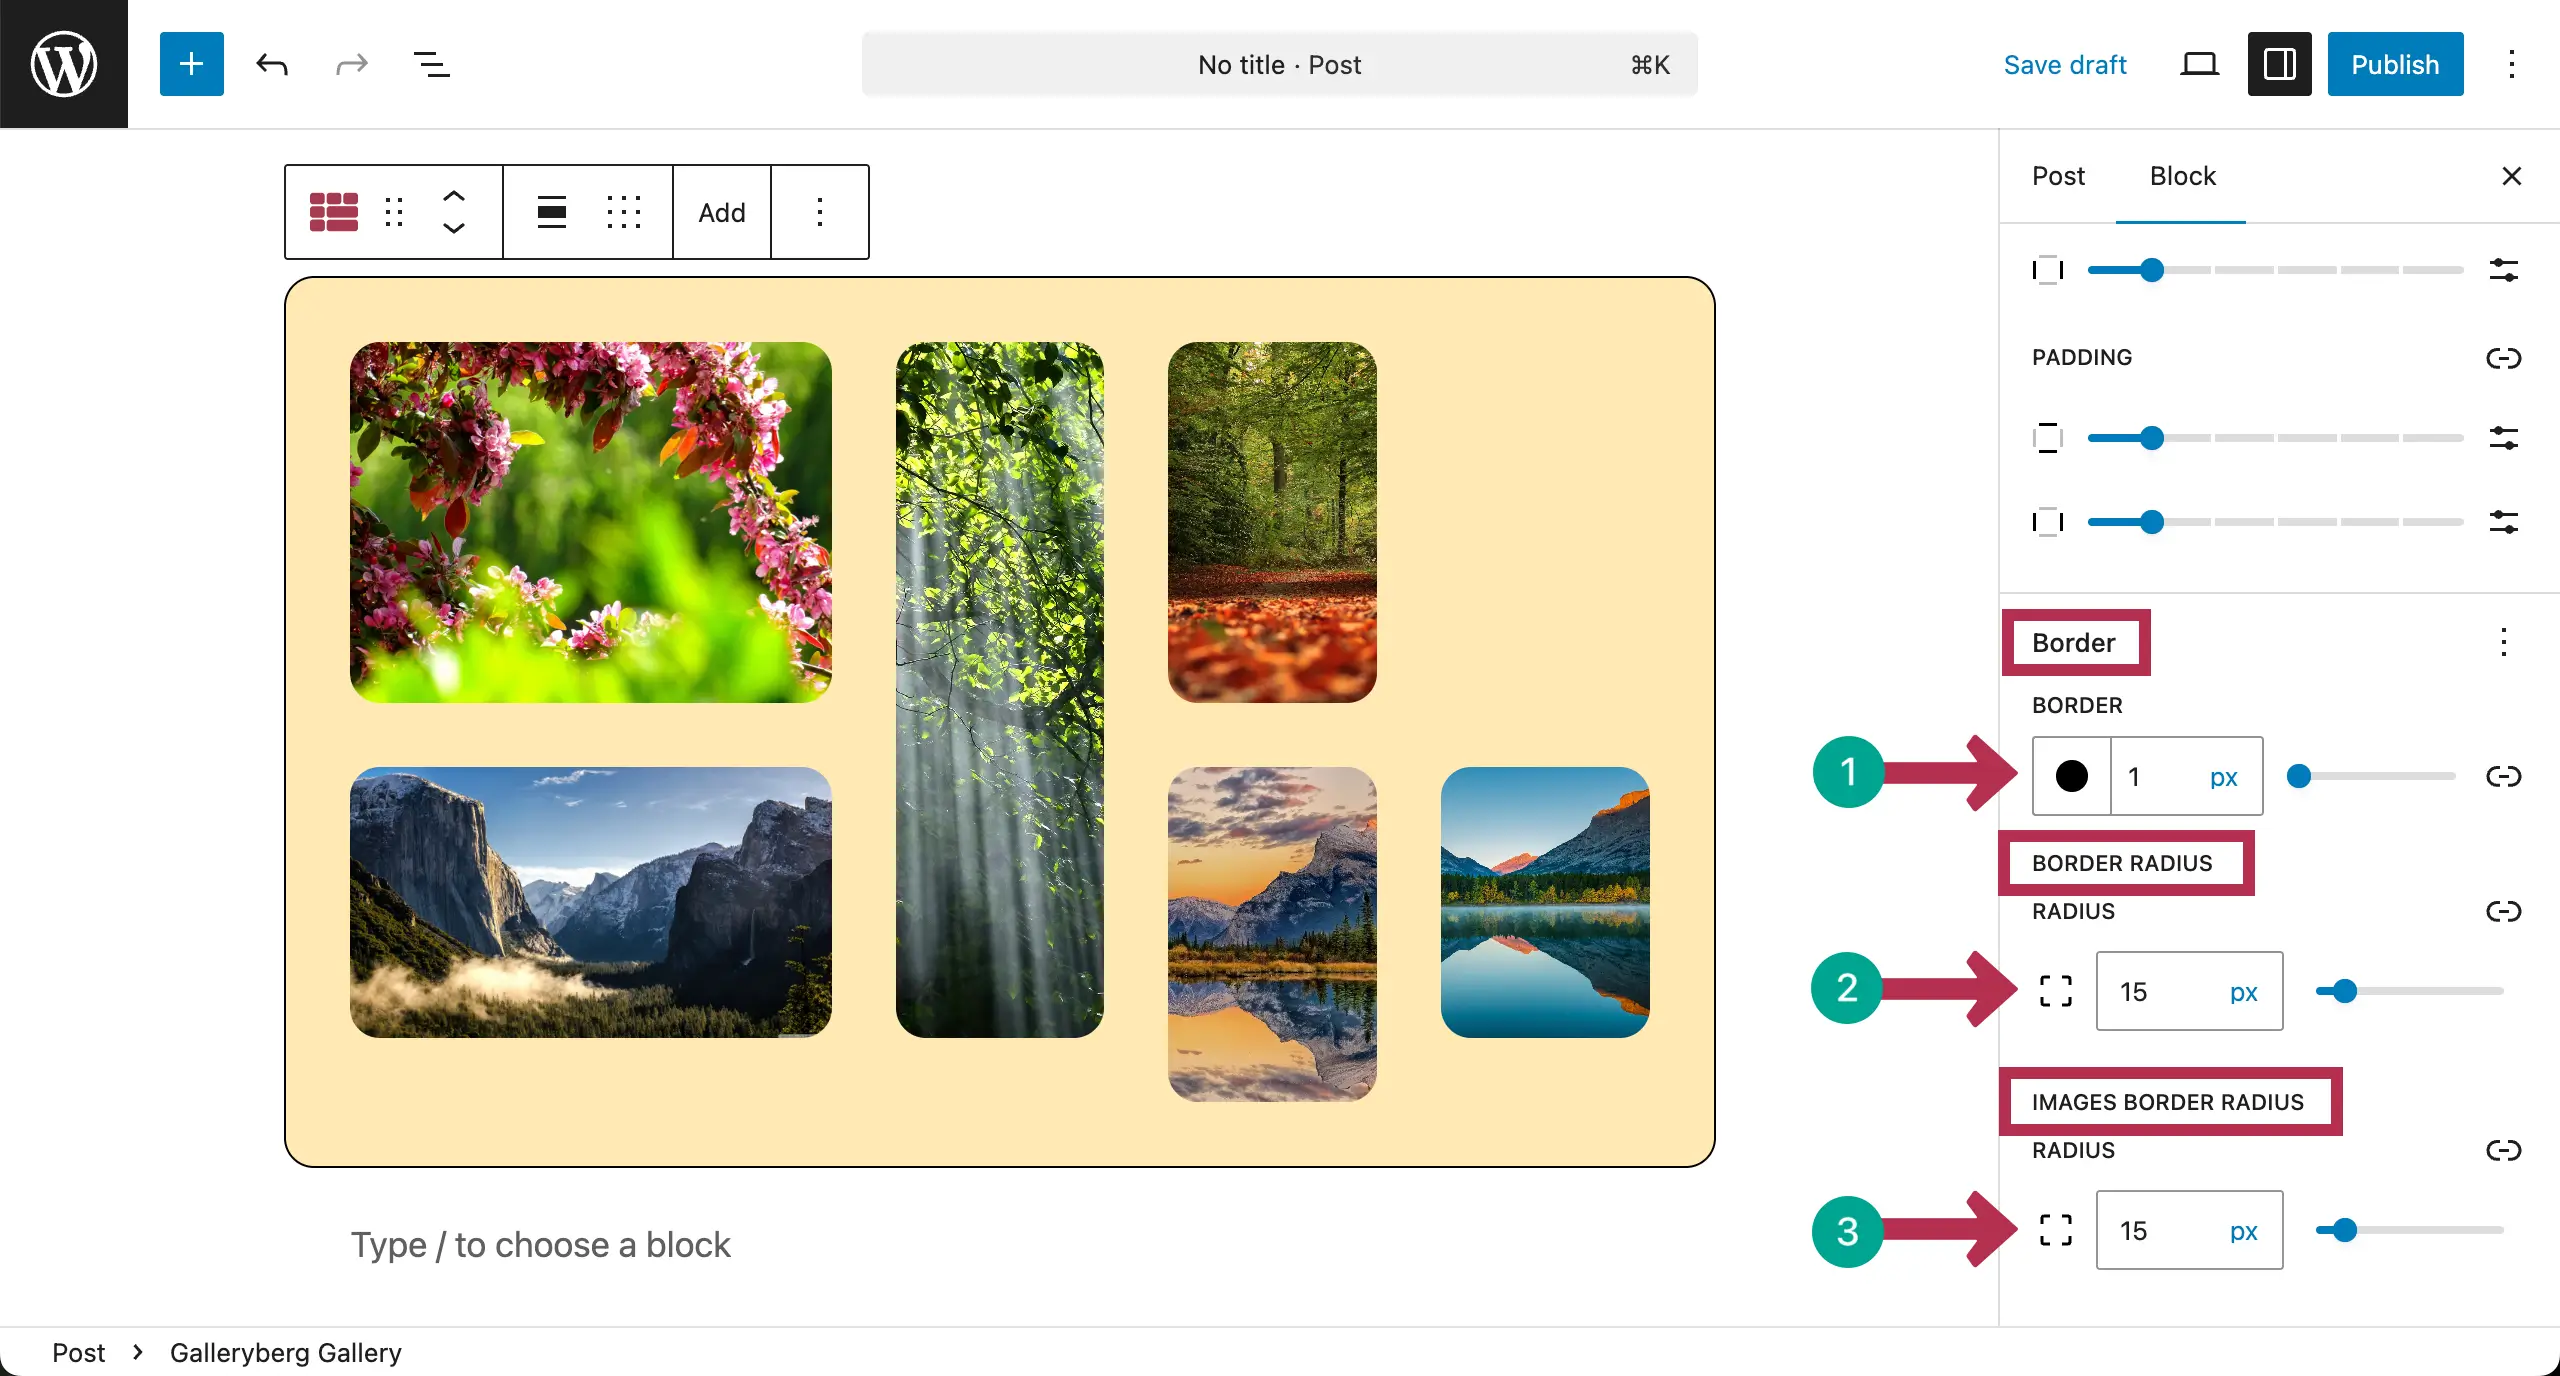
Finally, add a border, its width, and radius for the gallery.
Conclusion #
Thus, you can create mosaic galleries on the WordPress block editor using the Galleryberg plugin. This layout keeps visitors engaged and makes your WordPress site look modern and professional.
But to get the best, keep a clear visual balance between large and small images. Do not overload the gallery with too many photos. Leave enough spacing.


