A Justified Layout Gallery maintains a consistent height to present all images in a balanced way. The gallery does not crop the images into fixed squares. The photos keep their original shape, but their width changes, so every row looks neat.
Here’s how to create a Justified Layout Gallery in the WordPress block editor.
Adding the Justified Layout Gallery #
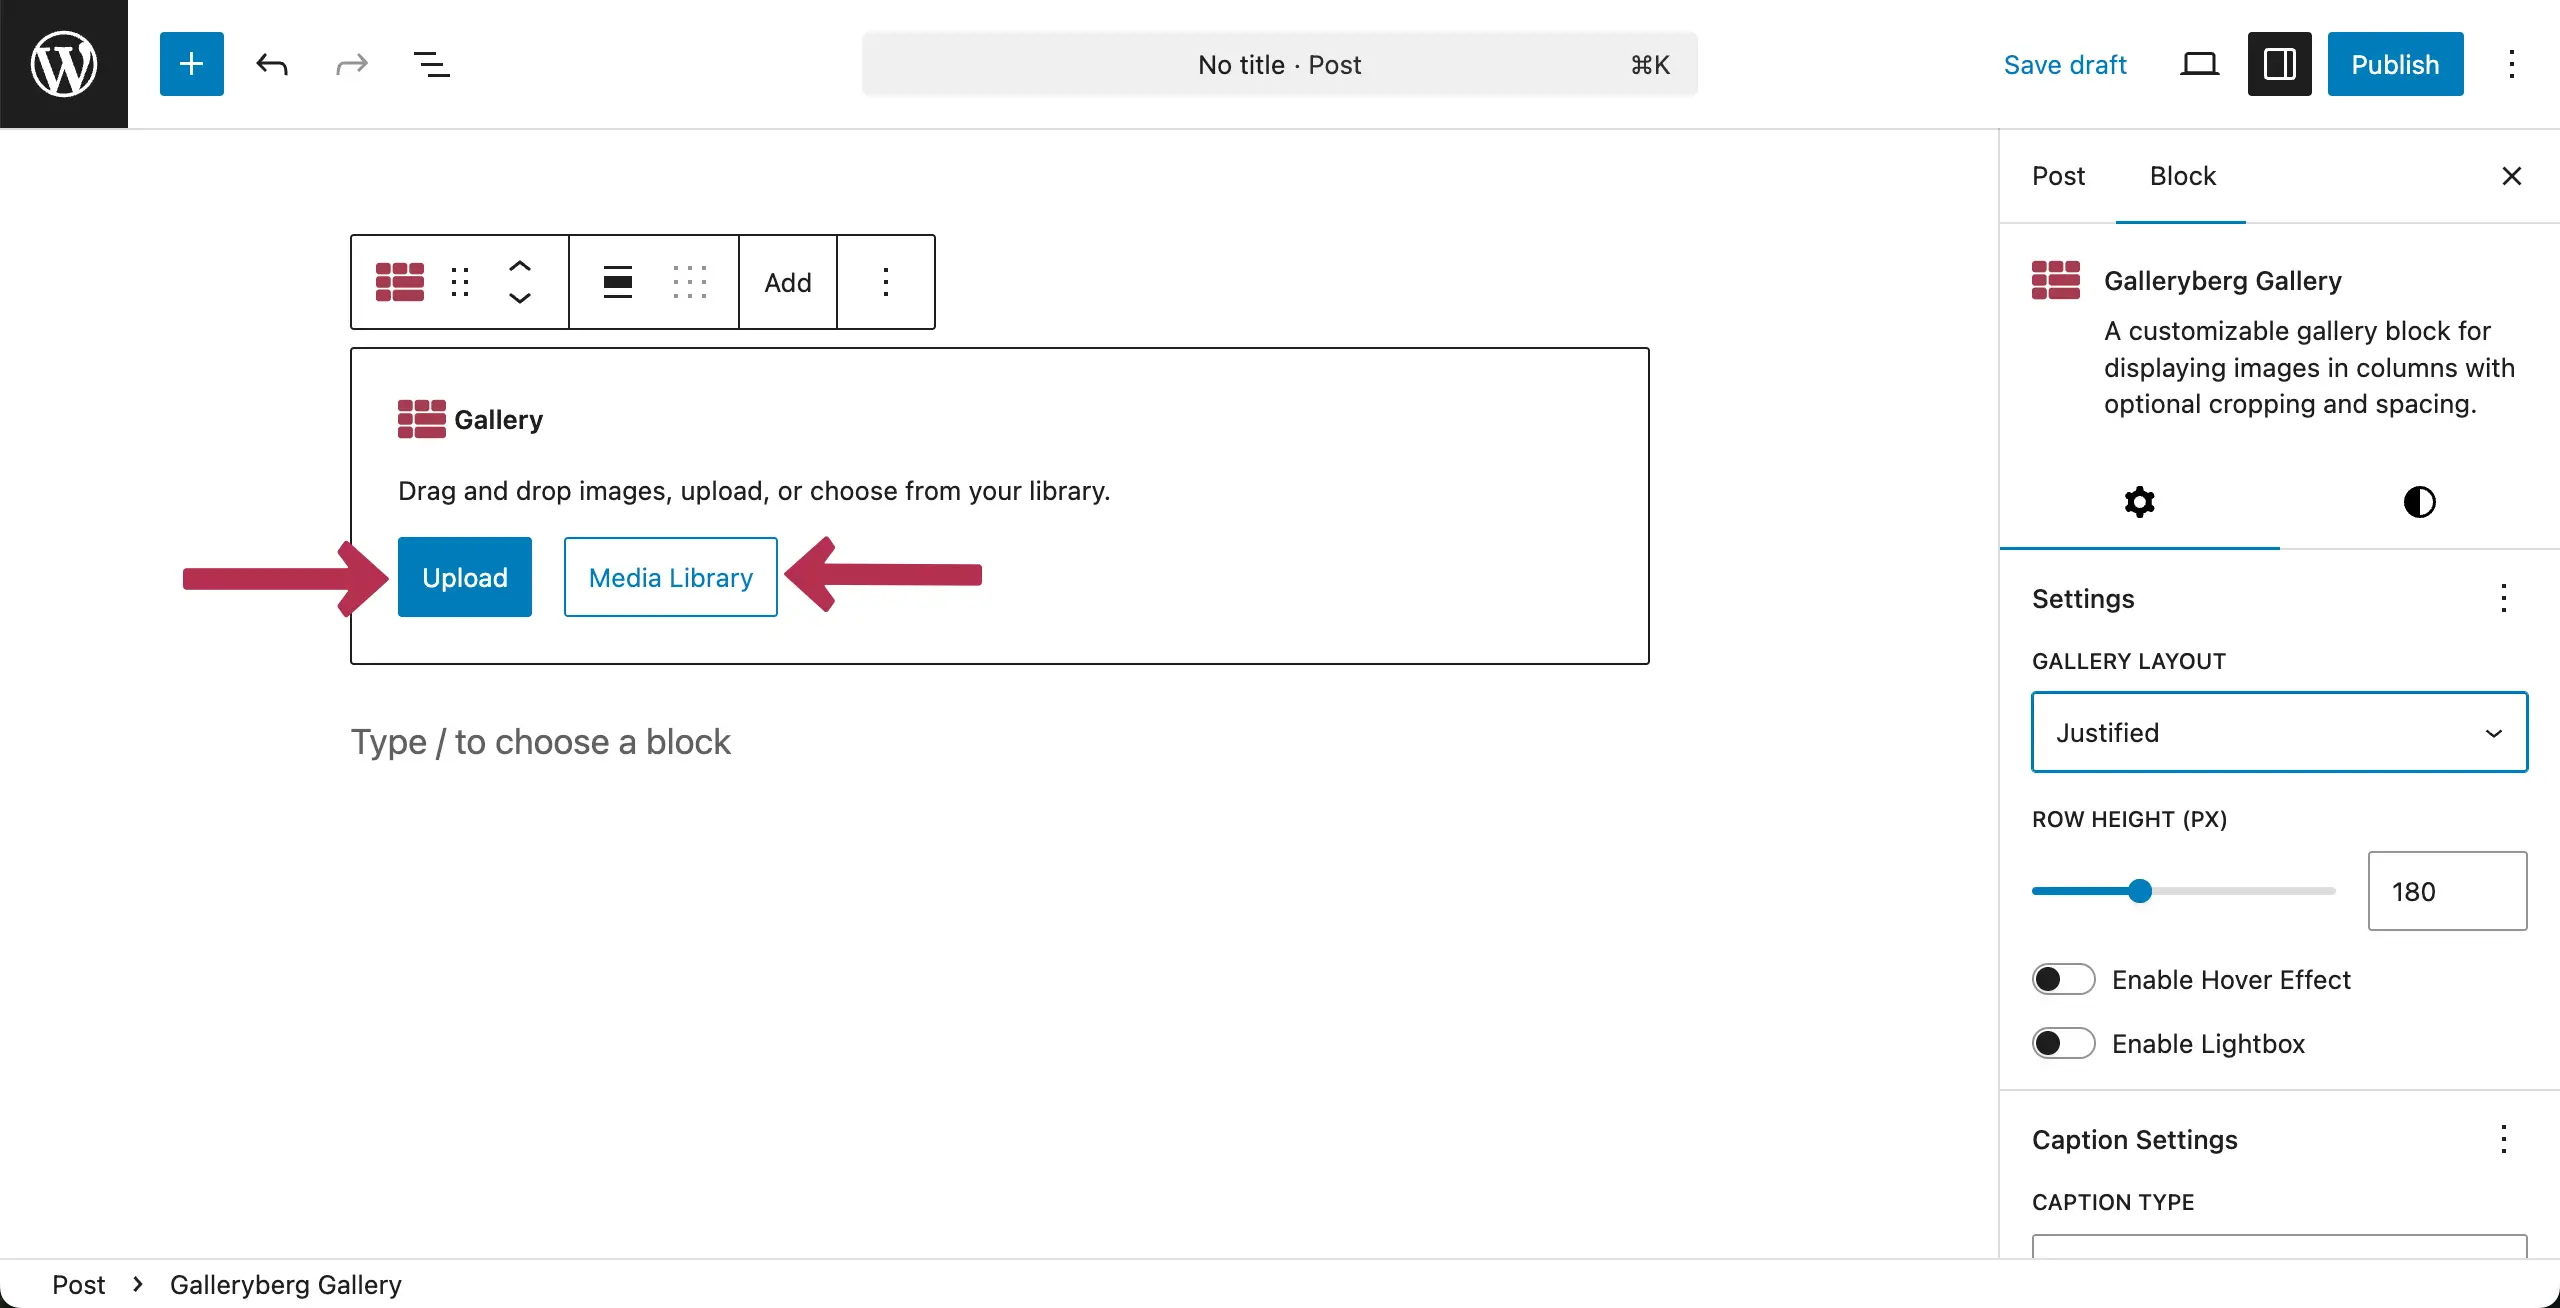
Like any other block, find and add the Galleryberg block to your WordPress editor.

Come to the settings tab. Then, click the dropdown icon under the Gallery Layout option. Select Justified.

Now, upload images, whether from your local drive or media library using the suitable option.
Once uploaded, select the images you want to add to the gallery. After that, hit the Create a new gallery button.
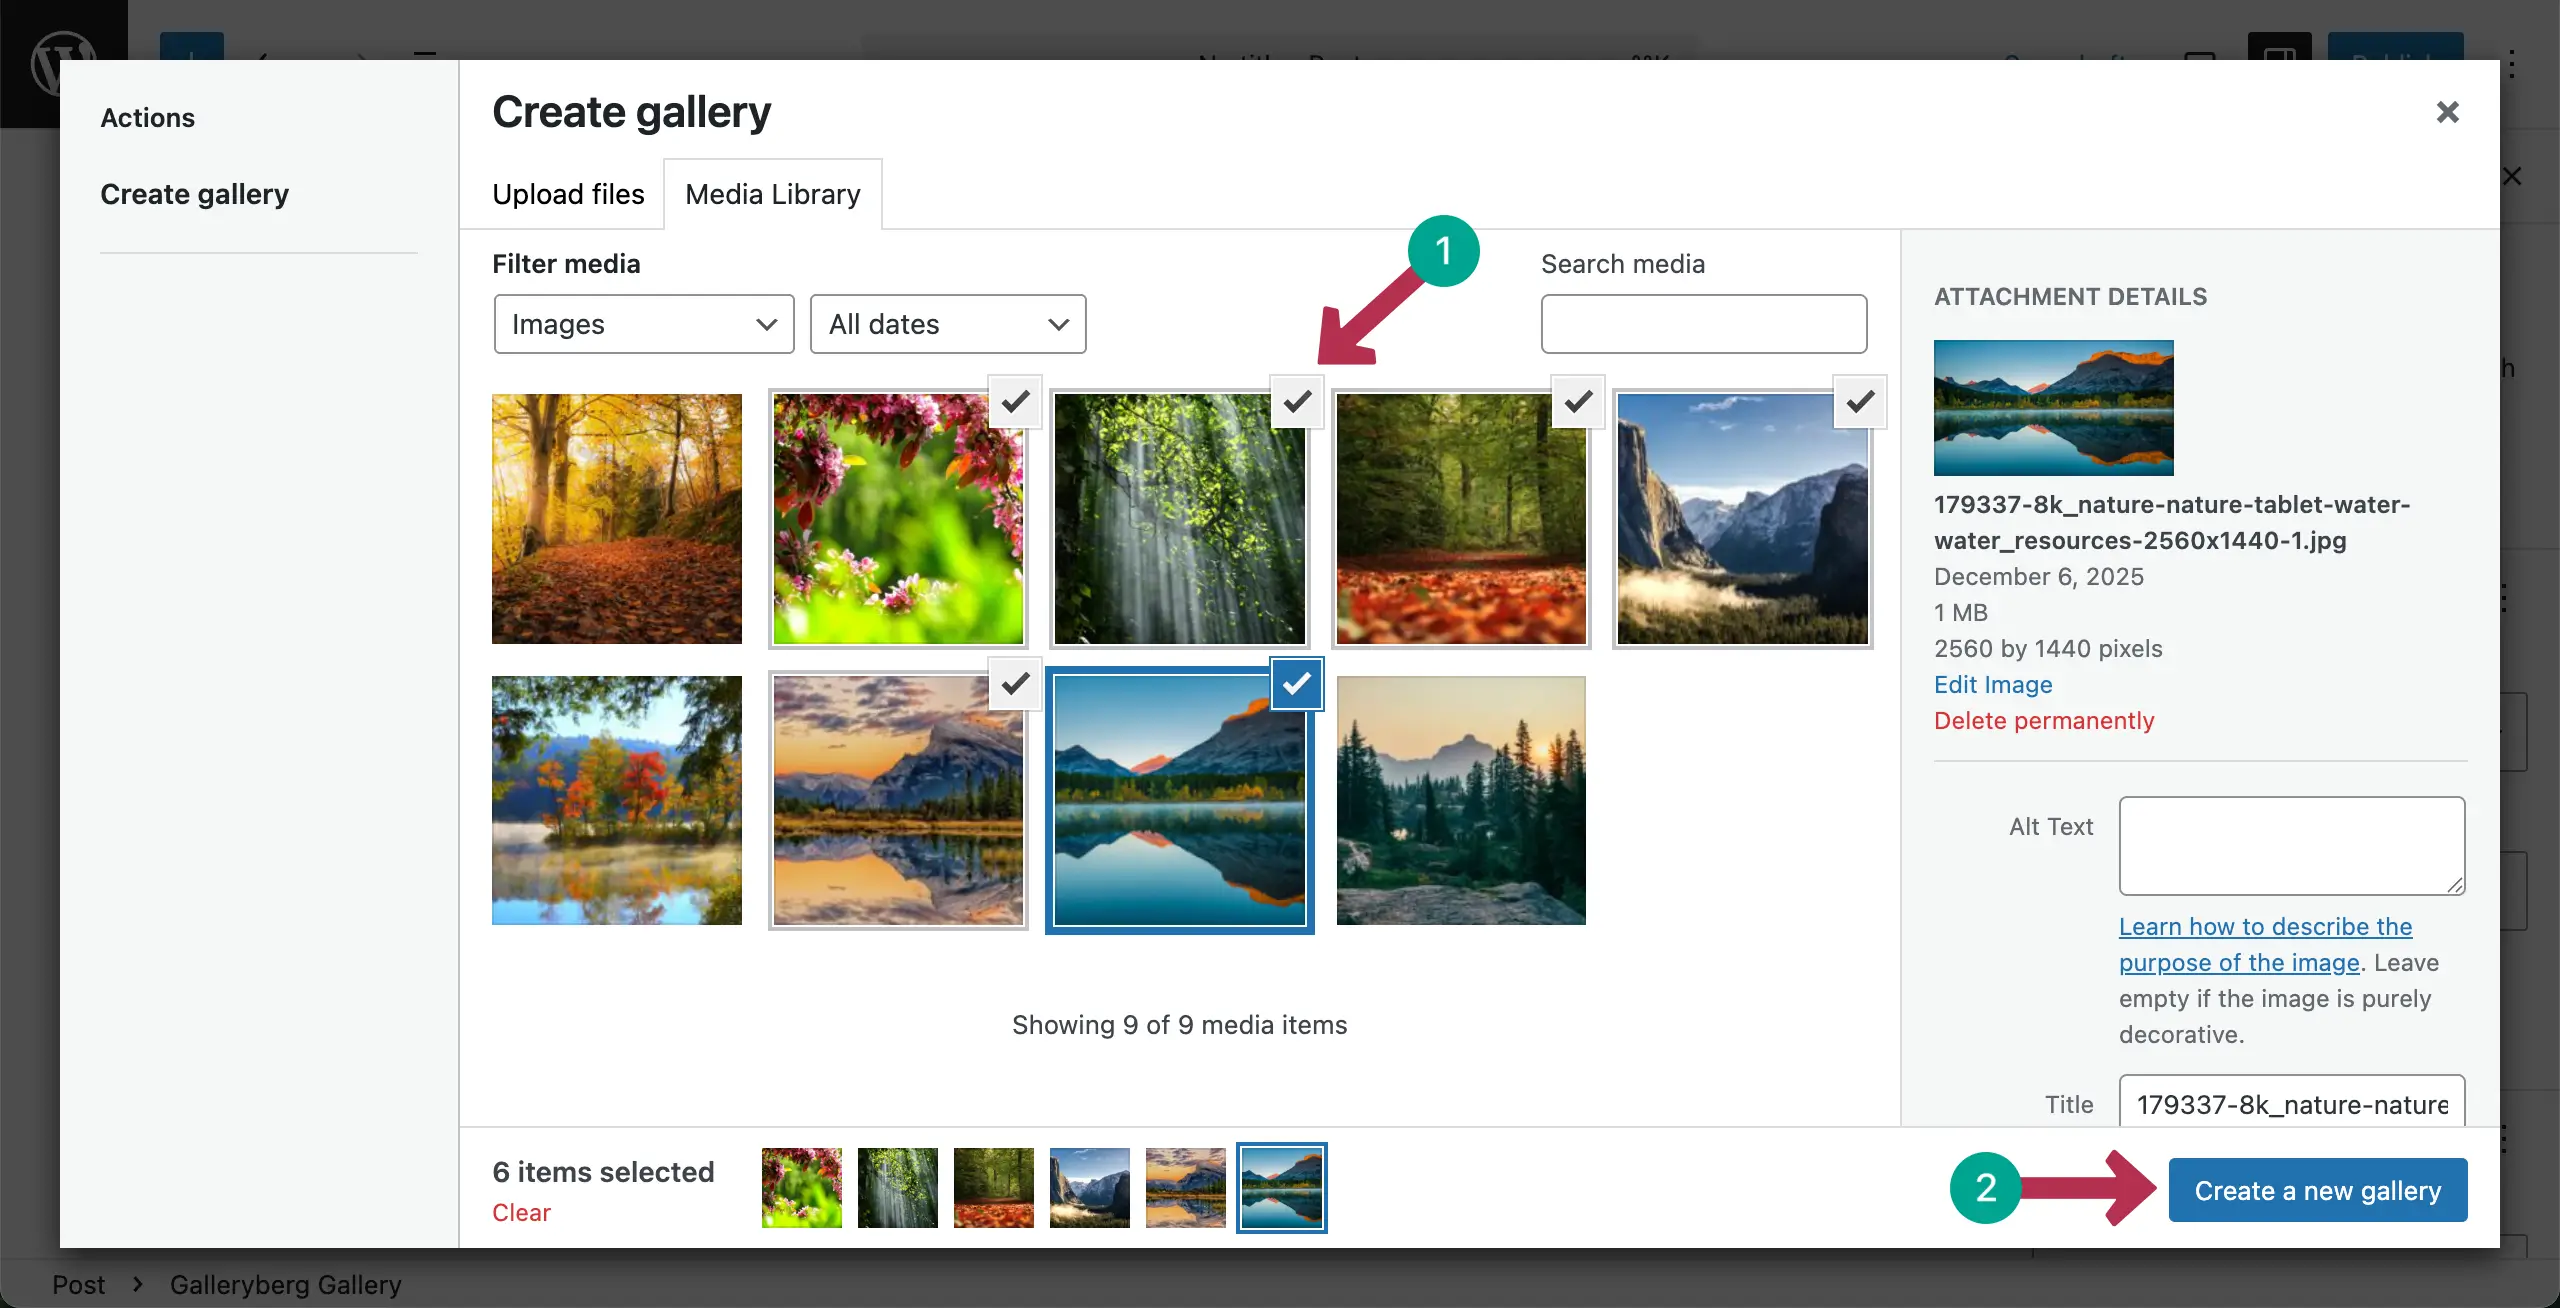
In the next screen, you’ll be allowed to add captions to the images one by one. It’s not mandatory. You may leave them blank. Finally, click the Insert gallery button.

The image gallery will be created right away.

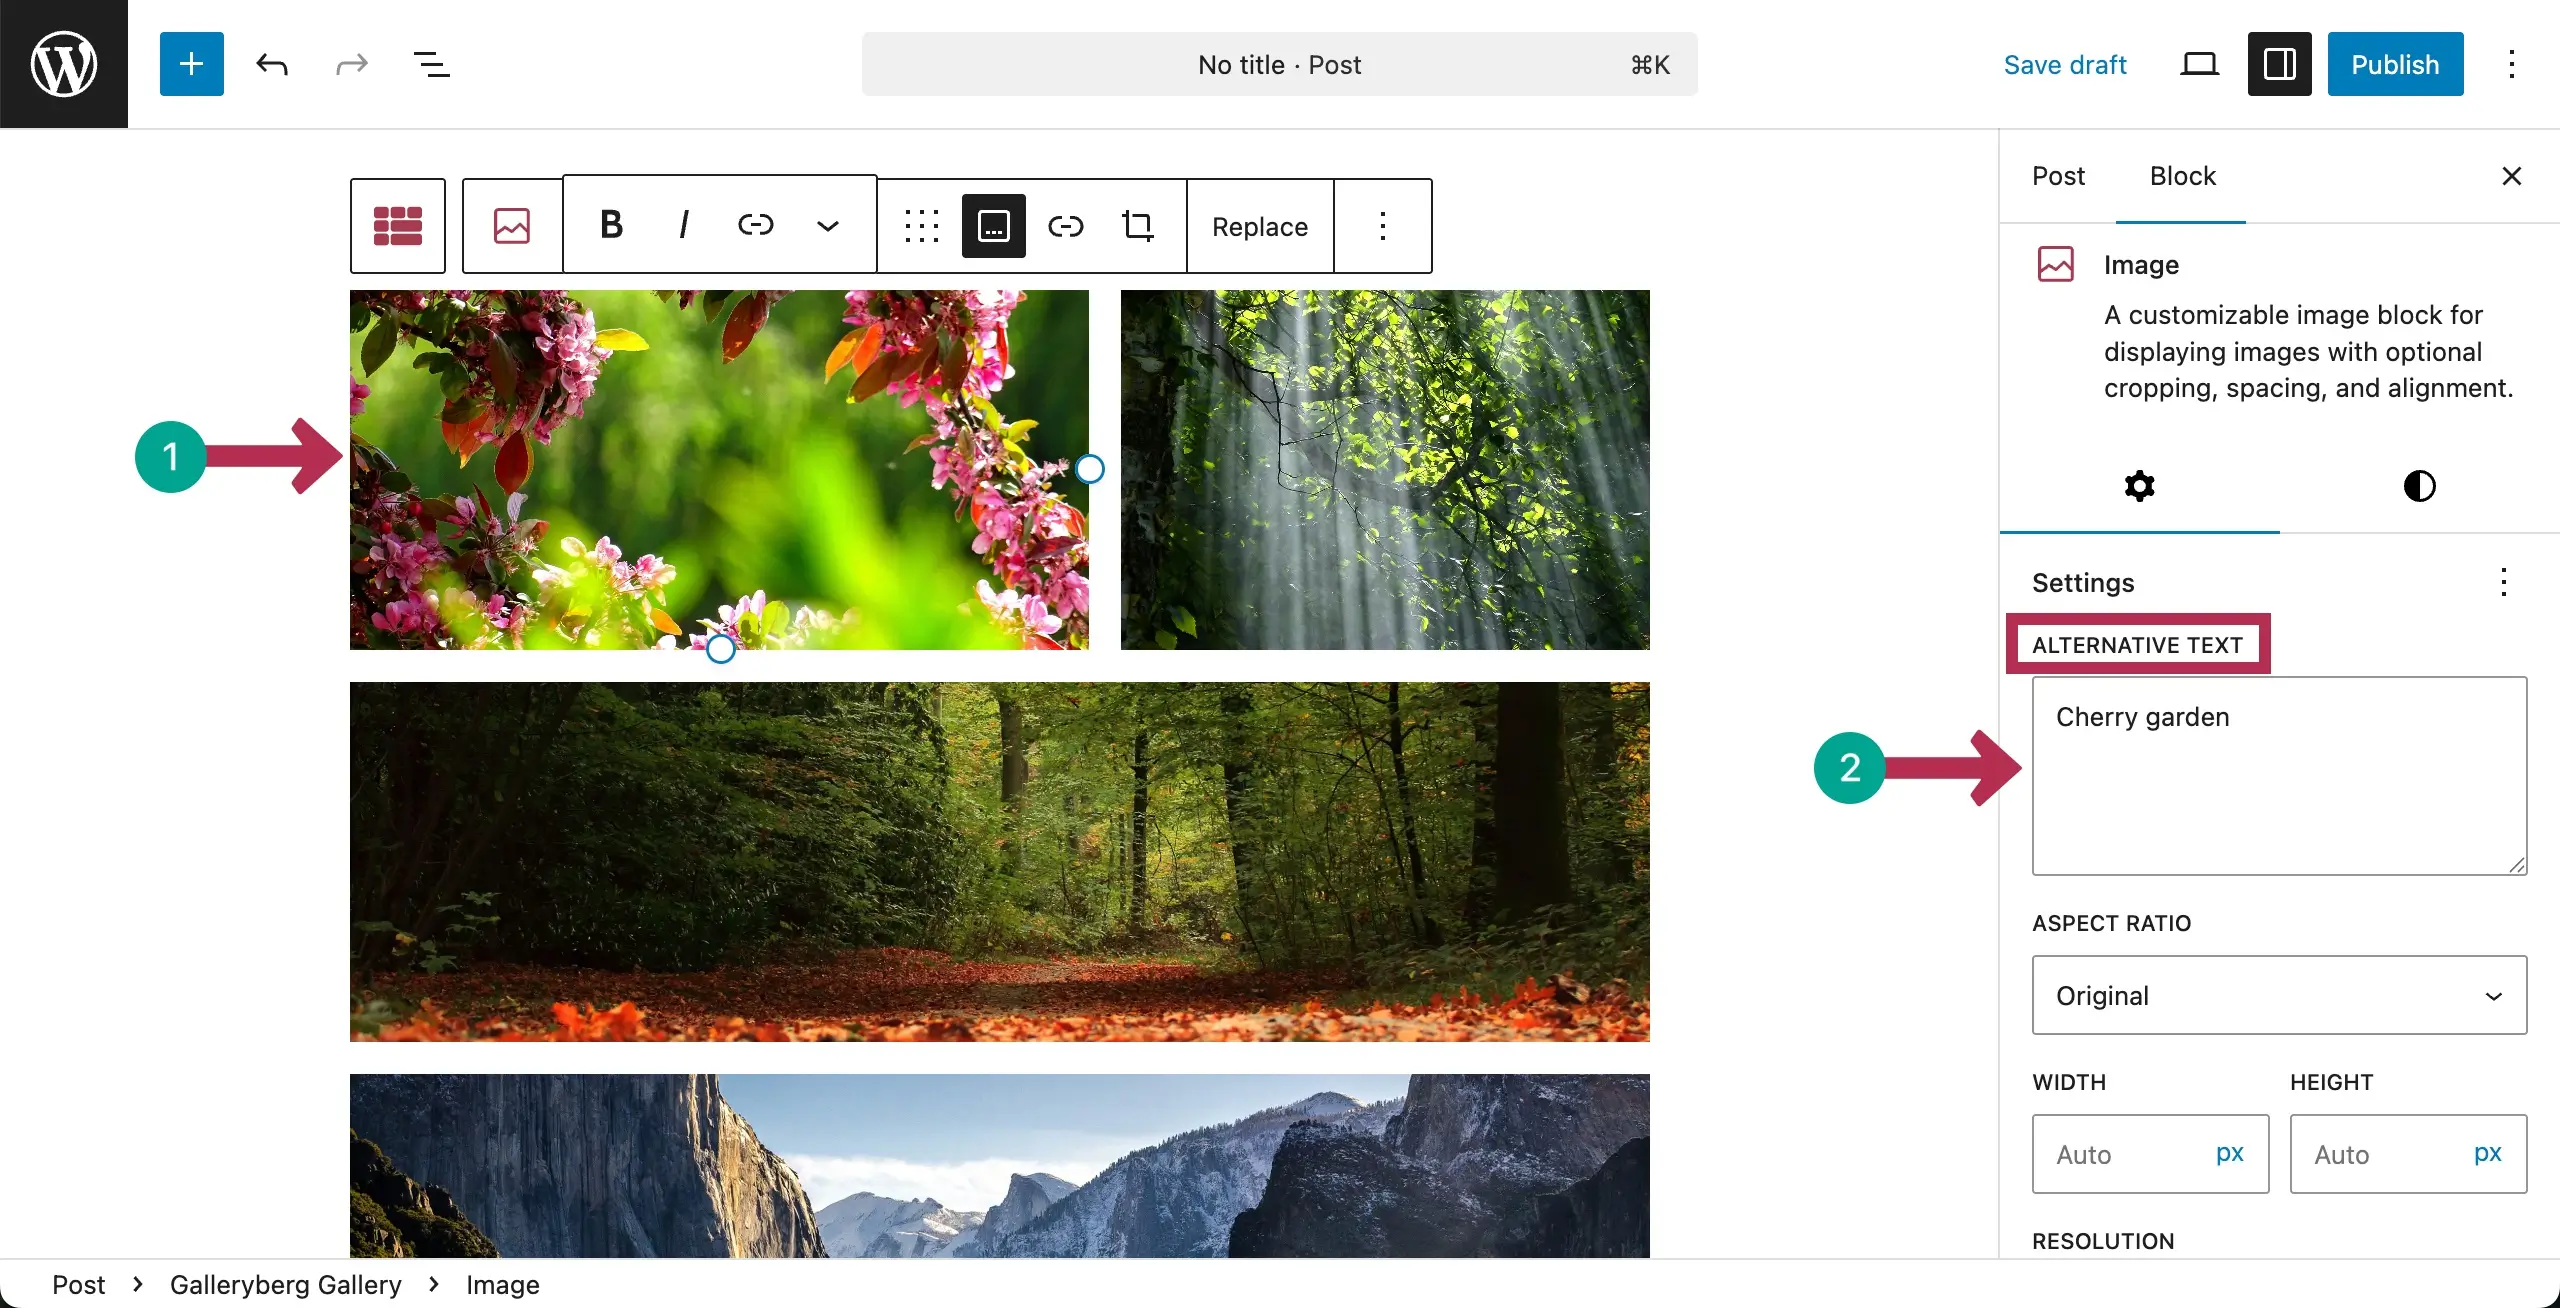
After the gallery is created, you can add alternative texts to the images one by one by selecting them individually.
Configuring General Settings #
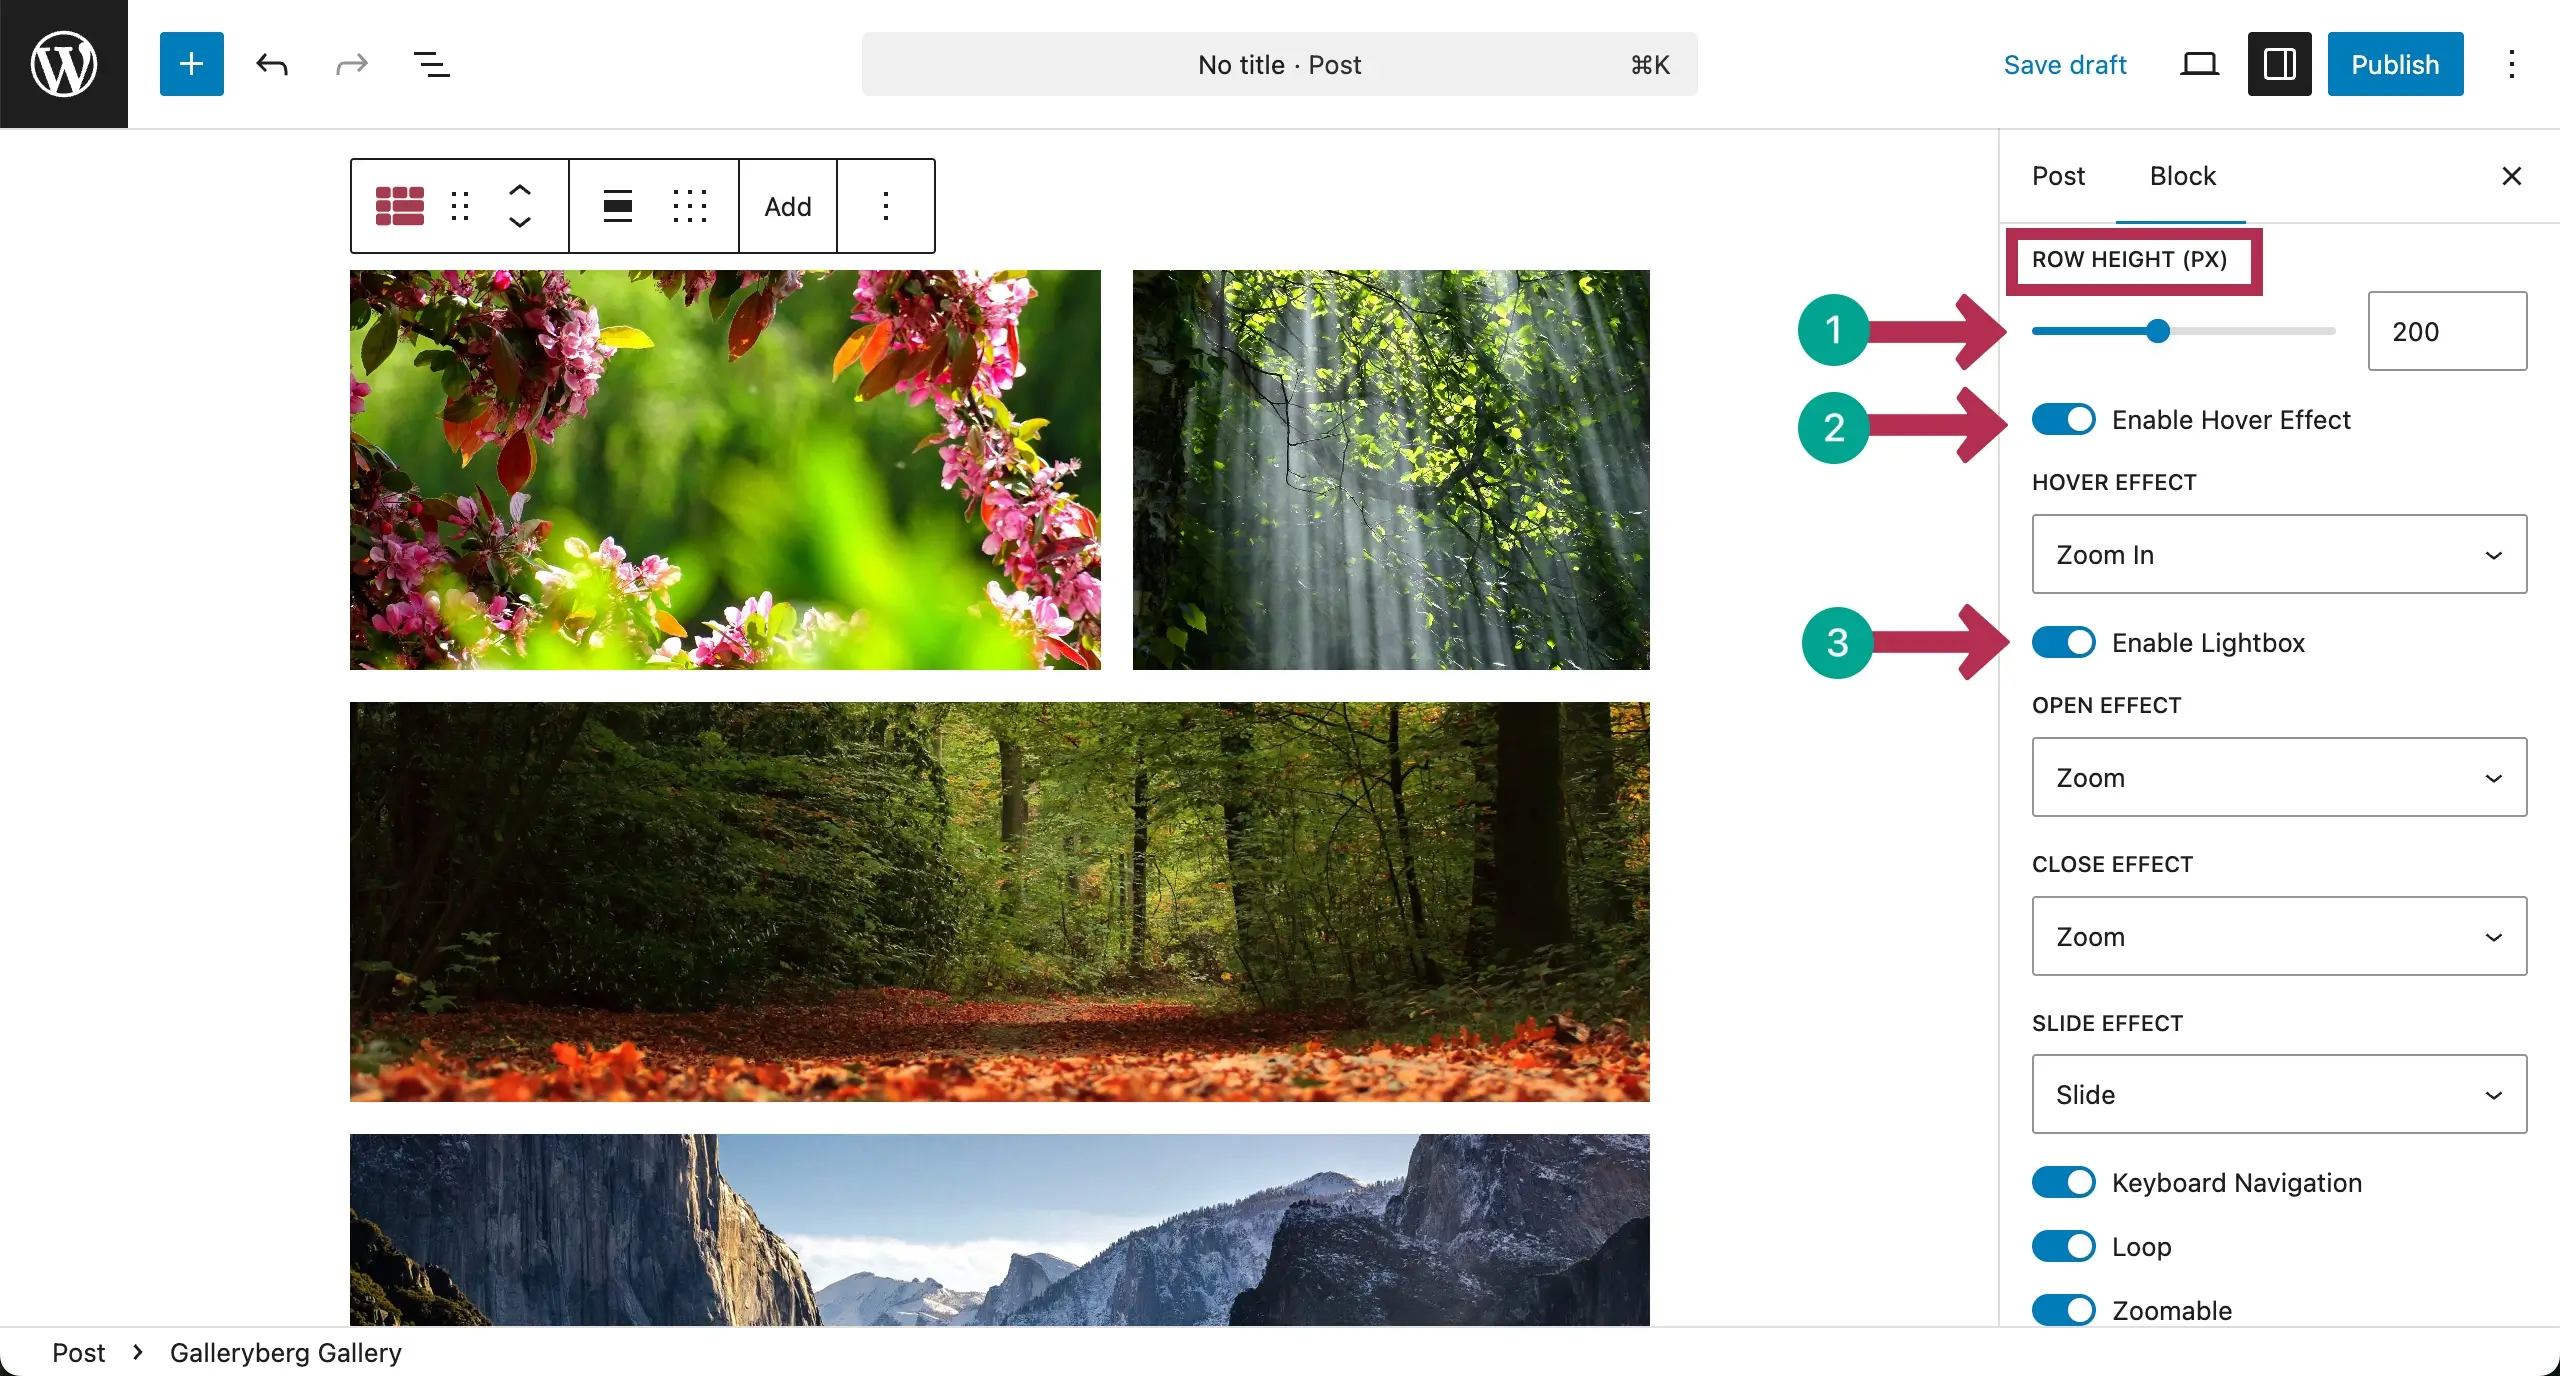
Select the entire gallery by clicking the Galleryberg icon on the toolbar. Then, come to the settings tab on the right sidebar.
From the Row Height option, you can increase or decrease the row height. After that, you can enable the hover effect and the lightbox.

You can see that we have increased the row height. Also, when the hover effect and lightbox are enabled, some more options will be shown. Hope you can explore and configure them.
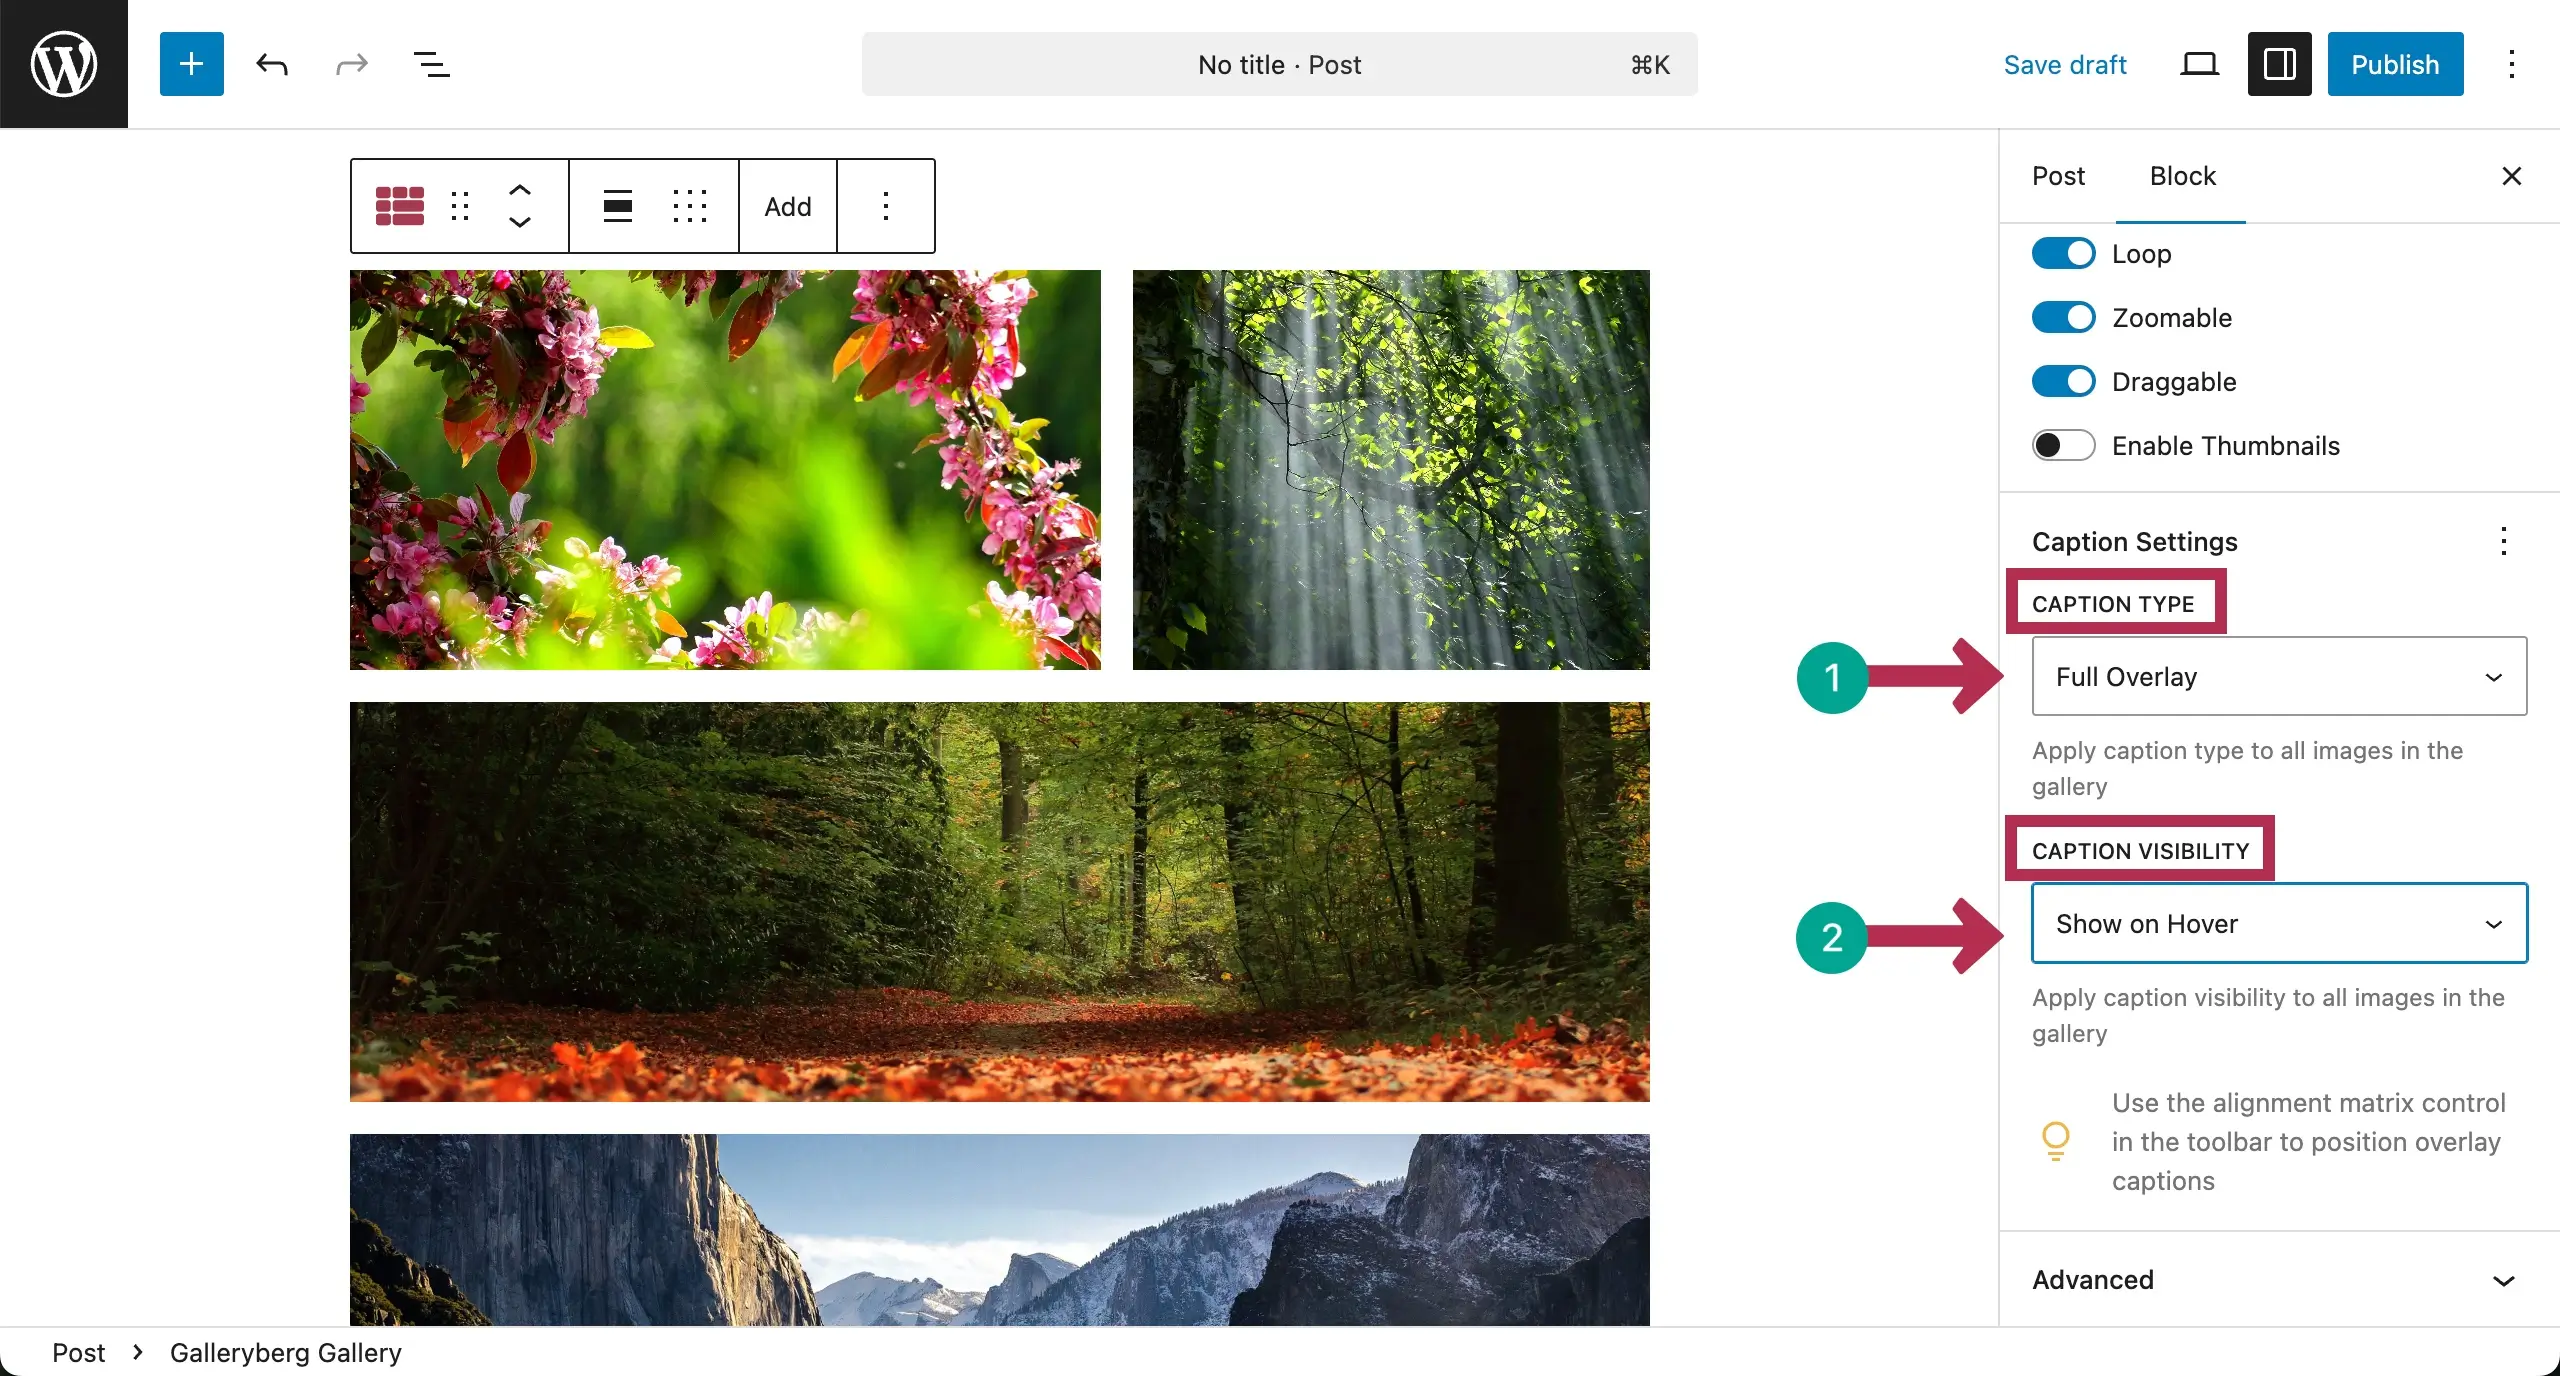
Scroll down the sidebar. You’ll get Caption Type and Caption Visibility. Each one has three options.
Caption Type lets you set where you want to display the caption. It has three options: Below Image, Full Overlay, and Bar Overlay.
Caption Visibility lets you decide when the caption will be displayed. Its options are Always Visible, Show on Hover, and Hide on Hover.
Customization #
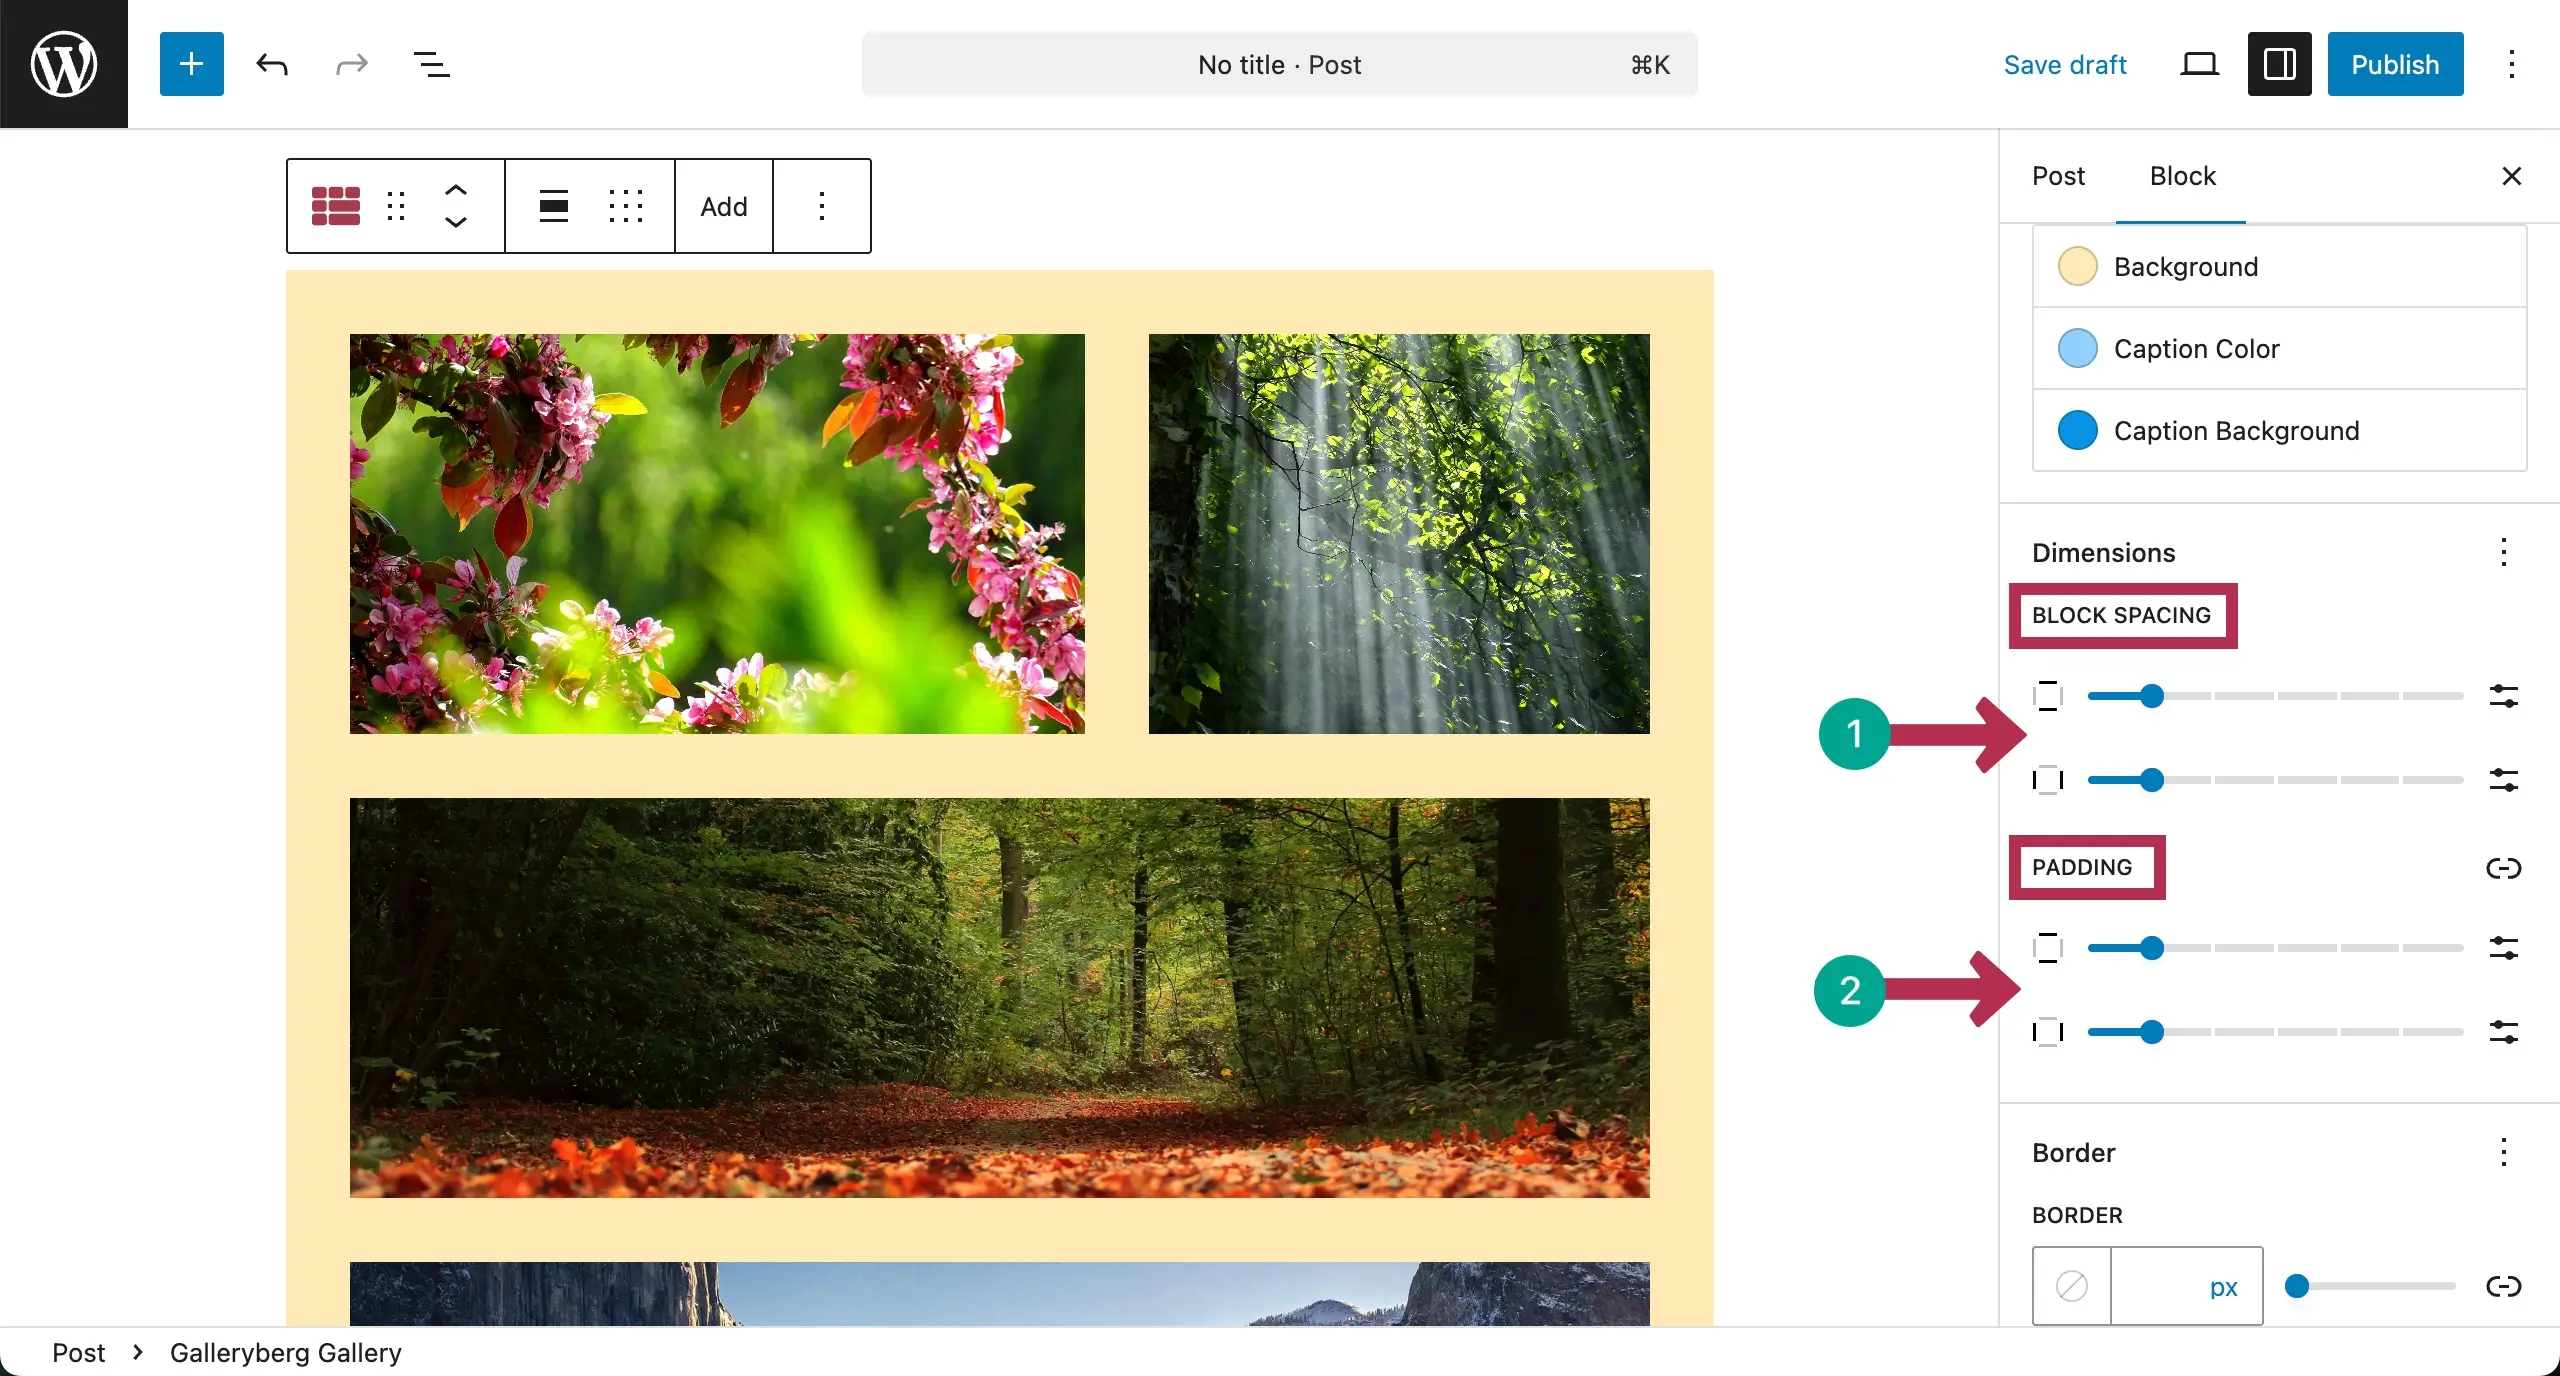
For customization, come to the Styles tab on the right sidebar. The first stylization option there is Color.

There are three color options. They are Background, Caption Color, and Caption Background Color. You can see that we have set respective colors here.

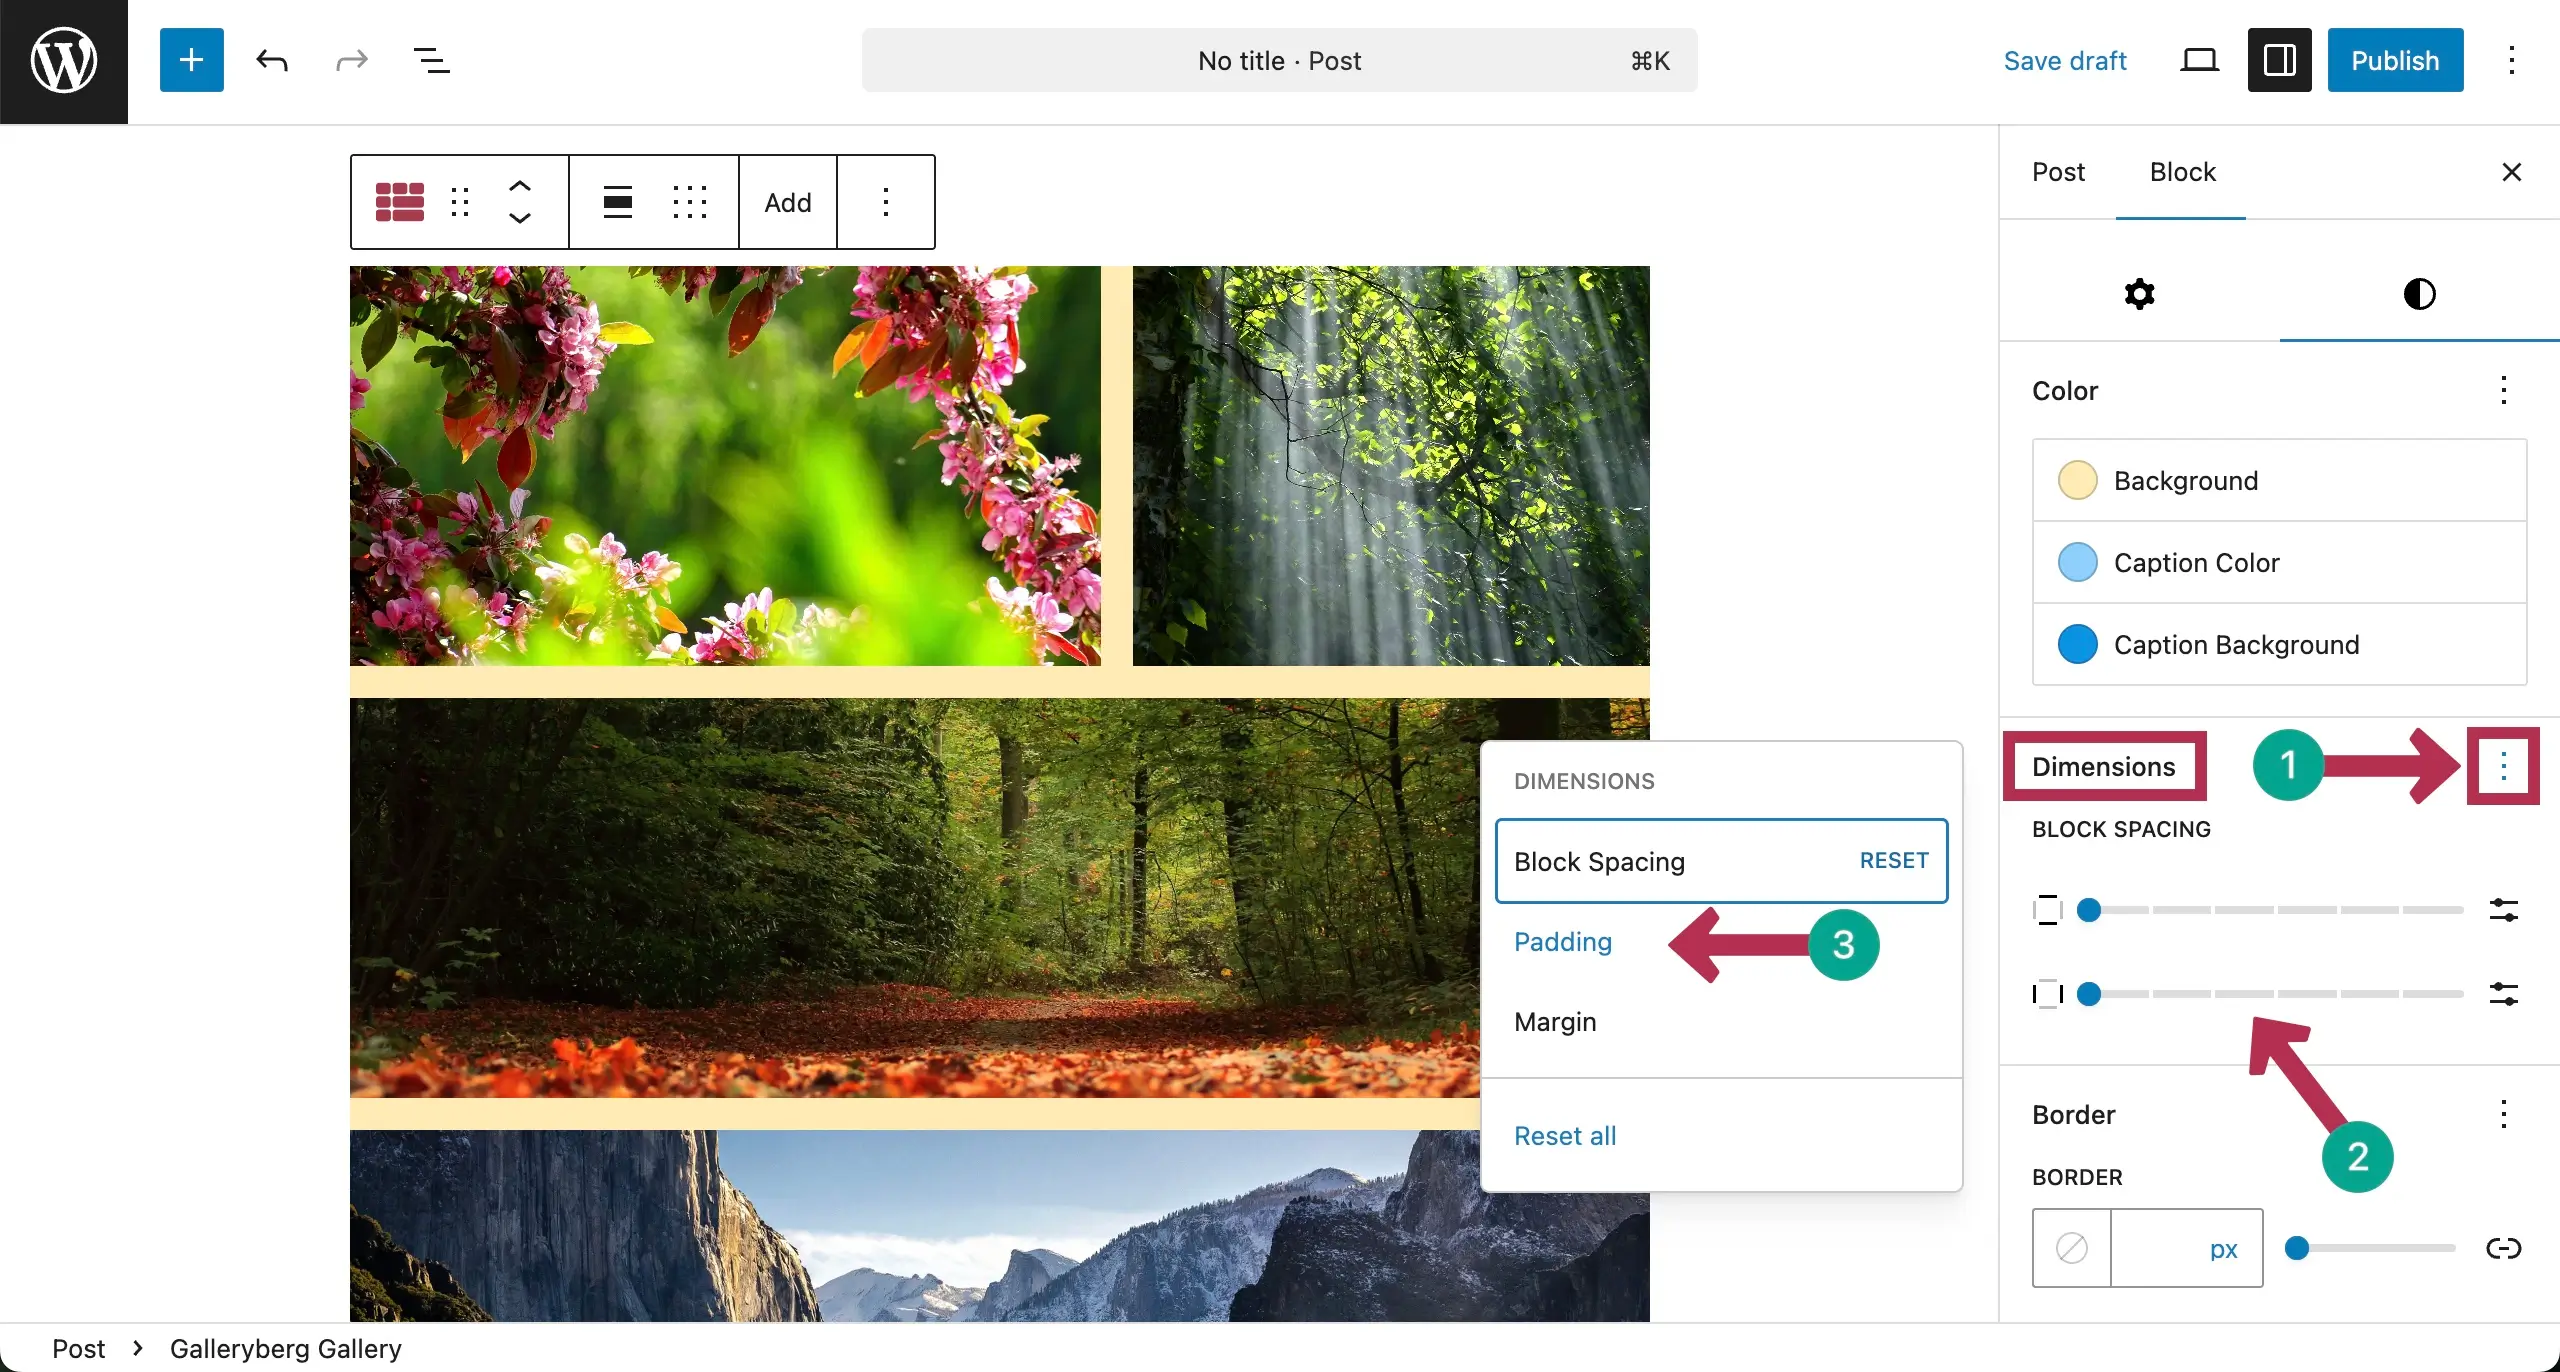
To customize the Padding, Margin, and Block Spacing, come to the Dimensions section and hit the three-dot icon.
This will show up a small popup where you will see the Padding and Margin options. Click the option you want to customize.
For this tutorial, we’re clicking the Padding option.
You’ll see the Padding option has been added to the sidebar. Now, you can set their values. The changes will be instantly seen on the editor.
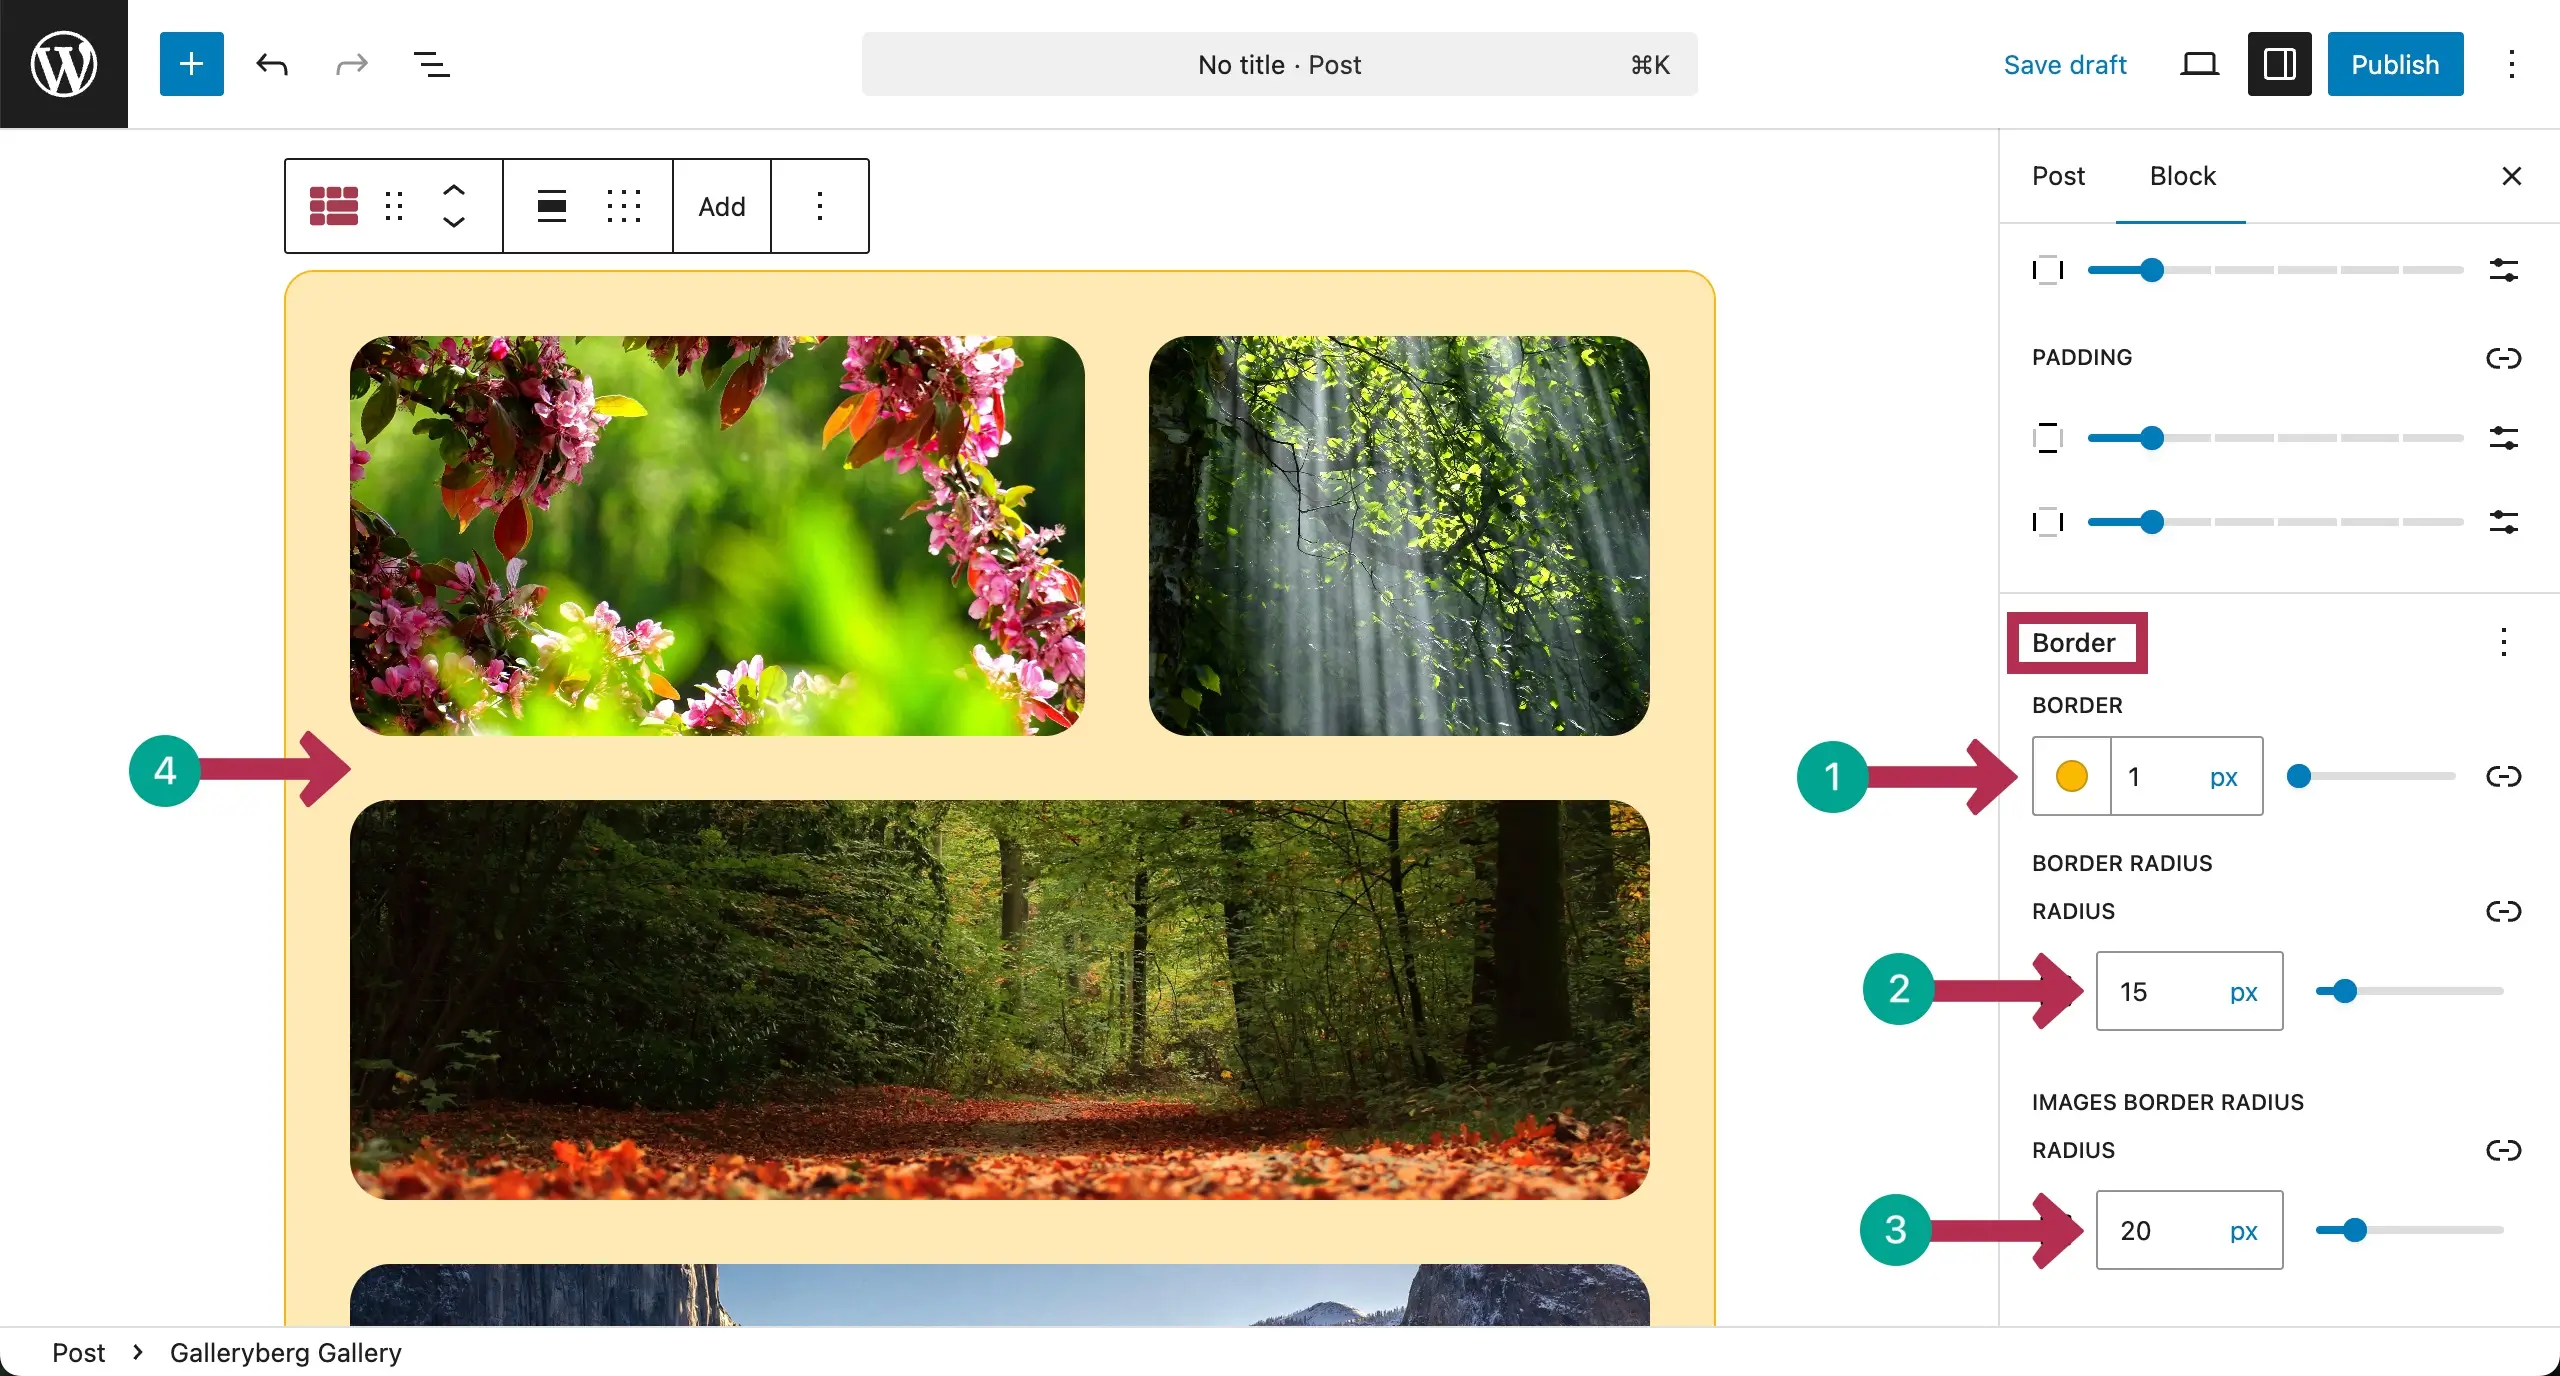
Scroll down to the Border section. From here, you can set values for the Border, Border Radius, and Image Border Radius.
Conclusion #
Thus, you can create Justified Layout Galleries in the WordPress editor. However, to get the best results from a justified layout gallery, use high-quality photos, keep image sizes close, and avoid heavy filters.
Finally, maintain clear spacing and don’t forget to test the gallery on mobile for smooth viewing.


