Duotone filters apply two-color effects to images in WordPress galleries. They change image mood and style without editing files. Duotone filters help create a consistent visual theme and make galleries look modern and creative.
Let’s check how to use Doutone filters on images in WordPress in this guide.
Adding Duotone Filters on Images in WordPress #
Let’s first create a gallery with the Gallerberg plugin. You can see that we have already created a gallery to explain to you the process.

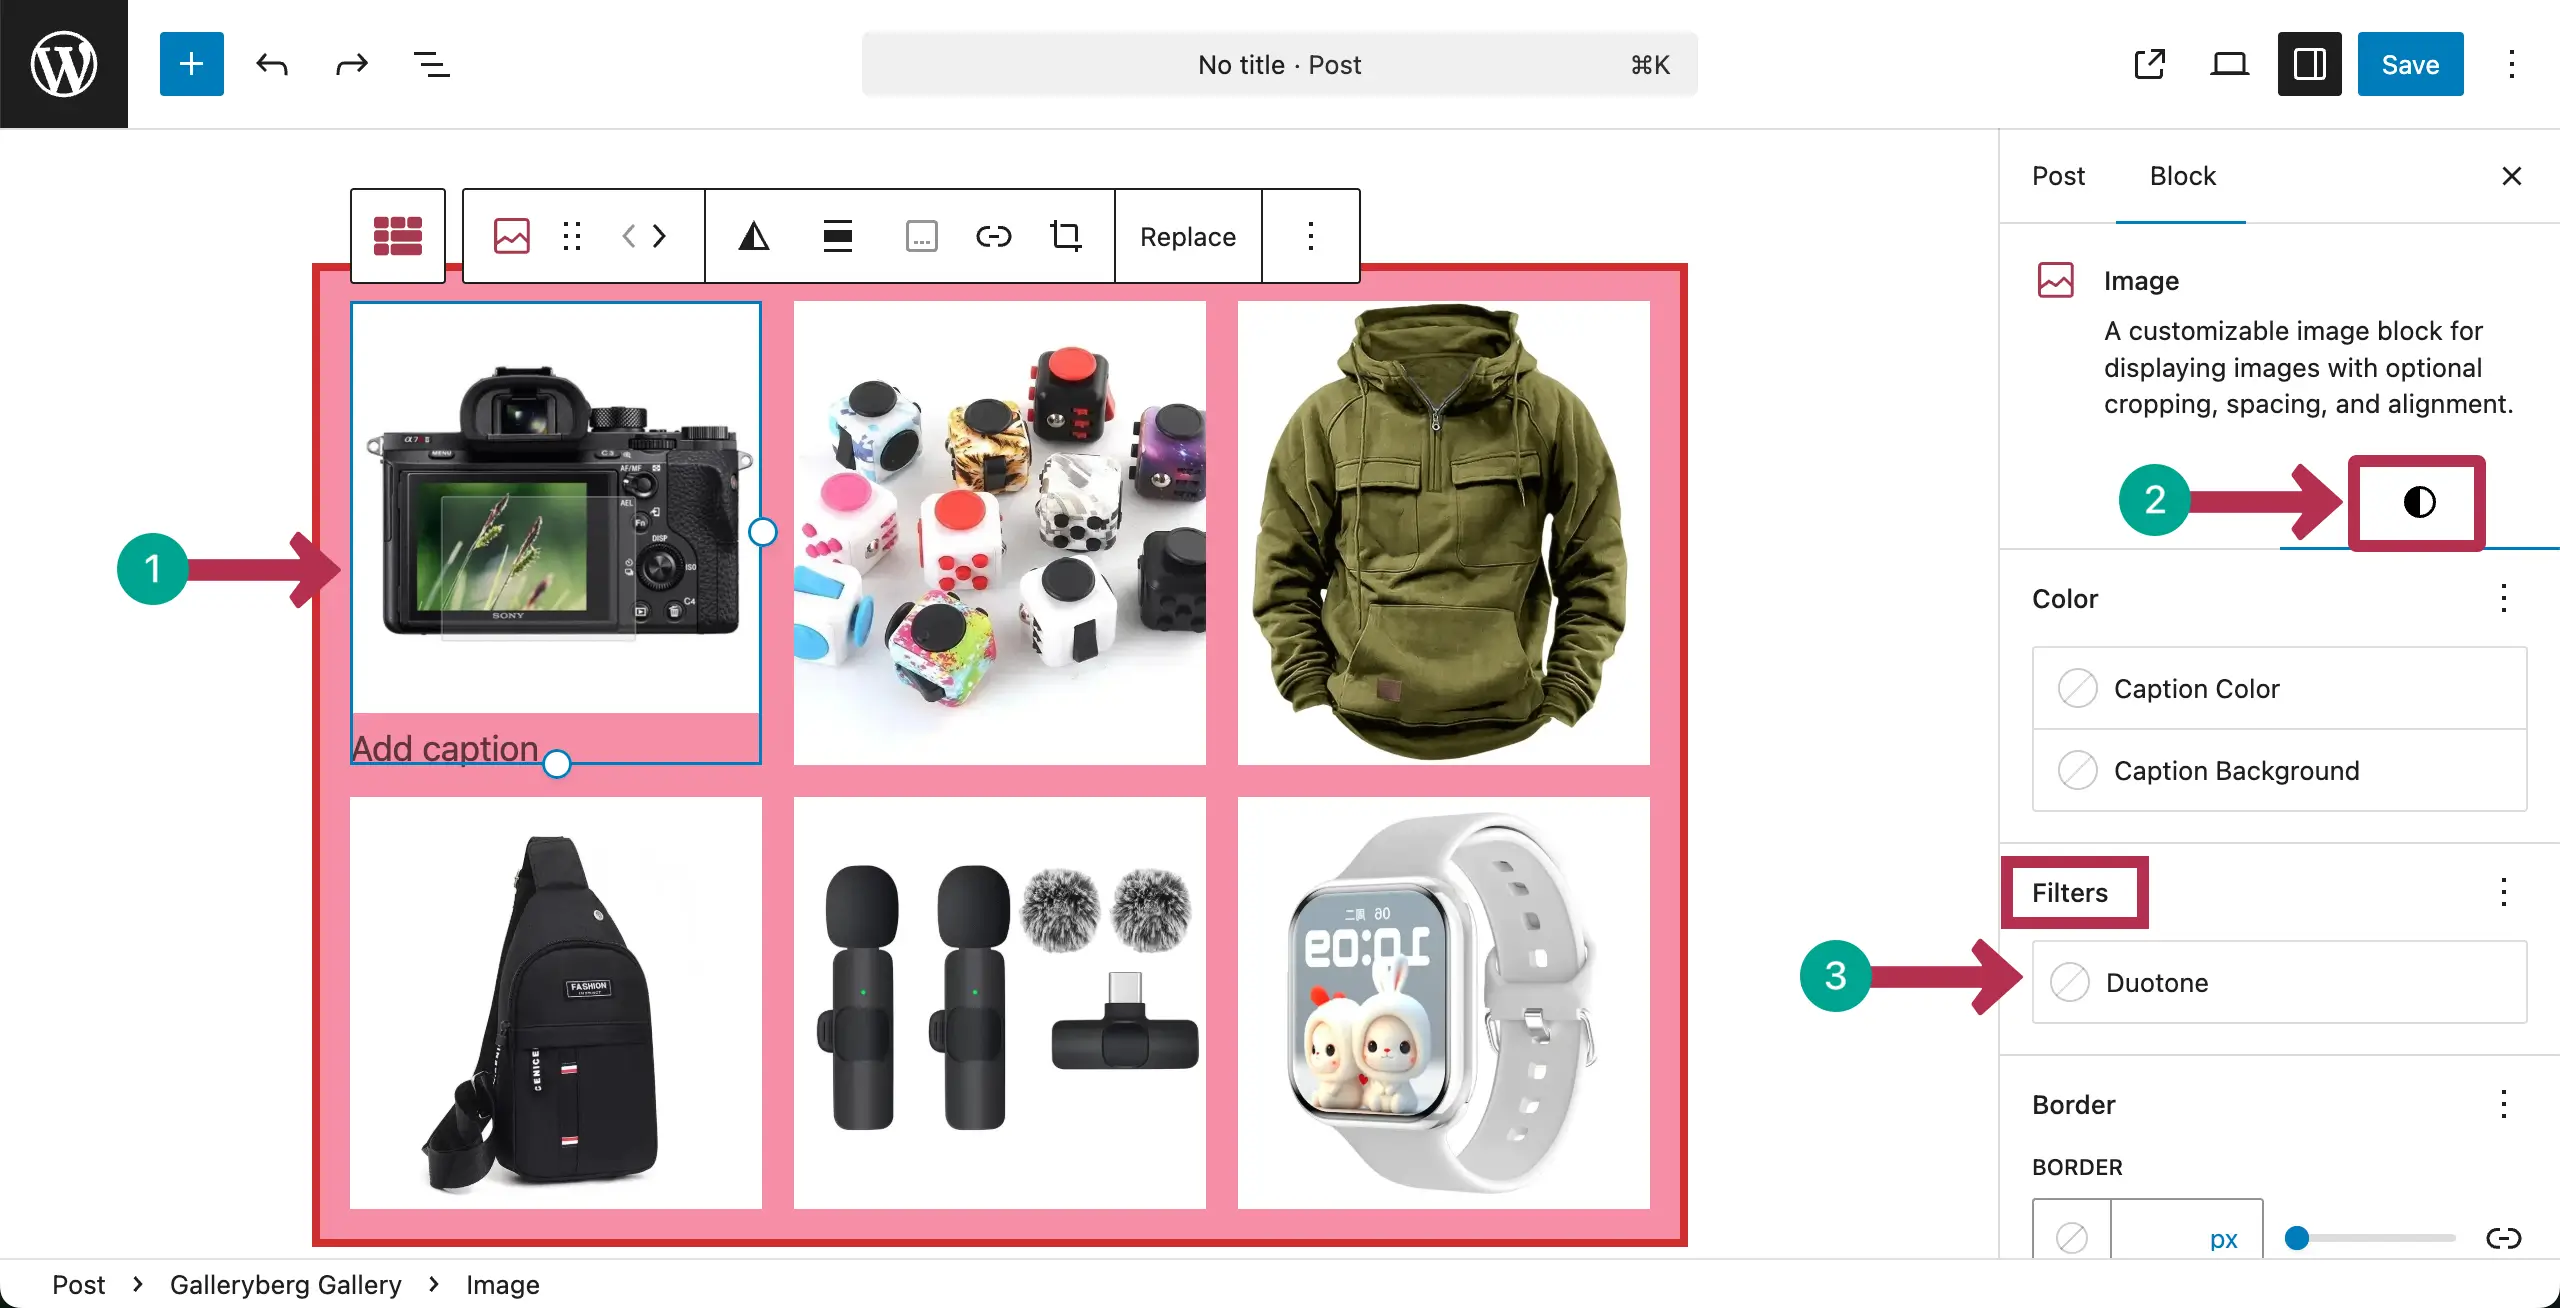
Now, select any image you want. Go to the Styles tab and find Filters. Then, Click on Duotone.
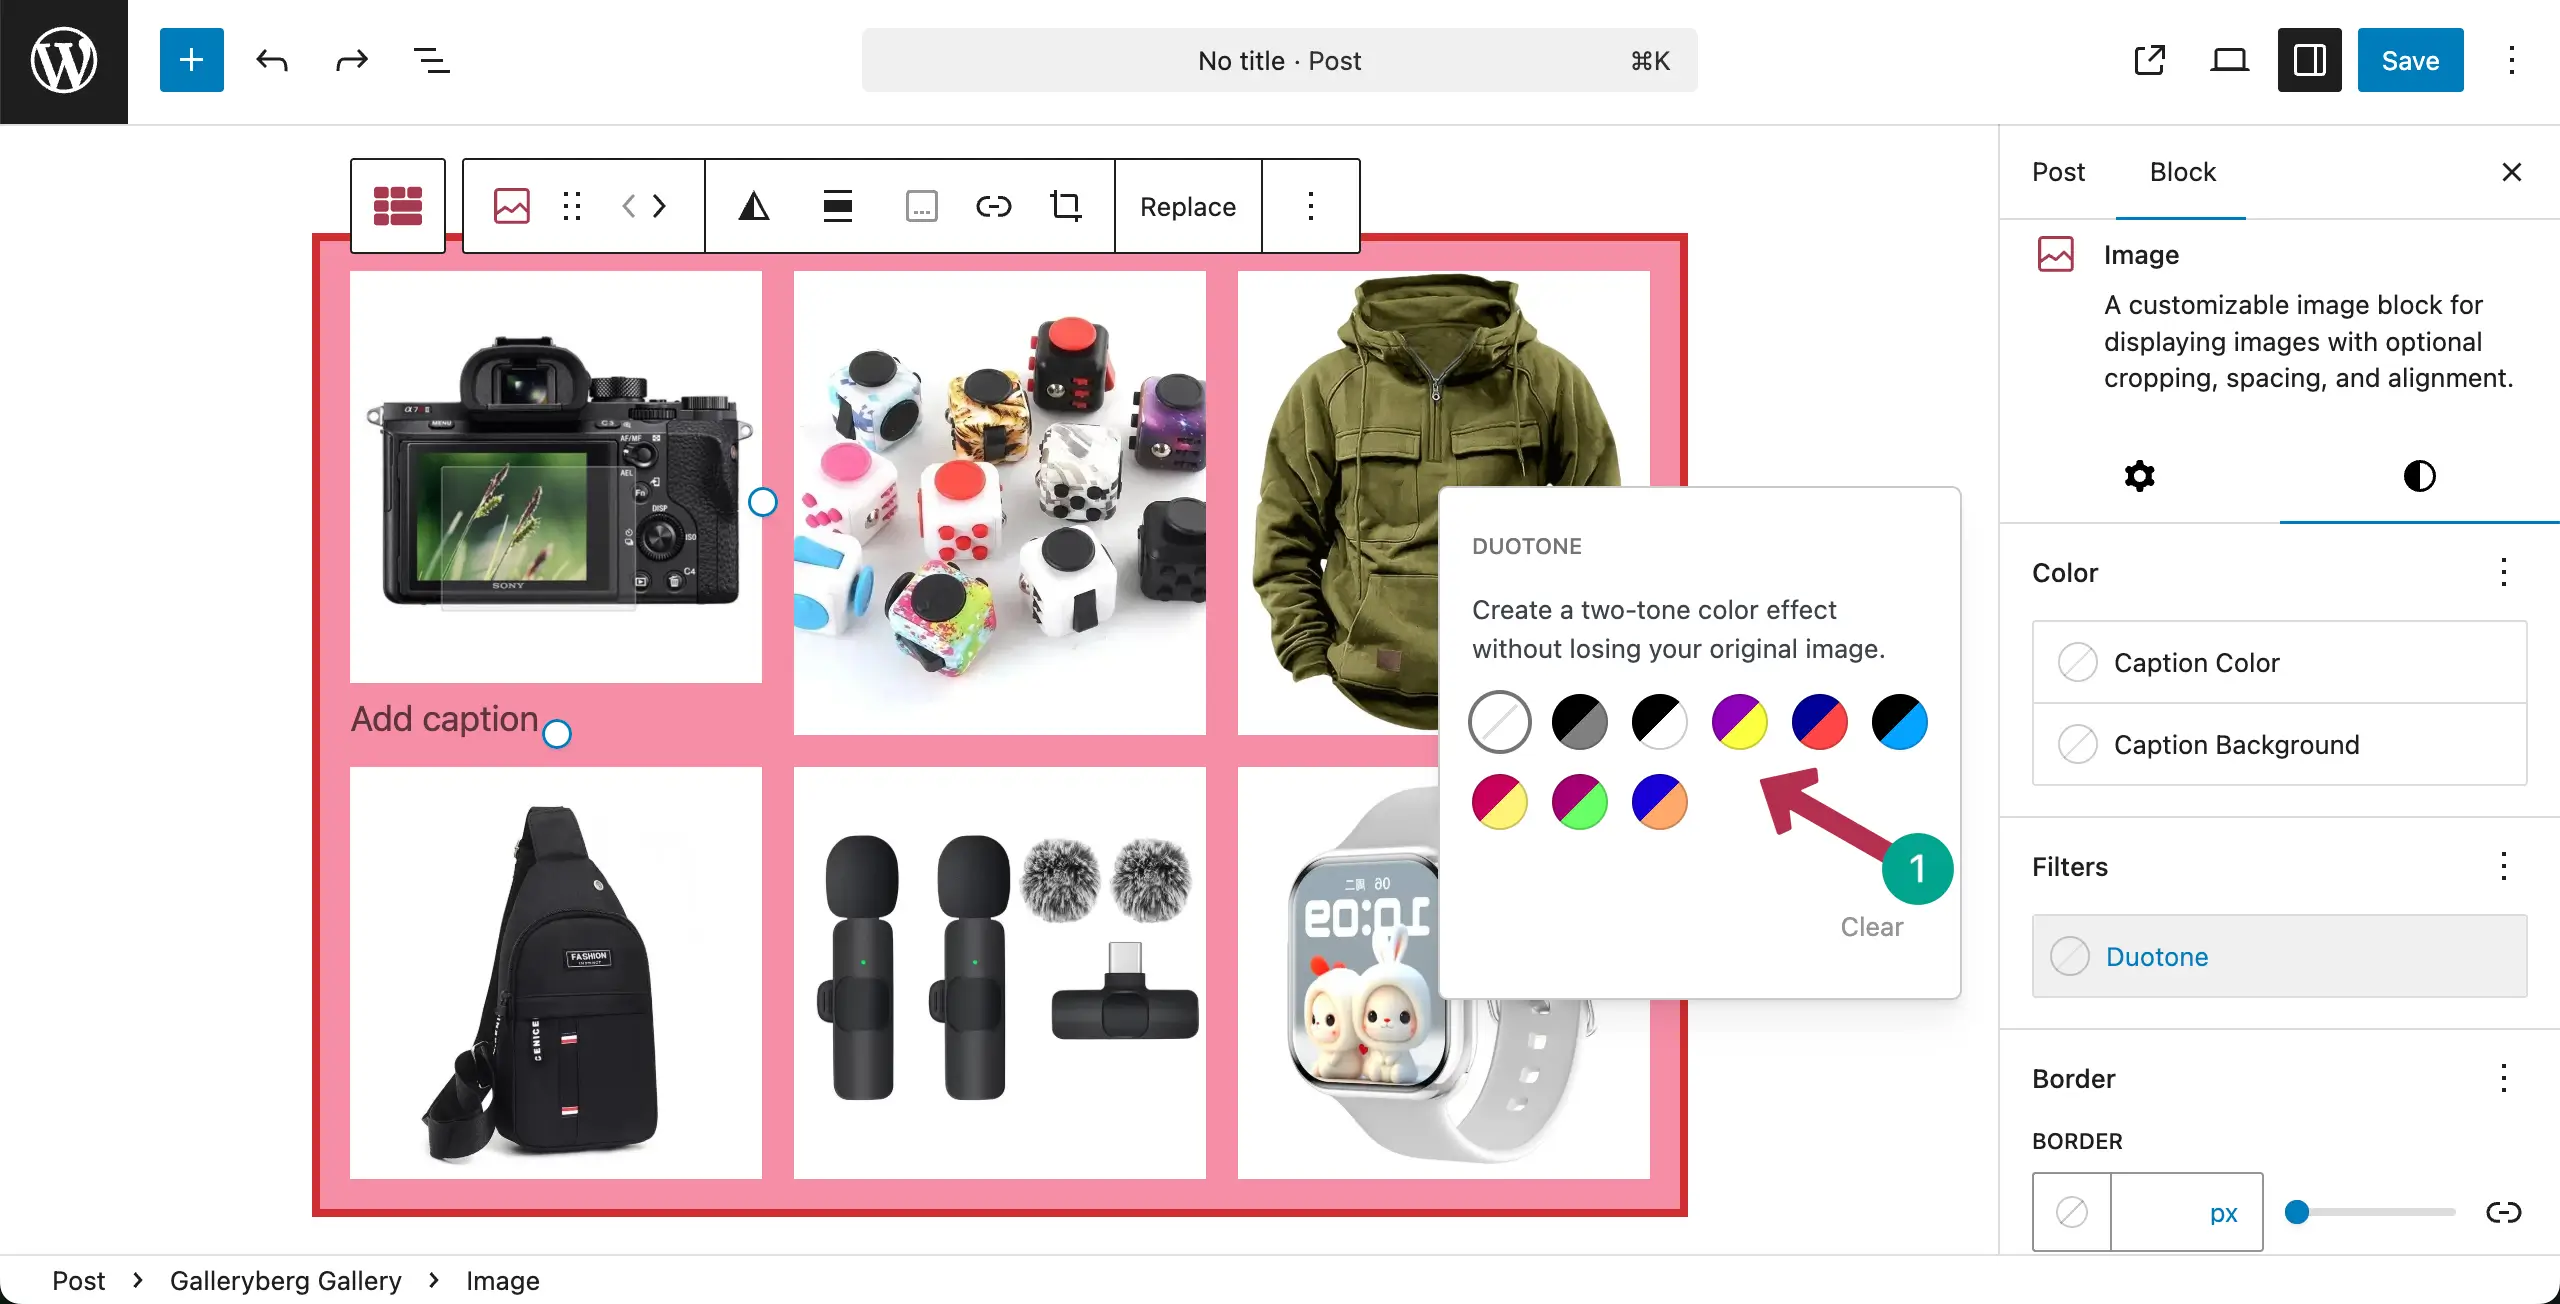
A popup will open where you will see several Duotone presets. Click on any Duotone preset you like.
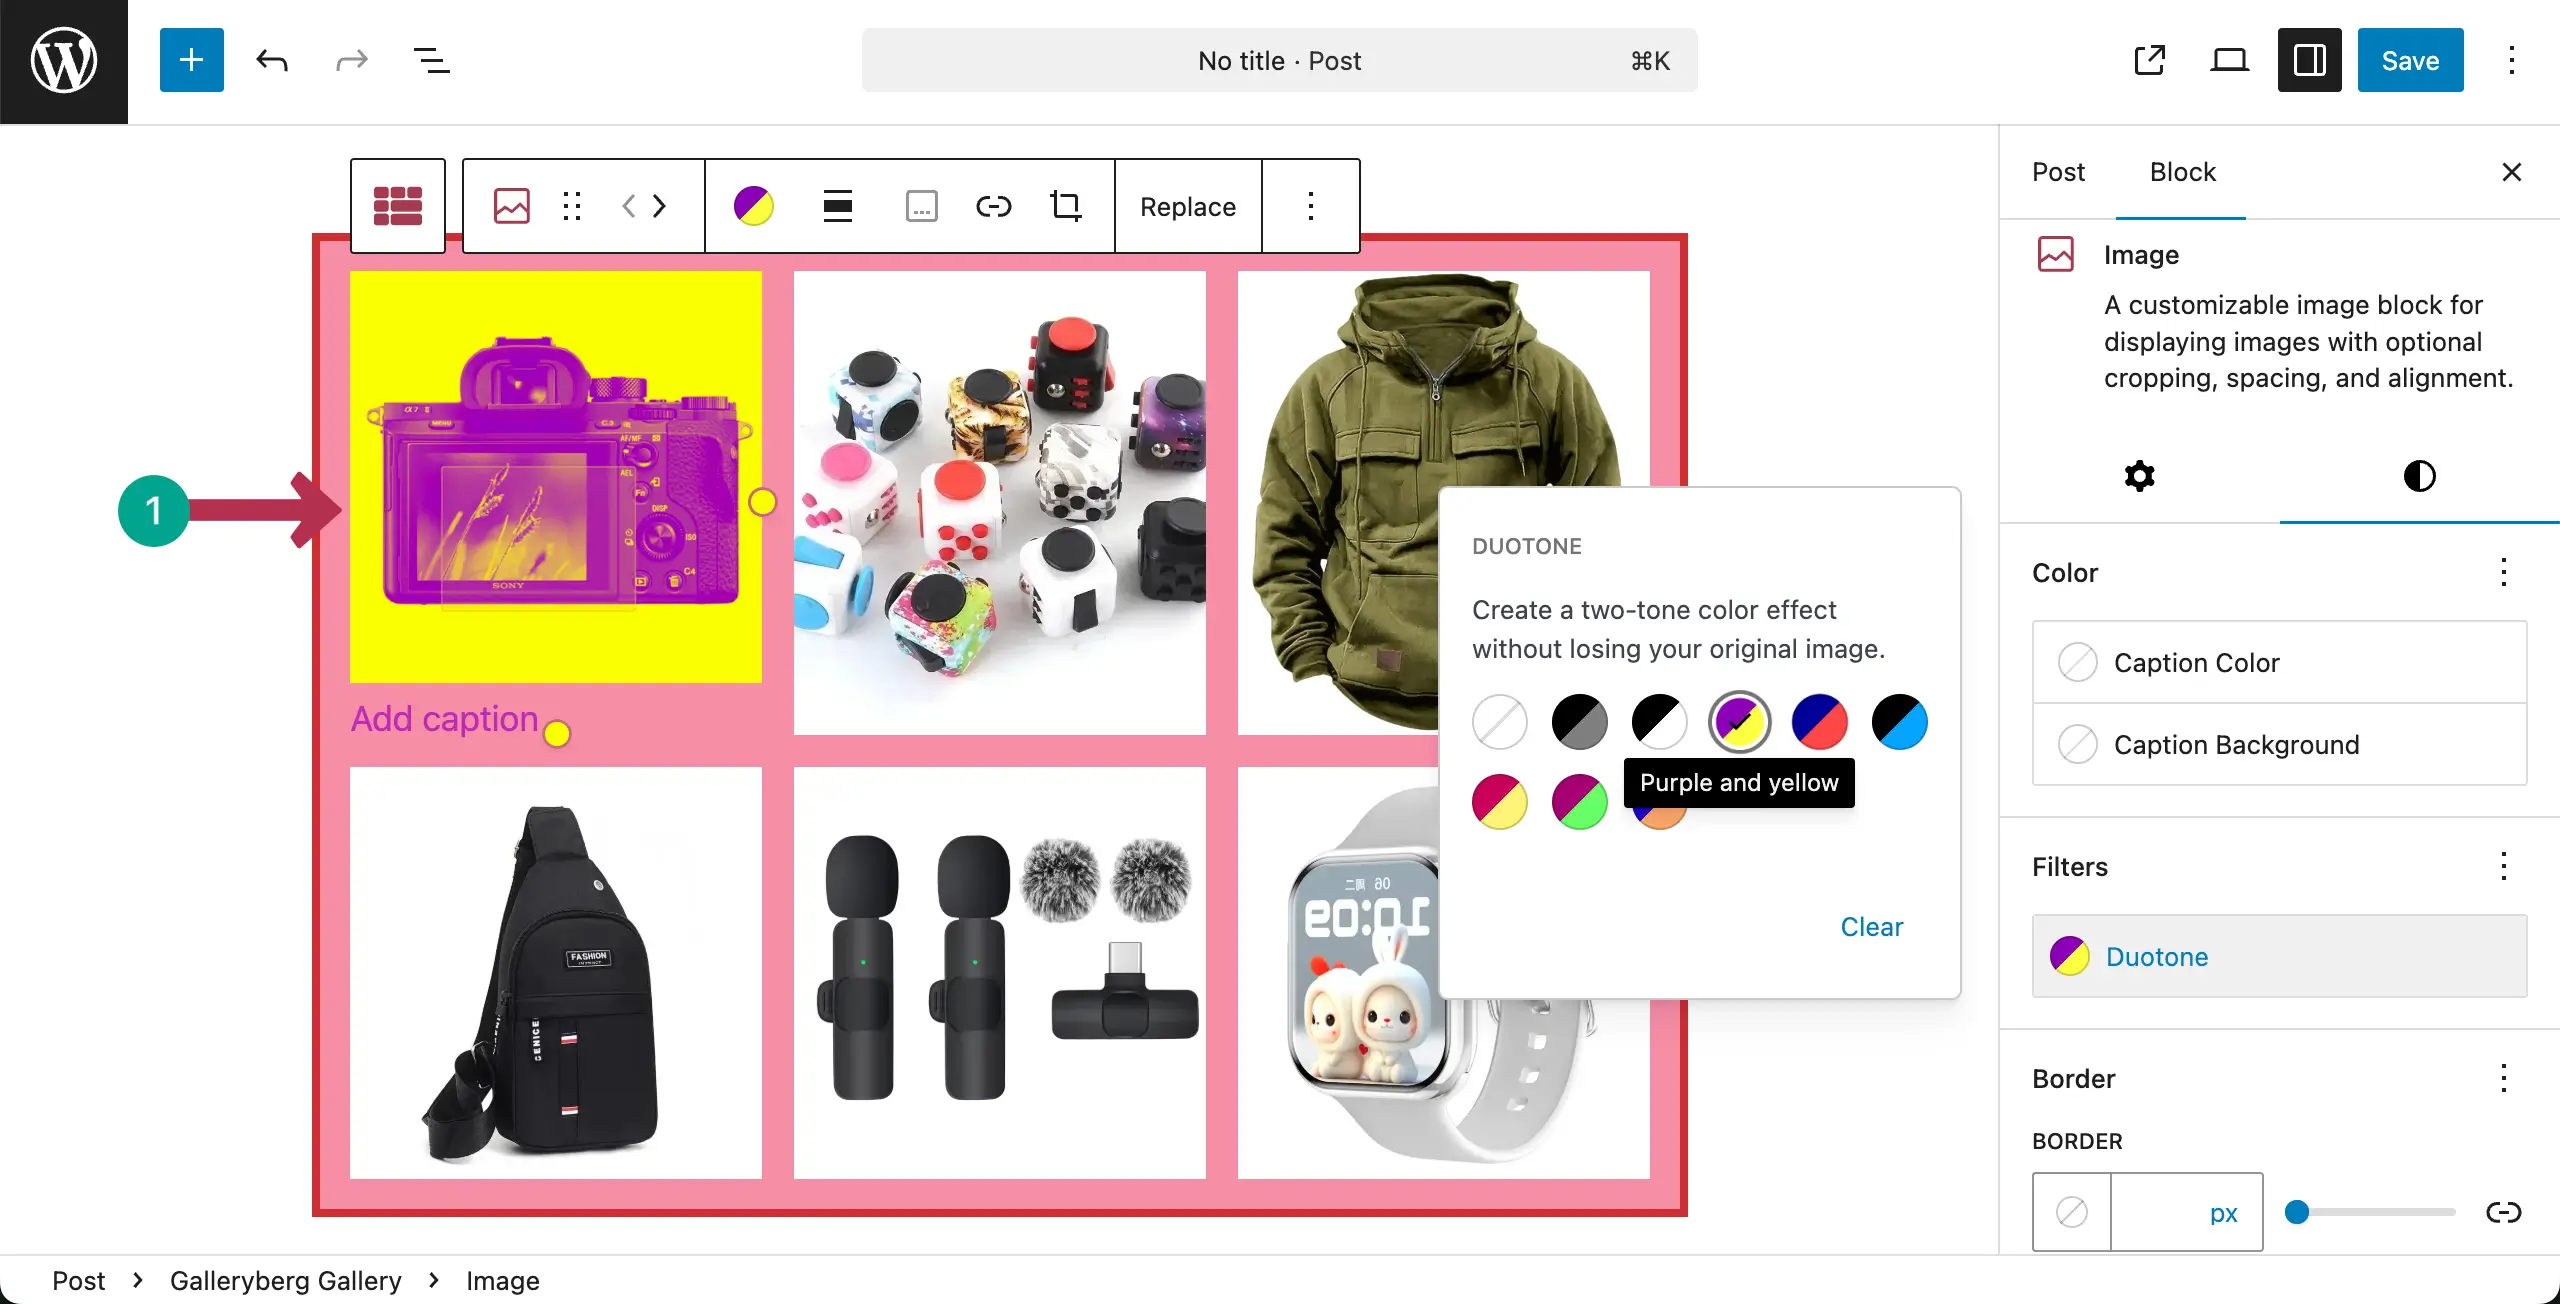
You can see that a preset has been applied to the selected image.
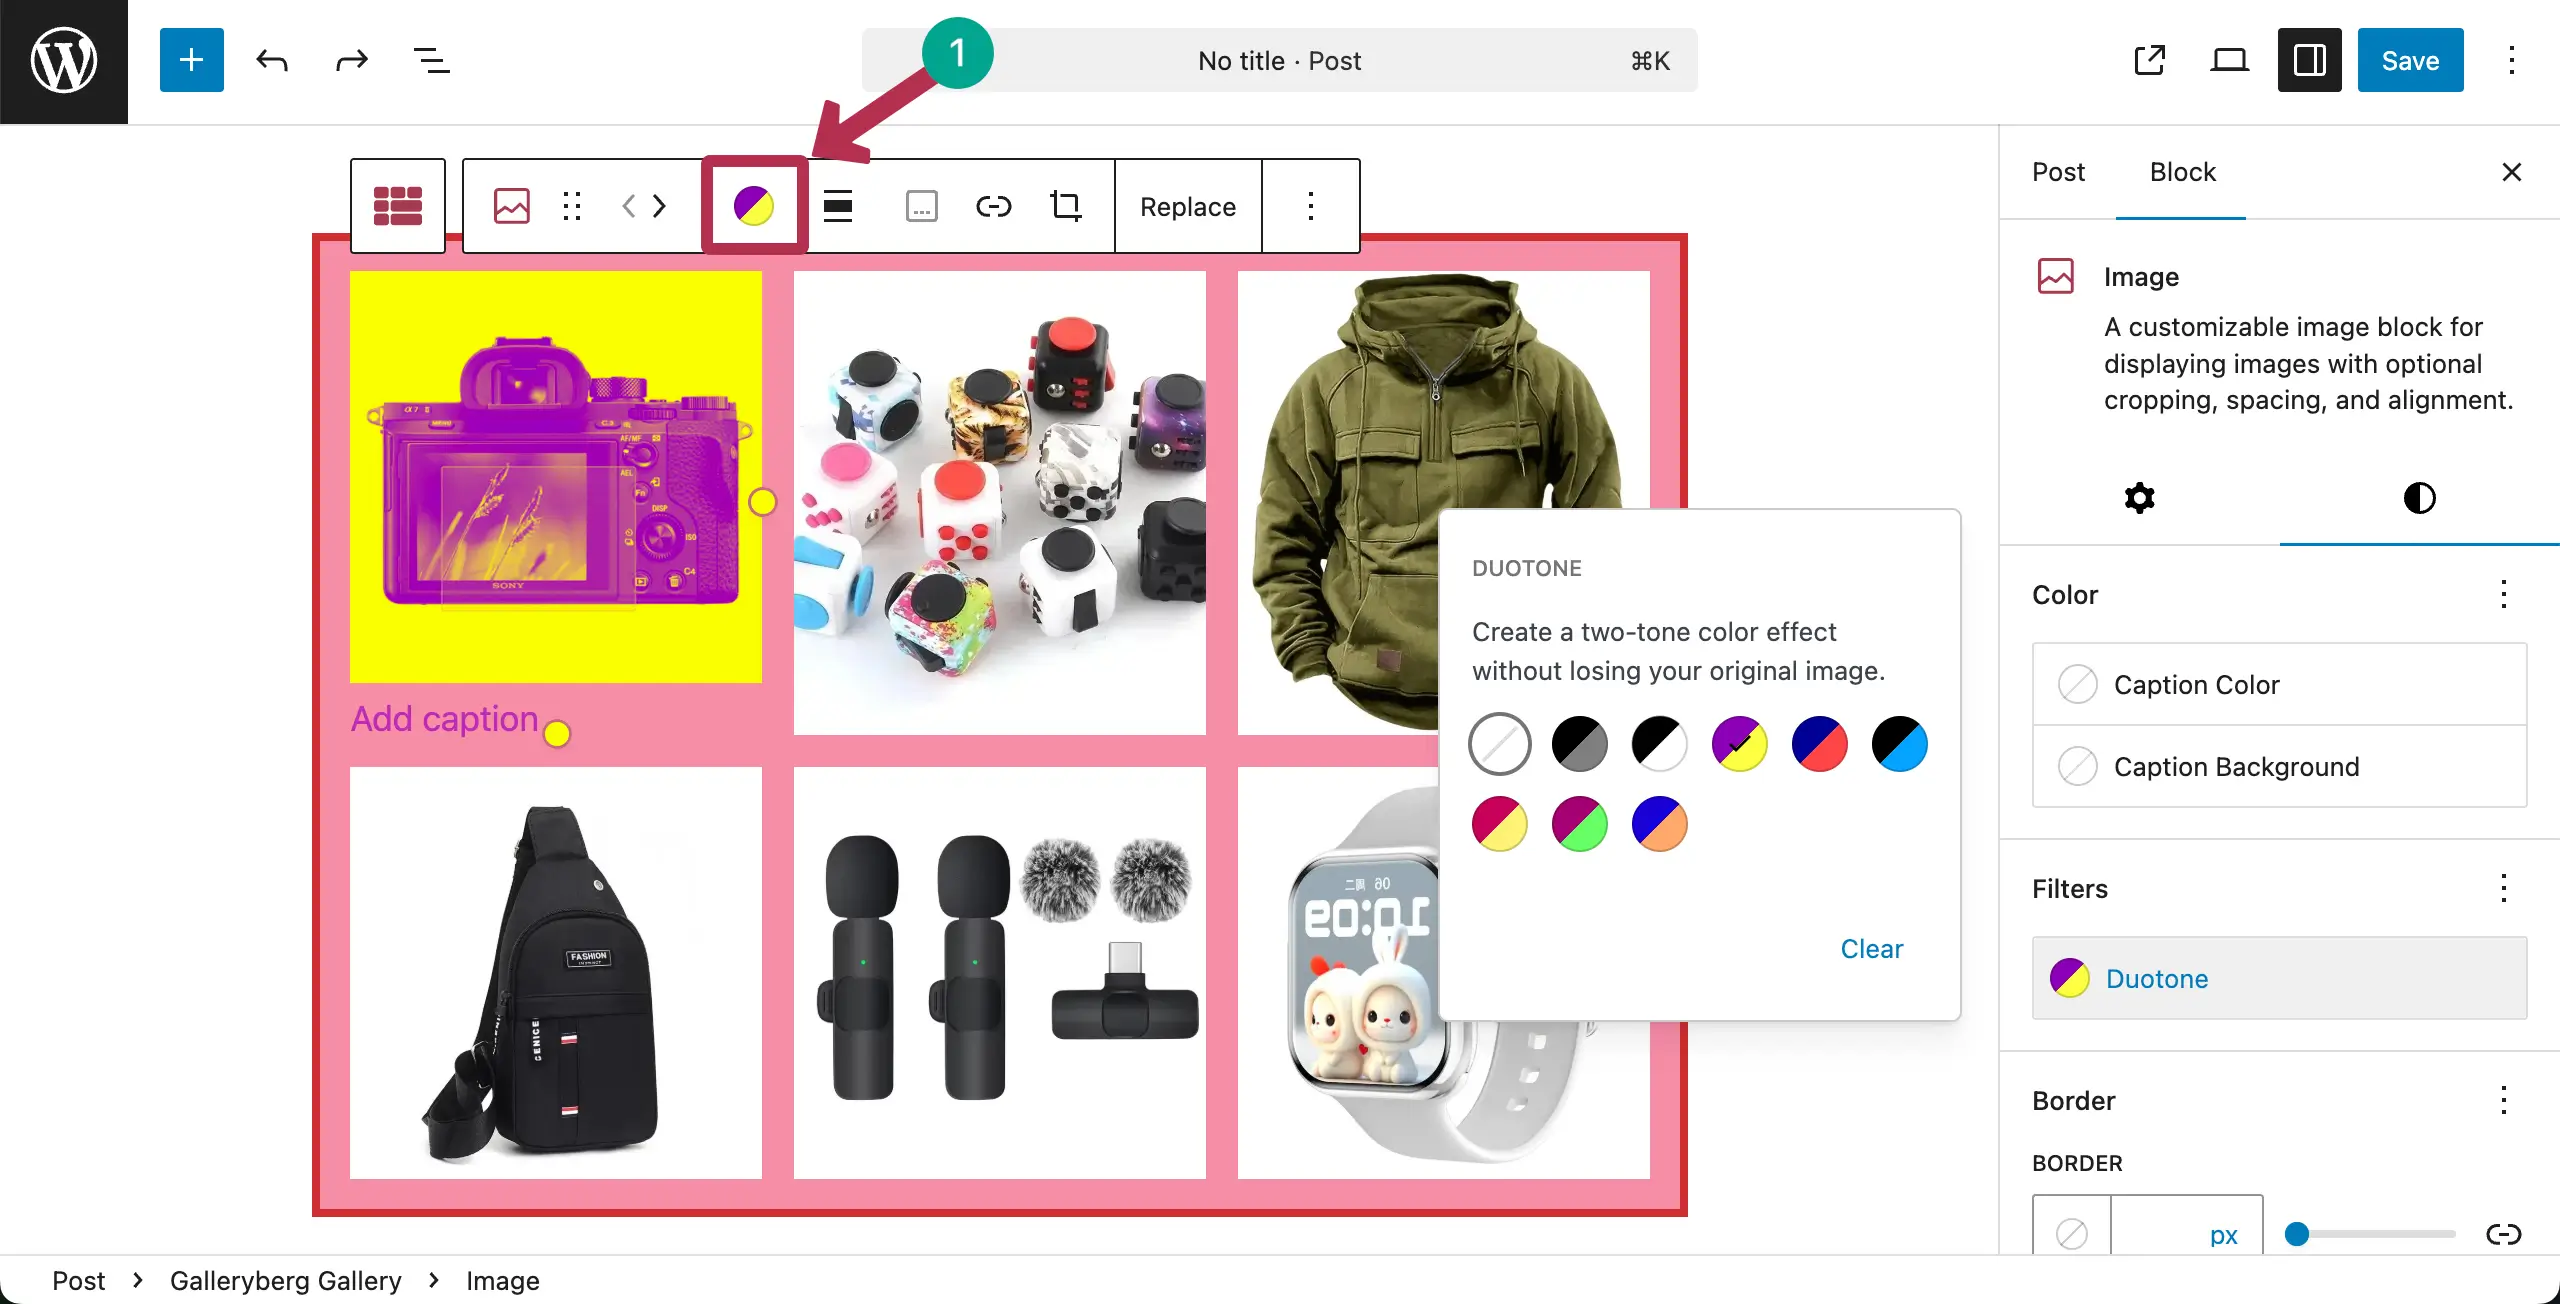
You can even set different colors for the Duotone. To do this, click on the Duetone icon on the toolbar.
A new panel will open up where you’ll get options to set colors for the Duotone gradient. Click on any color pointer.
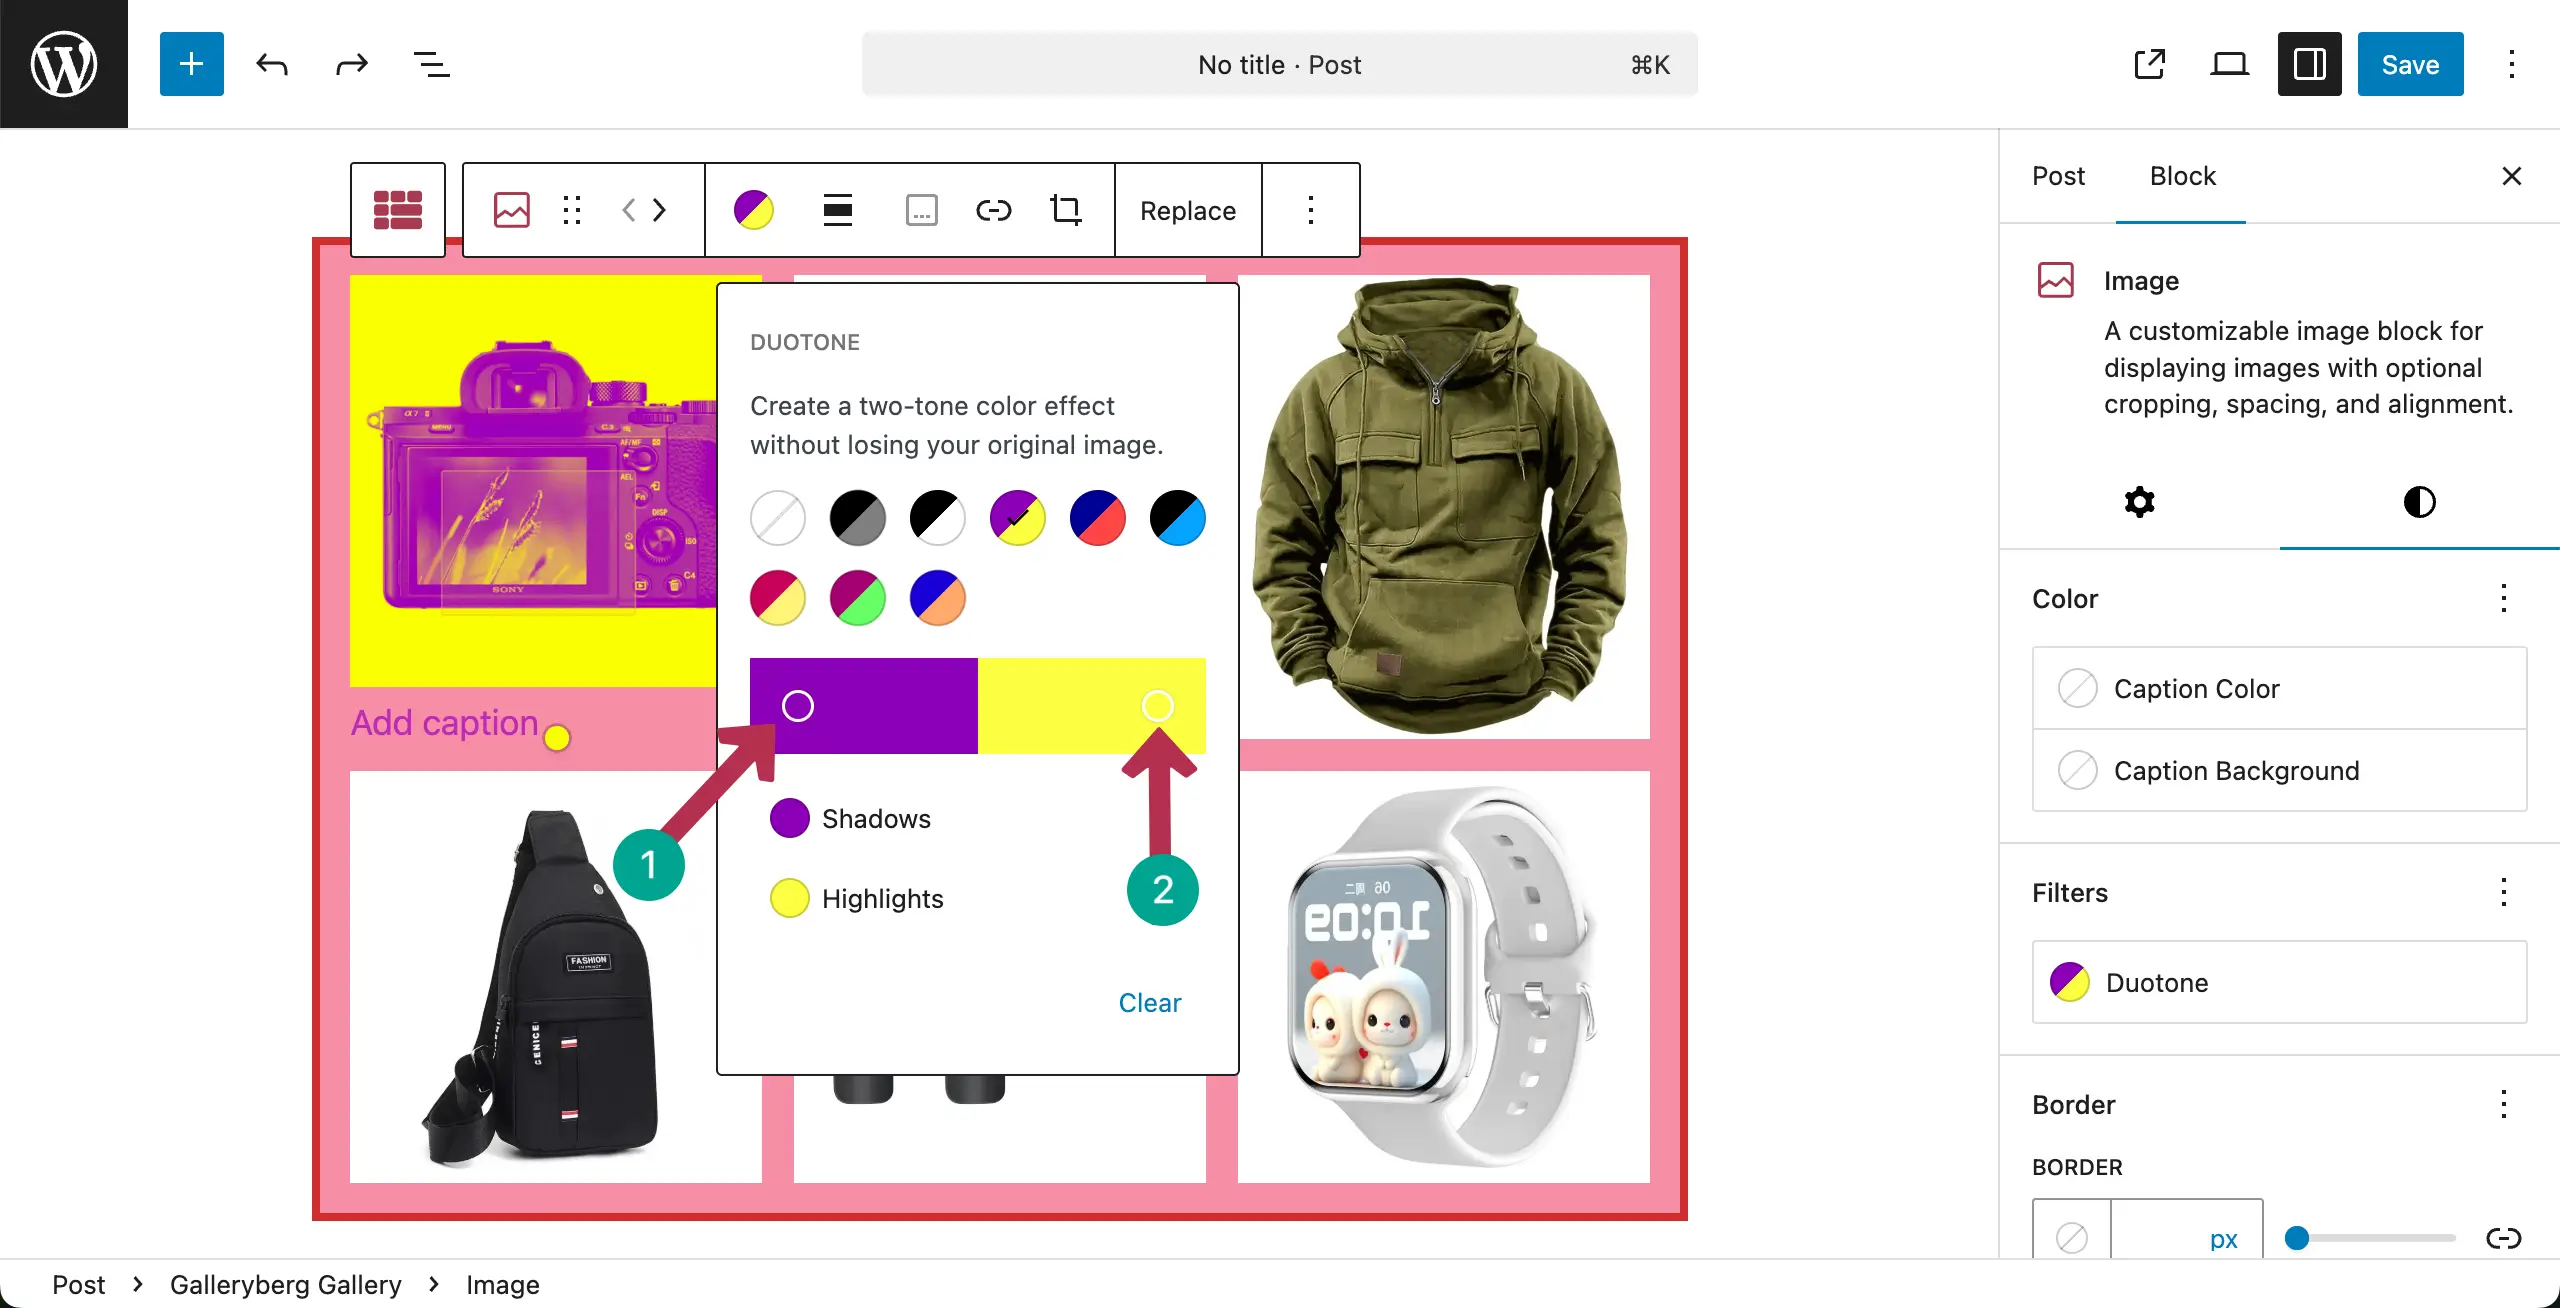
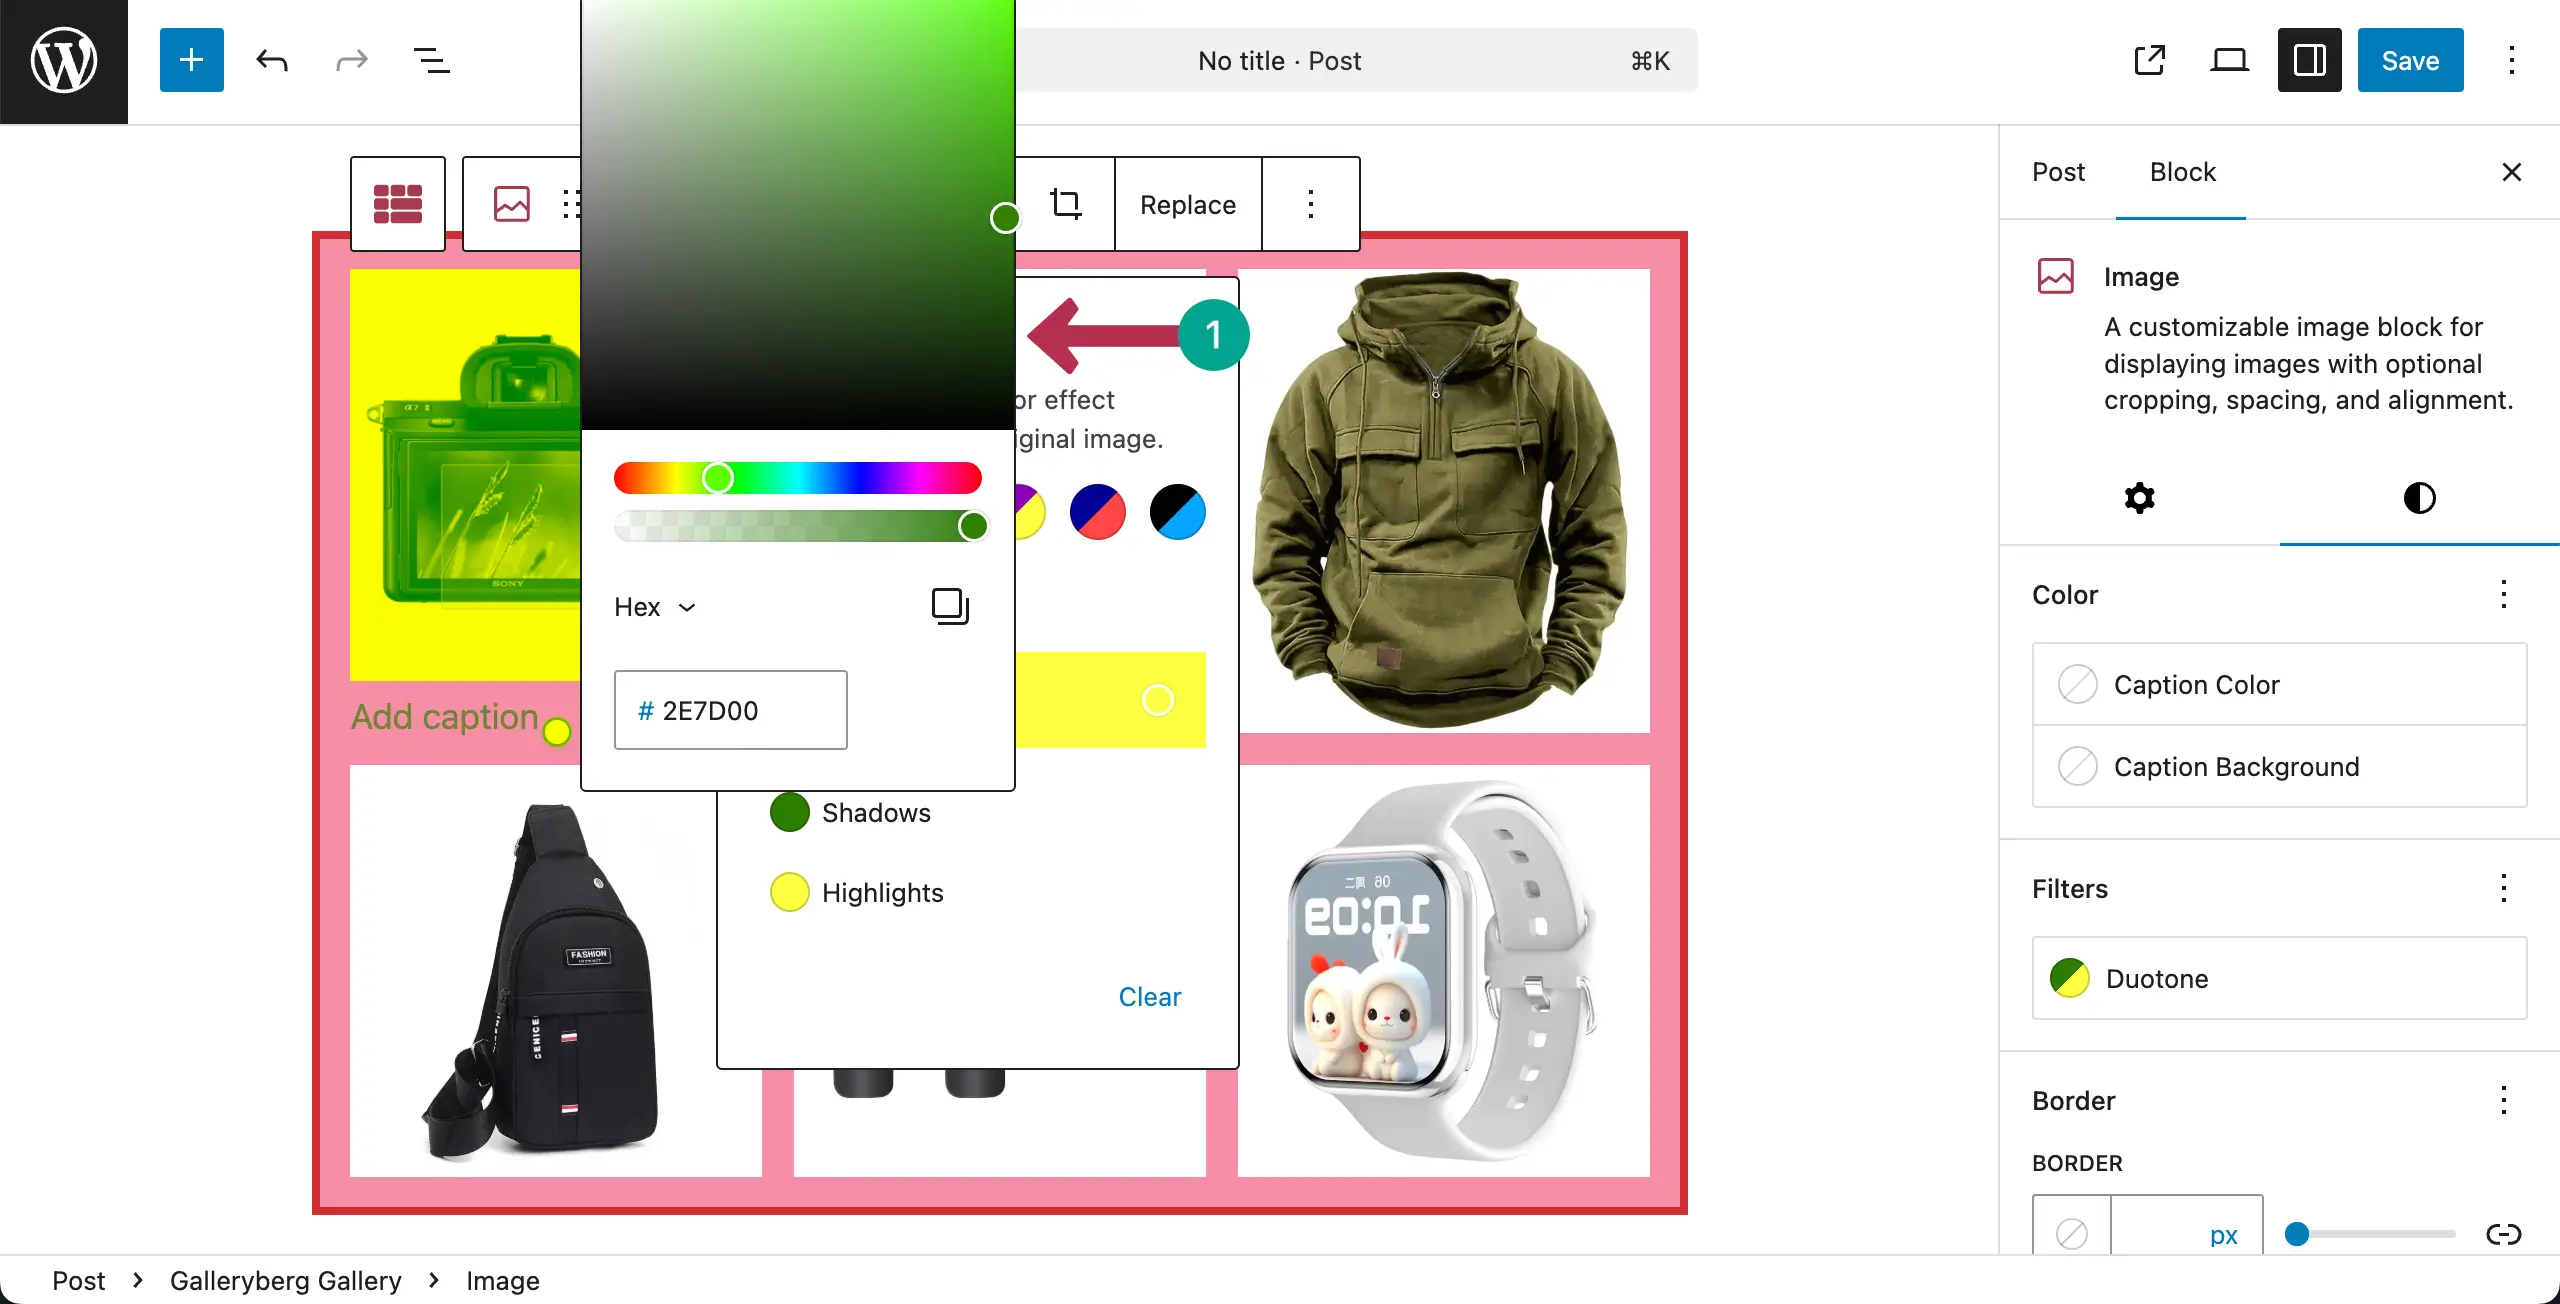
Choose a color for the respective color pointer. In the same way, add another color for the other pointer.
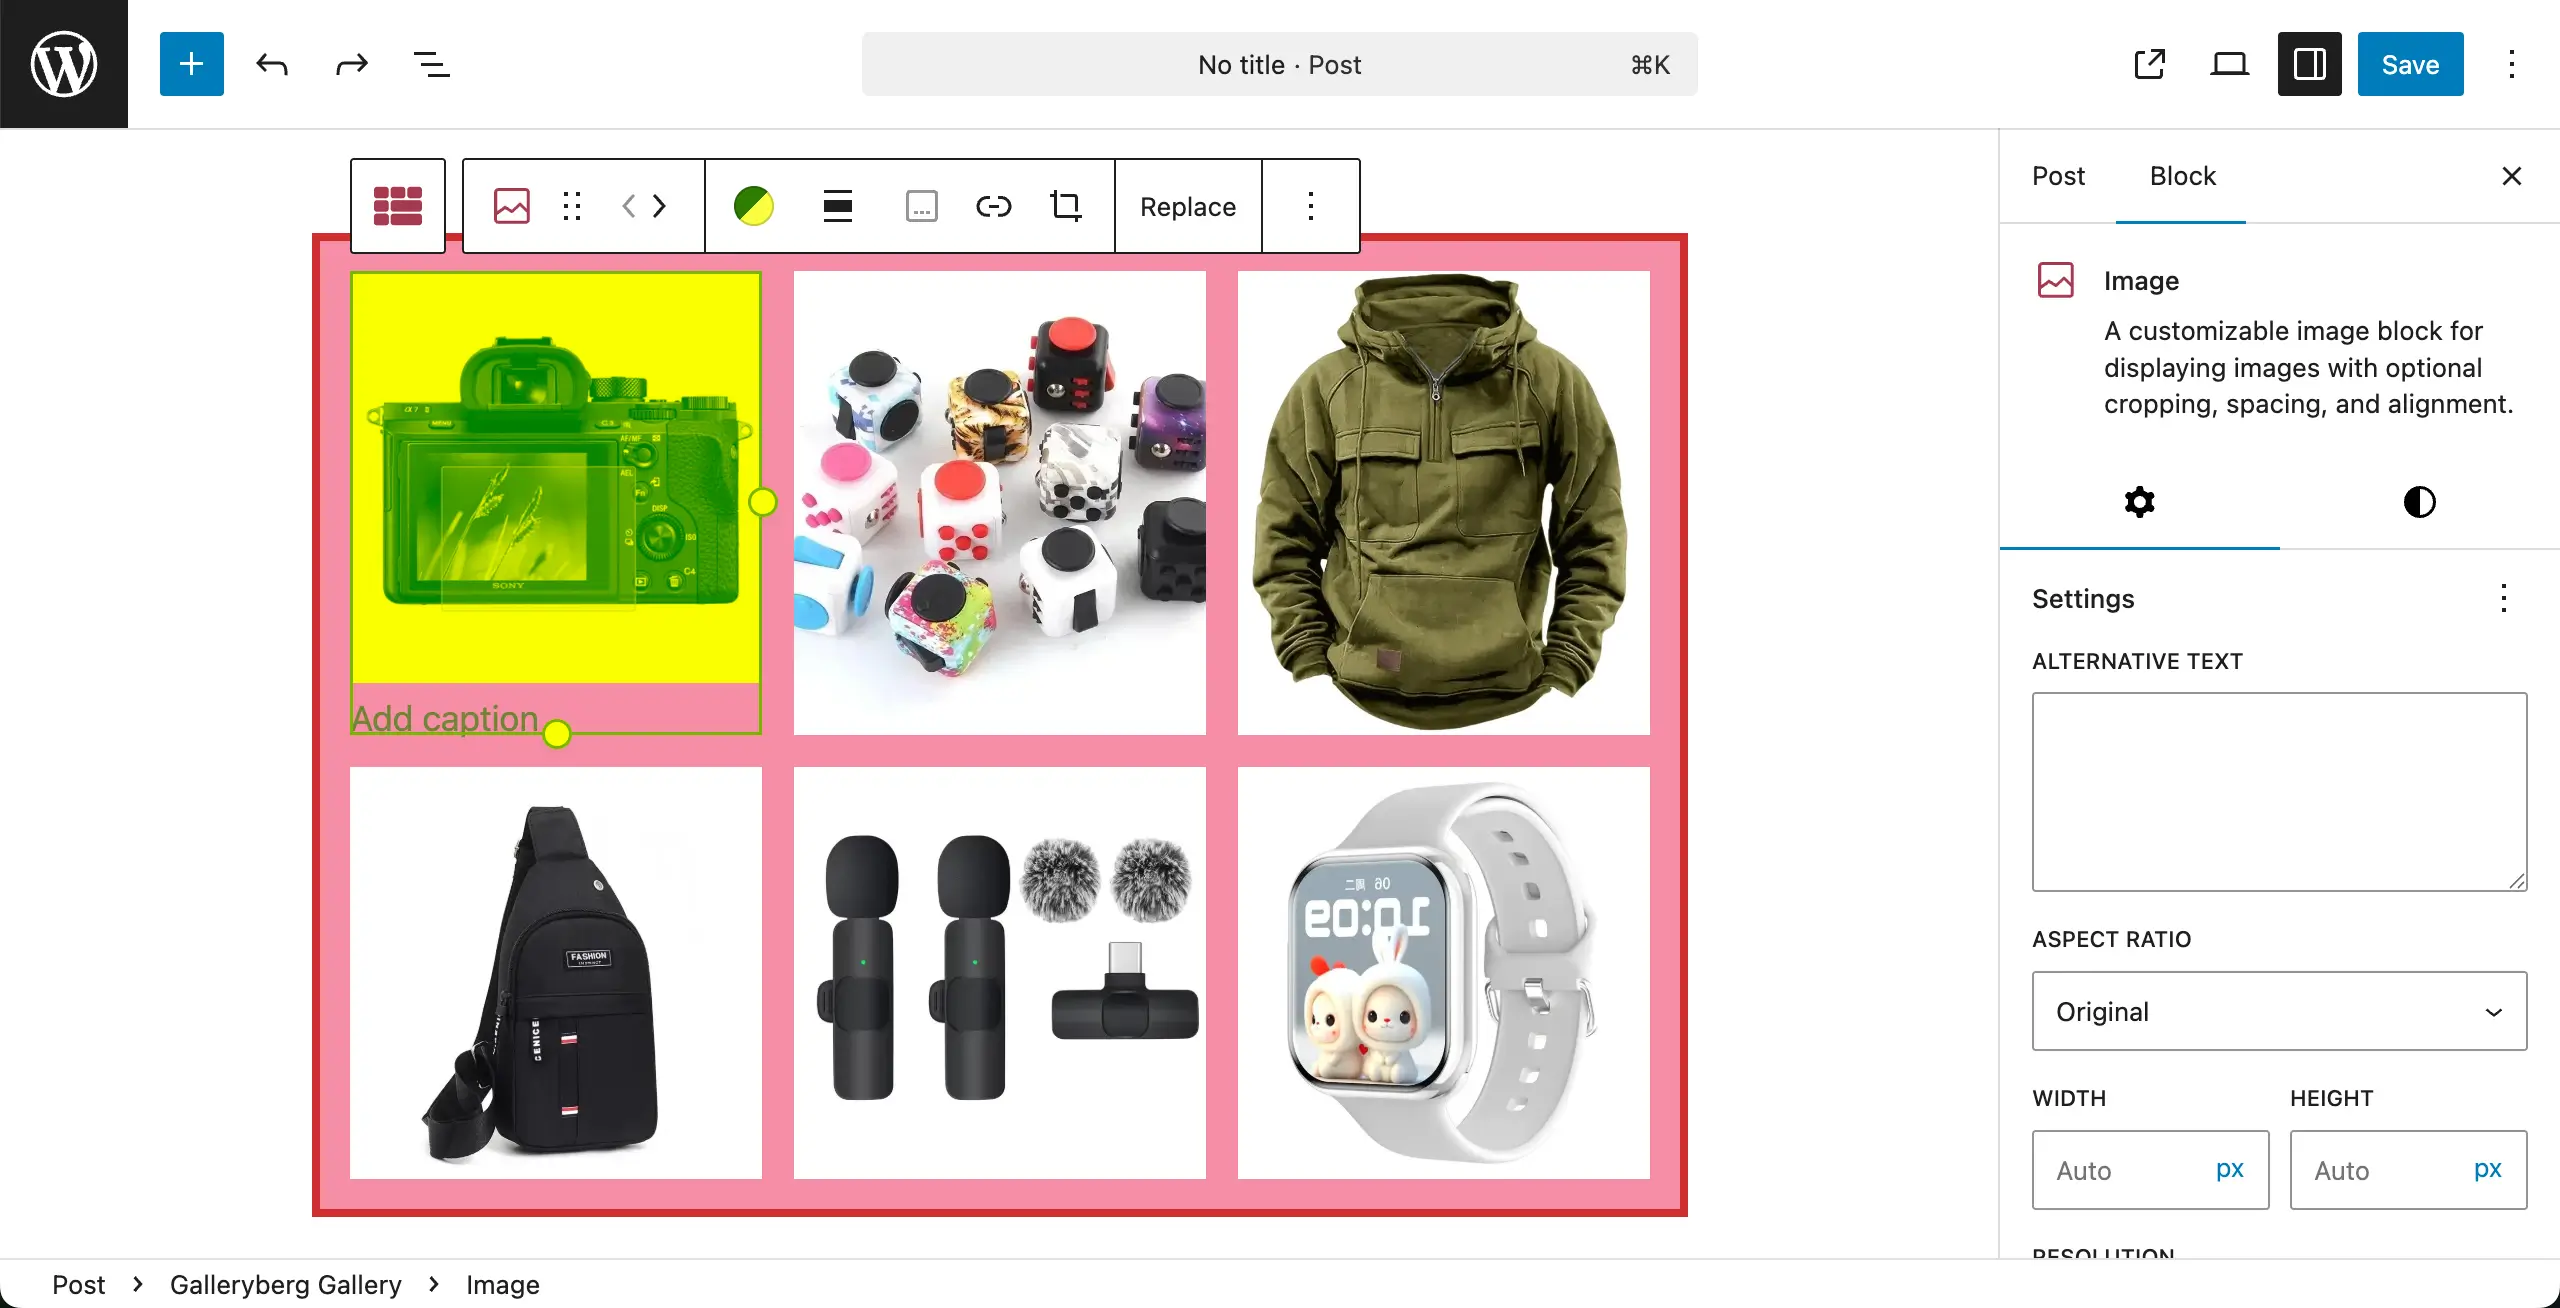
You can see that new Duotone color has been applied to the image.
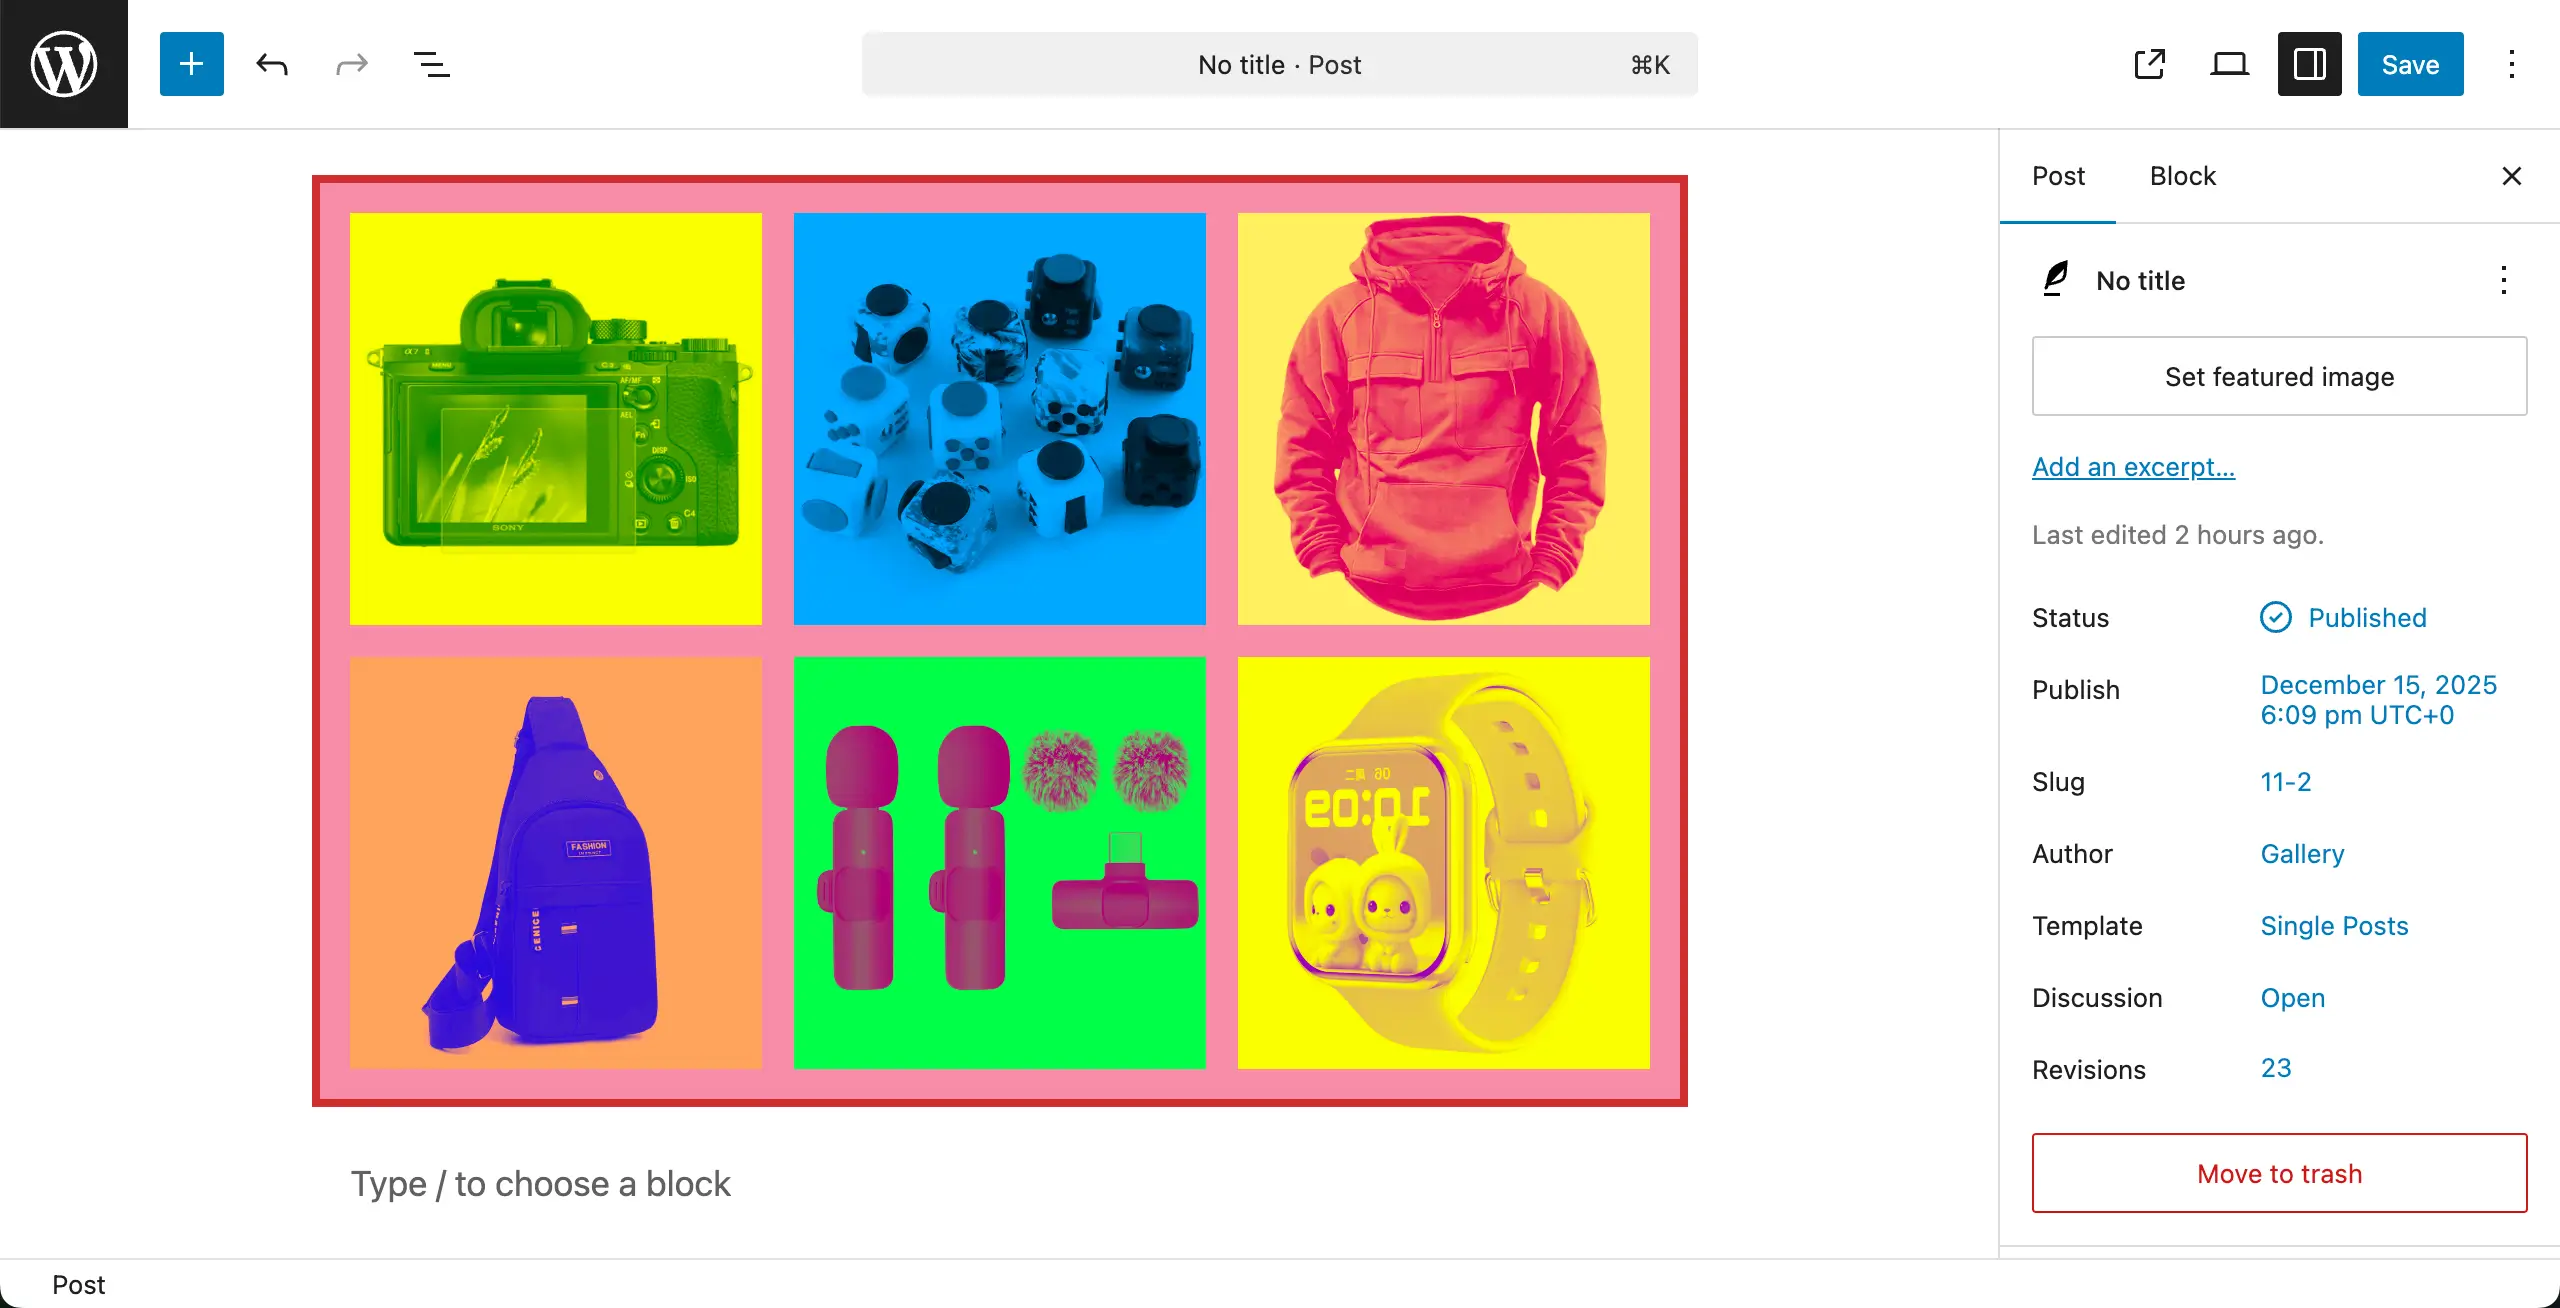
in the same way, you can choose and set different colors separately for each image on the gallery.
Conclusion #
There are several best practices you must follow to get the best from Duotone color. Use duotone filters to support your brand colors. Keep contrast clear so images stay visible. Avoid using many different filters in one gallery.


