Individual image caption controls let you add, edit, or remove text for each image in WordPress galleries. They help explain image details clearly. Proper caption management improves content clarity and gives better context to gallery viewers.
Let’s see how to add, edit, or remove individual image captions in WordPress.
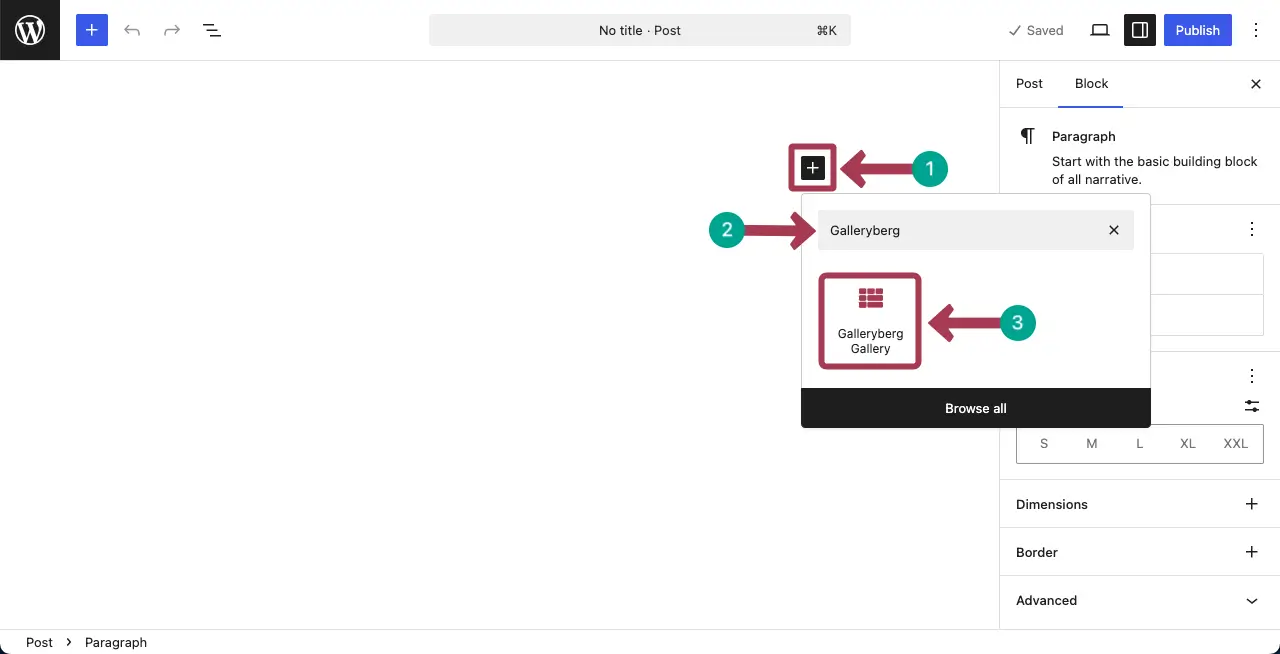
Adding Captions to the Images #
Like any other block, add the Galleryberg block to the editor.
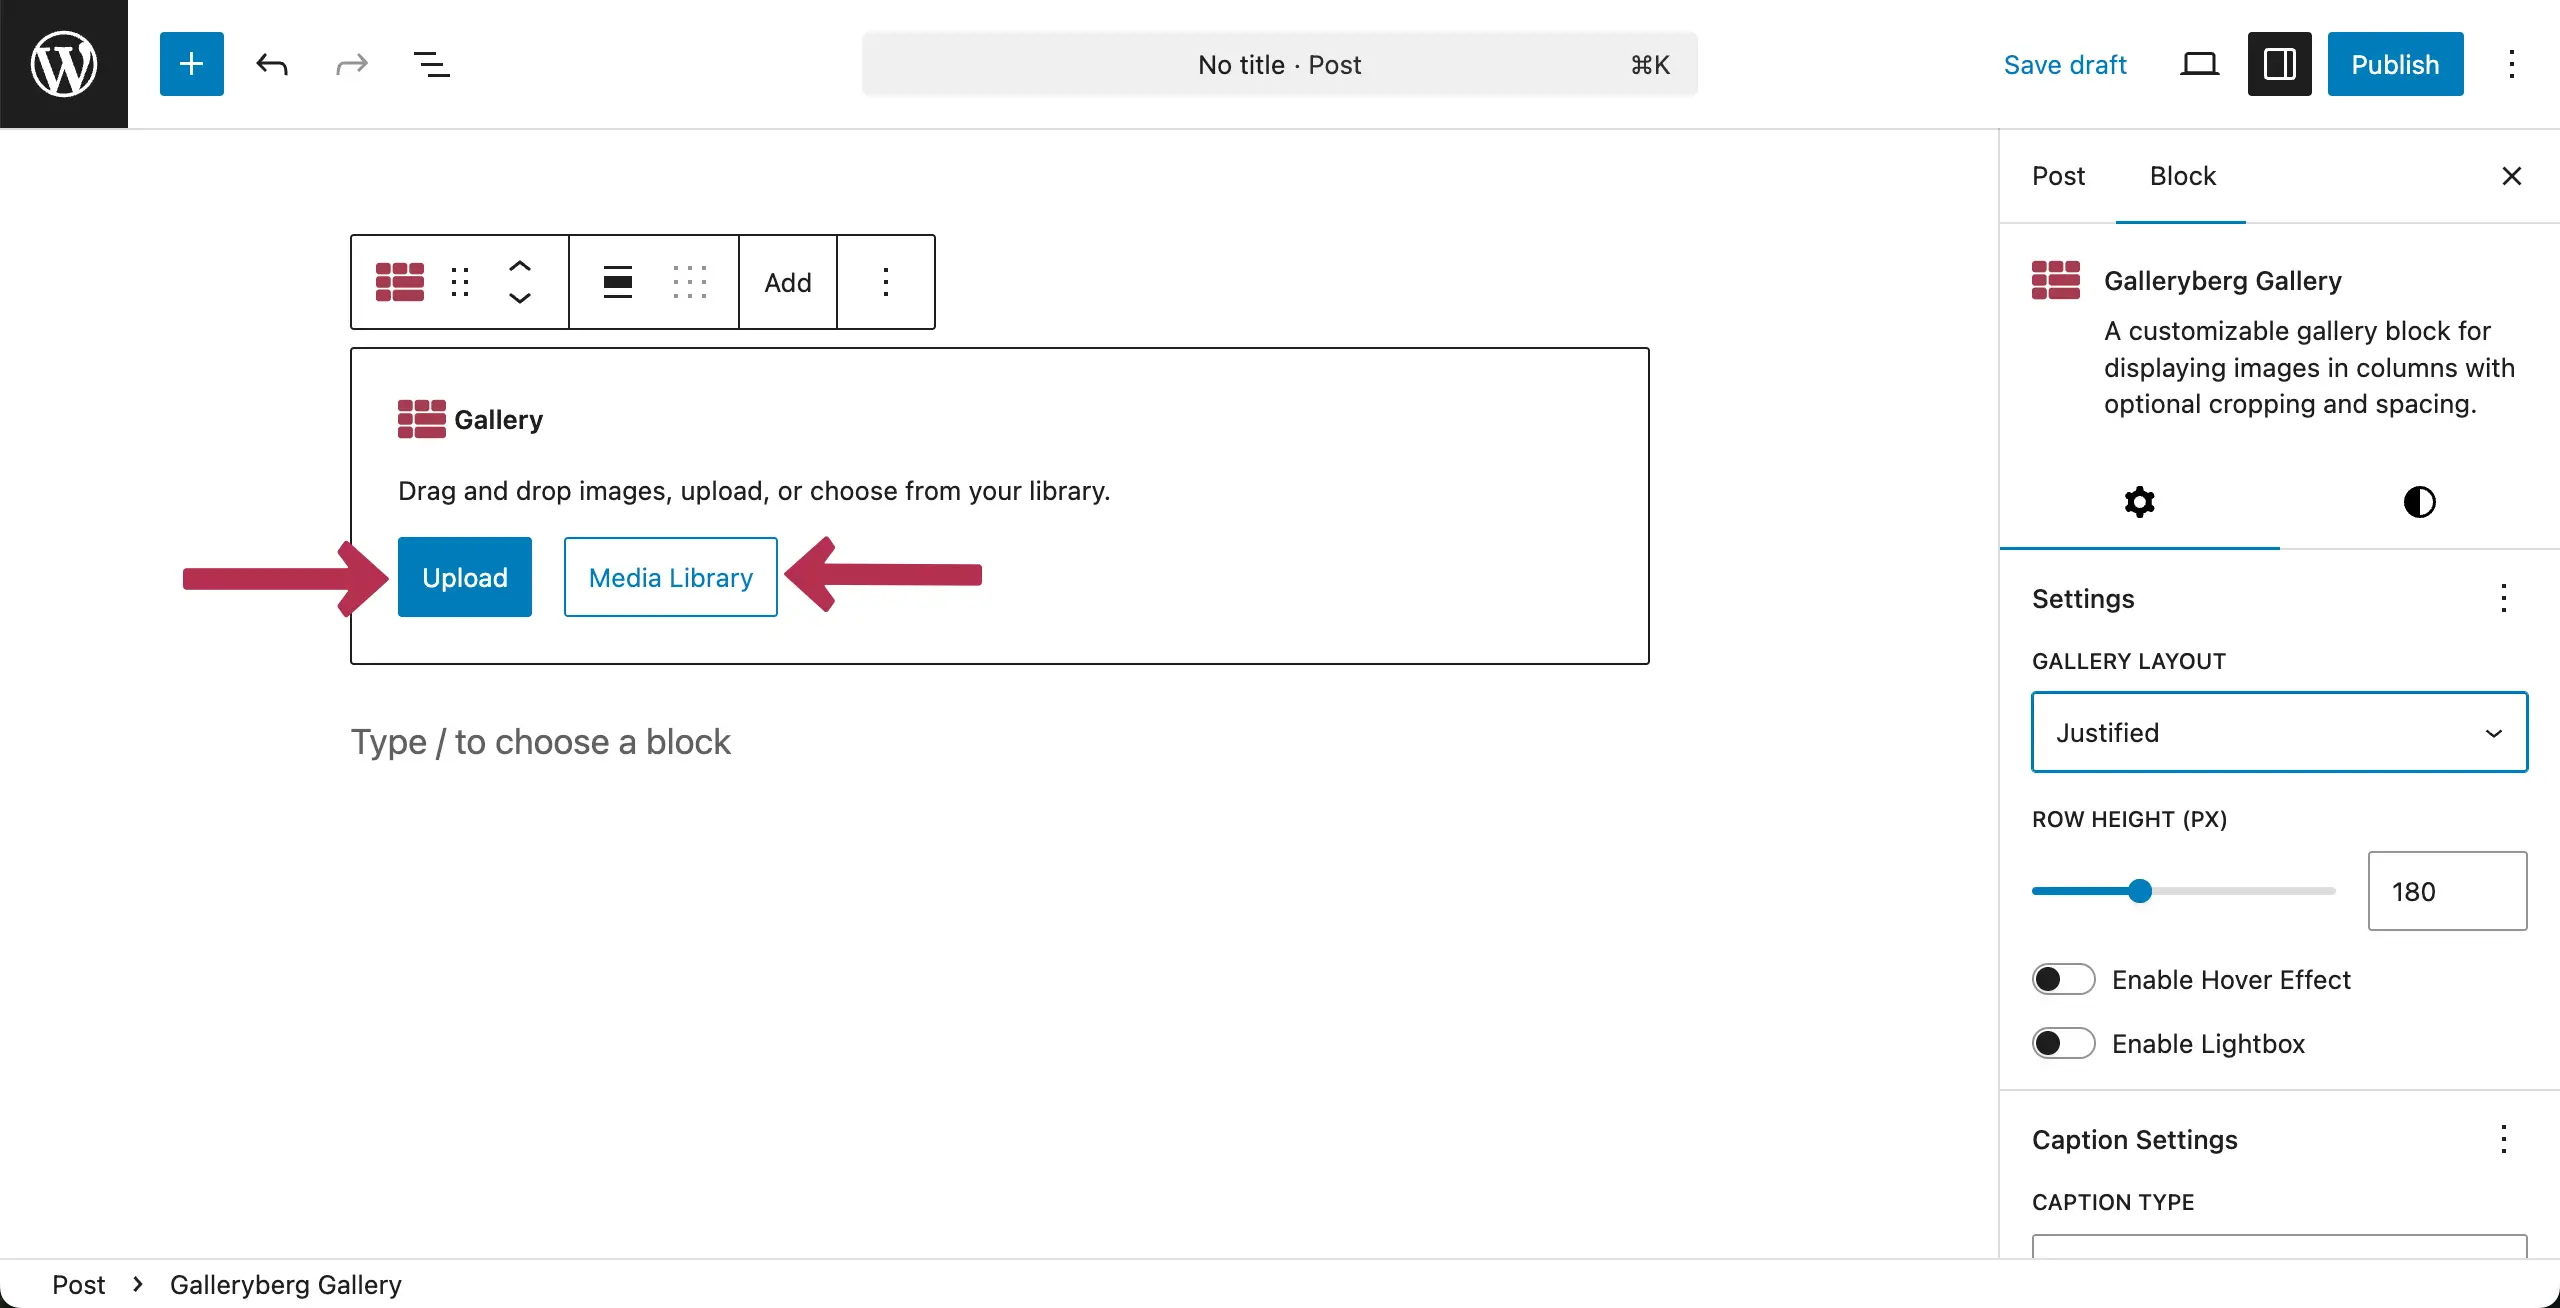
Upload images to your local drive or from the media library. Click the suitable button for that.
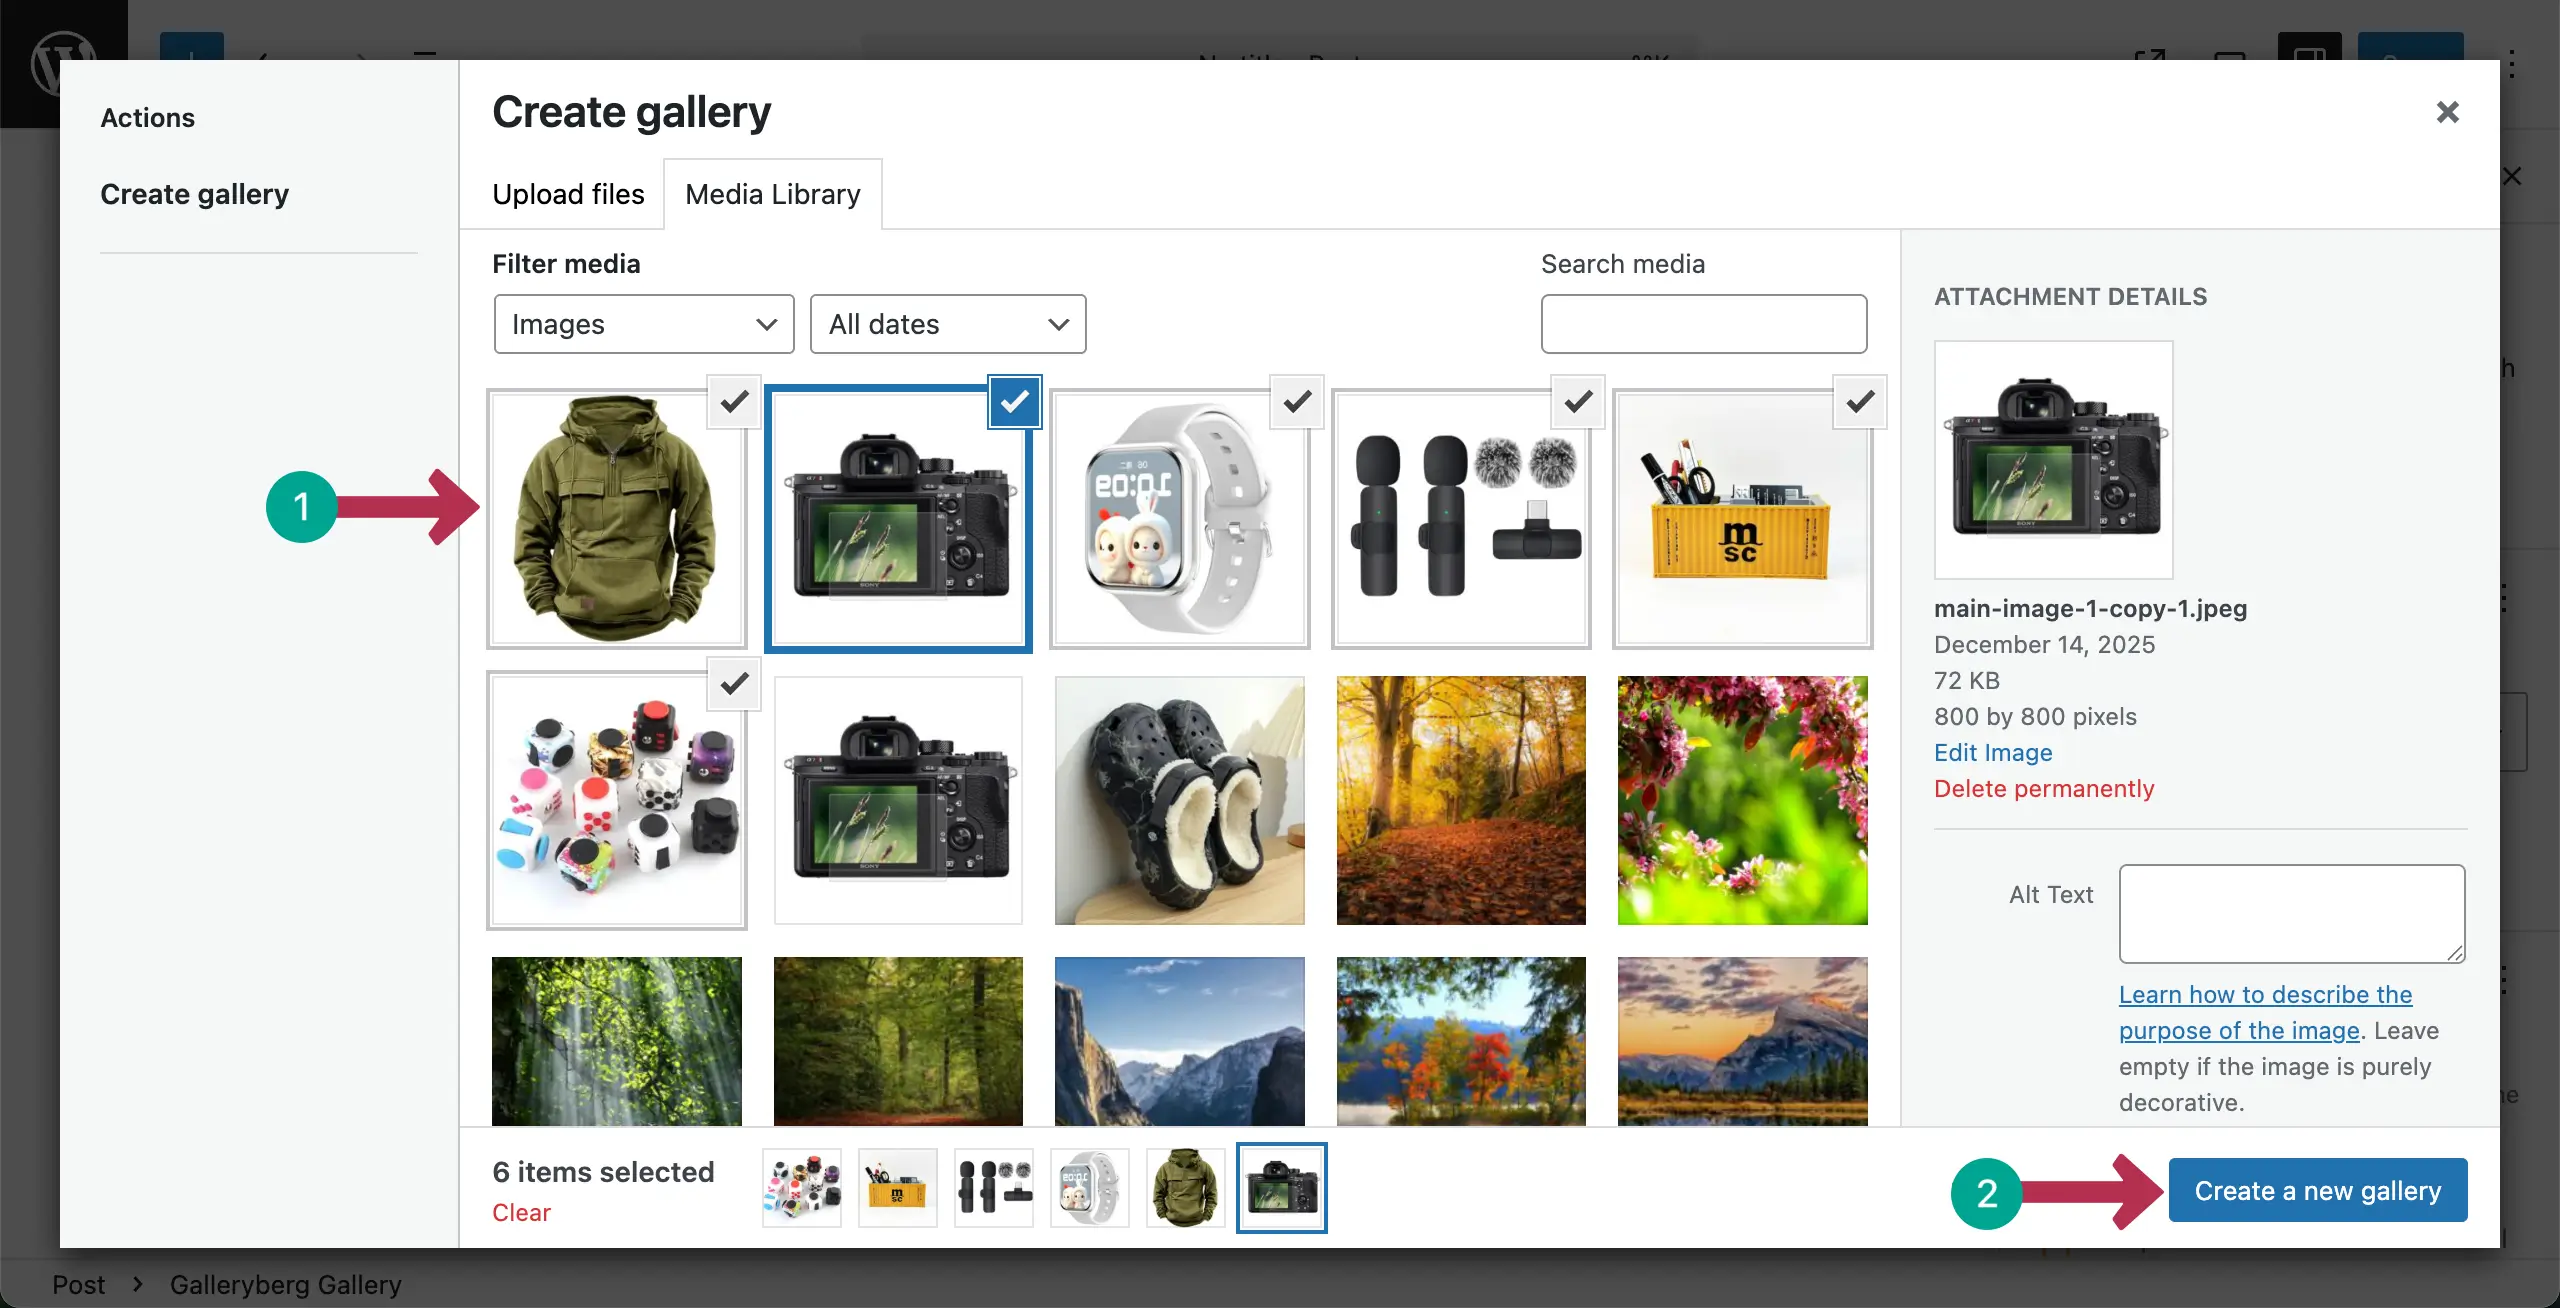
Once uploaded, choose the images you finally want to display in the gallery. After they are selected, hit the Create a new gallery button.
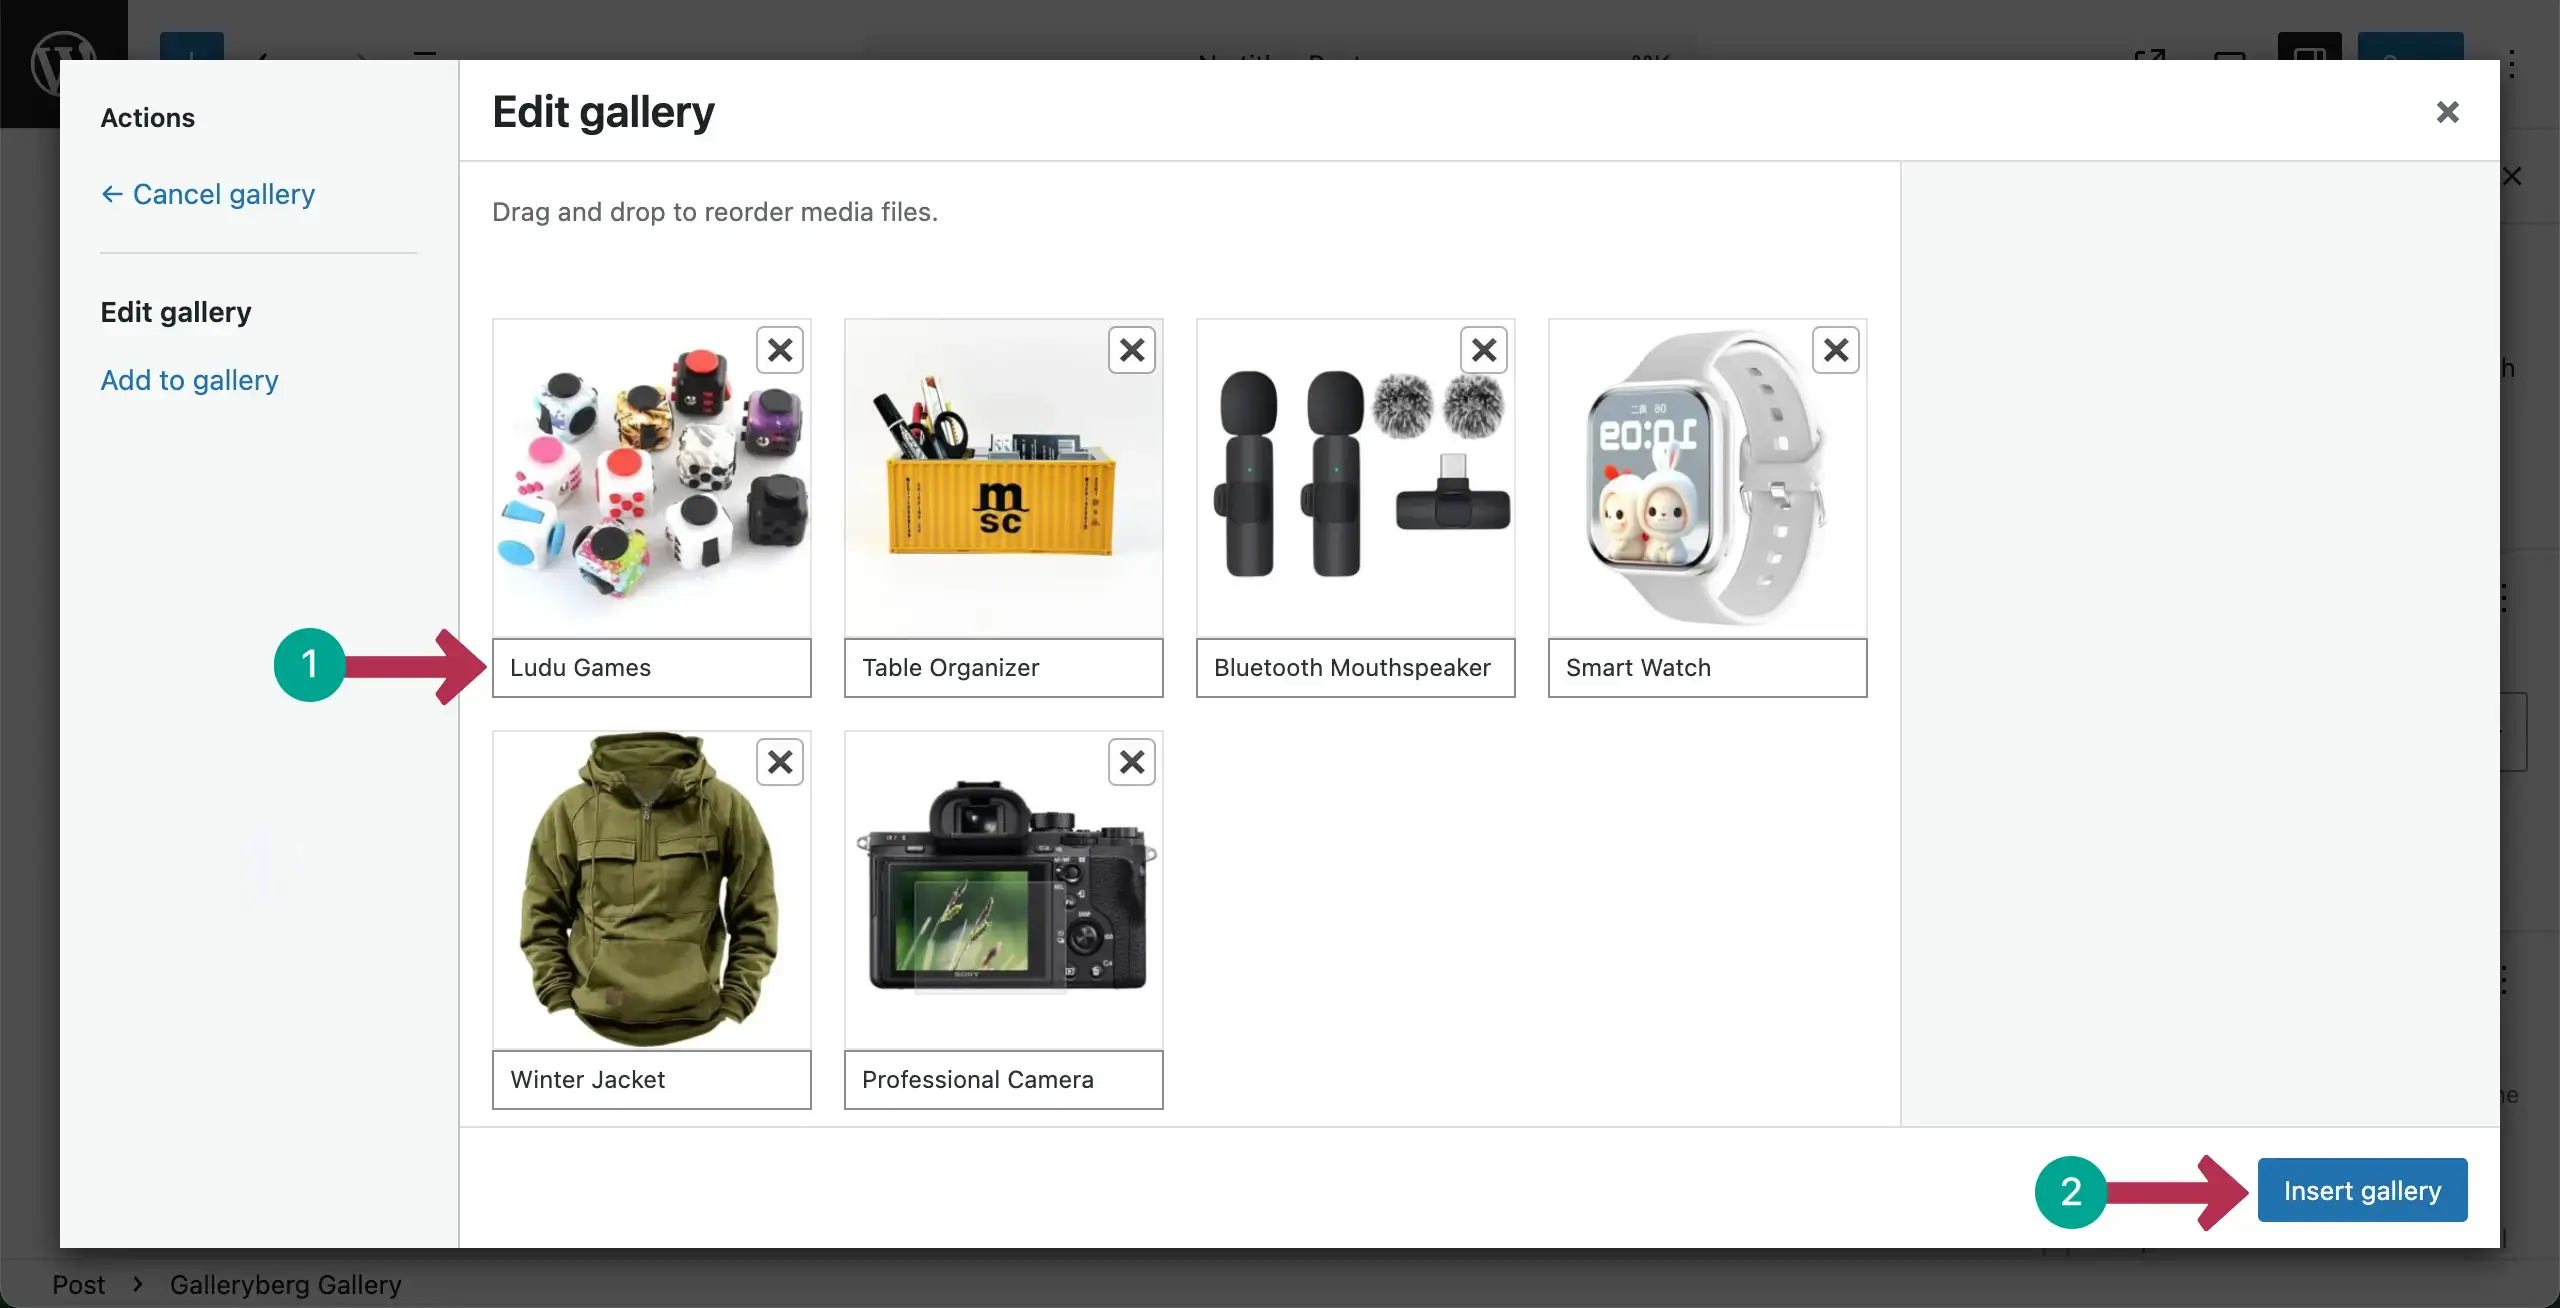
In the next screen, you’ll get the option to write a caption for each image. You can see that we have written captions for the images, one by one. Once done, hit the Insert gallery button.
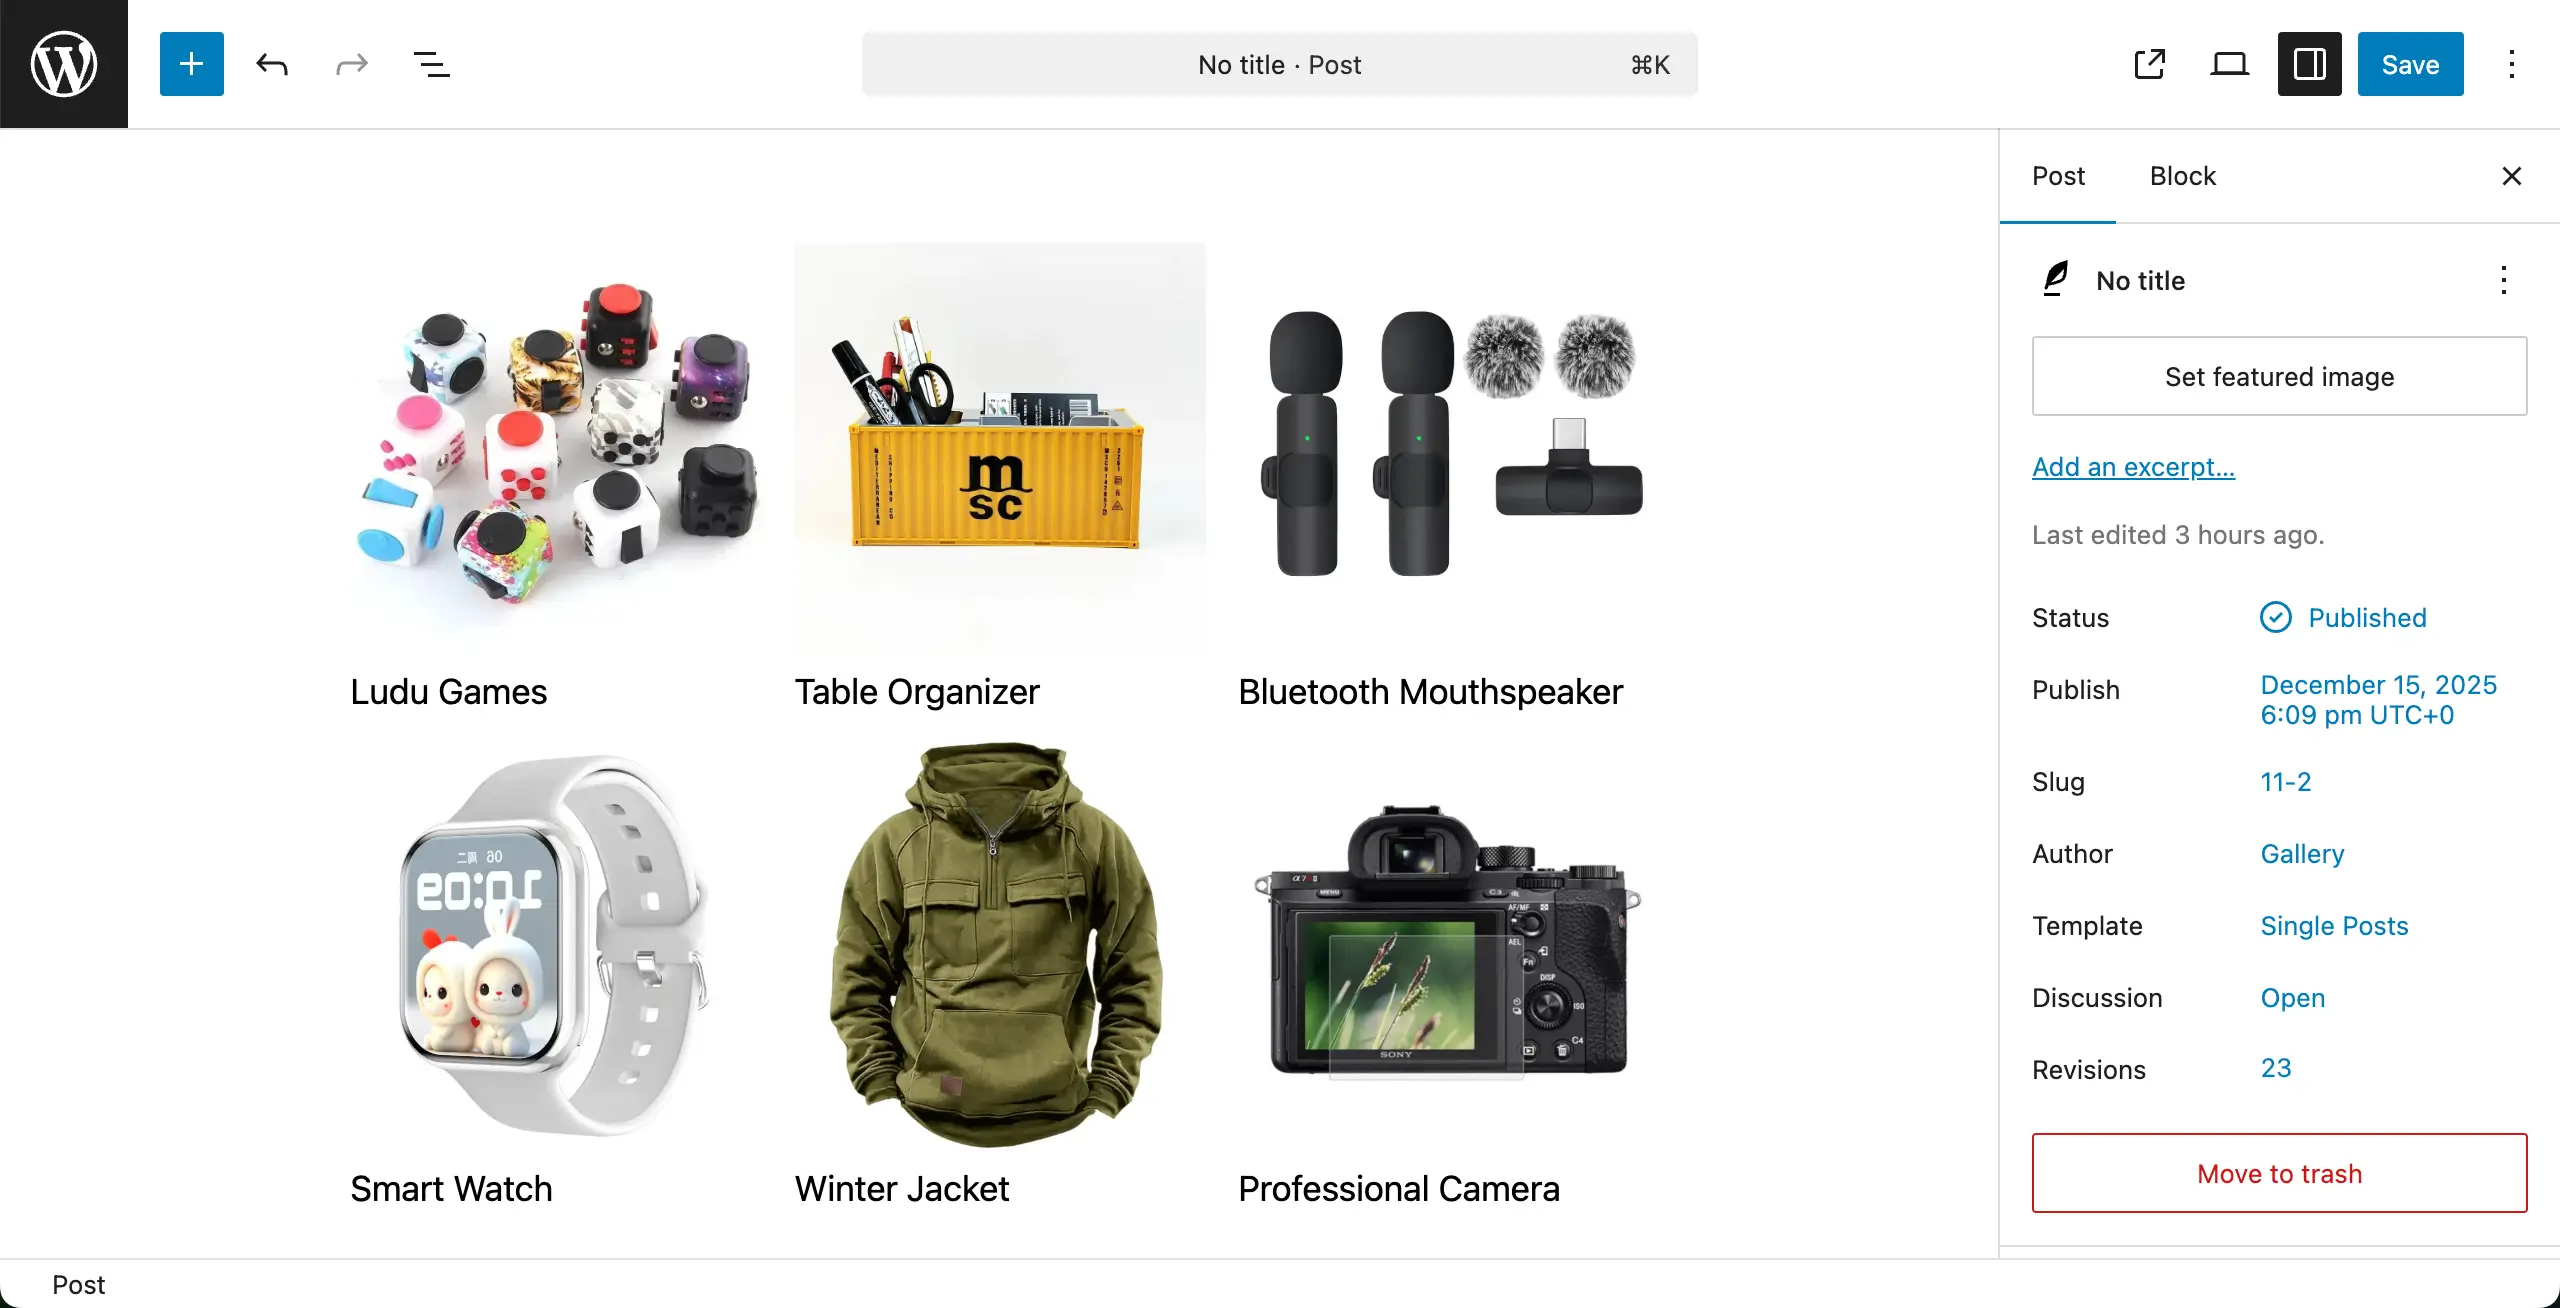
The gallery will be created right away, displaying their captions.
Editing Captions #
To edit captions, place your cursor on the caption of any image. You’ll be able to edit them.
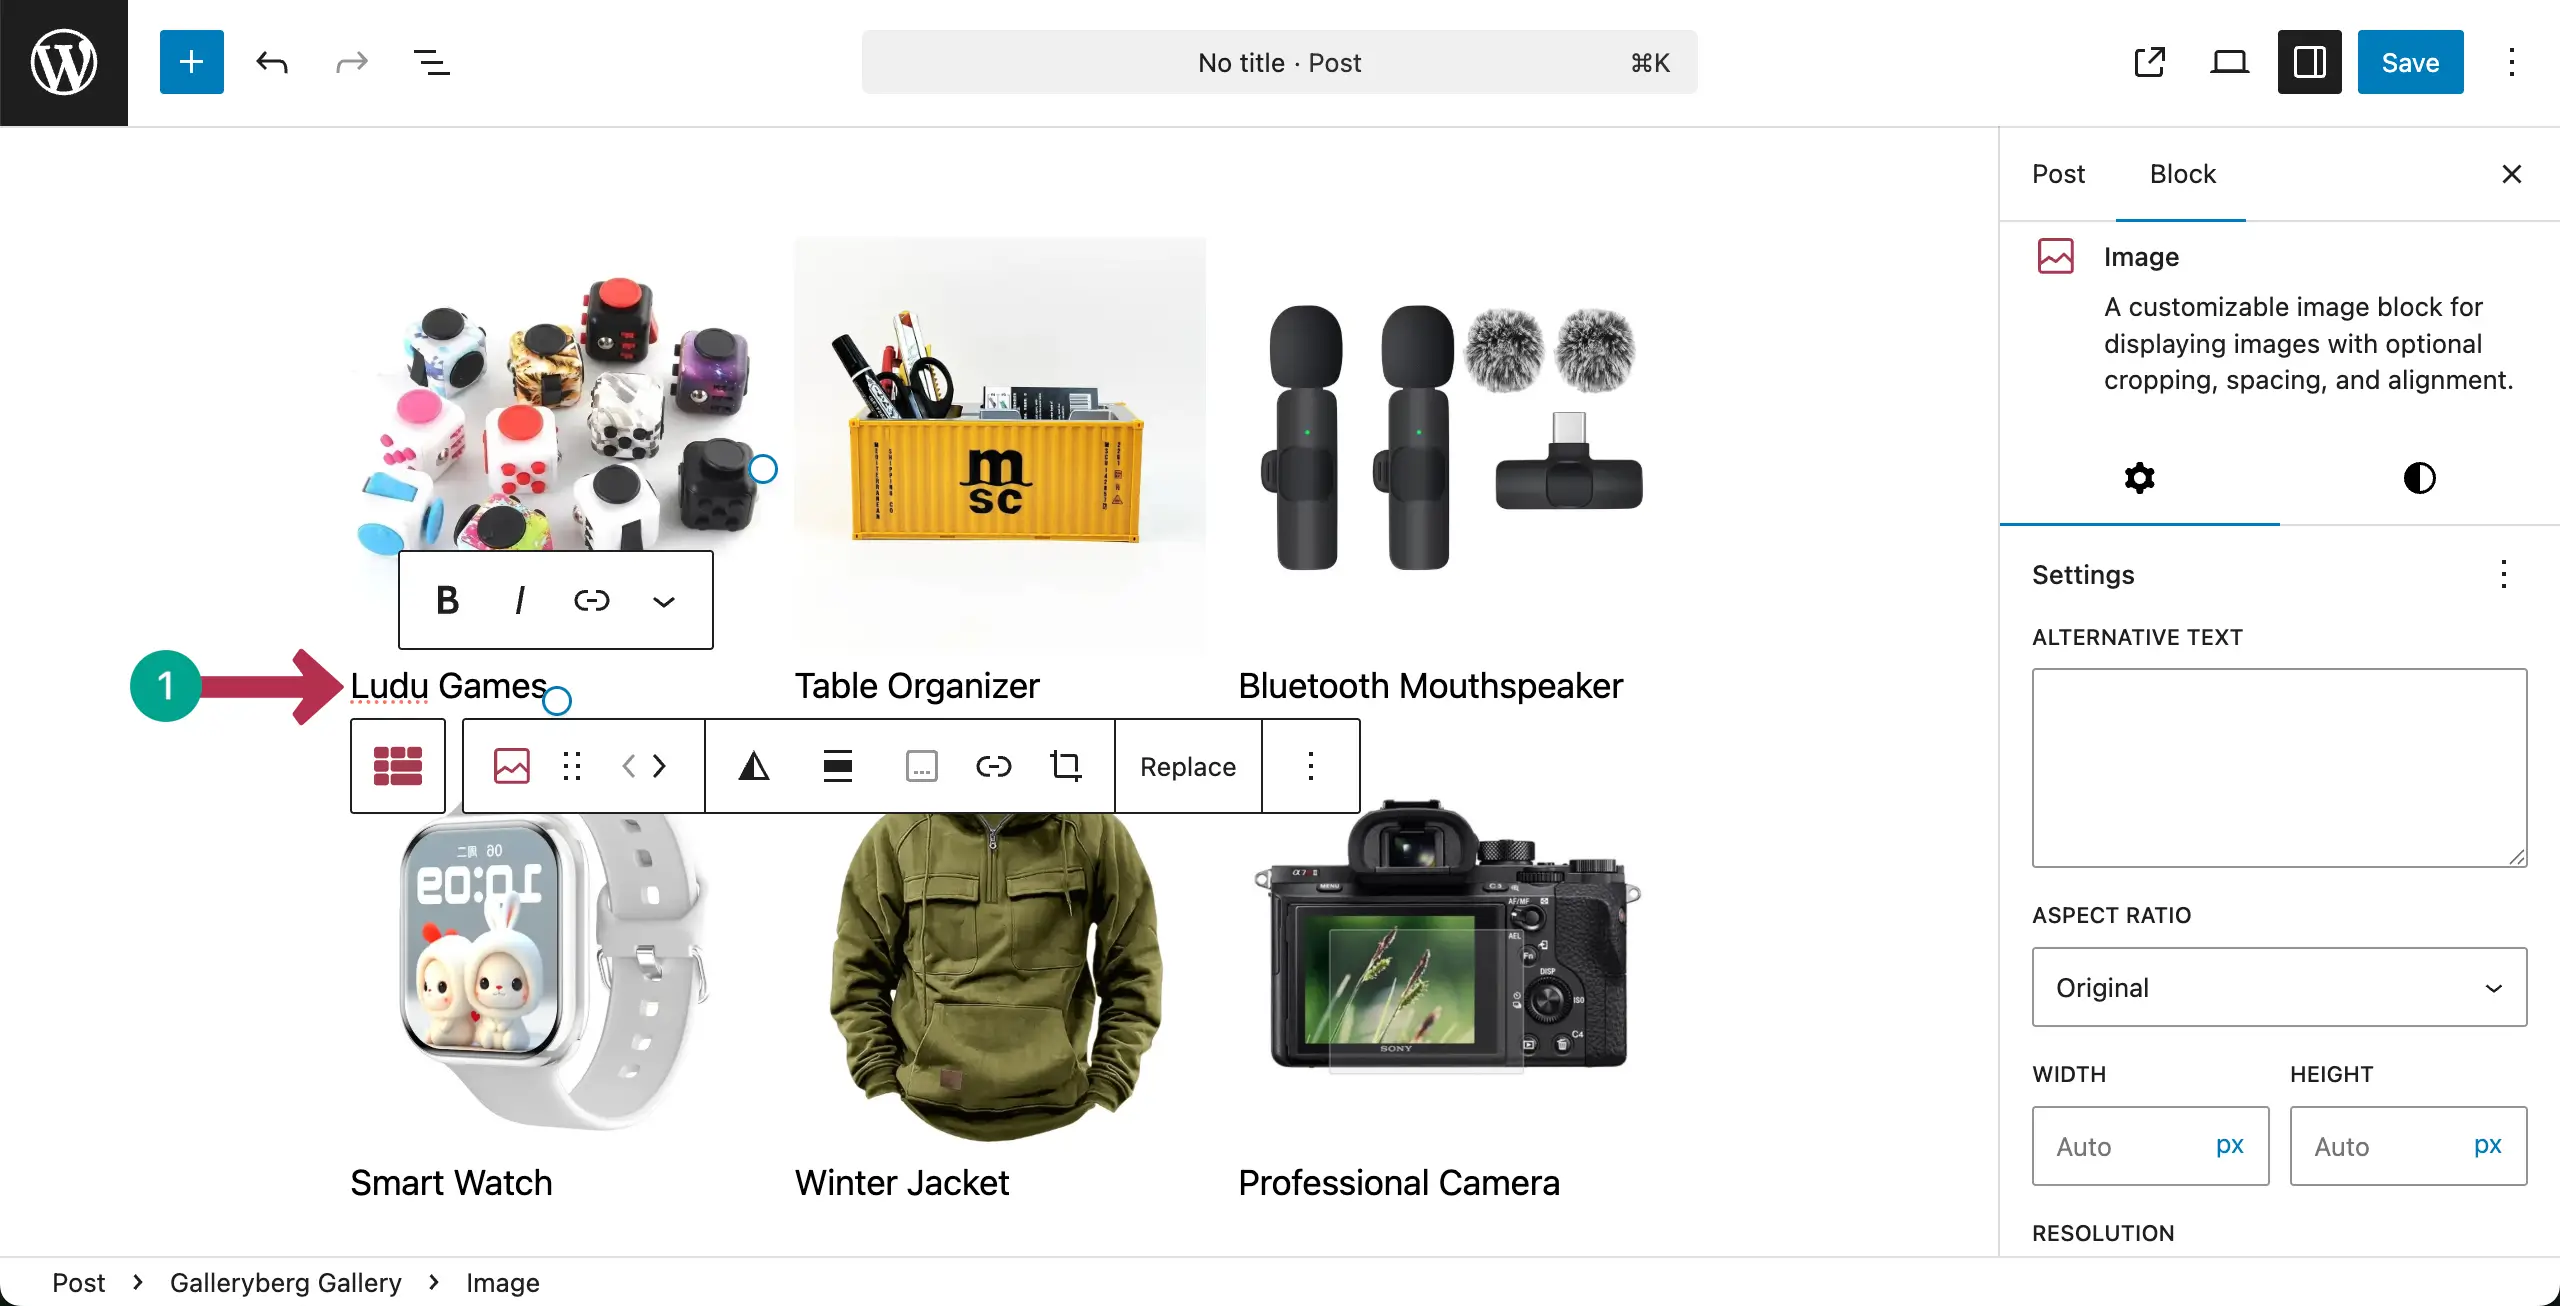
The process has been shown in the short video clip attached below. Thus, you can edit captions in the image gallery.
Removing Captions from the Gallery #
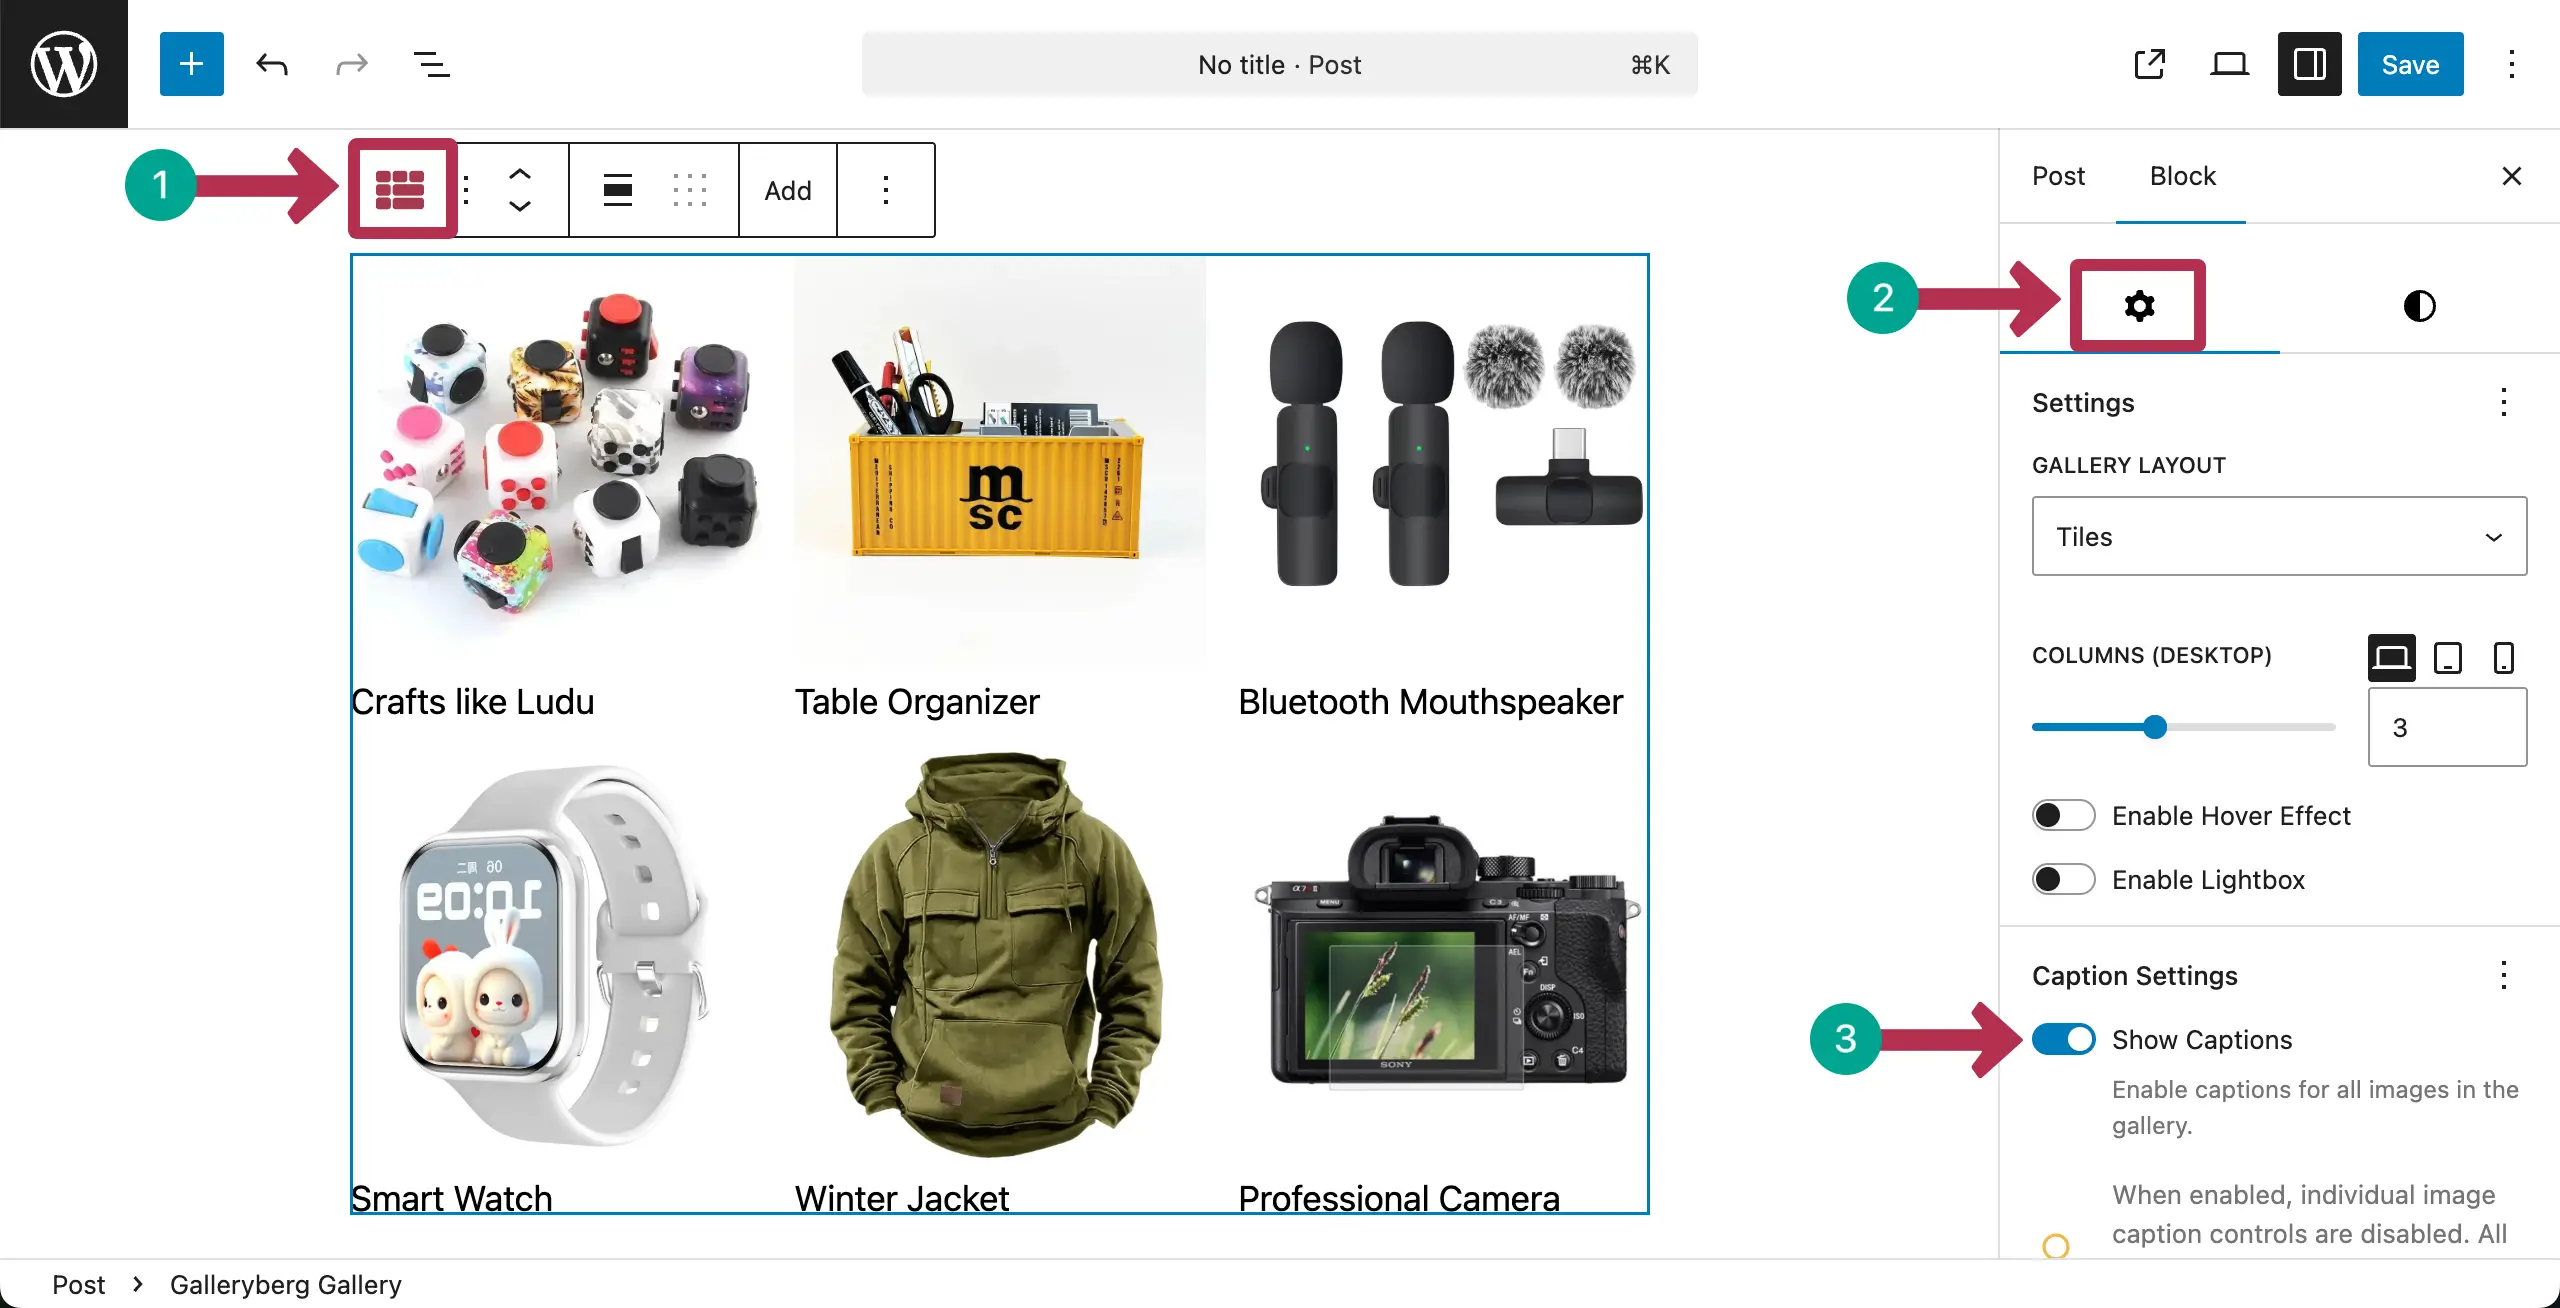
To remove all captions from the gallery at once, select the entire gallery by clicking the Galleryberg icon on the toolbar.
Go to the Settings tab. Find and toggle off the Show Captions option.
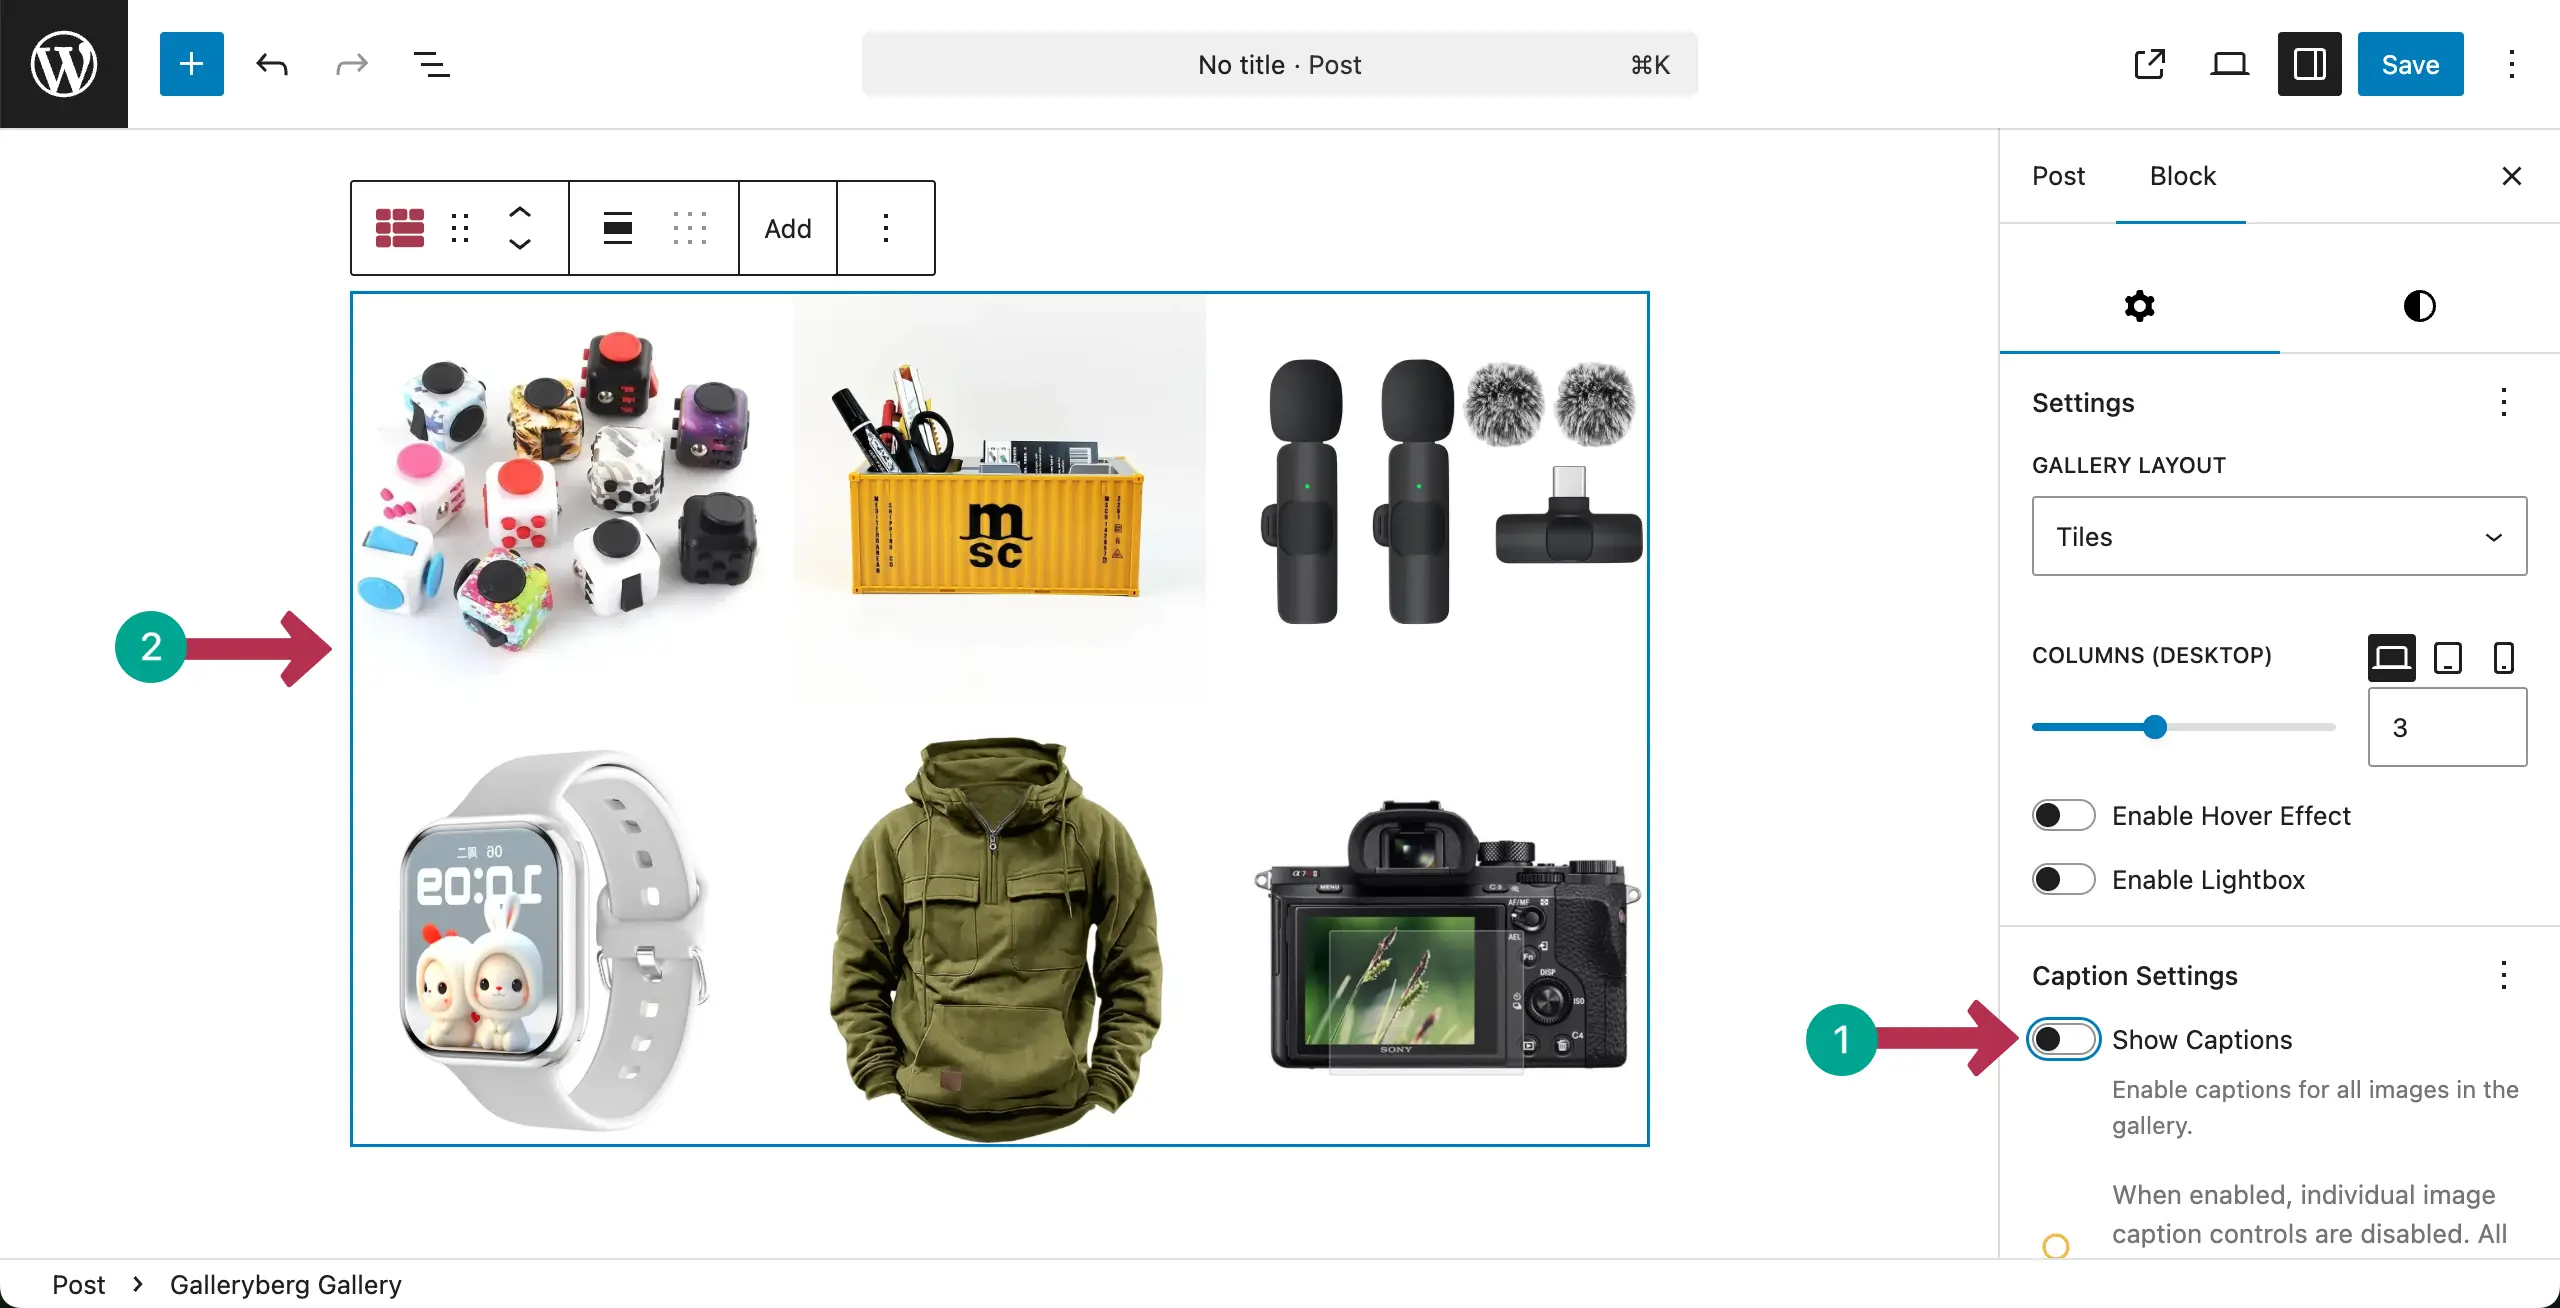
You’ll see that all captions have been removed from the image gallery at once.
Conclusion #
Use captions only when they add clear value. Keep text short and meaningful. Avoid repeating the same caption on many images. Check spelling and clarity. Hope you have found this documentation post helpful enough.


