Border and corner styling lets you add borders and rounded edges to images in WordPress galleries. These controls help define image boundaries and soften sharp edges. Proper styling improves visual harmony.
To explain the process to you, we have already created a gallery with the Galleryberg plugin below.

Below, we have explained how to add borders and round corners in WordPress galleries. Take a look:
Step 01: Add a Border to the Gallery #
Select the entire gallery by clicking the Galleryberg icon on the toolbar. Then, come to the Styles tab on the right sidebar.

Scrolling down the tab, come to the Border option. By clicking the color icon, you can choose and set any specific color for the border.
Then, place any numerical value to increase the width of the border.

Step 02: Add Radius to the Gallery Border #
Come to Border Radius. By placing any numeric value into the box, you can specify how the radius of the gallery border should be.
You will see it instantly on the edges of the gallery as shown in the image below.

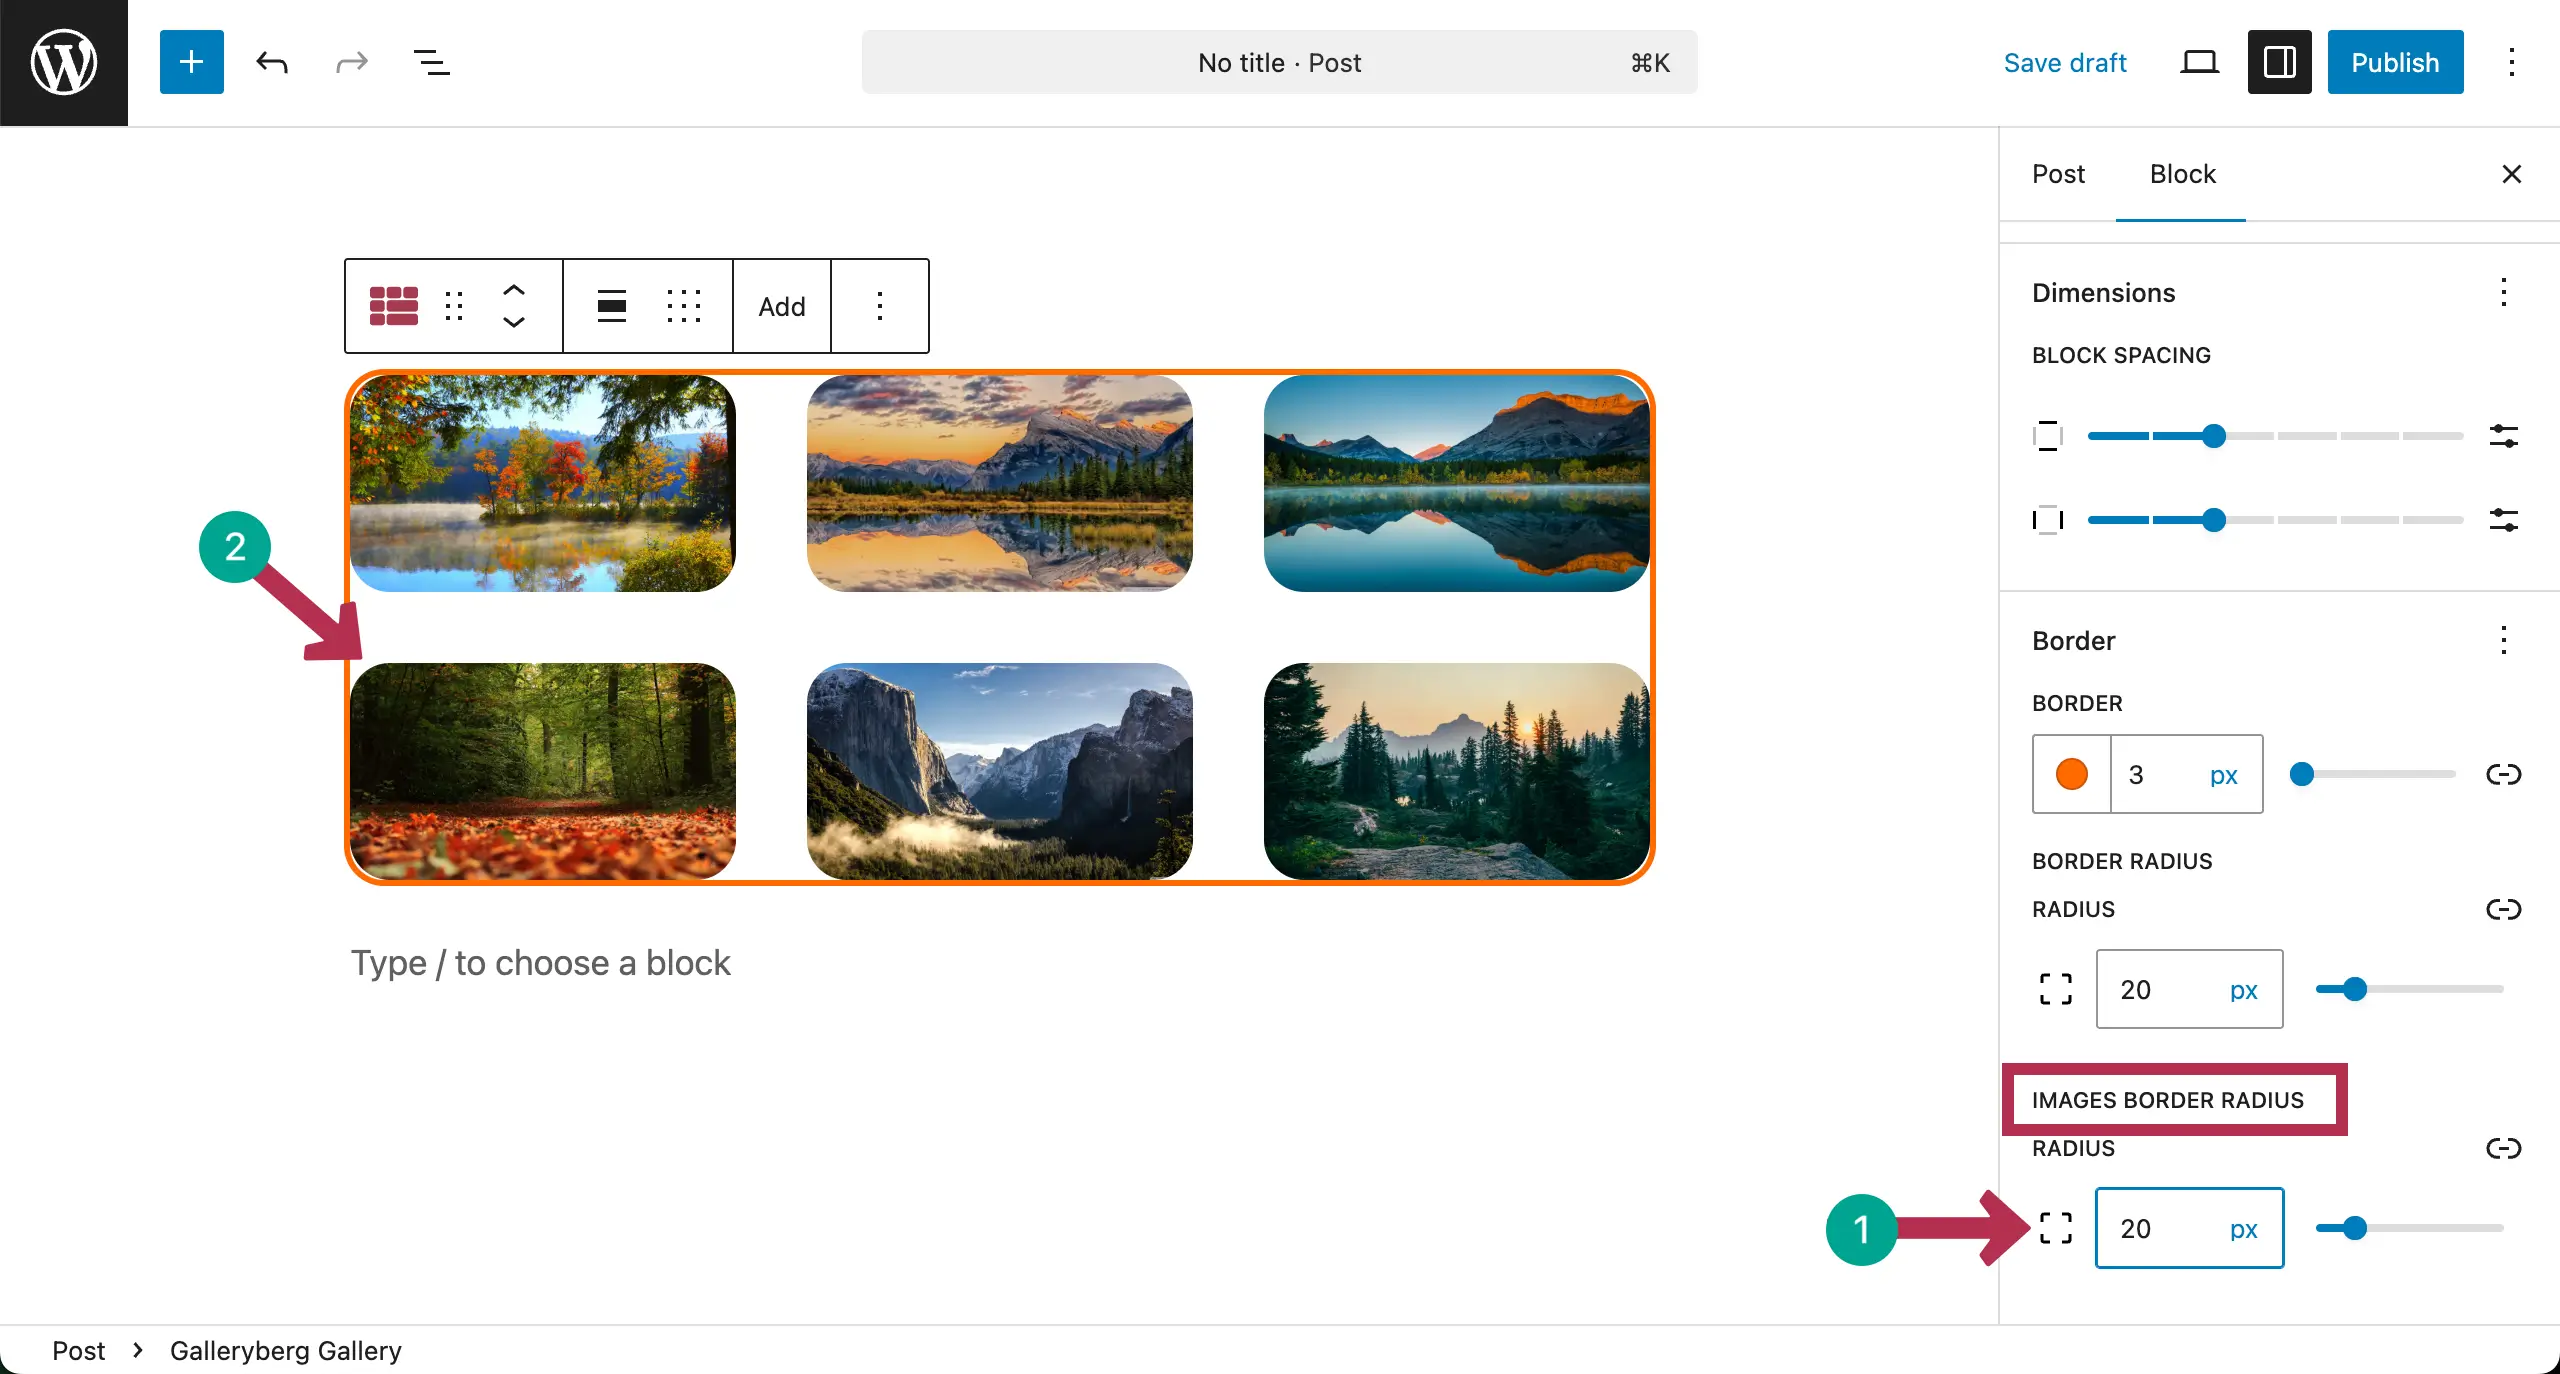
In the same way, write your desired value into the box of the Image Border Radius. This will curve the edges of images inside the gallery, as shown in the image below.
Conclusion #
Hope you have found this documentation post valuable. But before leaving out, be careful to use borders and rounded corners in a balanced way. Keep border width and color simple. Match the corner radius with your site style.
Avoid heavy borders that distract from images. Thus, it will be possible for you to get the best from an image gallery.


