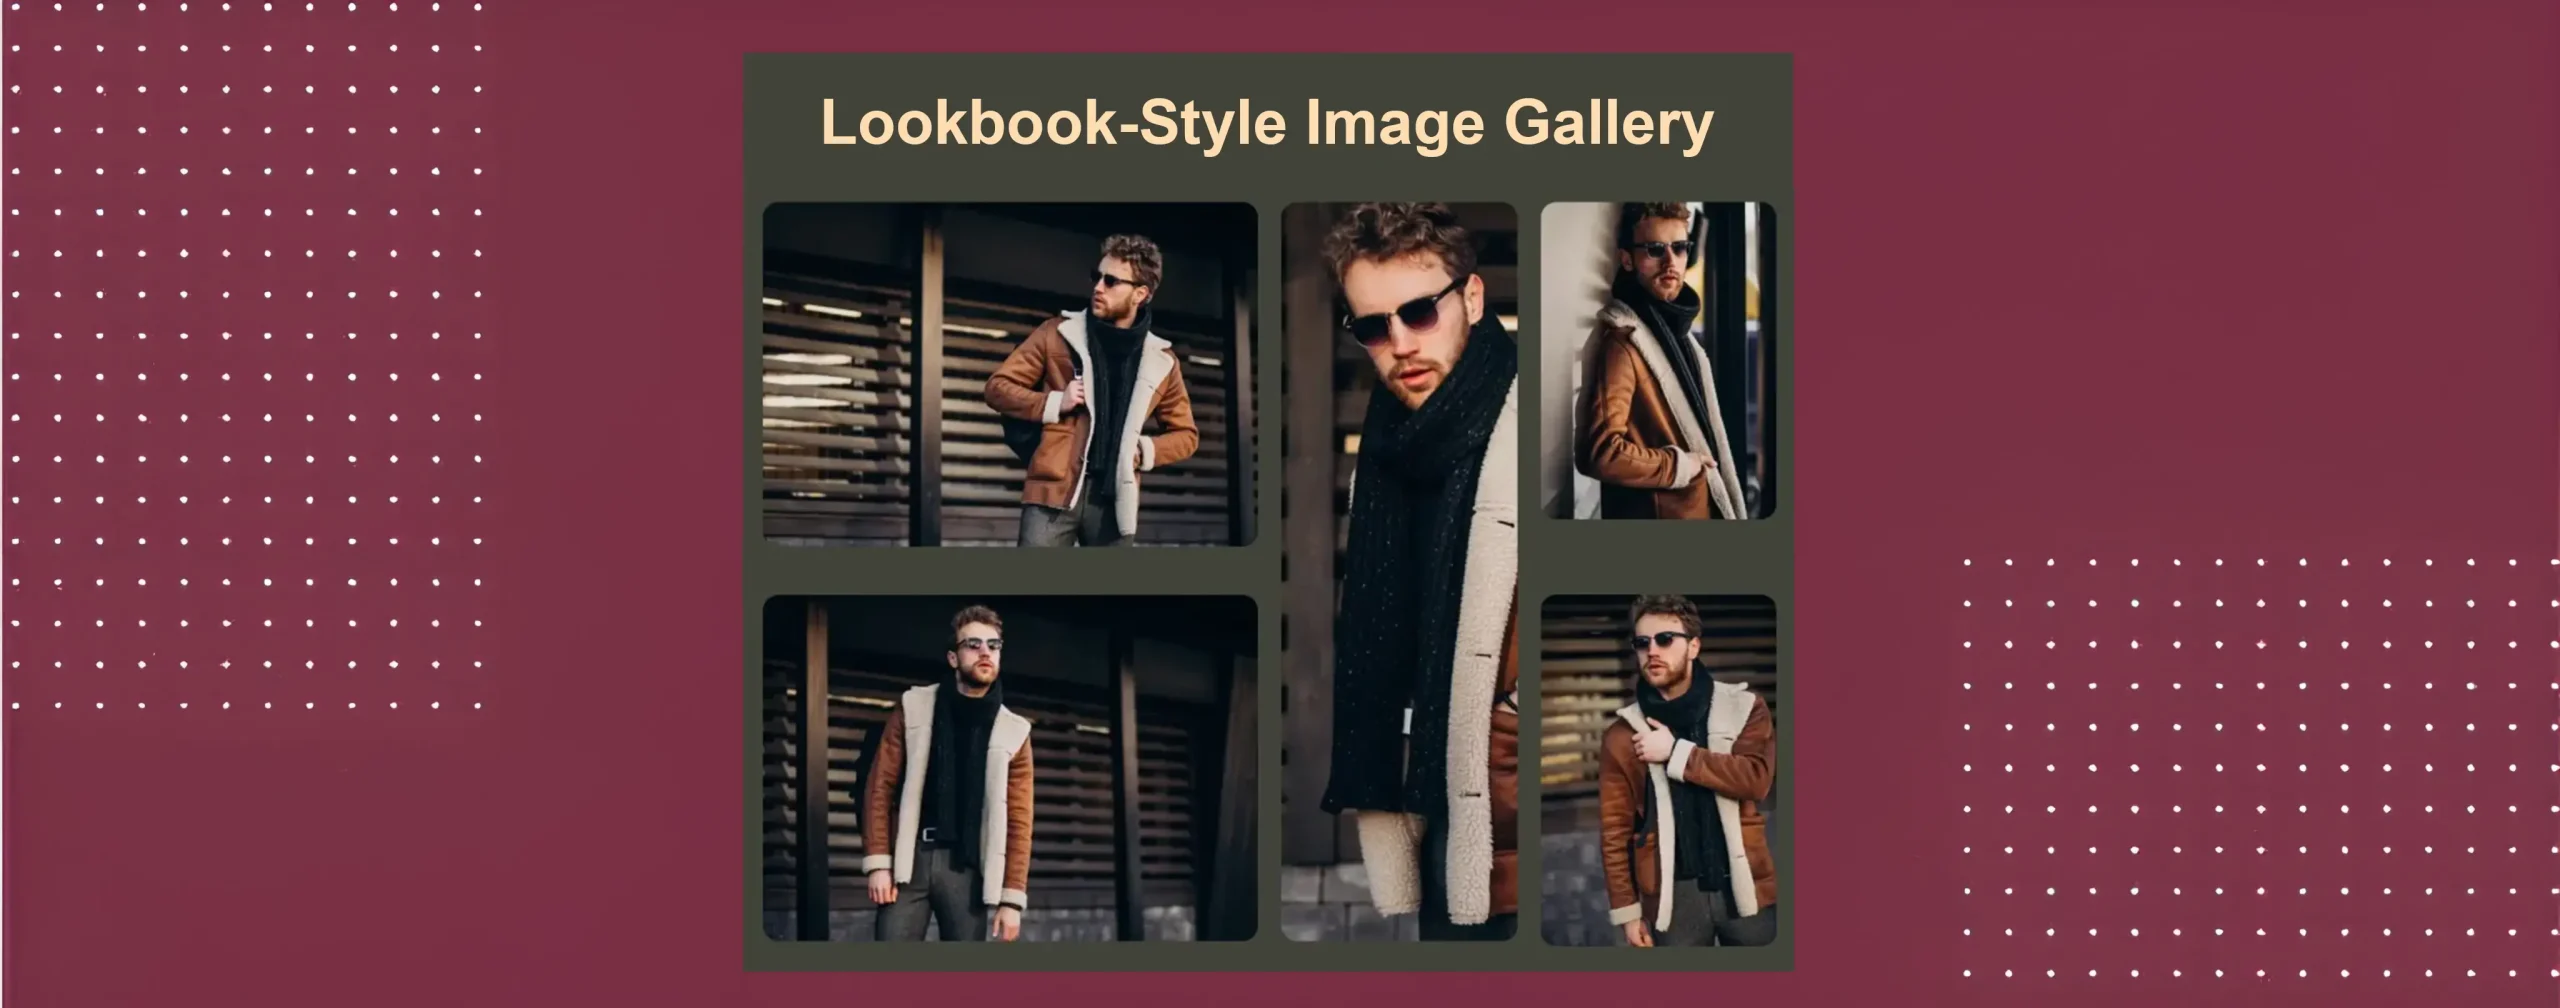
A lookbook-style fashion gallery is a visual gallery that showcases fashion items in a story-driven, stylish way. It is often used by fashion brands, designers, and bloggers. The main goal is to present outfits, collections, or styles in attractive ways.
In a lookbook gallery, images are not shown like a normal photo grid. Each image is placed with care. Photos usually show full outfits, close-up details, and lifestyle shots. This helps visitors understand how clothes look when worn in real life.
If you are looking for ways to create such galleries on WordPress, this post is for you. In this blog post, how to create a lookbook-style fashion gallery in WordPress with a detailed step by step guide. Keep reading it to the end!
What Makes a Great Lookbook-Style Fashion Gallery
There are several points/features that make a great lookbook-style fashion gallery. Before going to cover the tutorial, let’s have a few minutes to explore them. We have discussed them below.
a. High-Quality and Consistent Images
The gallery should start with clear and sharp images. Photos should be well-lit and properly edited. They must follow the same color tone and style. This consistency will help visitors focus on the fashion, not on image differences.
b. Story-Focused Outfit Presentation
Images should show how outfits are worn in real life. Mixing full-body shots with detail images works well. This helps users imagine the style in their own lives. A story-based layout makes the gallery more engaging.
c. Clean and Minimal Layout
A lookbook gallery should not feel crowded. Proper spacing between images is very important. A clean layout keeps attention on the fashion items. Minimal design also improves readability. It makes the gallery look modern and premium.
d. Mobile-Friendly Design
Many users today browse fashion sites on mobile devices. So, your gallery must look perfect on small screens as well. Images should resize smoothly without breaking the layout. Not only will this reach more visitors, but it will also engage them. Learn how to create a responsive galleries in WordPress.
e. Balanced use of text and captions
Text should support the images, not overpower them. Short captions can explain the outfit or style mood. Fonts should be easy to read and match the design. Simple text adds value without distraction. This keeps the focus on visuals.
f. Fast loading performance
A great lookbook gallery must load quickly. So, large images should be optimized before uploading them to the web. Slow loading can frustrate visitors. Fast performance improves user experience and SEO.
How to Create a Lookbook-Style Fashion Gallery in WordPress
Obviously, you can create such a lookbook-style fashion gallery using the default WordPress gallery plugin. You need an additional tool that can overcome this limitation. Galleryberg is such an easy-to-use, feature-rich, but minimalist plugin you can use for this. We’ll explain this tutorial below using this plugin.
Step 01: Install the Galleryberg Plugin
Since you need this plugin for creating the gallery, first install and activate it on your website. Just go to Plugins > Add Plugin. Type the plugin’s name, ‘Galleryberg‘, in the search box. Do the rest.

Galleryberg also offers a premium version. Get the Galleryberg Pro by clicking the button attached below if you want to add advanced features to the gallery.
Check how to install and activate Galleryberg Pro.
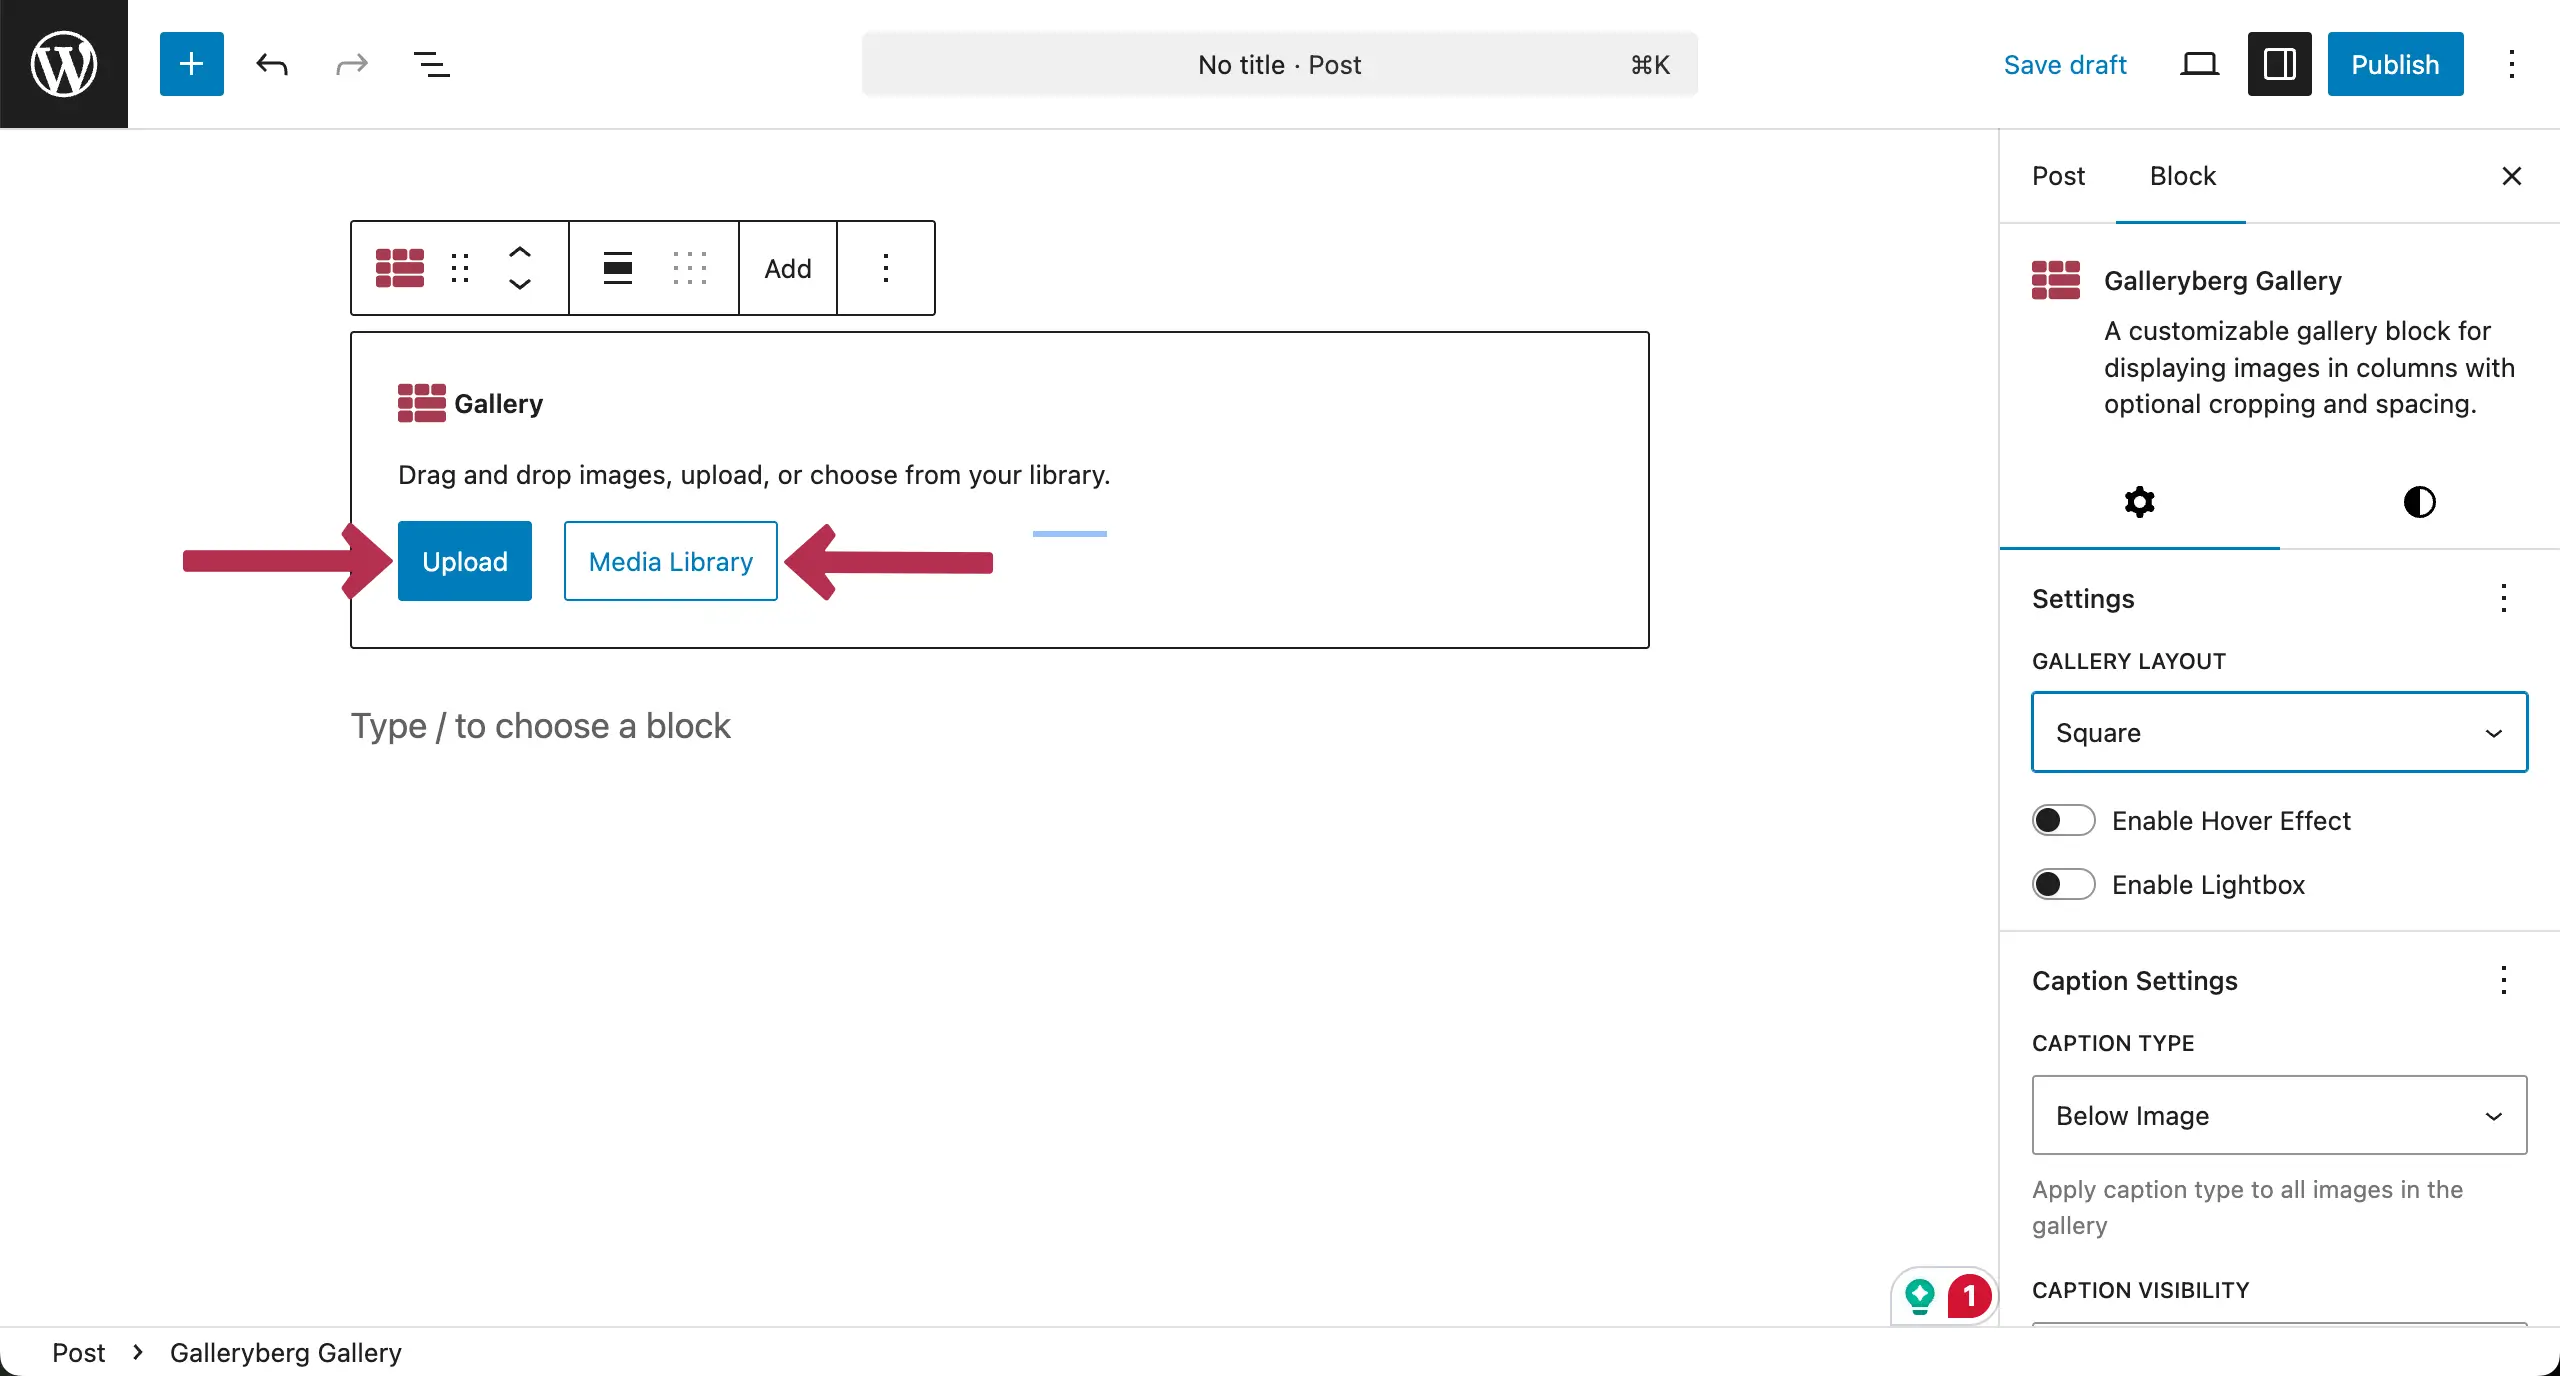
Step 02: Add the Galleryberg Block to the Editor
The Galleryberg plugin comes with a Gutenberg block with which you have to create the gallery. Open any post or page. Add the Galleryberg block to the editor.

Step 03: Add or Upload images
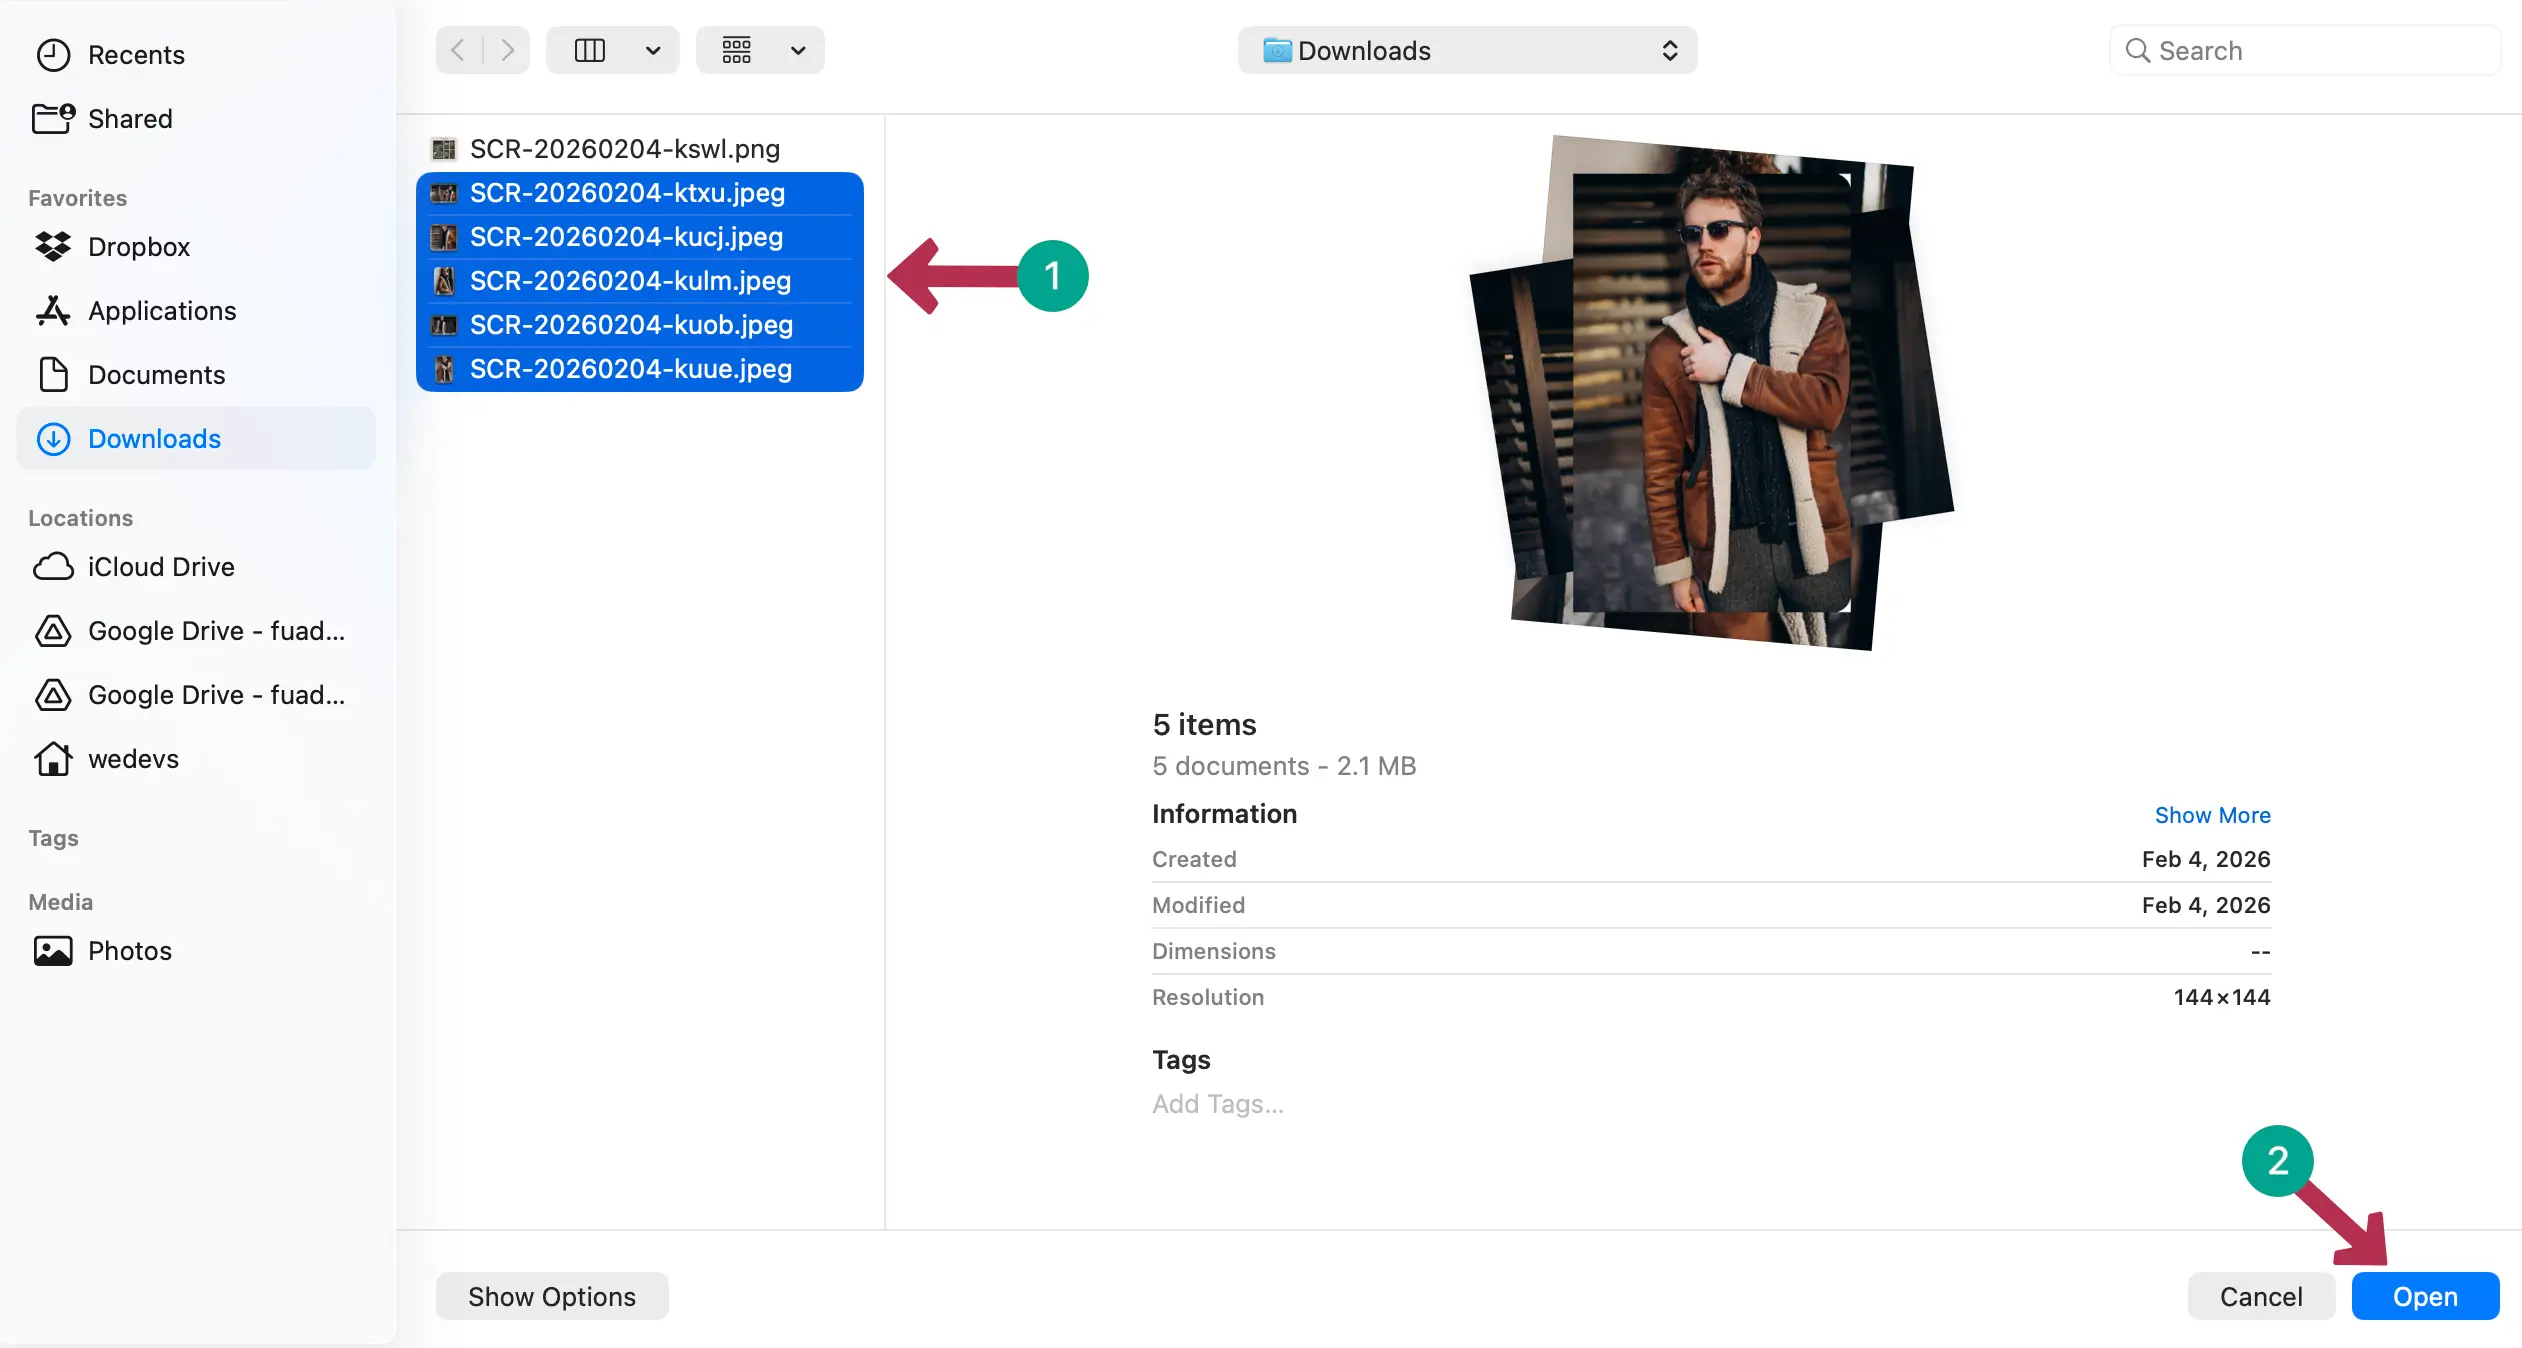
After the block is added to the editor, it’s time to add or upload images. To add completely new images that are not available in your media library, click the Upload button.
Choose the images you want to add from your local drive. Then, click the Open button.
Check best WordPress hostings for photographers.
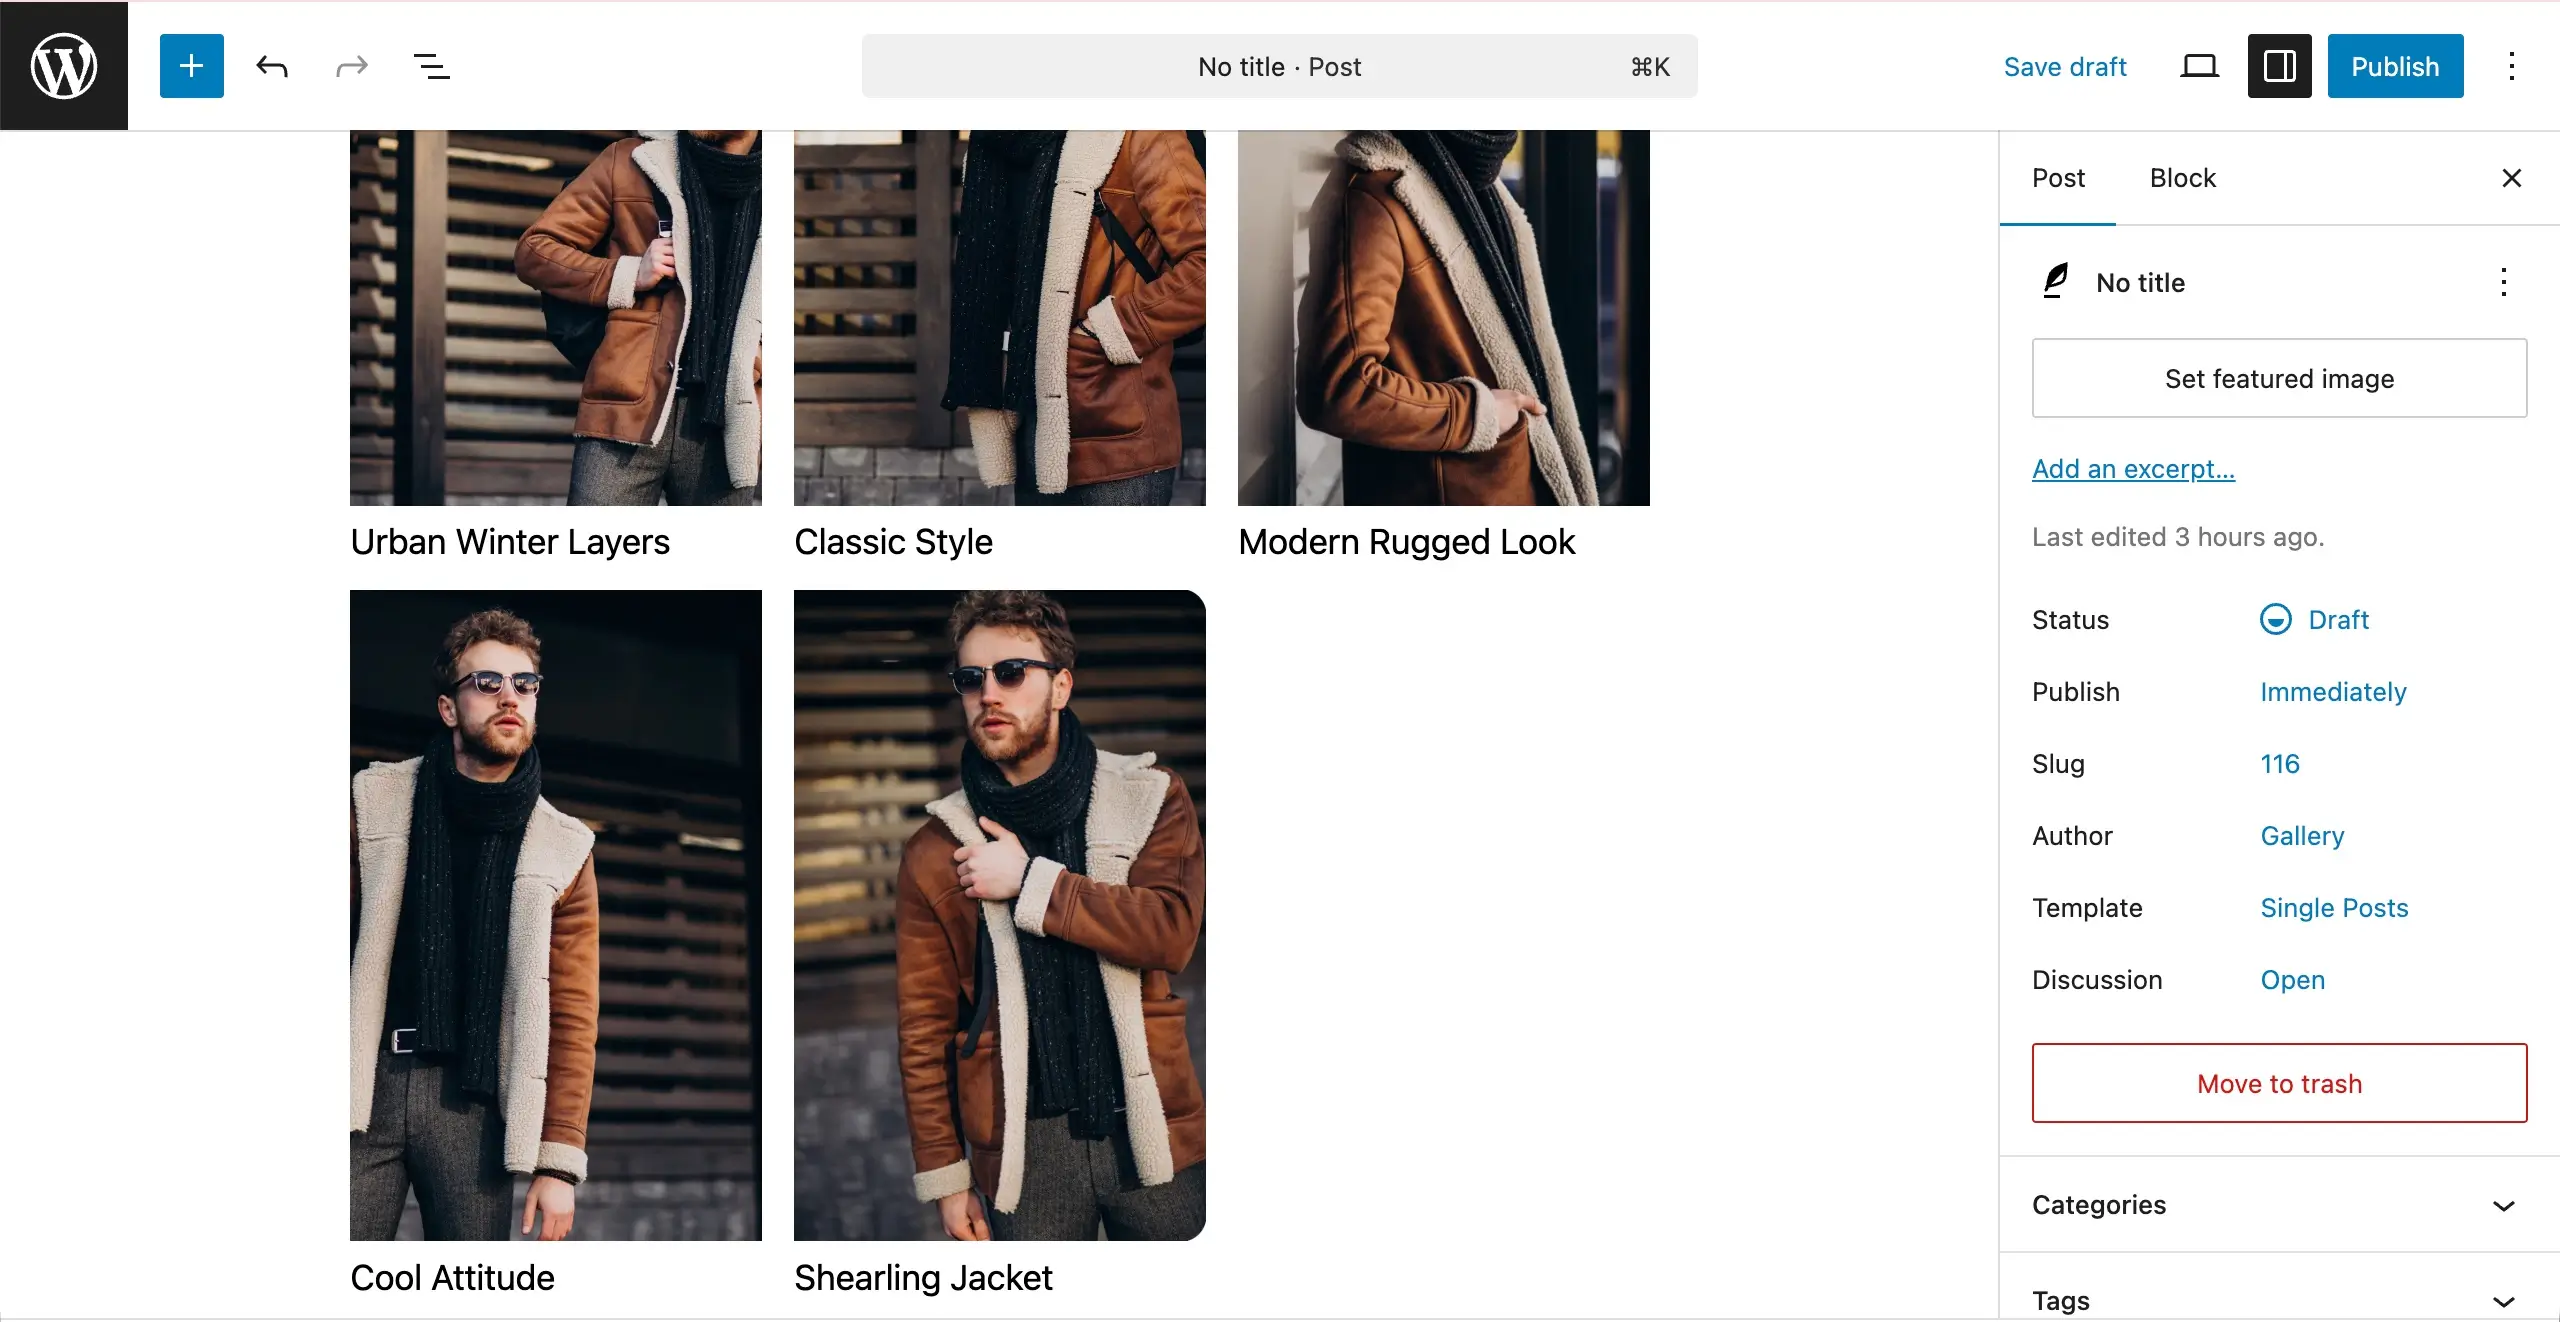
Step 04: Add Captions to the Images
You cannot ignore the importance of image captions in the lookbook-style fashion gallery. Without them, you cannot create a storytelling vibe. So, add suitable captions for each image in the gallery.
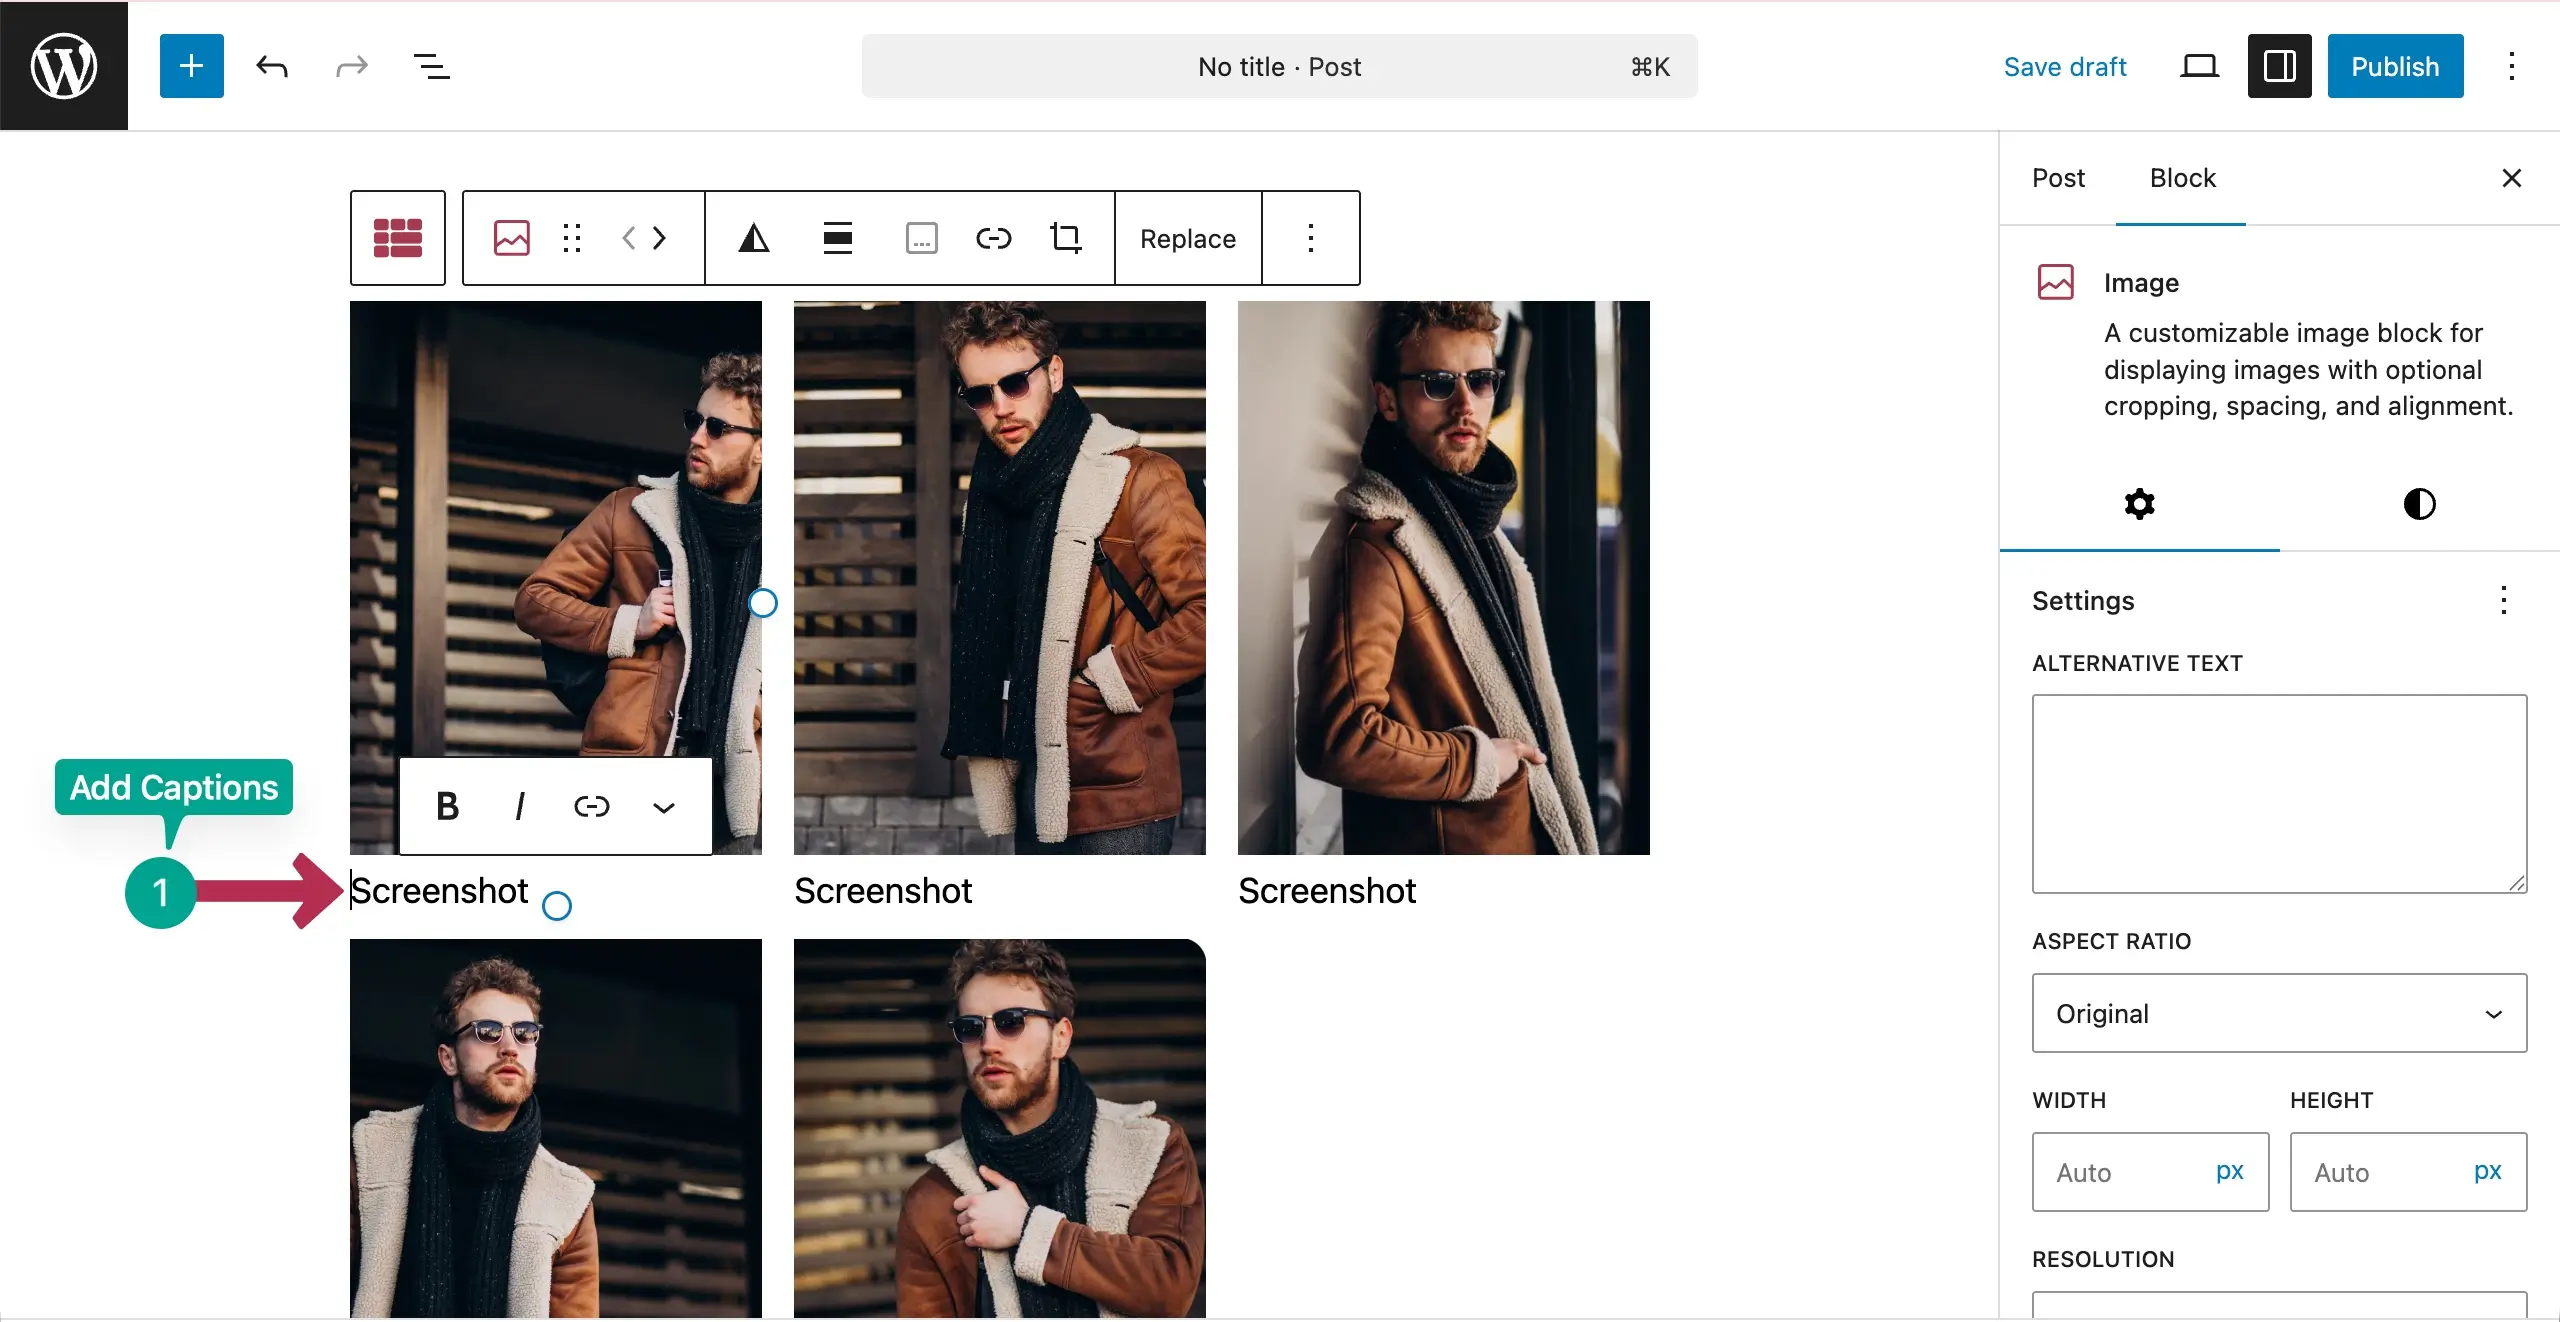
You can see that we have added captions to the images of the gallery.
Step 05: Select a Gallery Layout
There are different types of popular gallery layouts used to present the images in a gallery in attractive ways. Galleryberg comes with many of them built in.
Select the entire gallery by clicking the Galleryberg icon on the toolbar. Then, go to the Settings tab on the right sidebar.
Open the dropdown list under Gallery Layout. You will get a list of gallery layouts. They are Titles, Masonry, Justified, Square, and Mosaic.
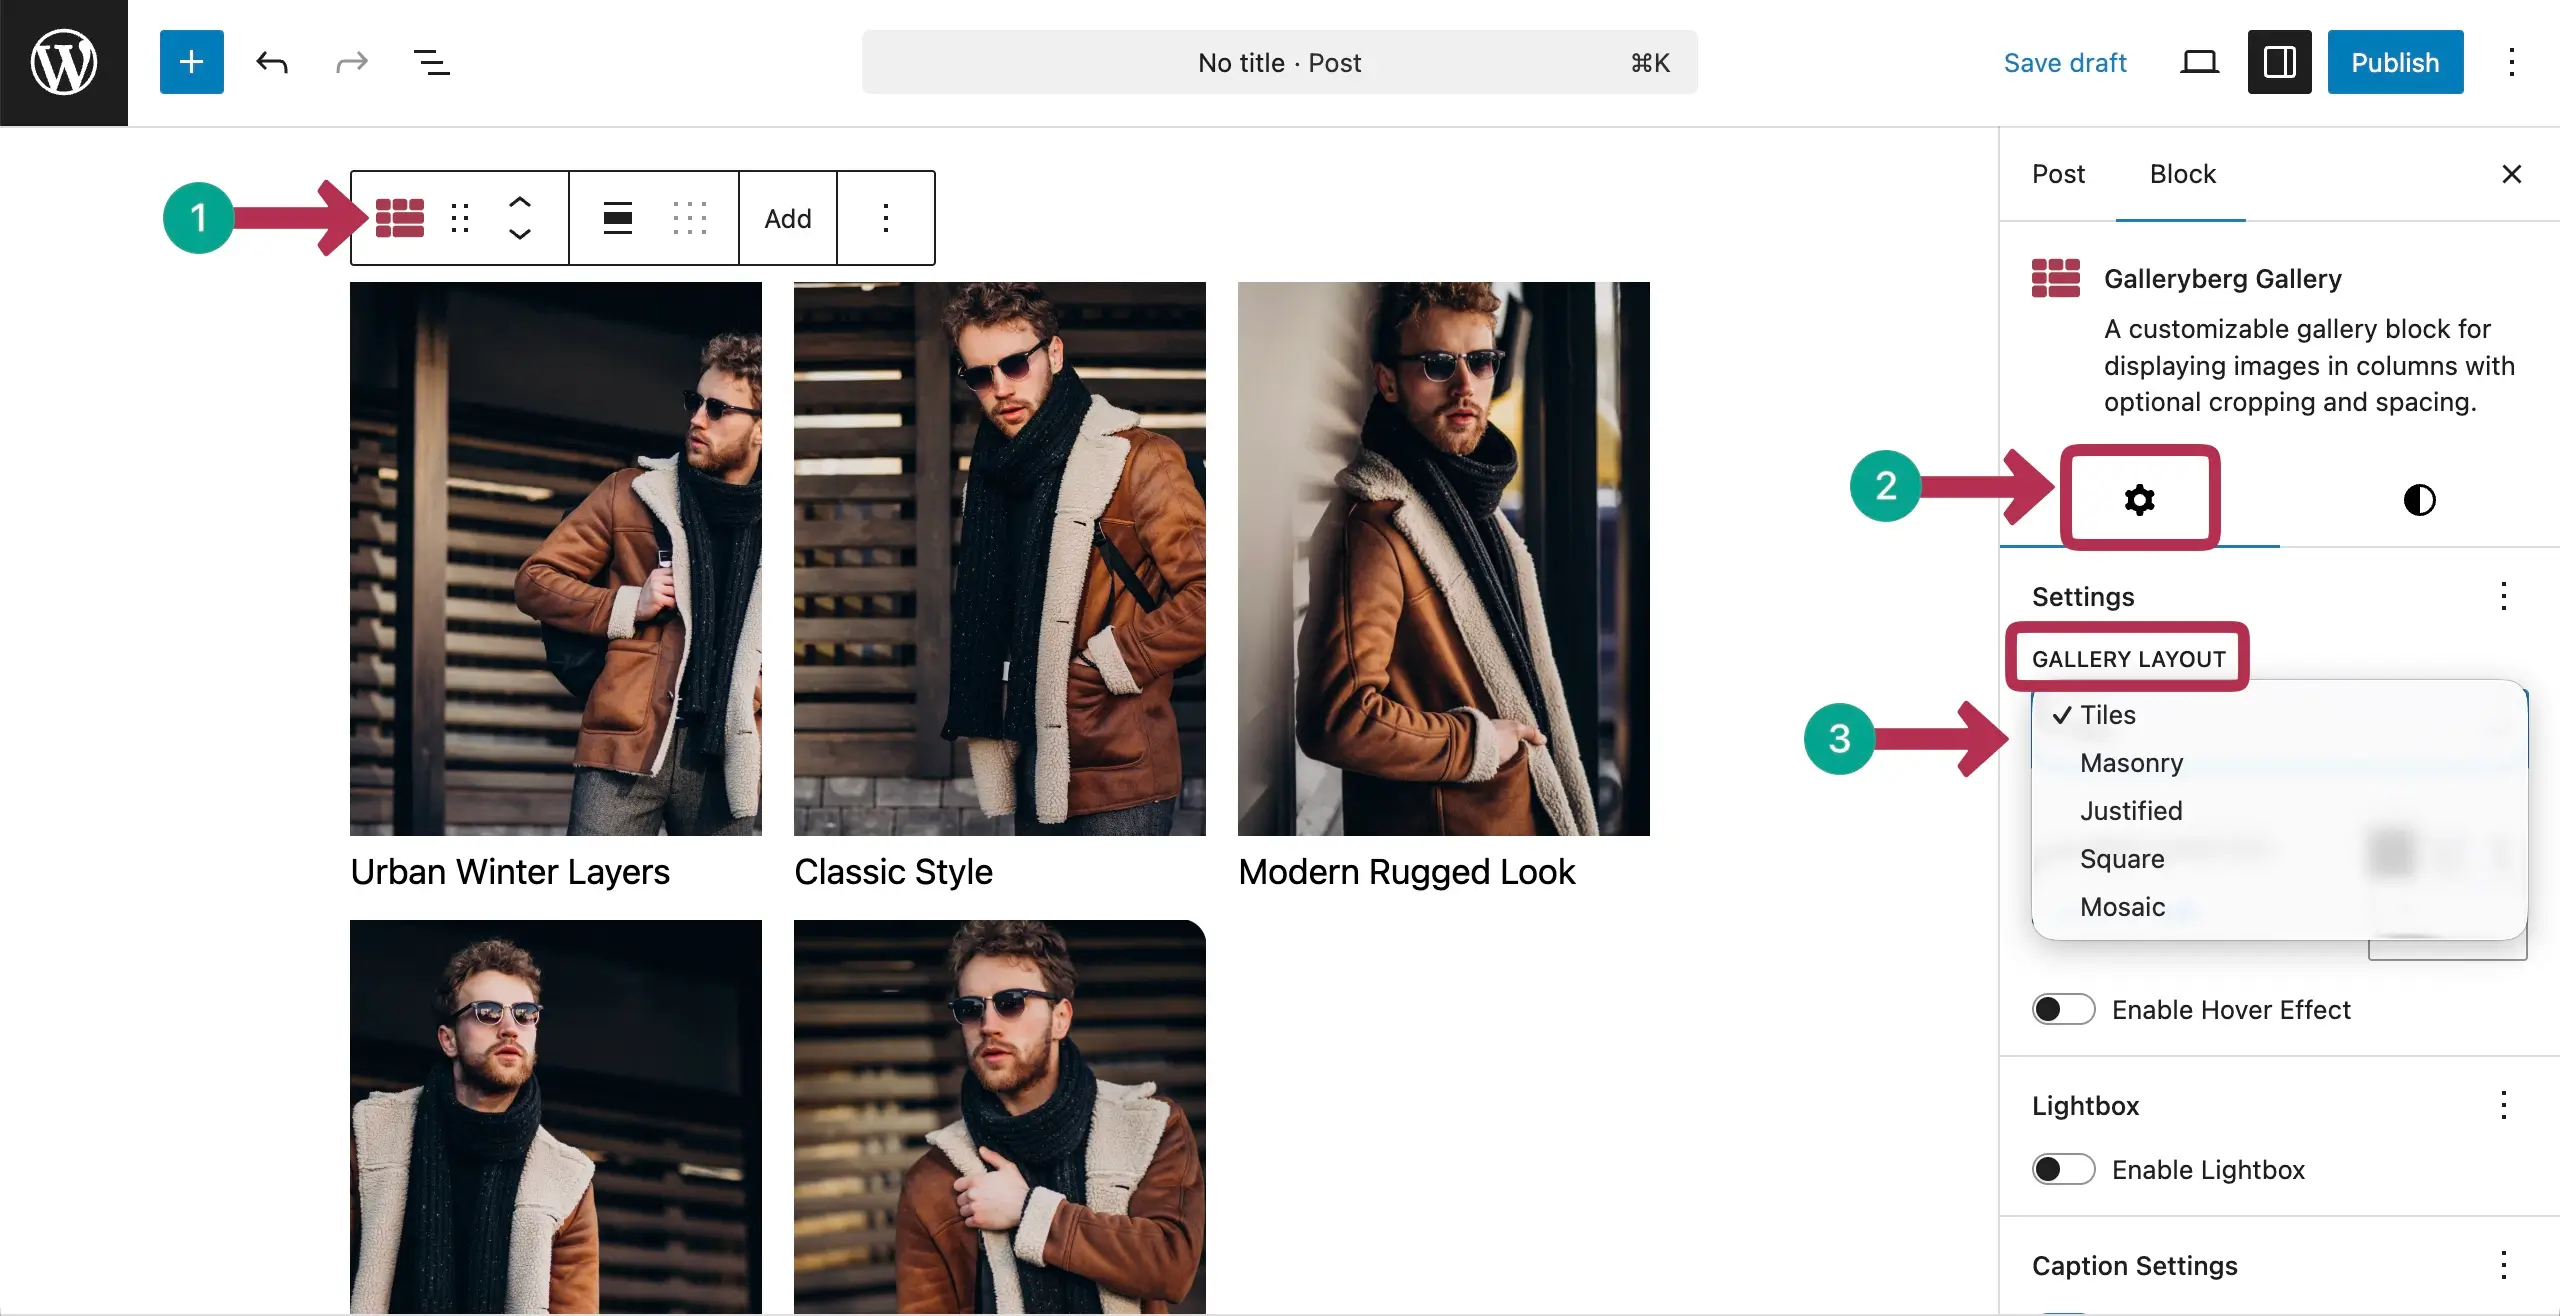
All your images in the gallery may not be the same size. So, to find out which one suits you best, explore each layout one by one by clicking and end up with the one that looks great.
Not just layouts, try changing the column number as well. Because how a gallery looks is also connected a lot with the number of columns in it. You can see in the video below how we have explored them.
As our images are different in size and ratio, Masonry and Mosaic layouts suit us best. Besides, these two galleries are prominent worldwide for visual storytelling.
Step 06: Set Column Number for Different Screensizes
Come to the Settings tab on the right sidebar. In the Columns section, you’ll get options to switch between different screensizes by choosing particular device types. After that, you can set the number of column that should for that respective device.
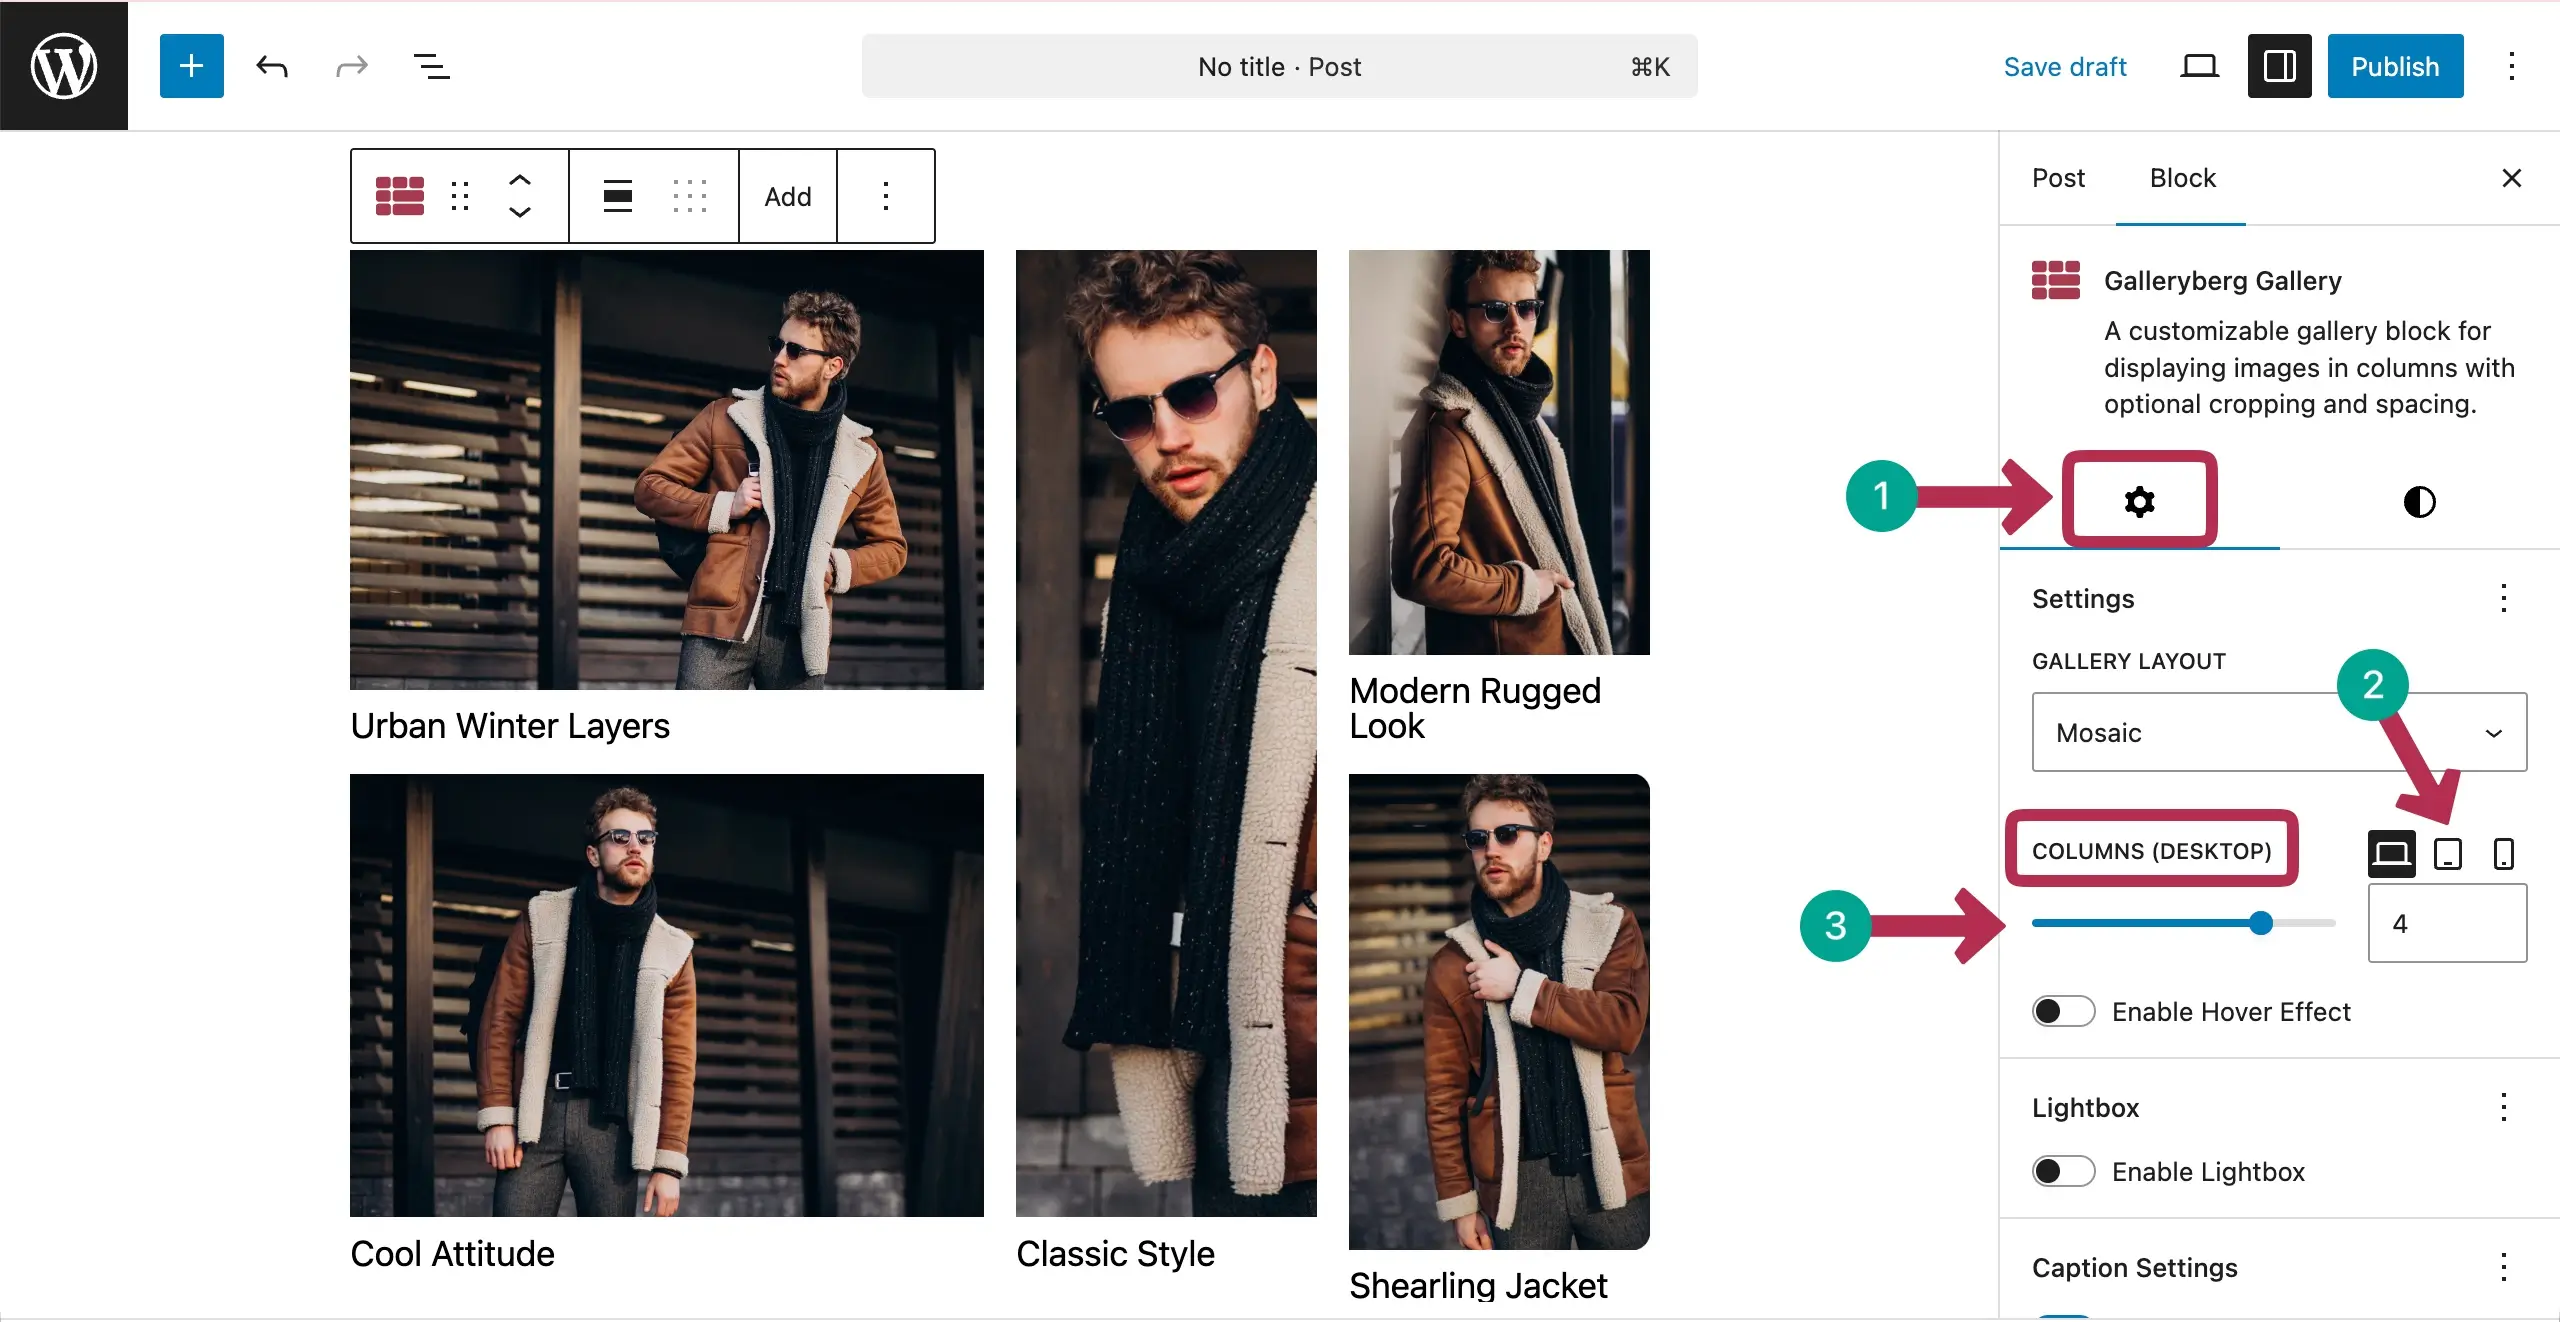
See the short video clip attached below. This is why you have to make the gallery mobile responsive.
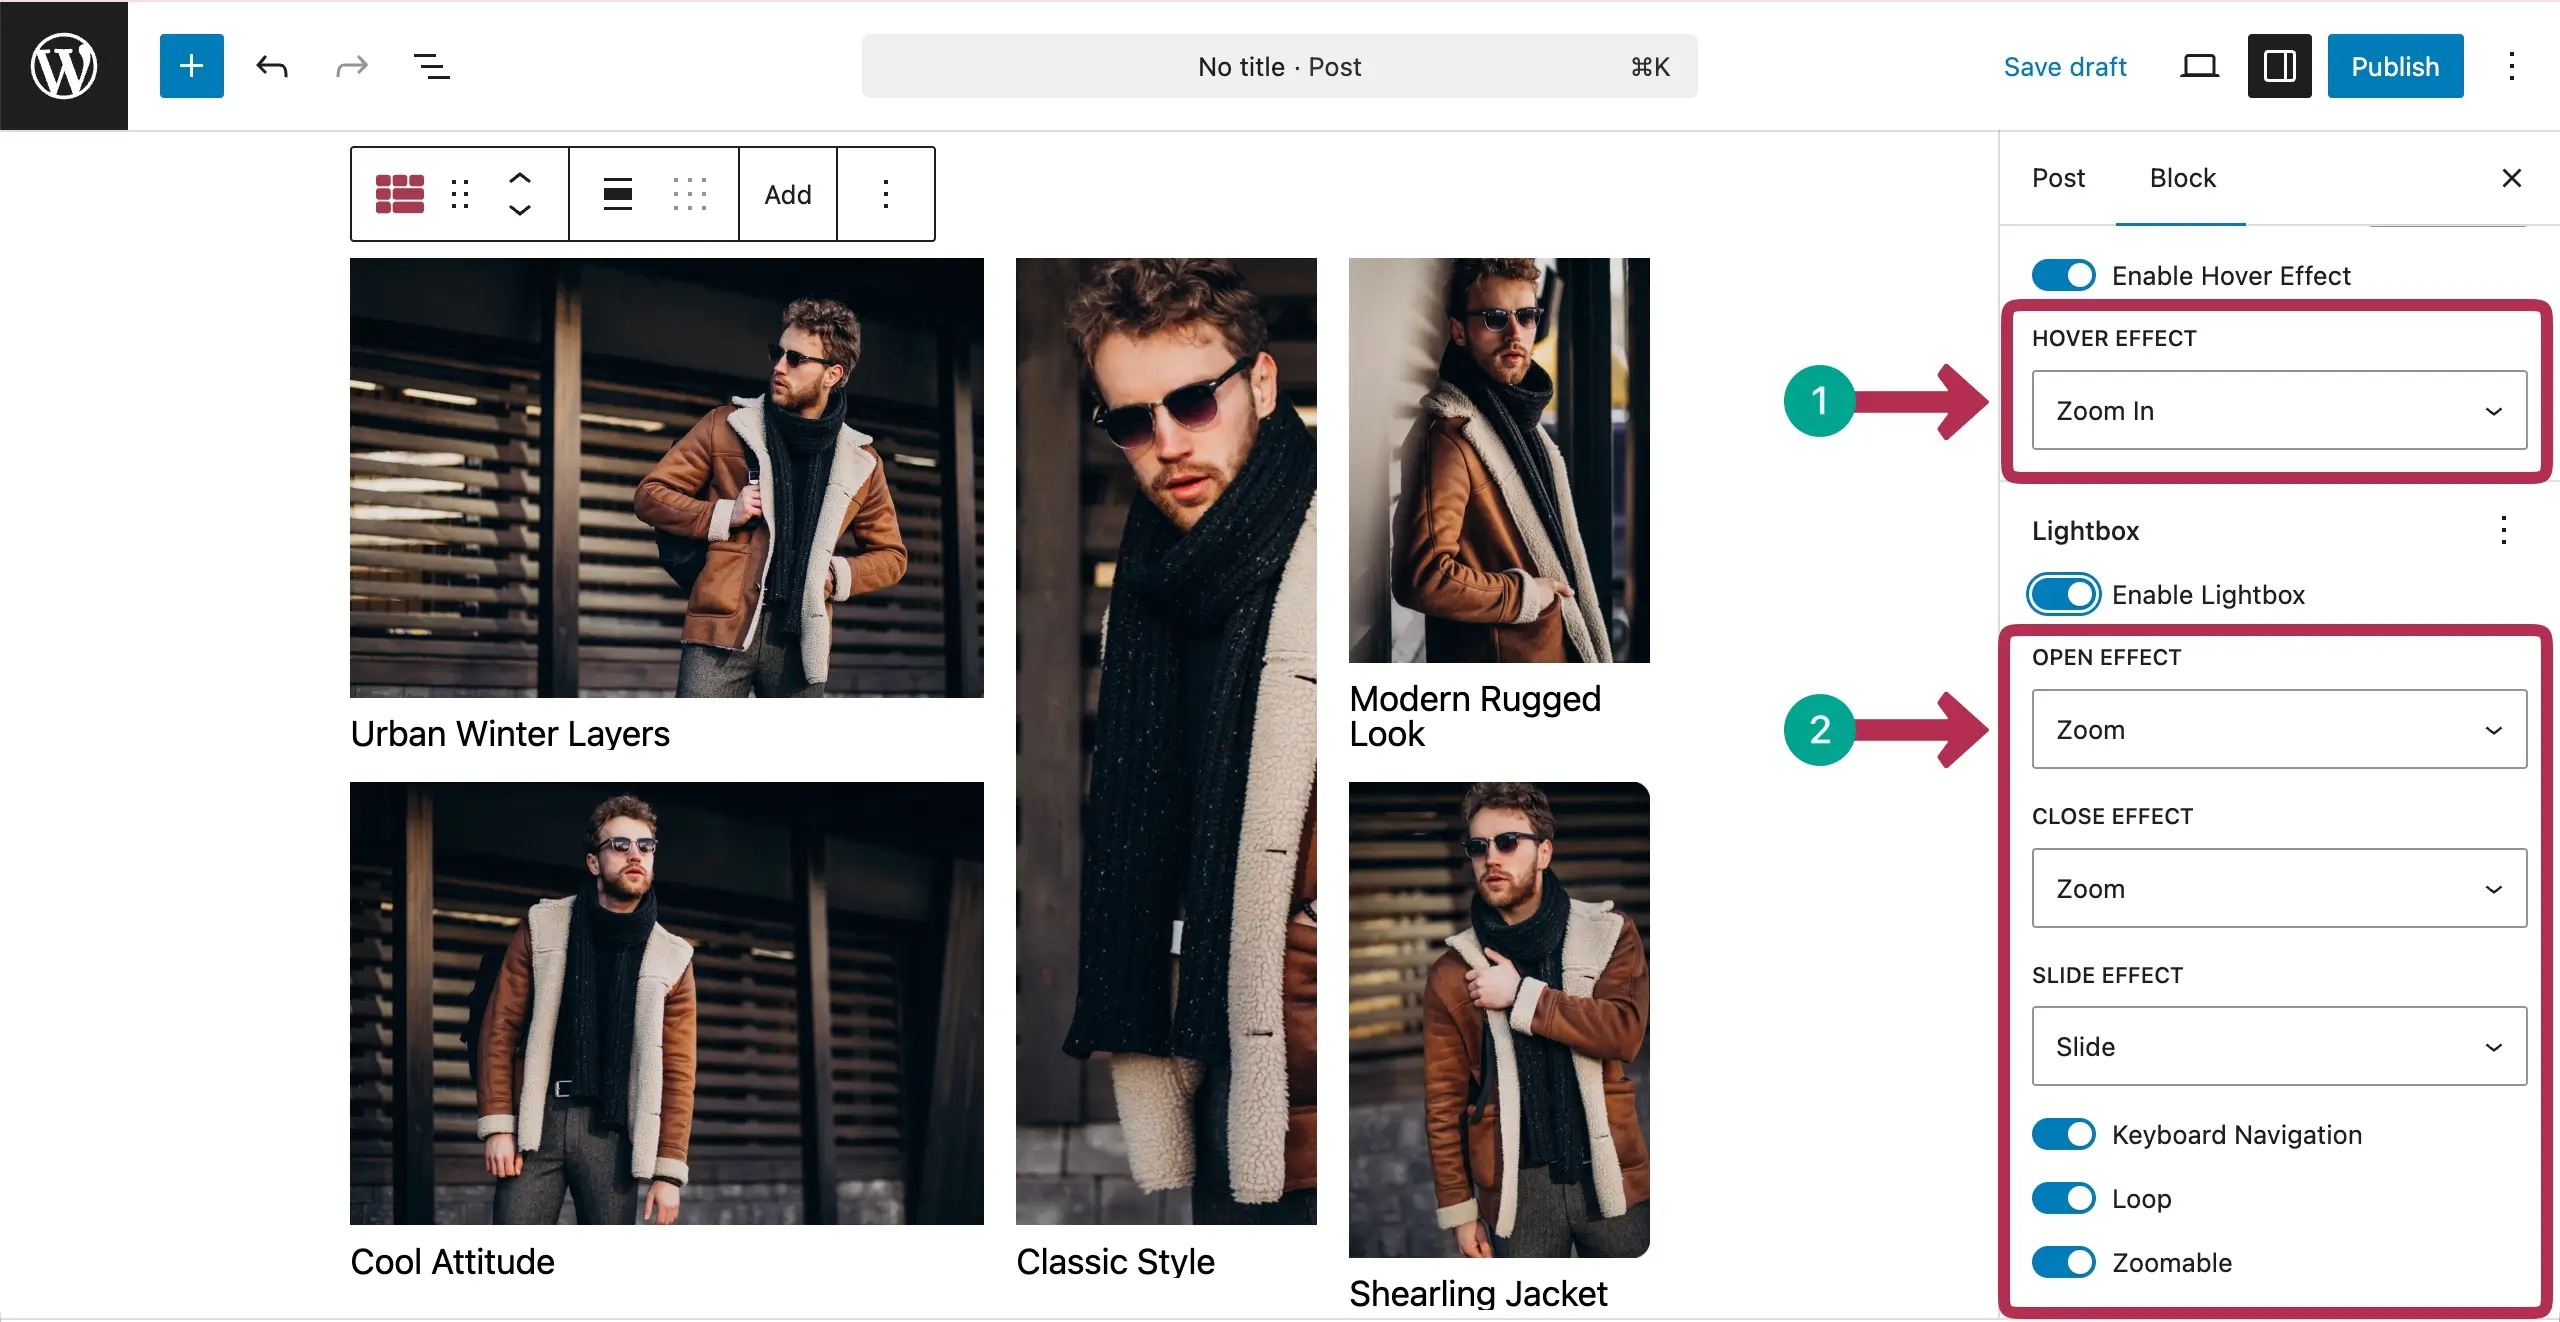
Step 07: Enable Hover Effect and Lightbox
Hope you already know what hover effect and lightbox are. They can create cinemetic experience in a lookbook-fashion style gallery. Just toggle on the marked options to enable them on the gallery.
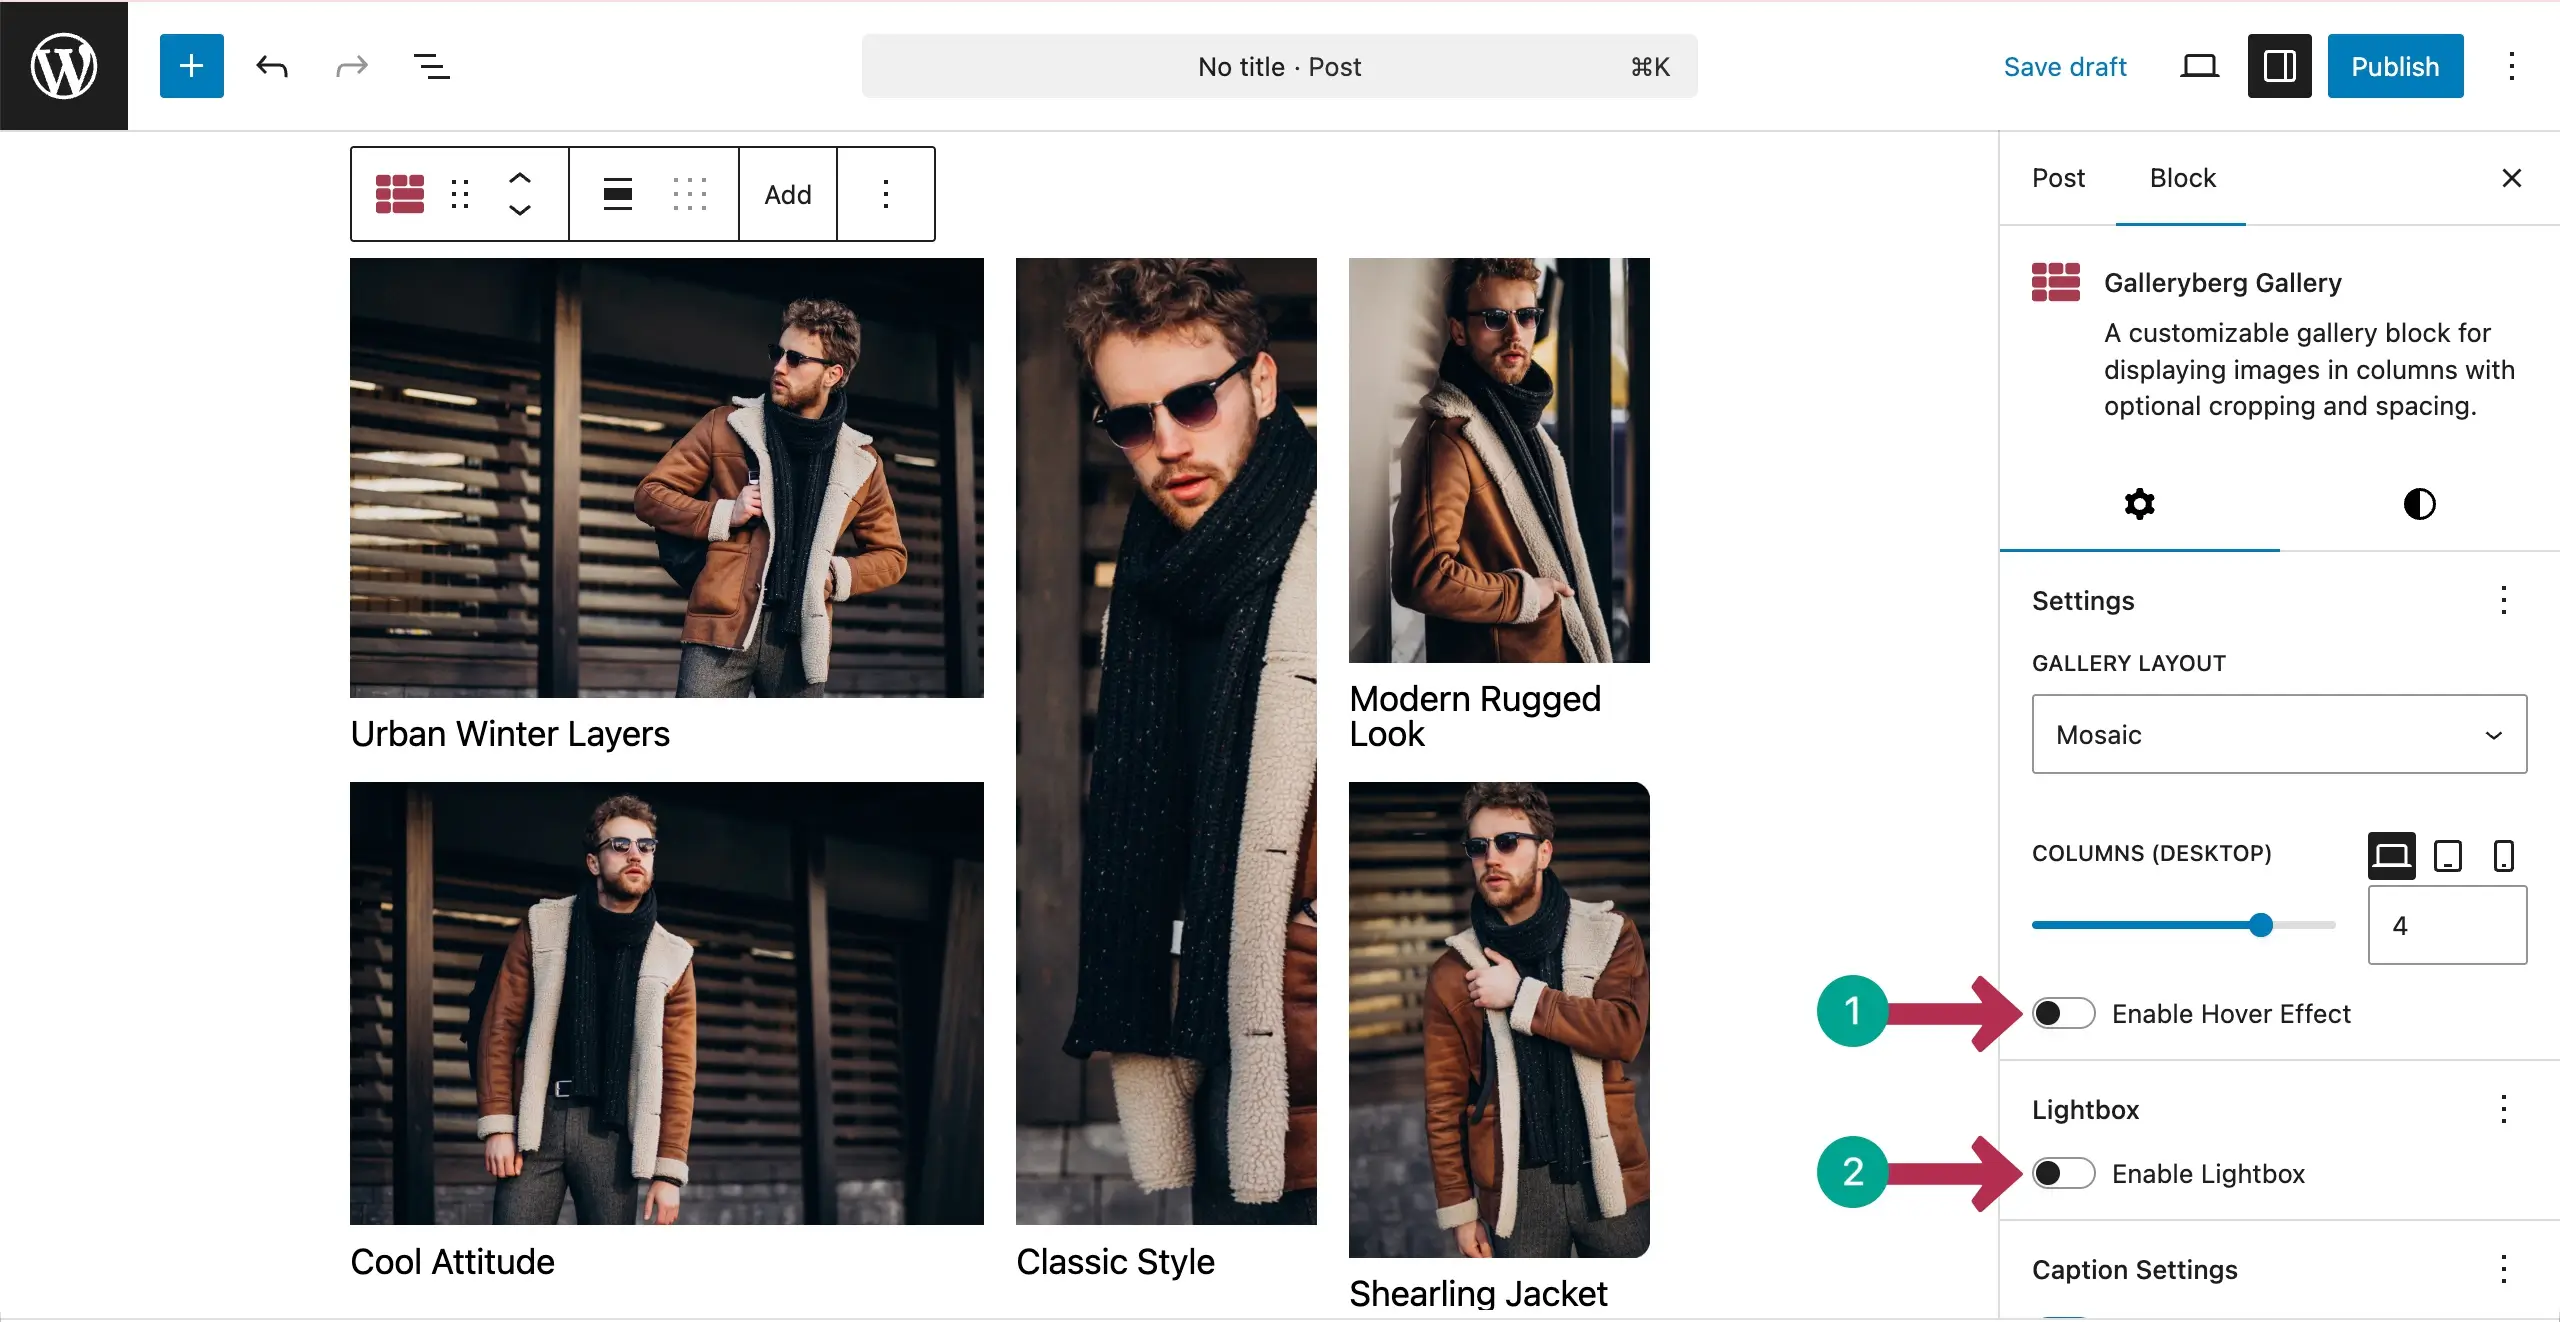
Once these options are enabled, some more options will appear. For example, you can define hove effect. Also, you can define various lightbox effect. Hope you can do these yourself alone.
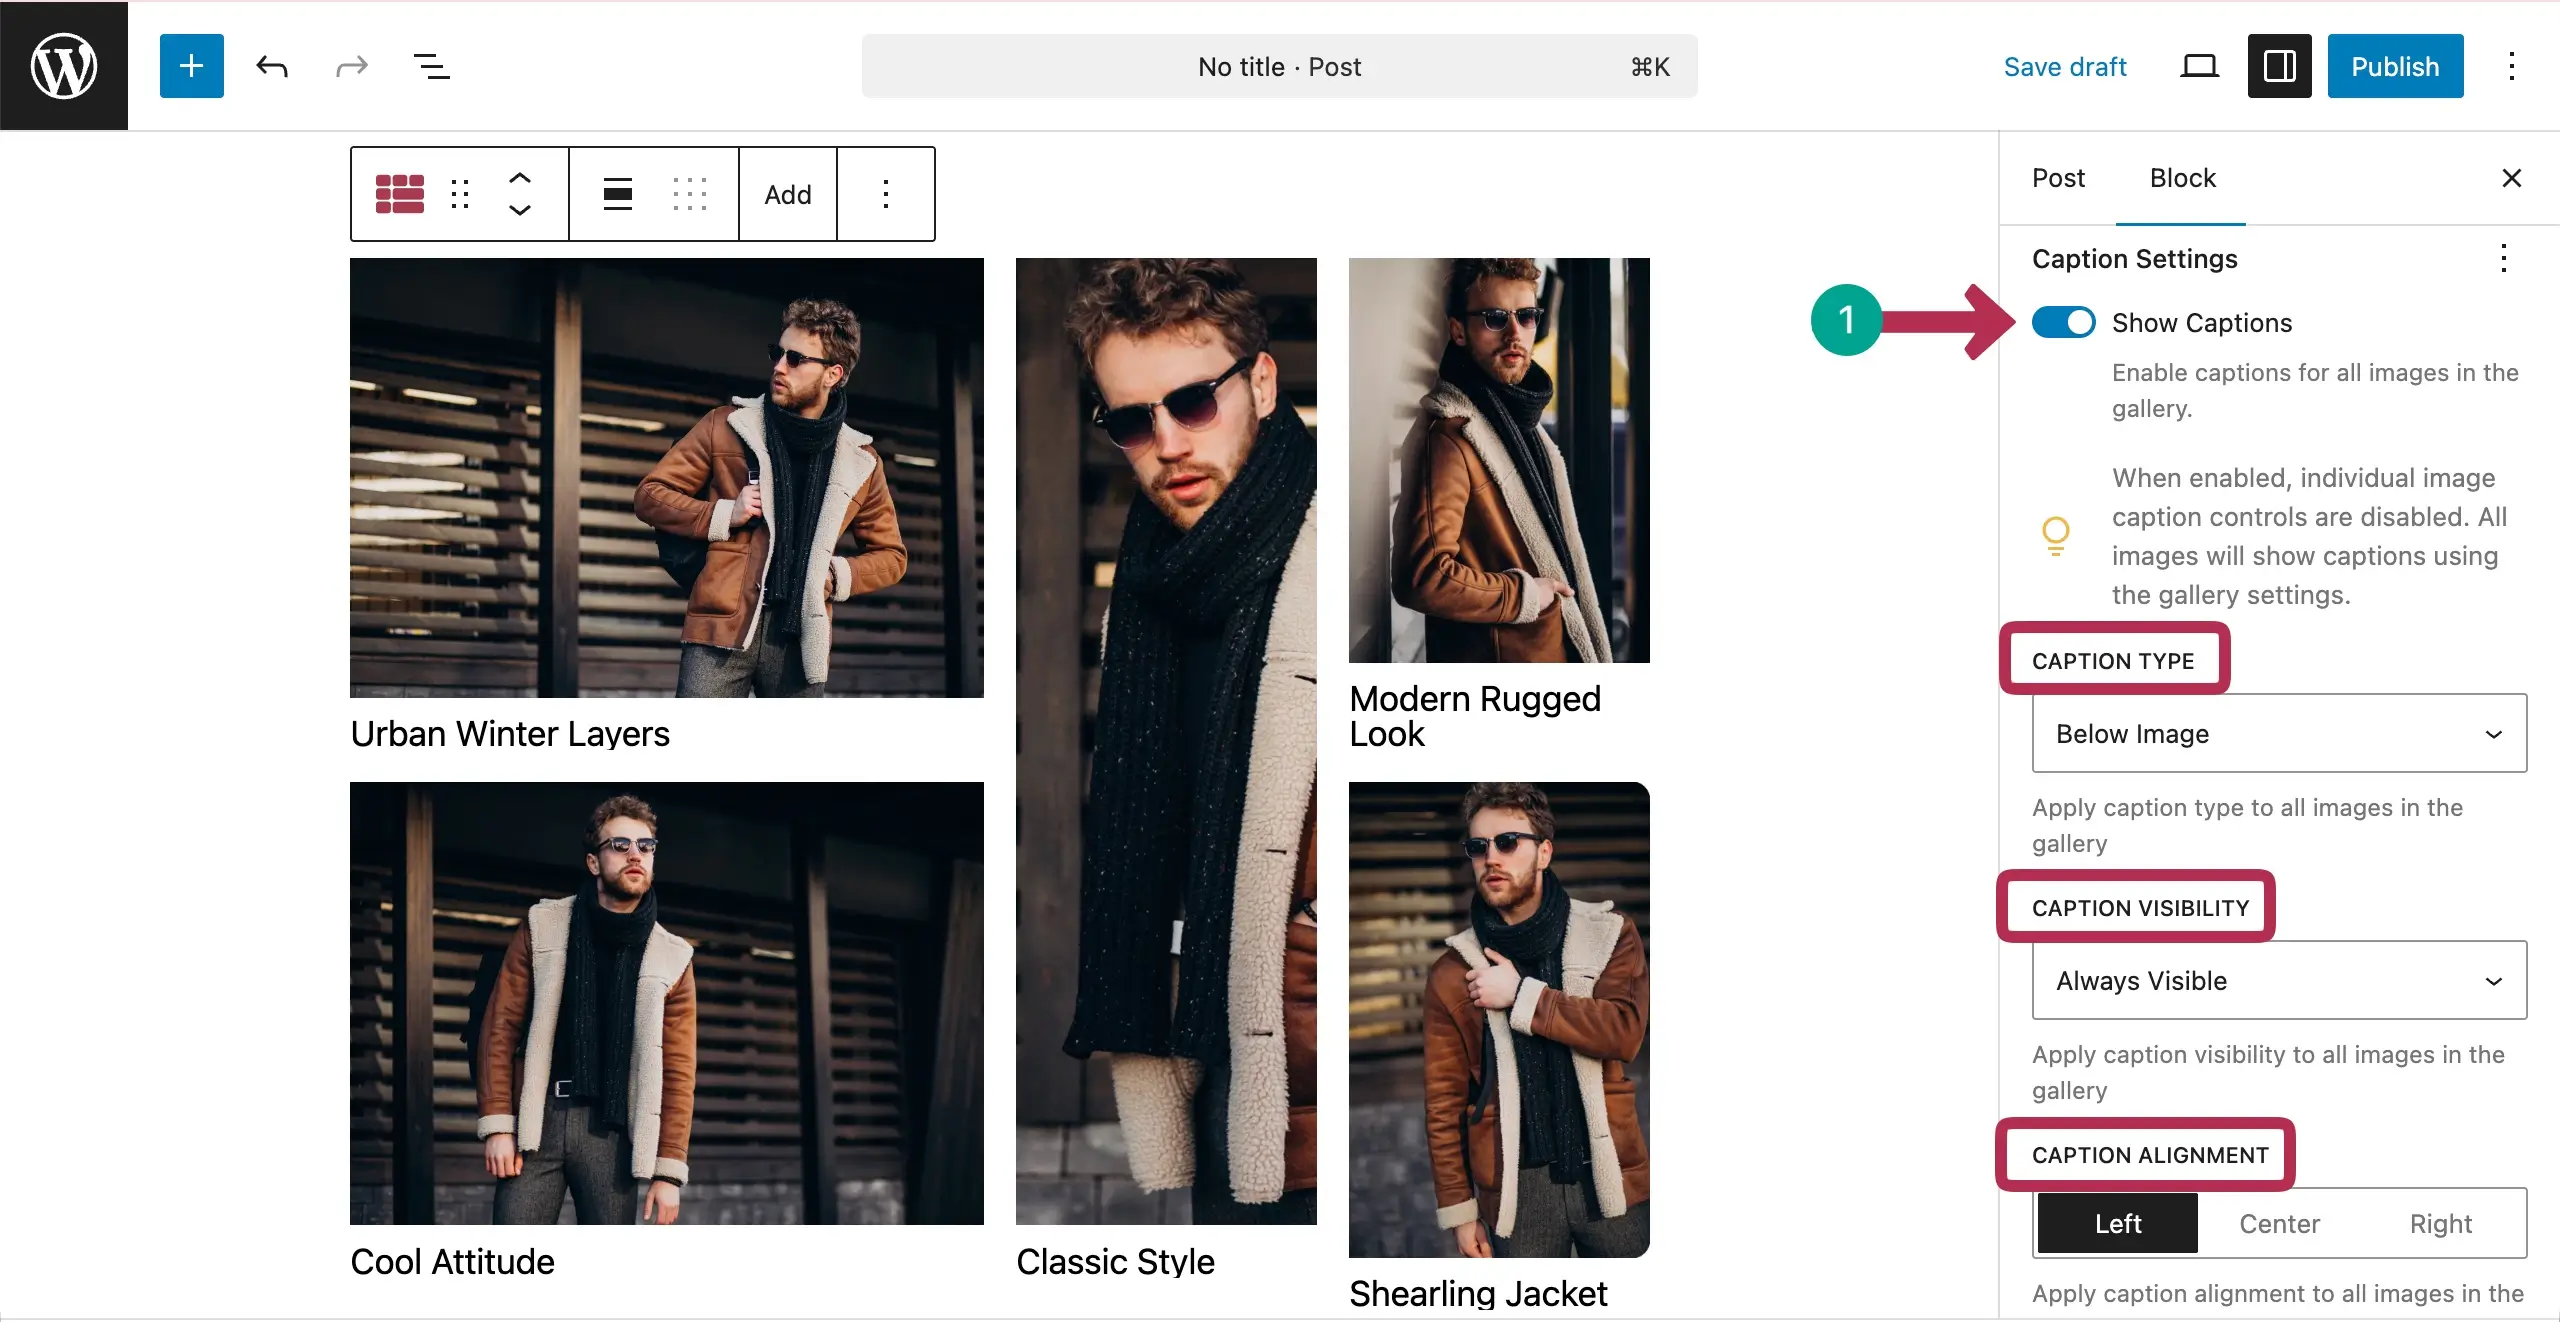
Step 08: Add Caption Settings
As already said, caption plays a crucial role in storytelling, define where you want to dispaly them. You can define the caption type, caption visibility, and alignment. Do these settings.
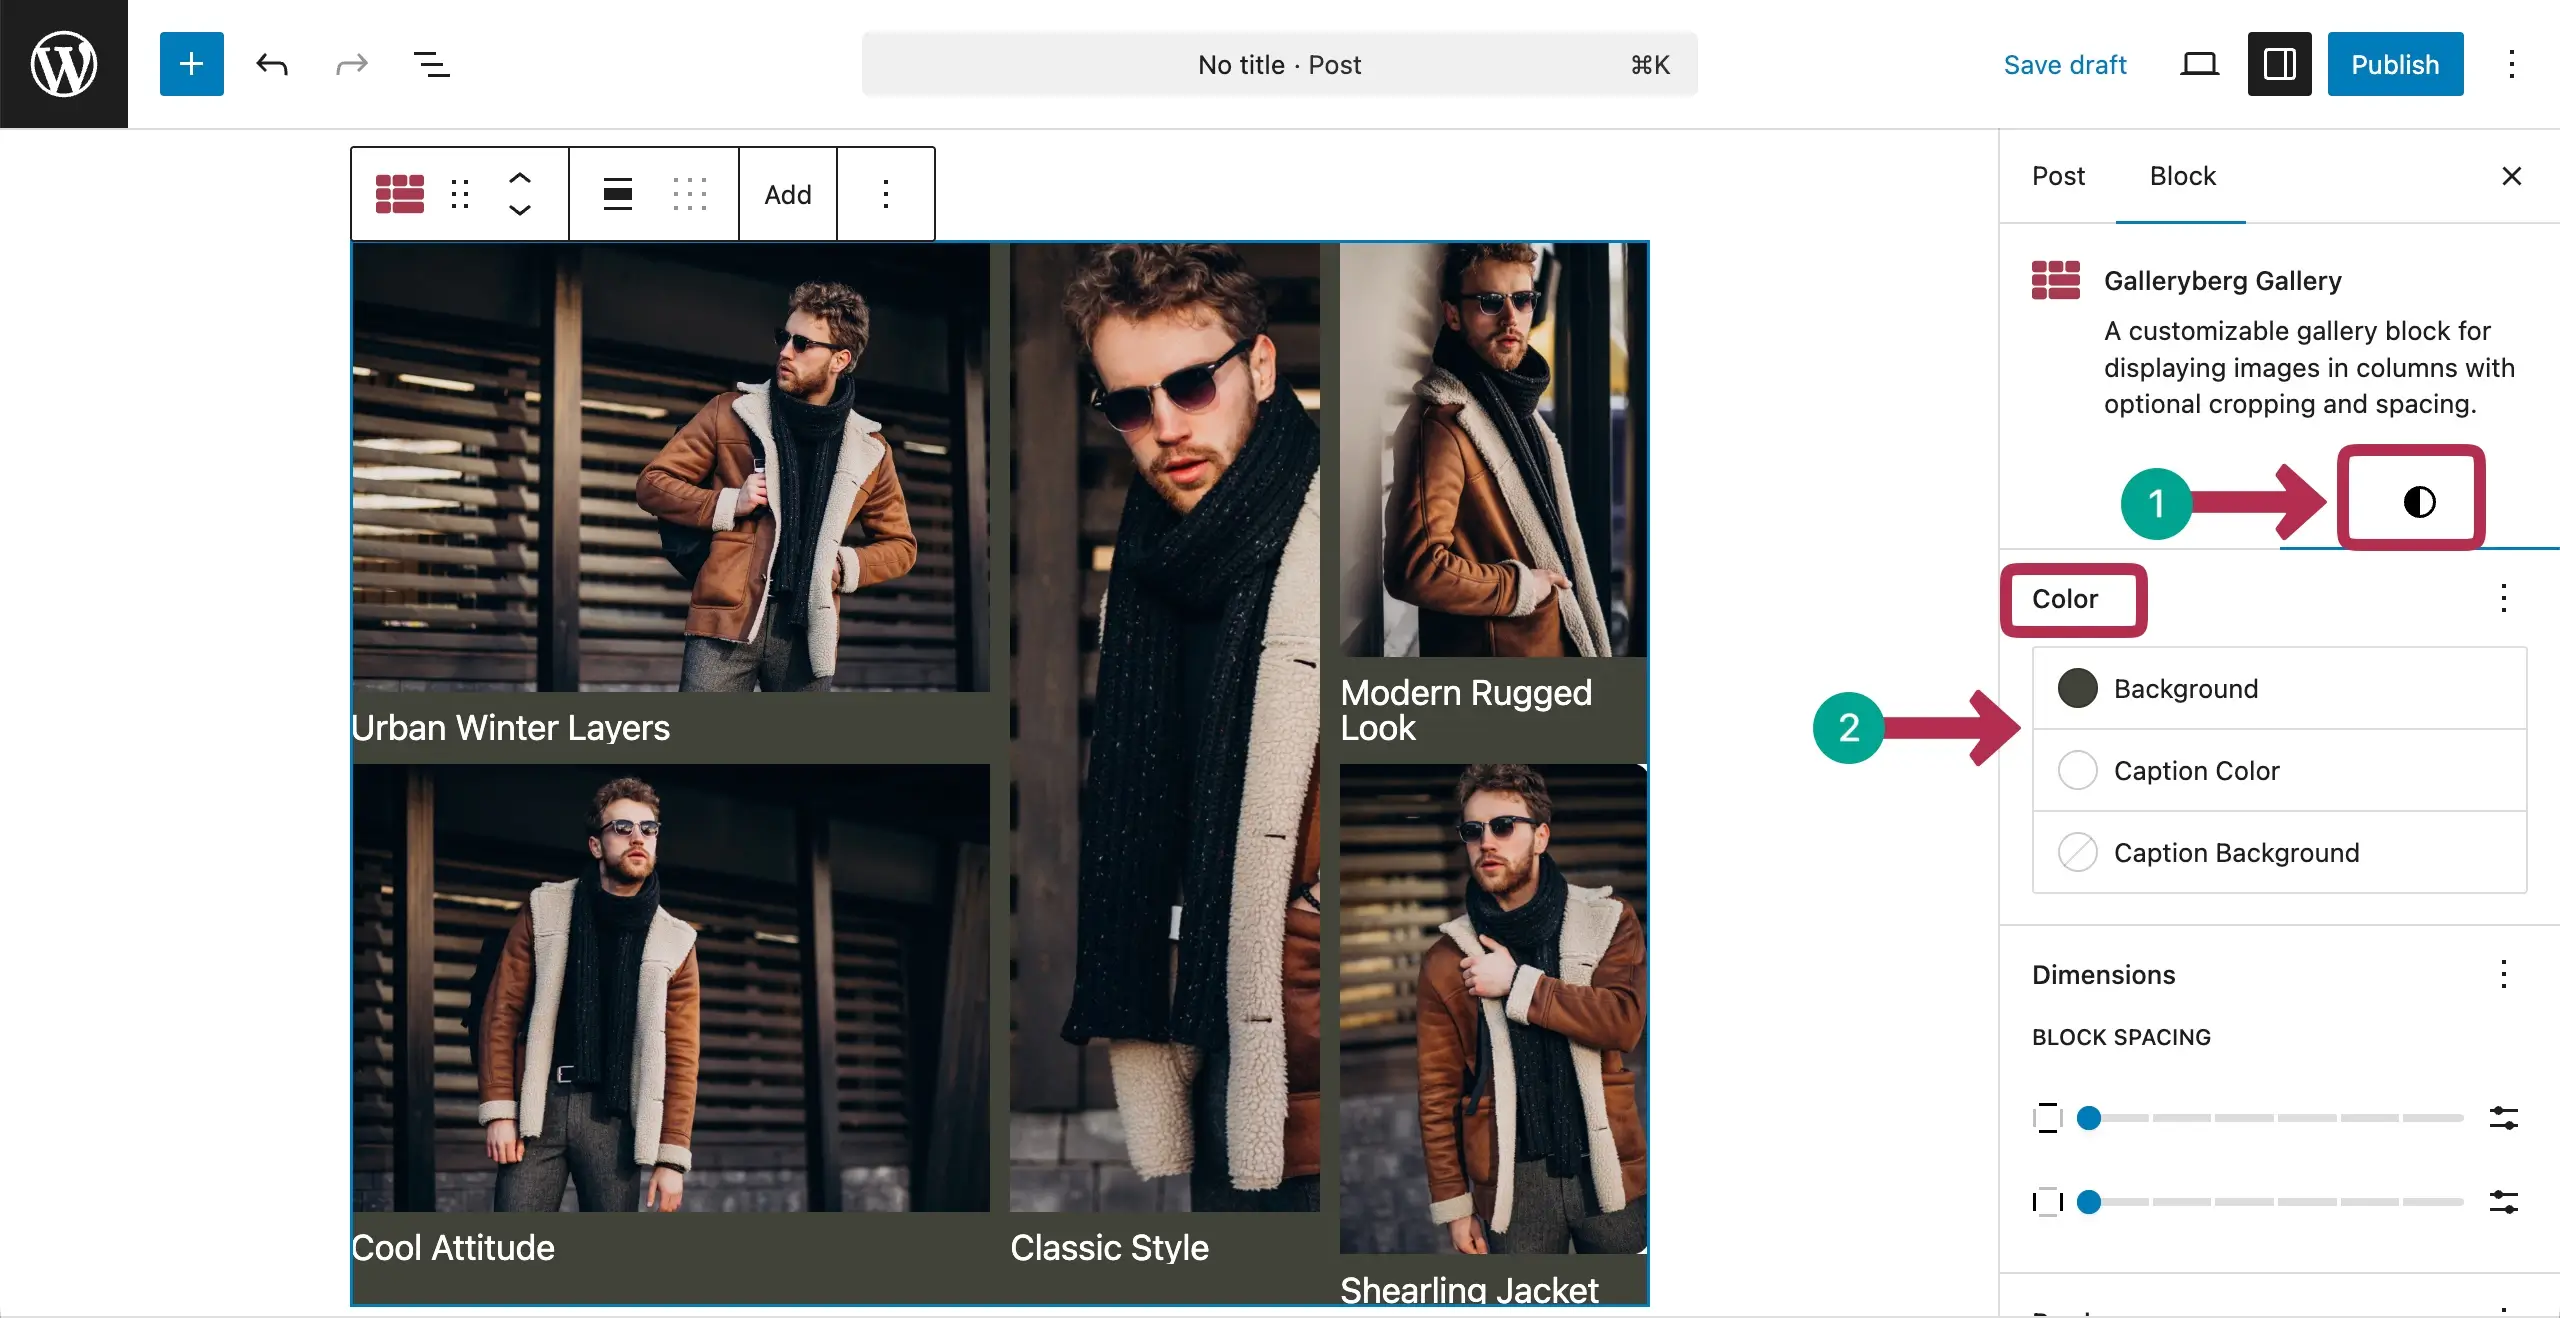
Step 09: Stylize the Lookbook-Fashion Gallery
Come to the Styles tab. From the color section, you can set a background color, caption color, and caption background color. For this tutorial, we have set a background color and caption color.
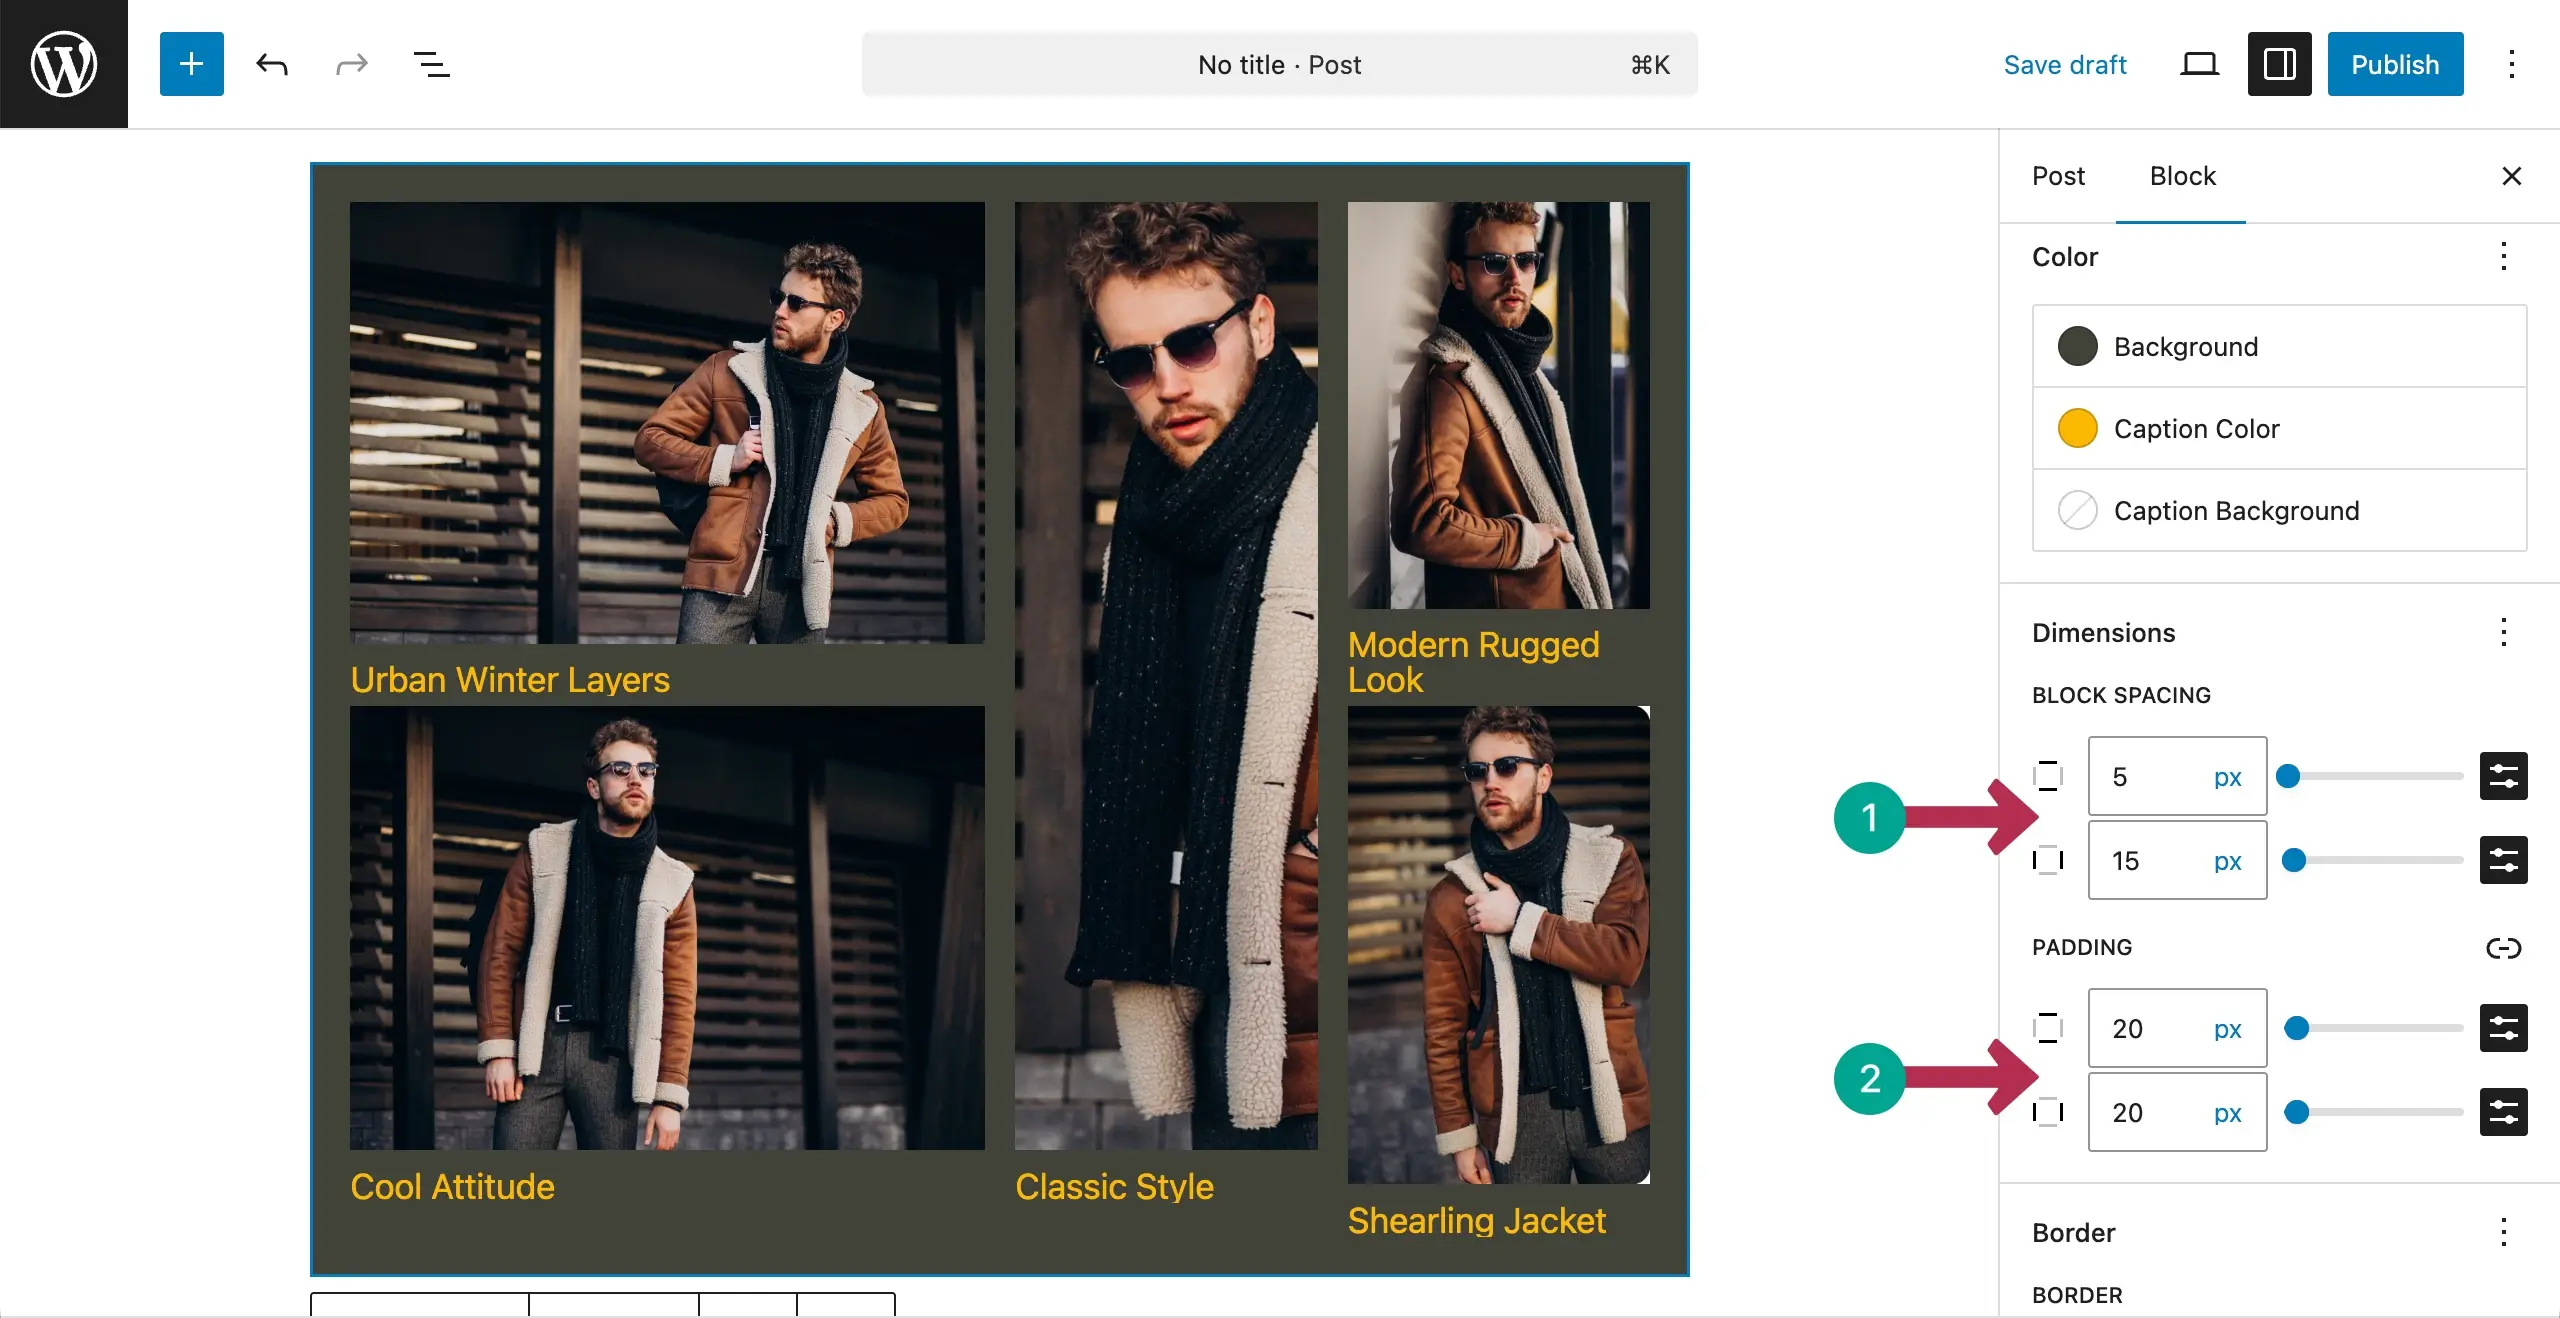
Step 10: Add Block Spacing and Padding
By default, the Padding and Margin options aren’t shown under the Styles tab. To enable them, click the three-dot icon. A box will show up. Click the options you want to enable. For example, we’ve choose the Block Spacing and Padding options.
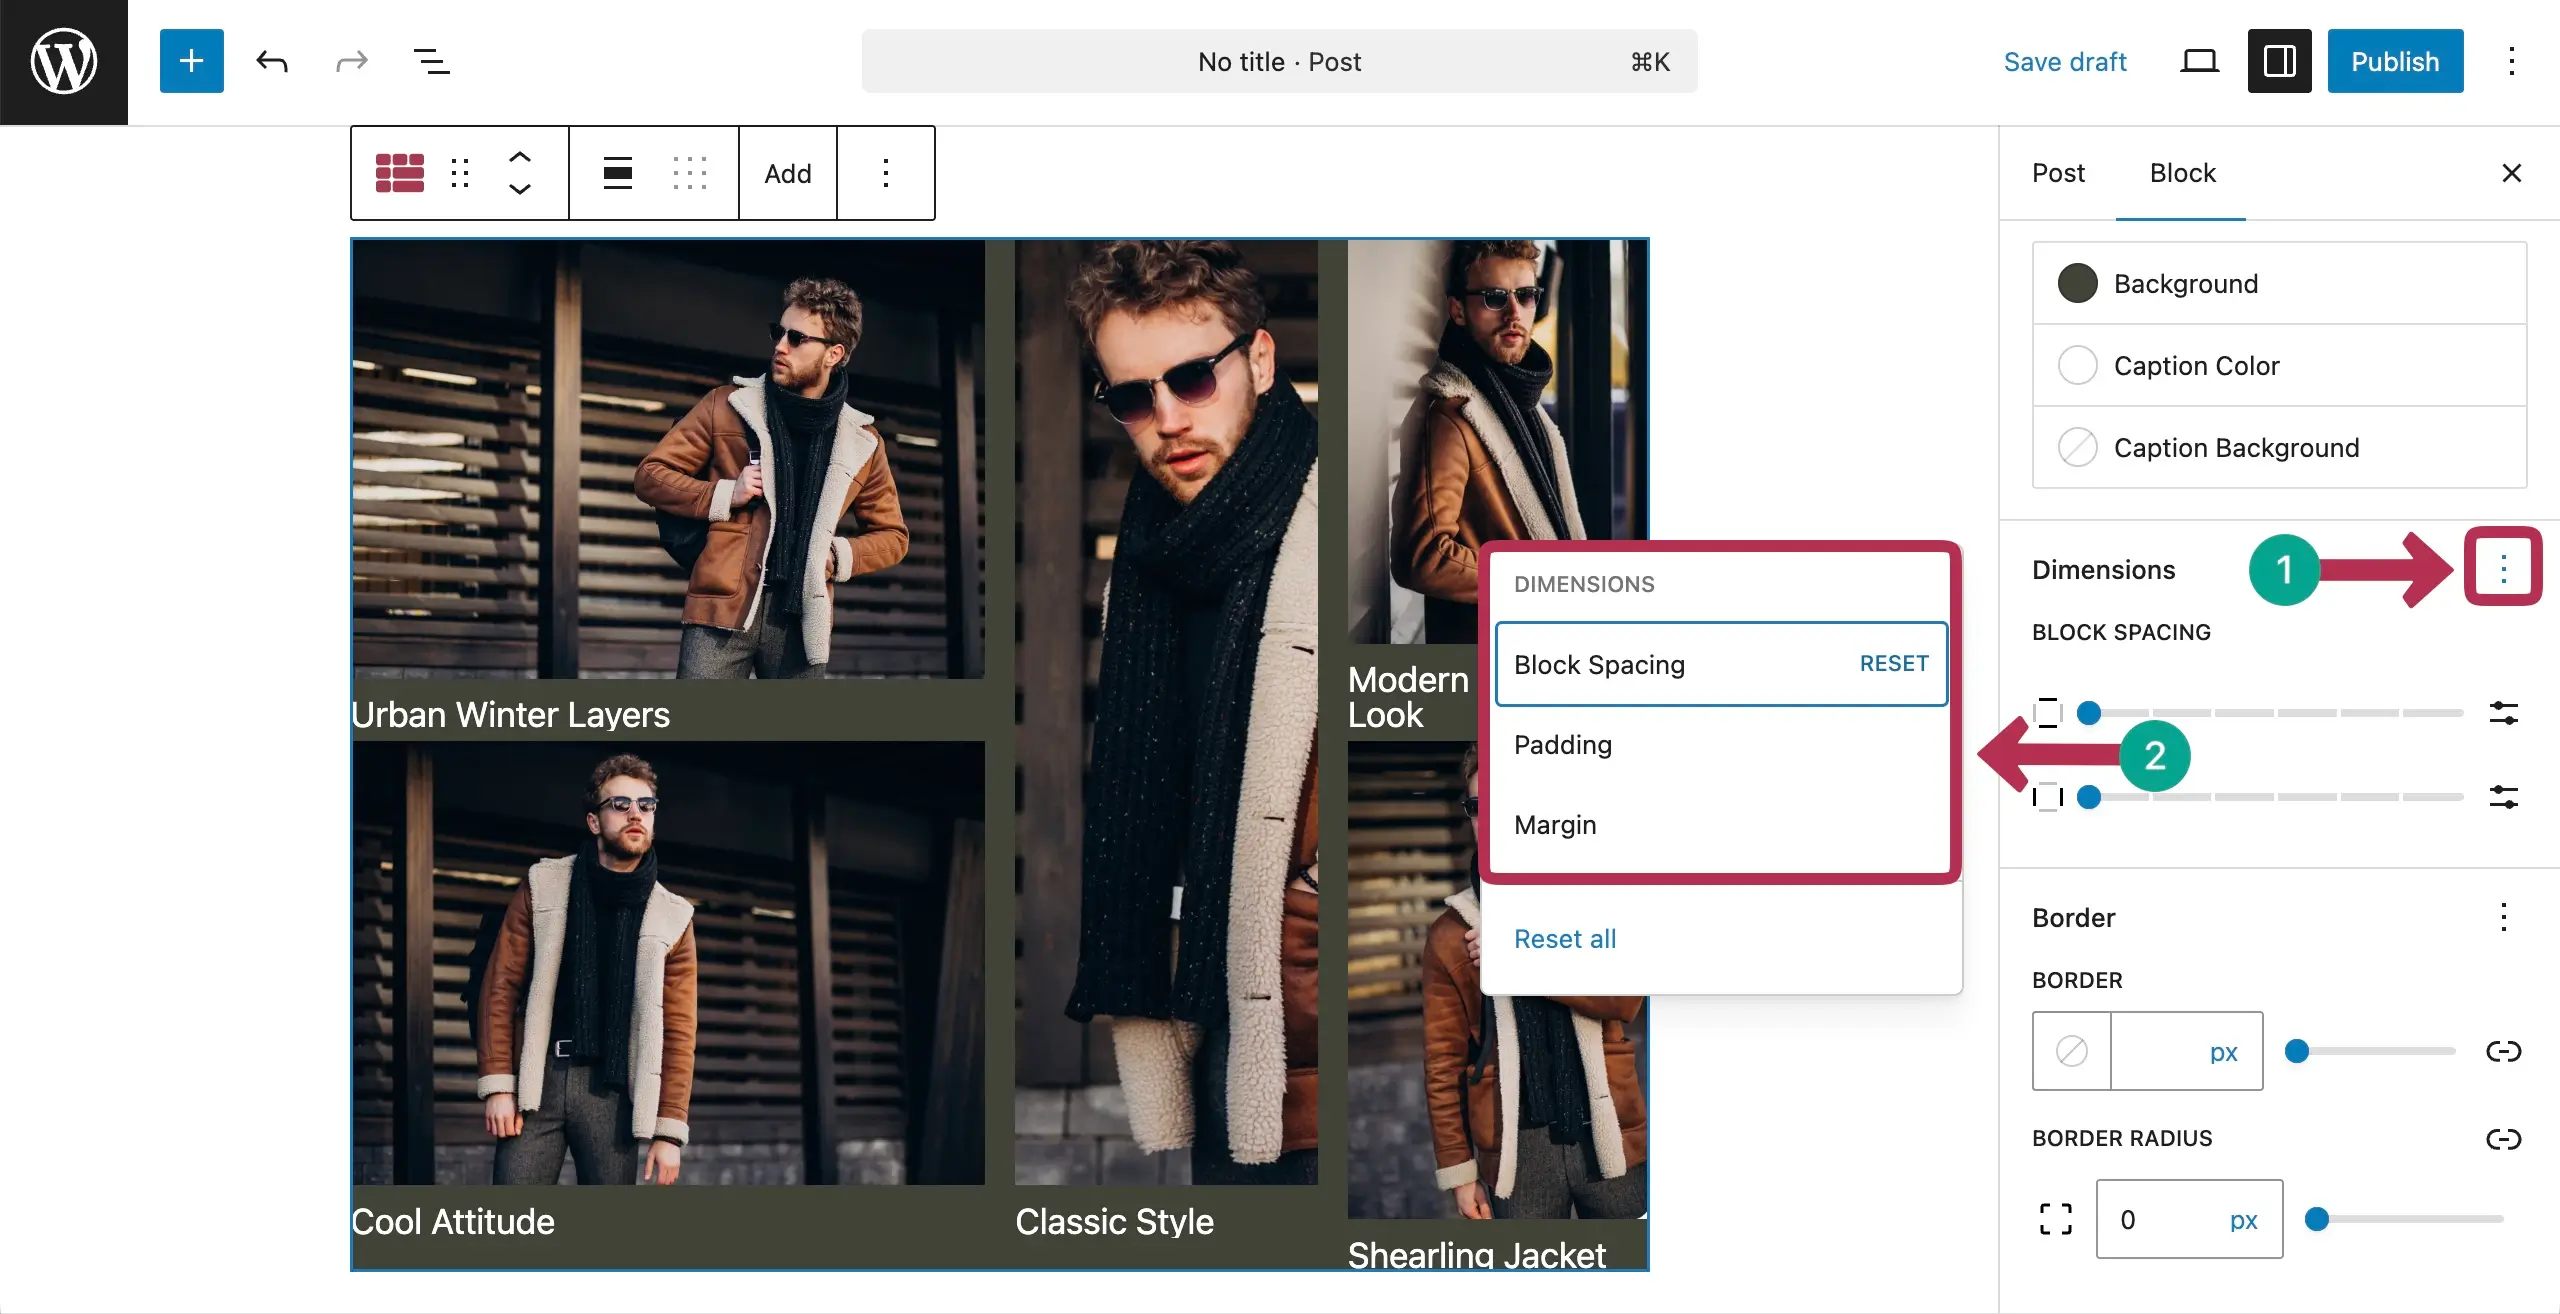
Now, place values to define block spacing and padding for the gallery.
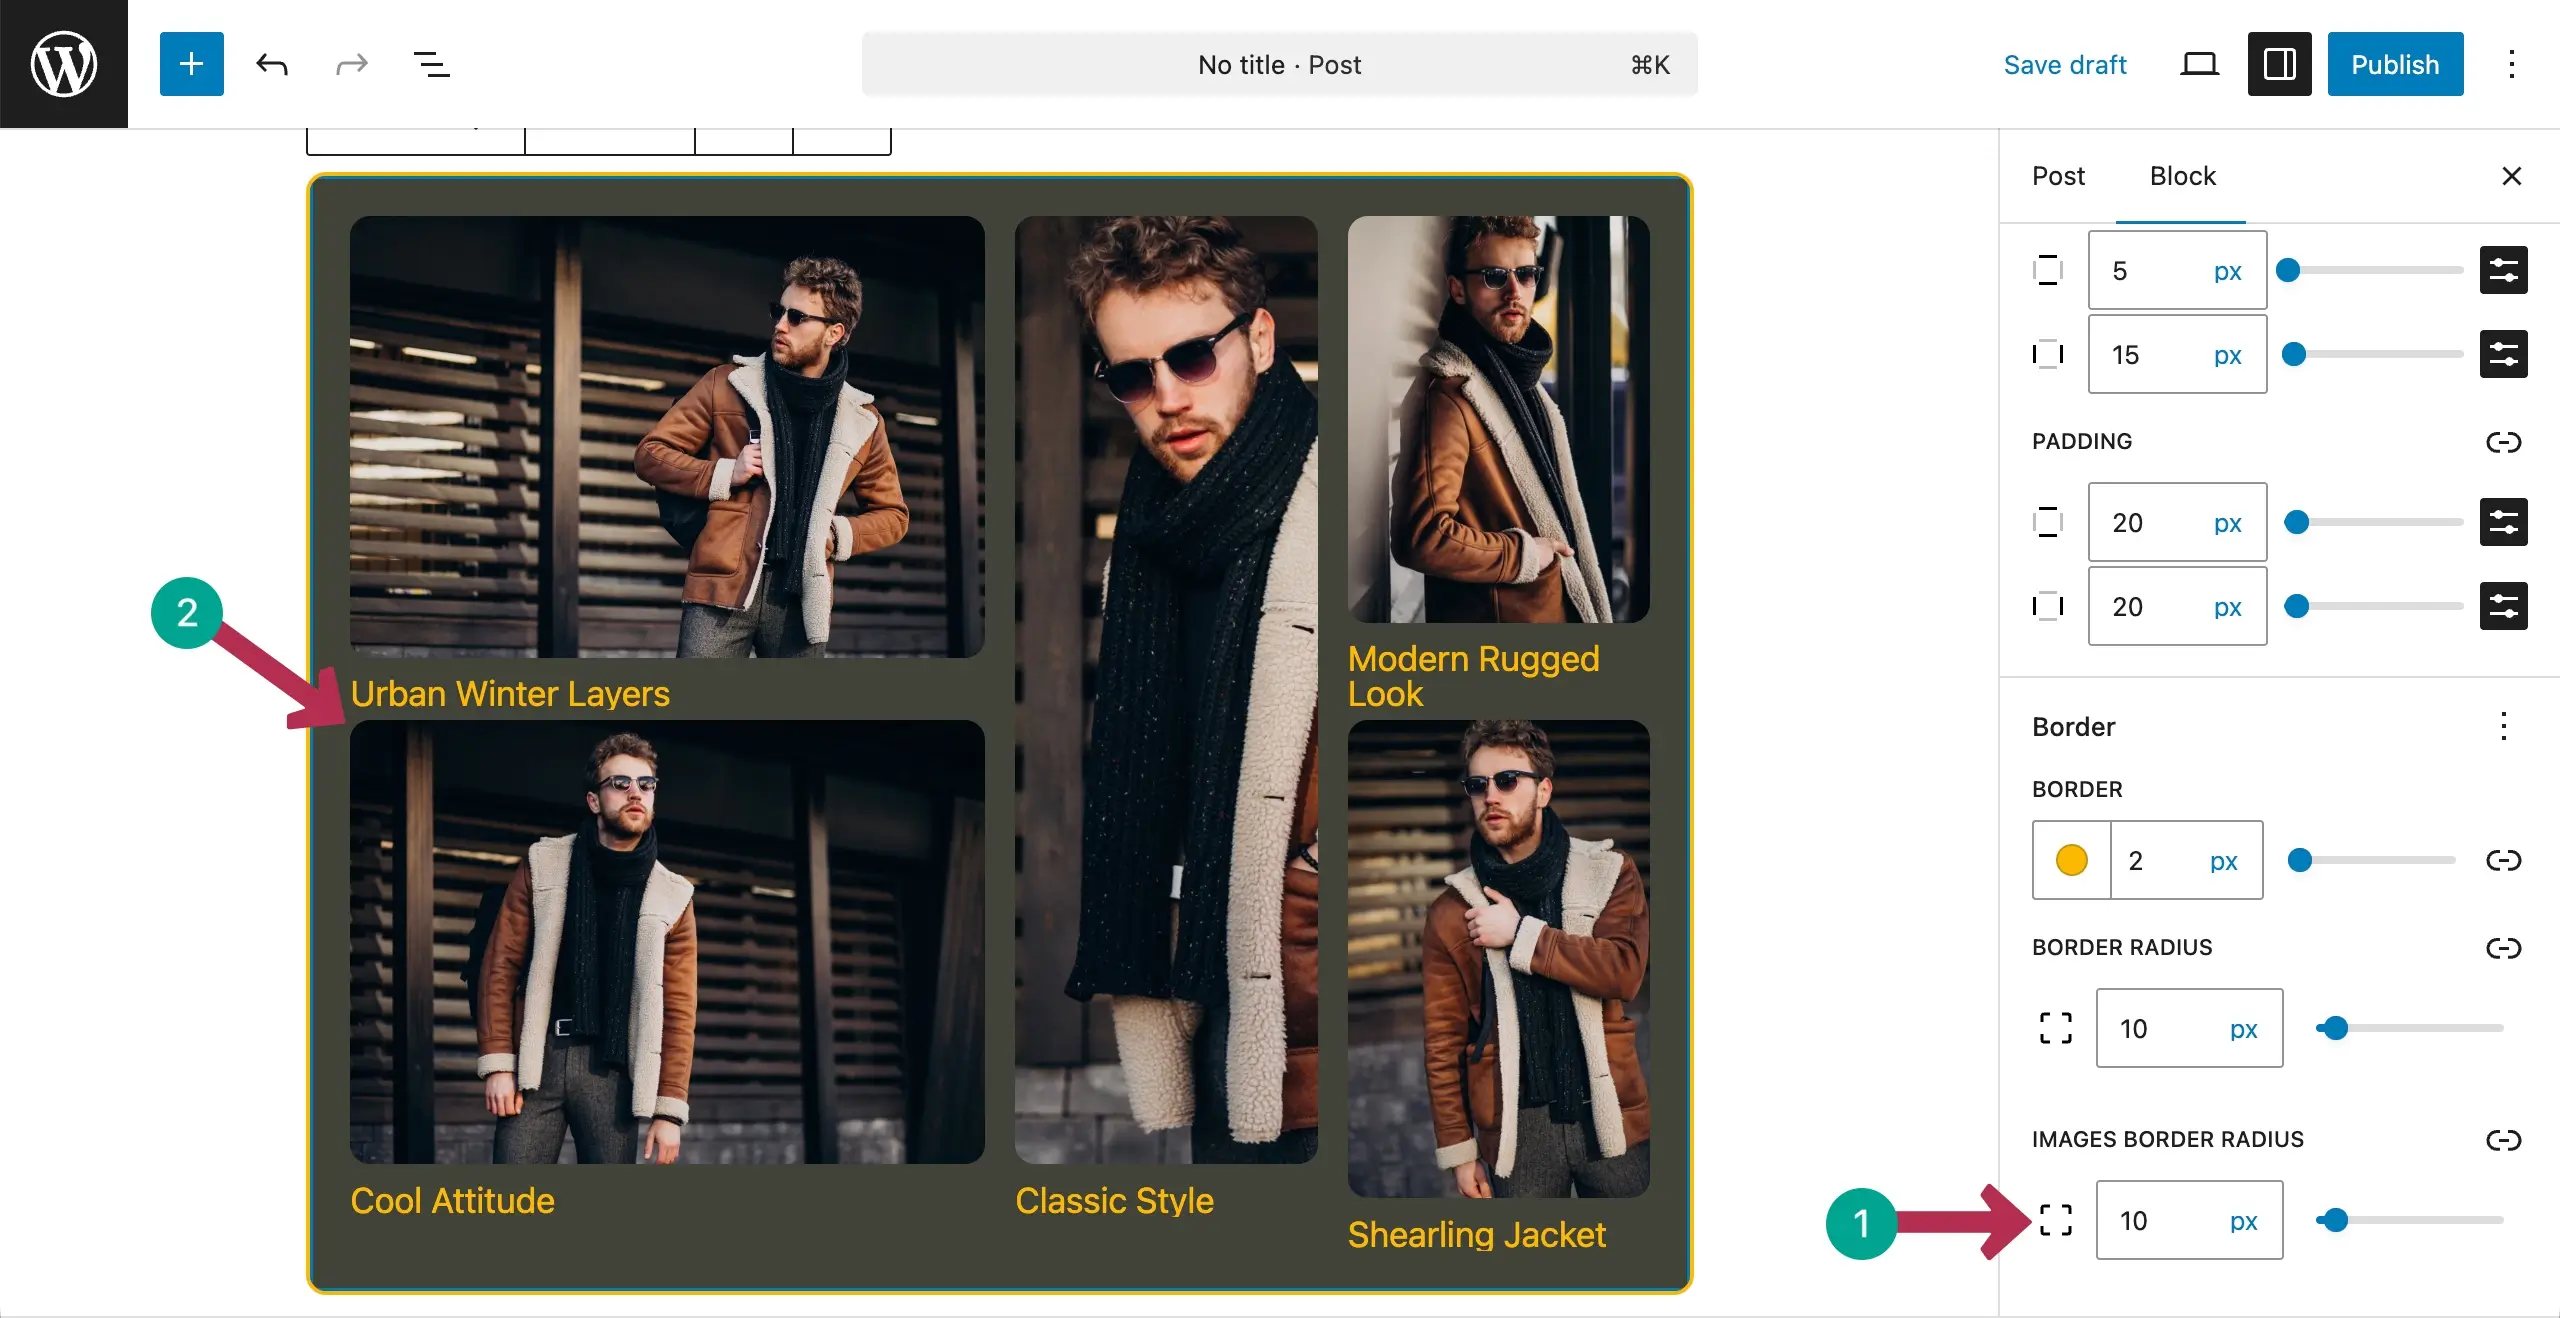
Step 11: Add a Border and Radius
Finally, by adding a border, border color, and radius, you can add an aesthetic value to the gallery.
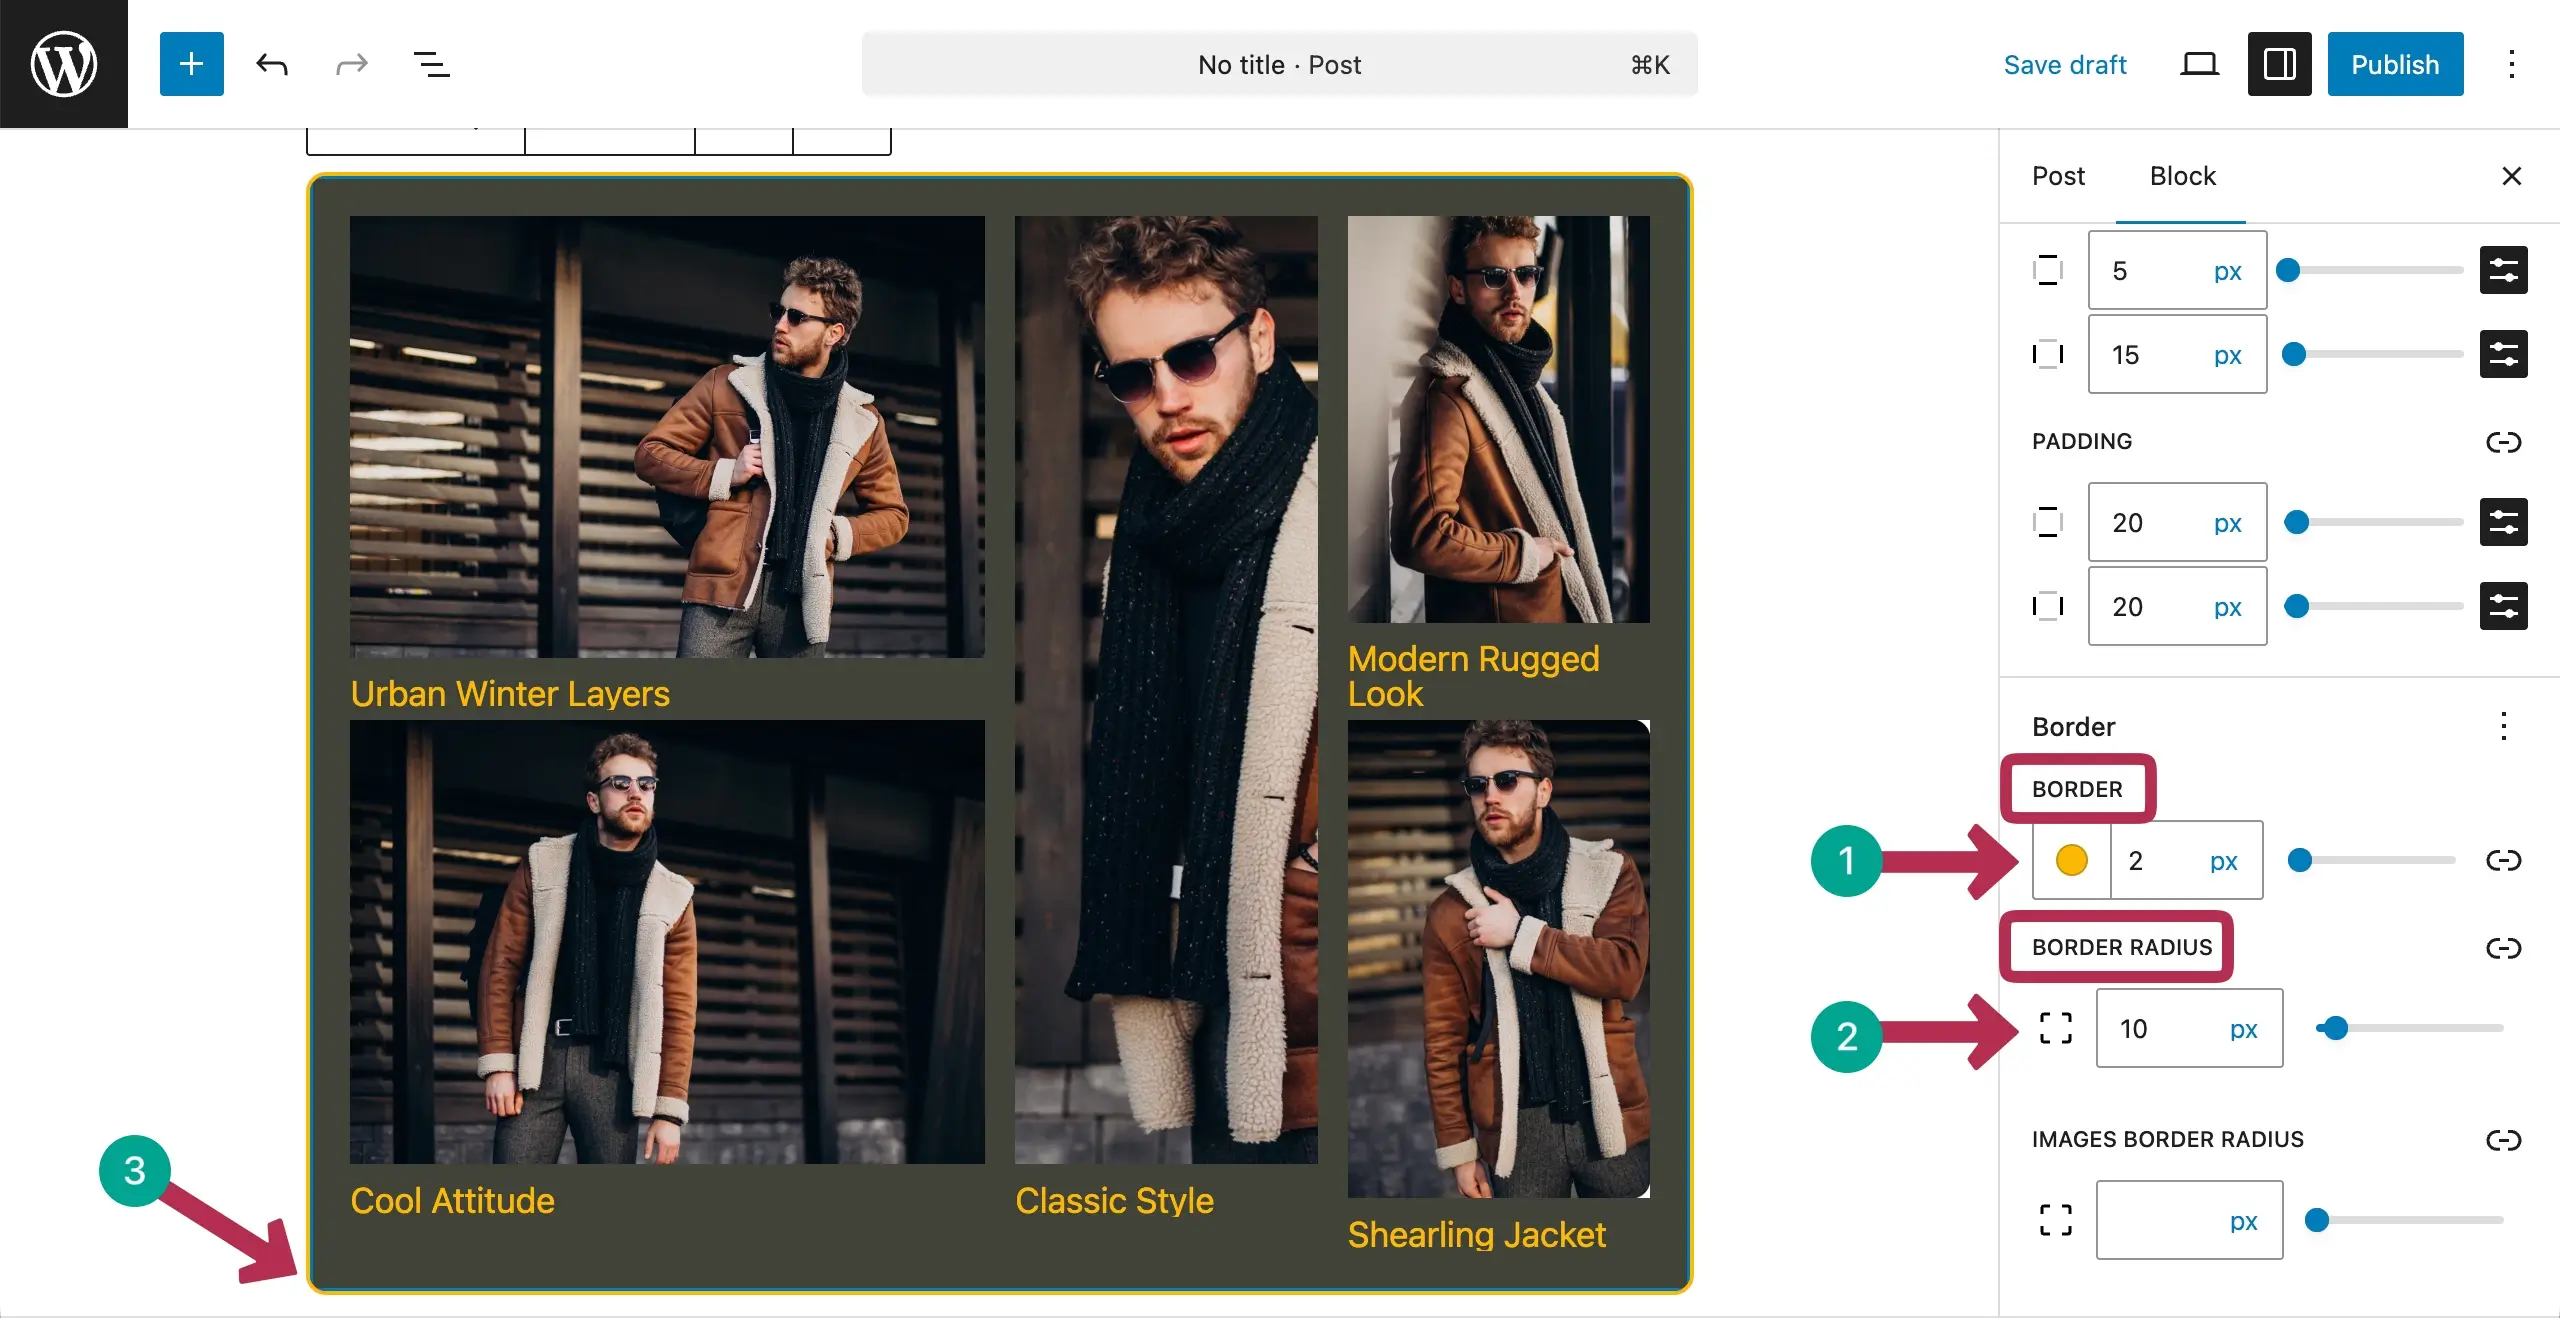
You can even add a radius to the images in the gallery by using the option marked in the screenshot below.
Thus, you can create a lookbook-style fashion gallery in quite easily following this guide covered above.
Final Words!
Finally, creating a lookbook-style fashion gallery is a smart way to show your fashion ideas with style and confidence. A well-designed lookbook makes visitors stop, scroll, and explore. It also helps them connect with your fashion in a more emotional way.
With the Galleryberg plugin, creating such galleries have become super easy today. If you want your fashion content to look modern and professional, now is the right time to create a lookbook gallery and bring your style vision to life.
If you have any question regarding today’s topic, mention in the comment box below. Explore the best YouTube video gallery WordPress plugins.
Leave a Reply