The lightbox thumbnails strip shows small preview images below or beside the main image in WordPress galleries. It helps users move quickly between images. This feature improves navigation, saves time, and makes large galleries easier to explore.
The following gallery has been created with the Galleryberg plugin.

Now, we’ll show you how to enable Lightbox thumbnails in the gallery.
Enabling Lightbox Thumbnail Navigation #
Select the entire gallery by clicking the Galleryberg icon.
Go to the Settings tab and enable lightbox.
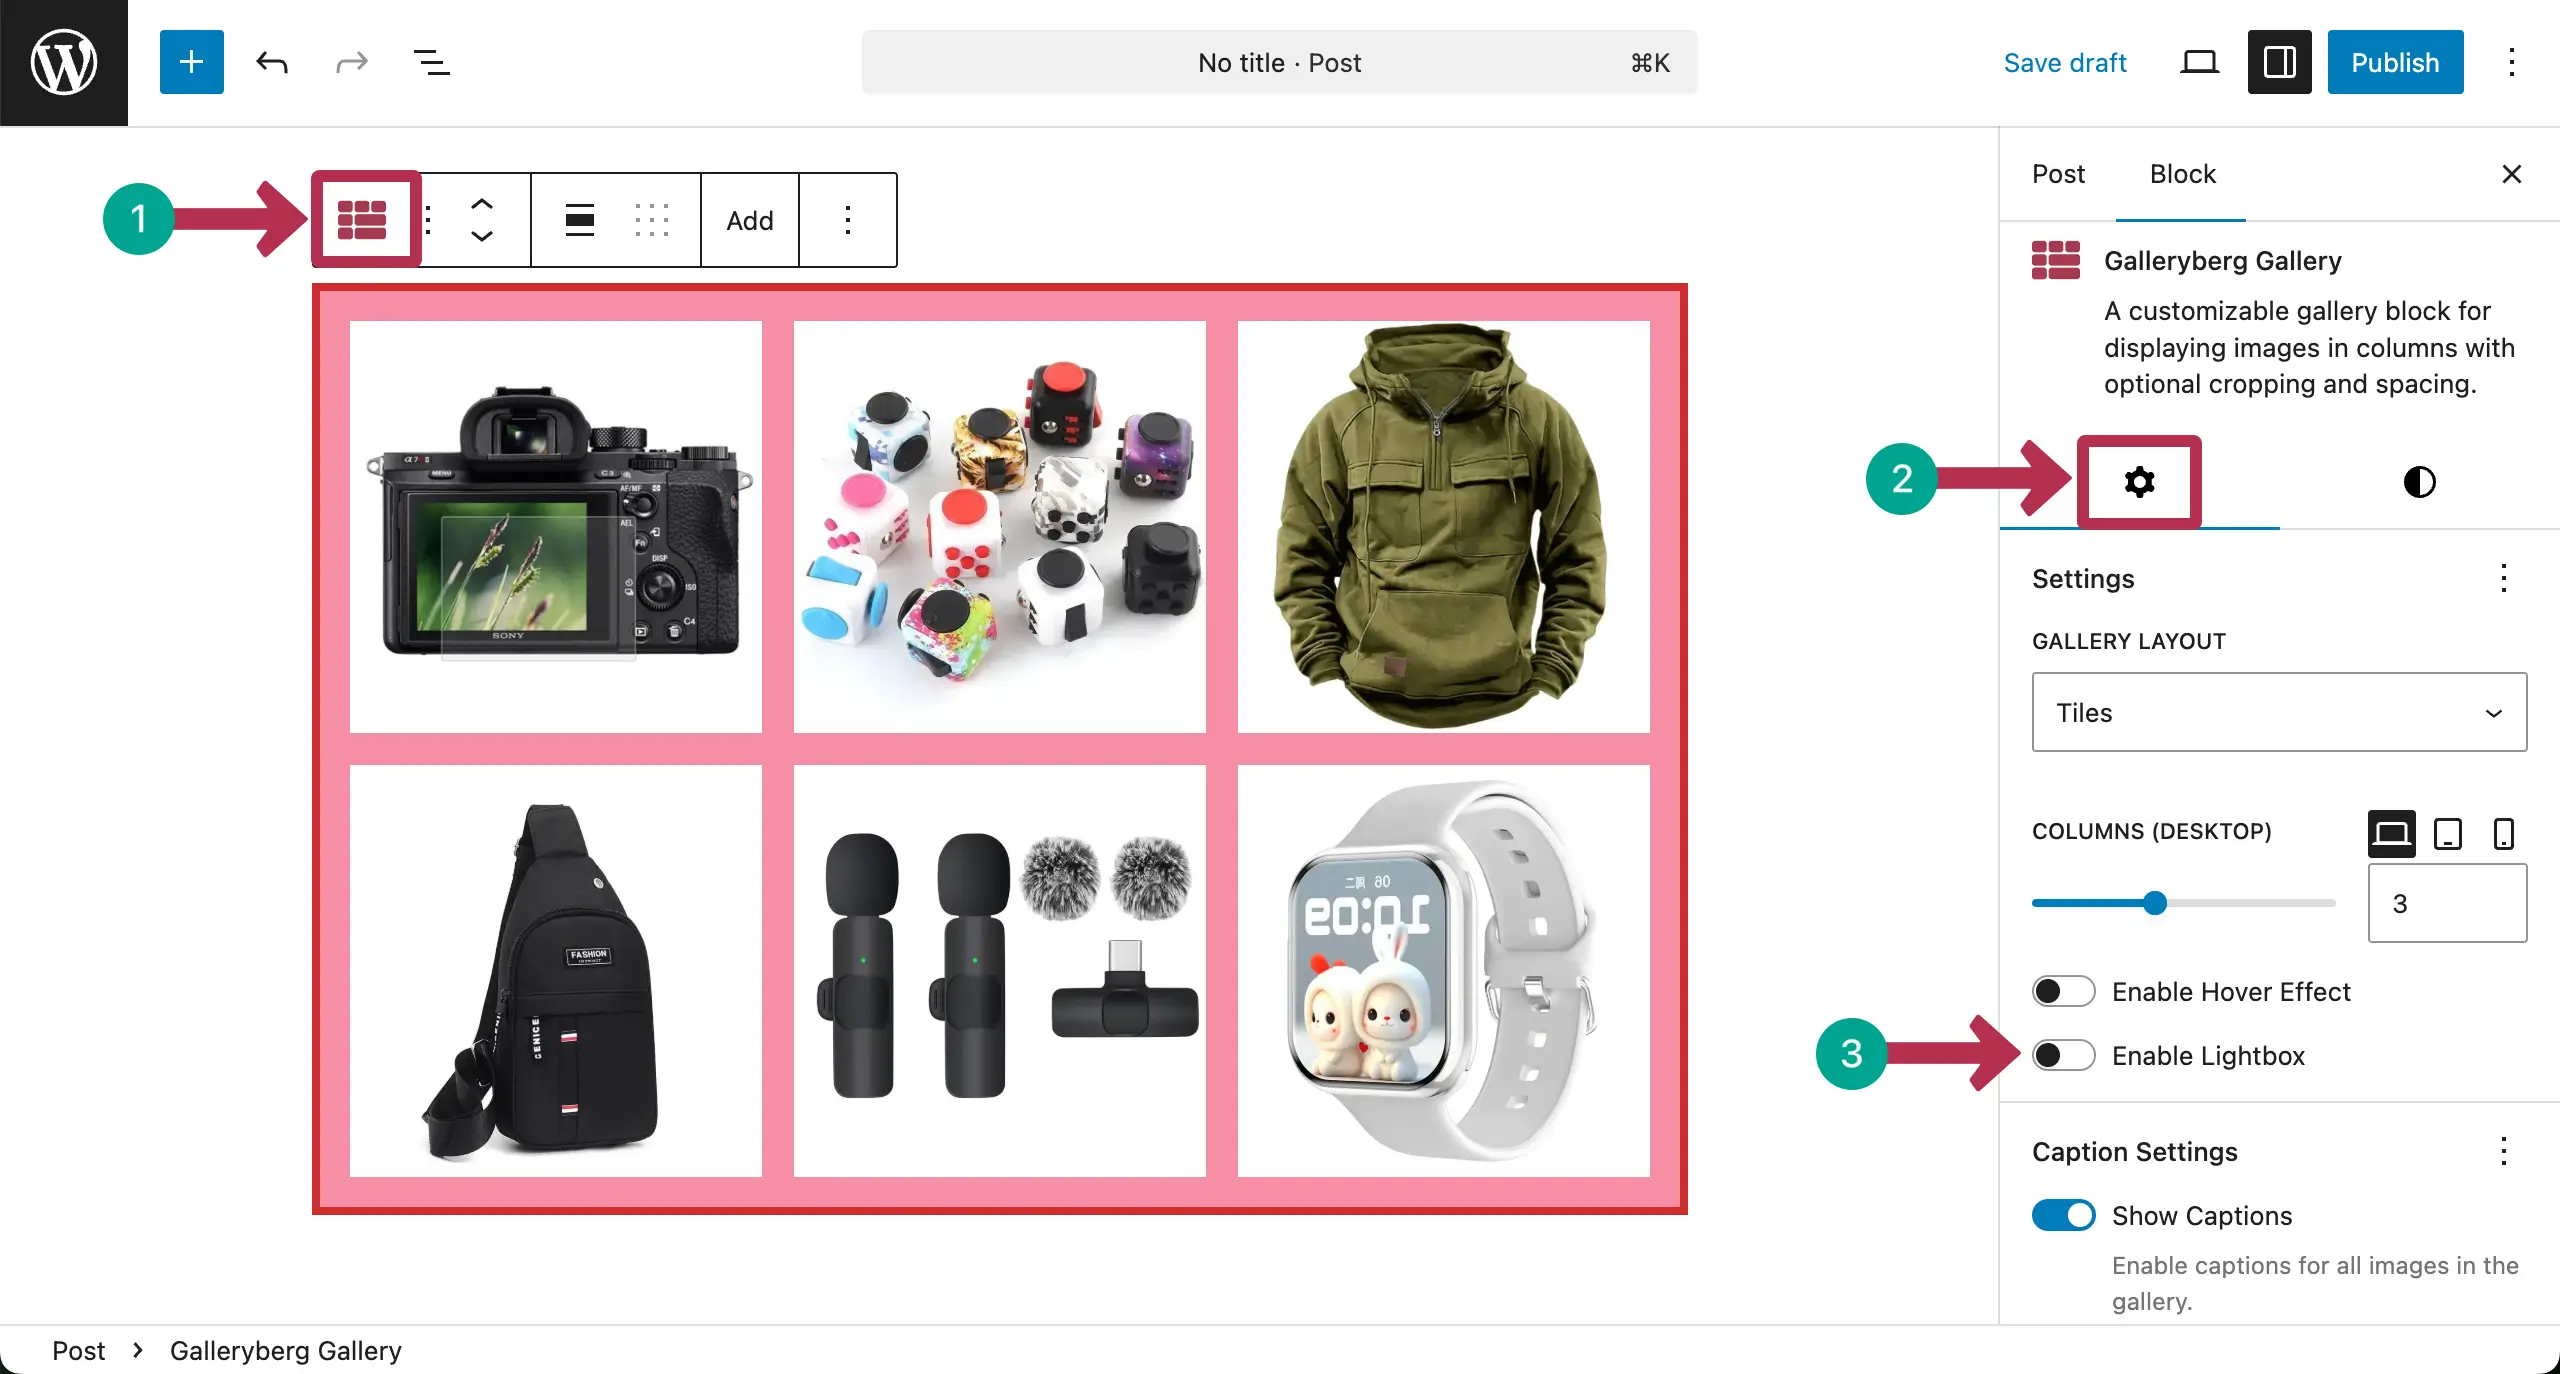
Once Lightbox is enabled, you will see the Thumbnails option. Toggle on to Enable Thumbnails.
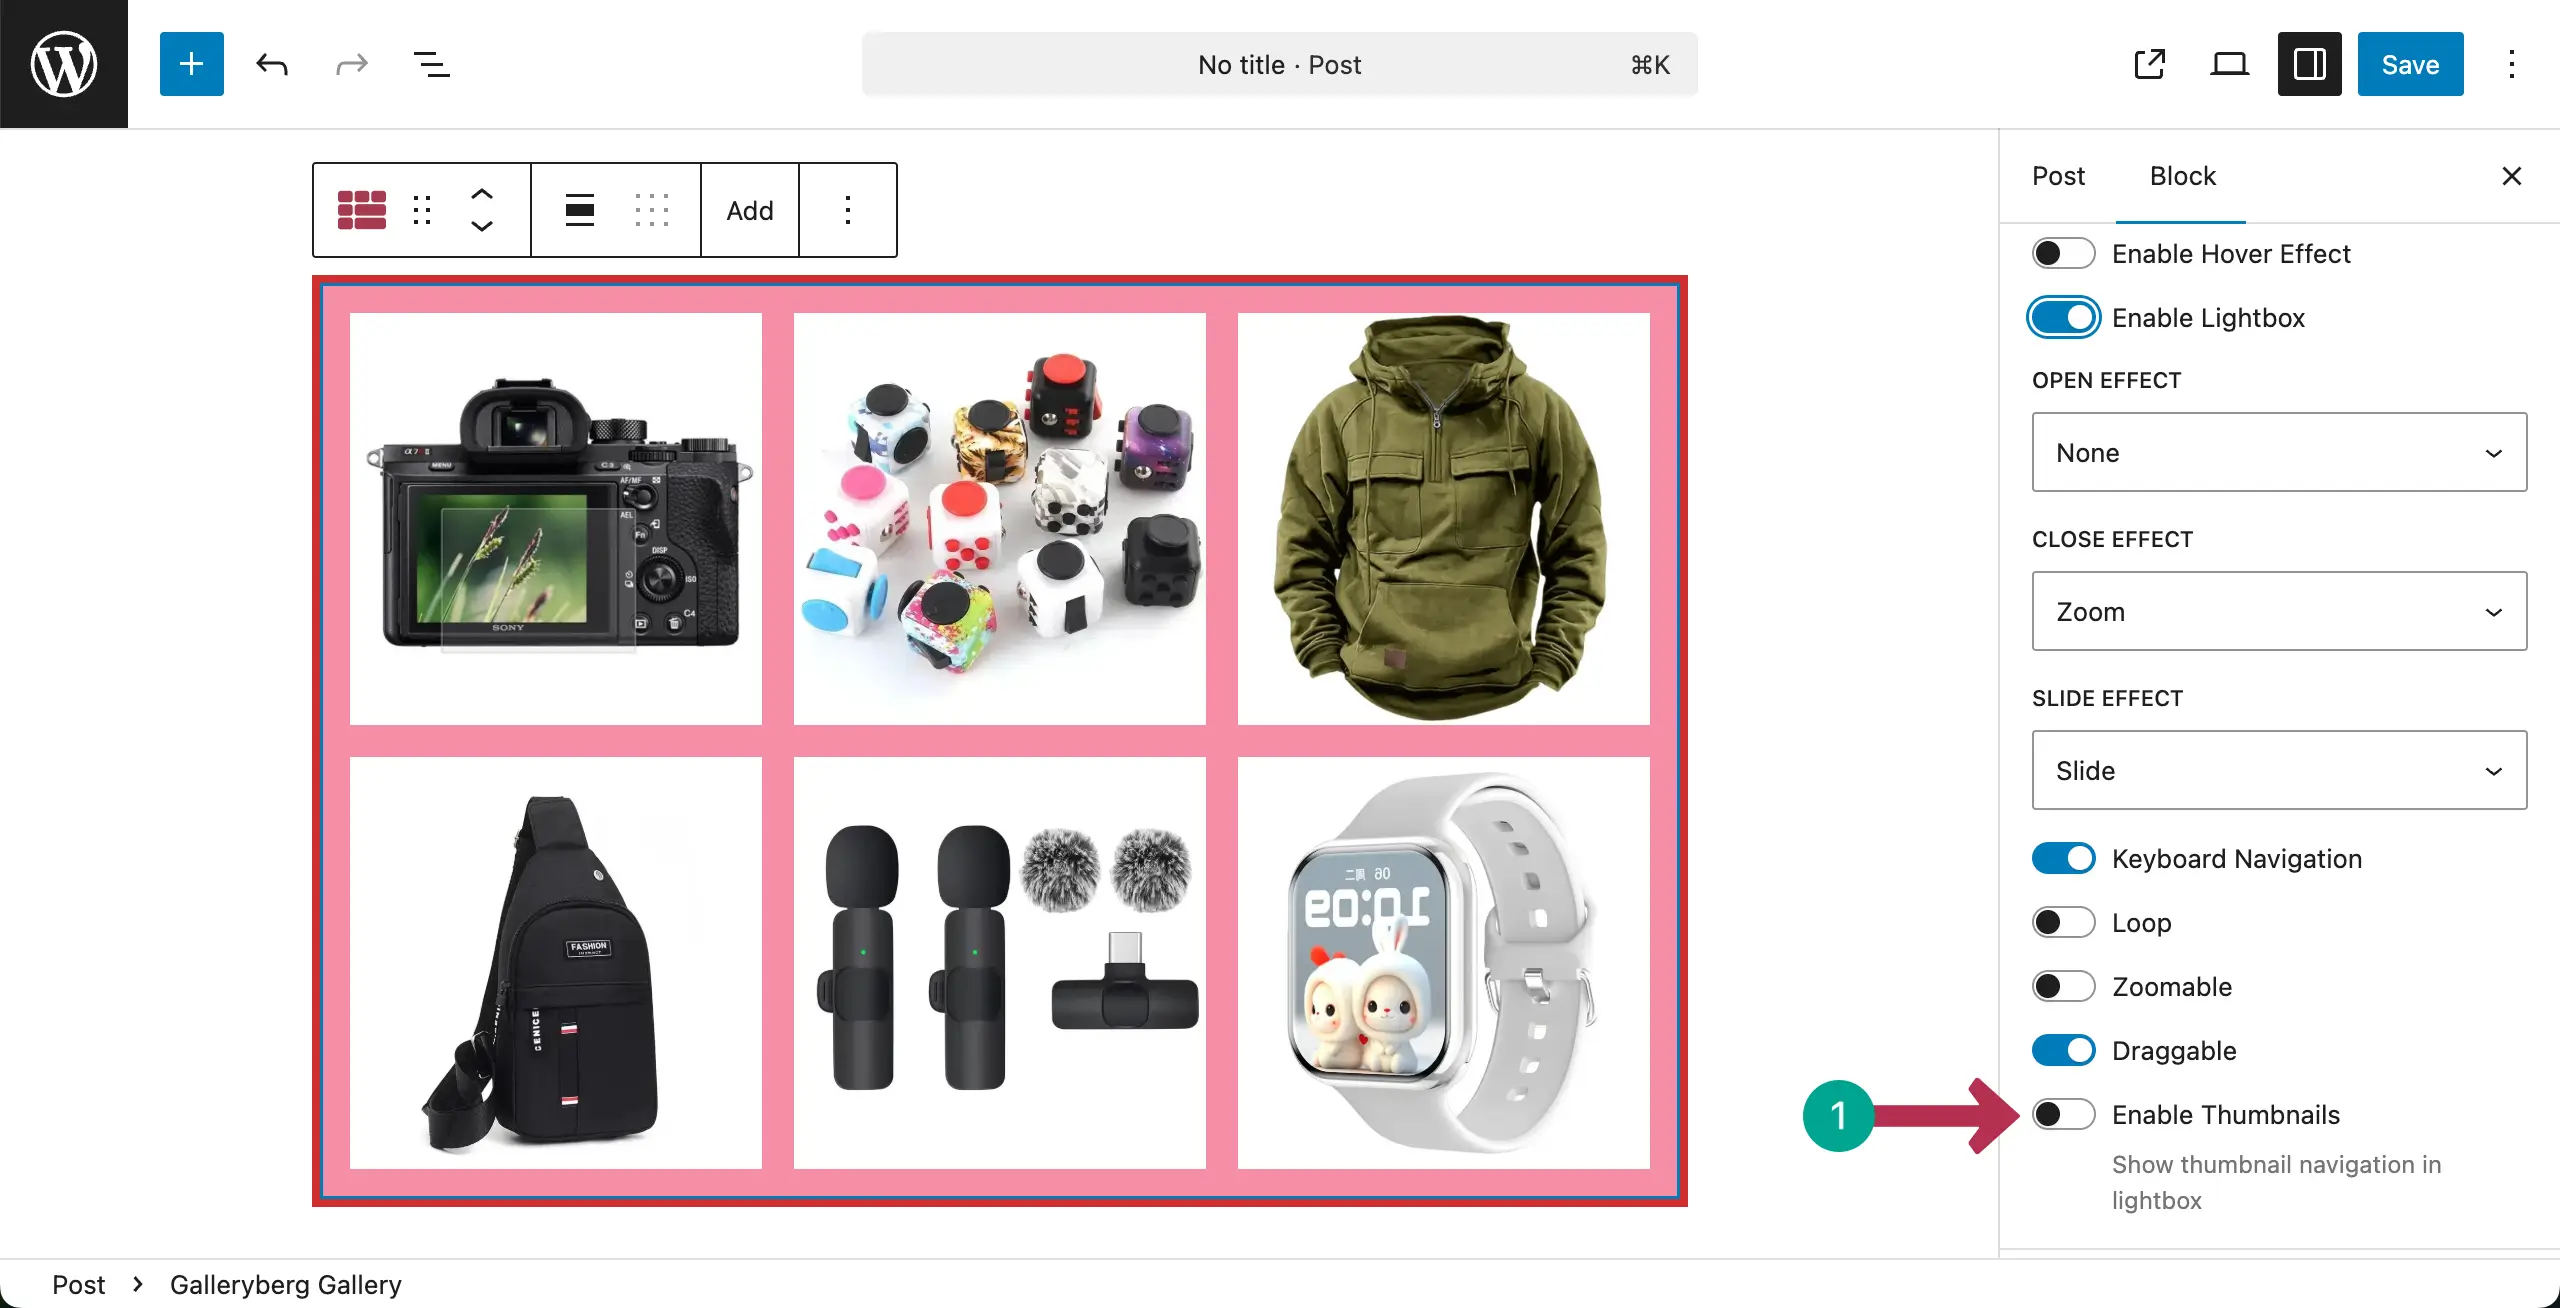
After the Thumbnails option is enabled, you’ll see two more options appearing – Thumbnail Position and Thumbnail Navigation.

From the Thumbnail Position, you can choose to set it to Bottom, Top, Left, or Right.
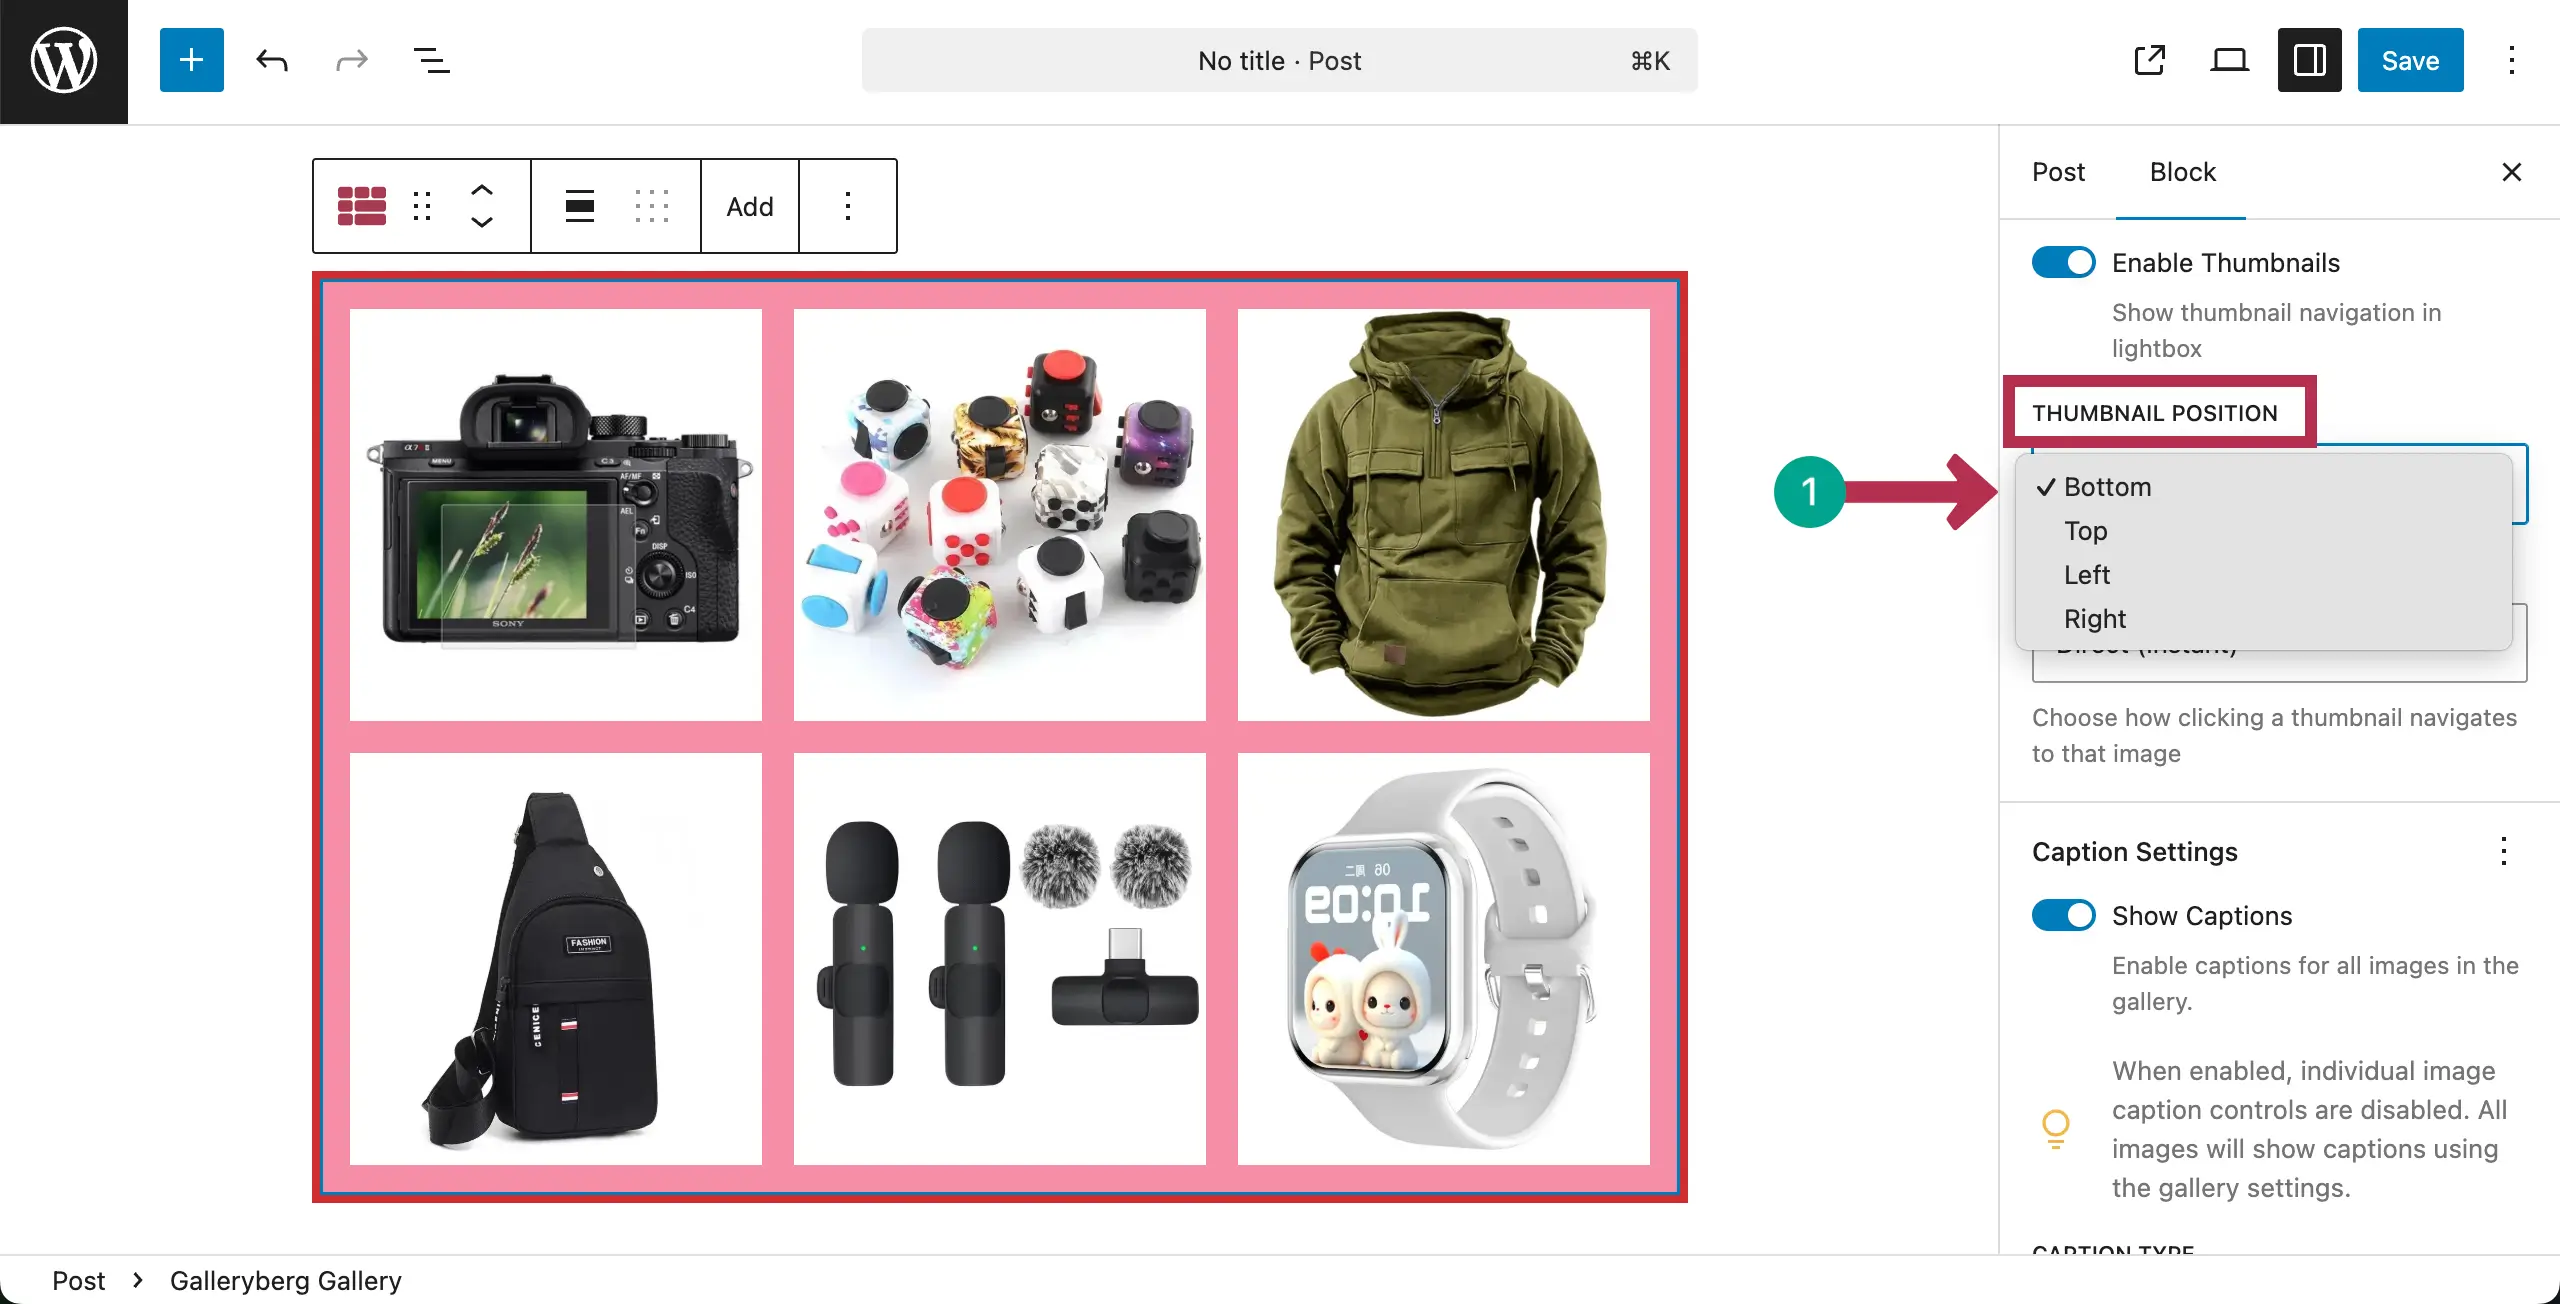
There are two types of Thumbnail Navigation – Direct (Instant) and Step by Step. Choose the one you like.

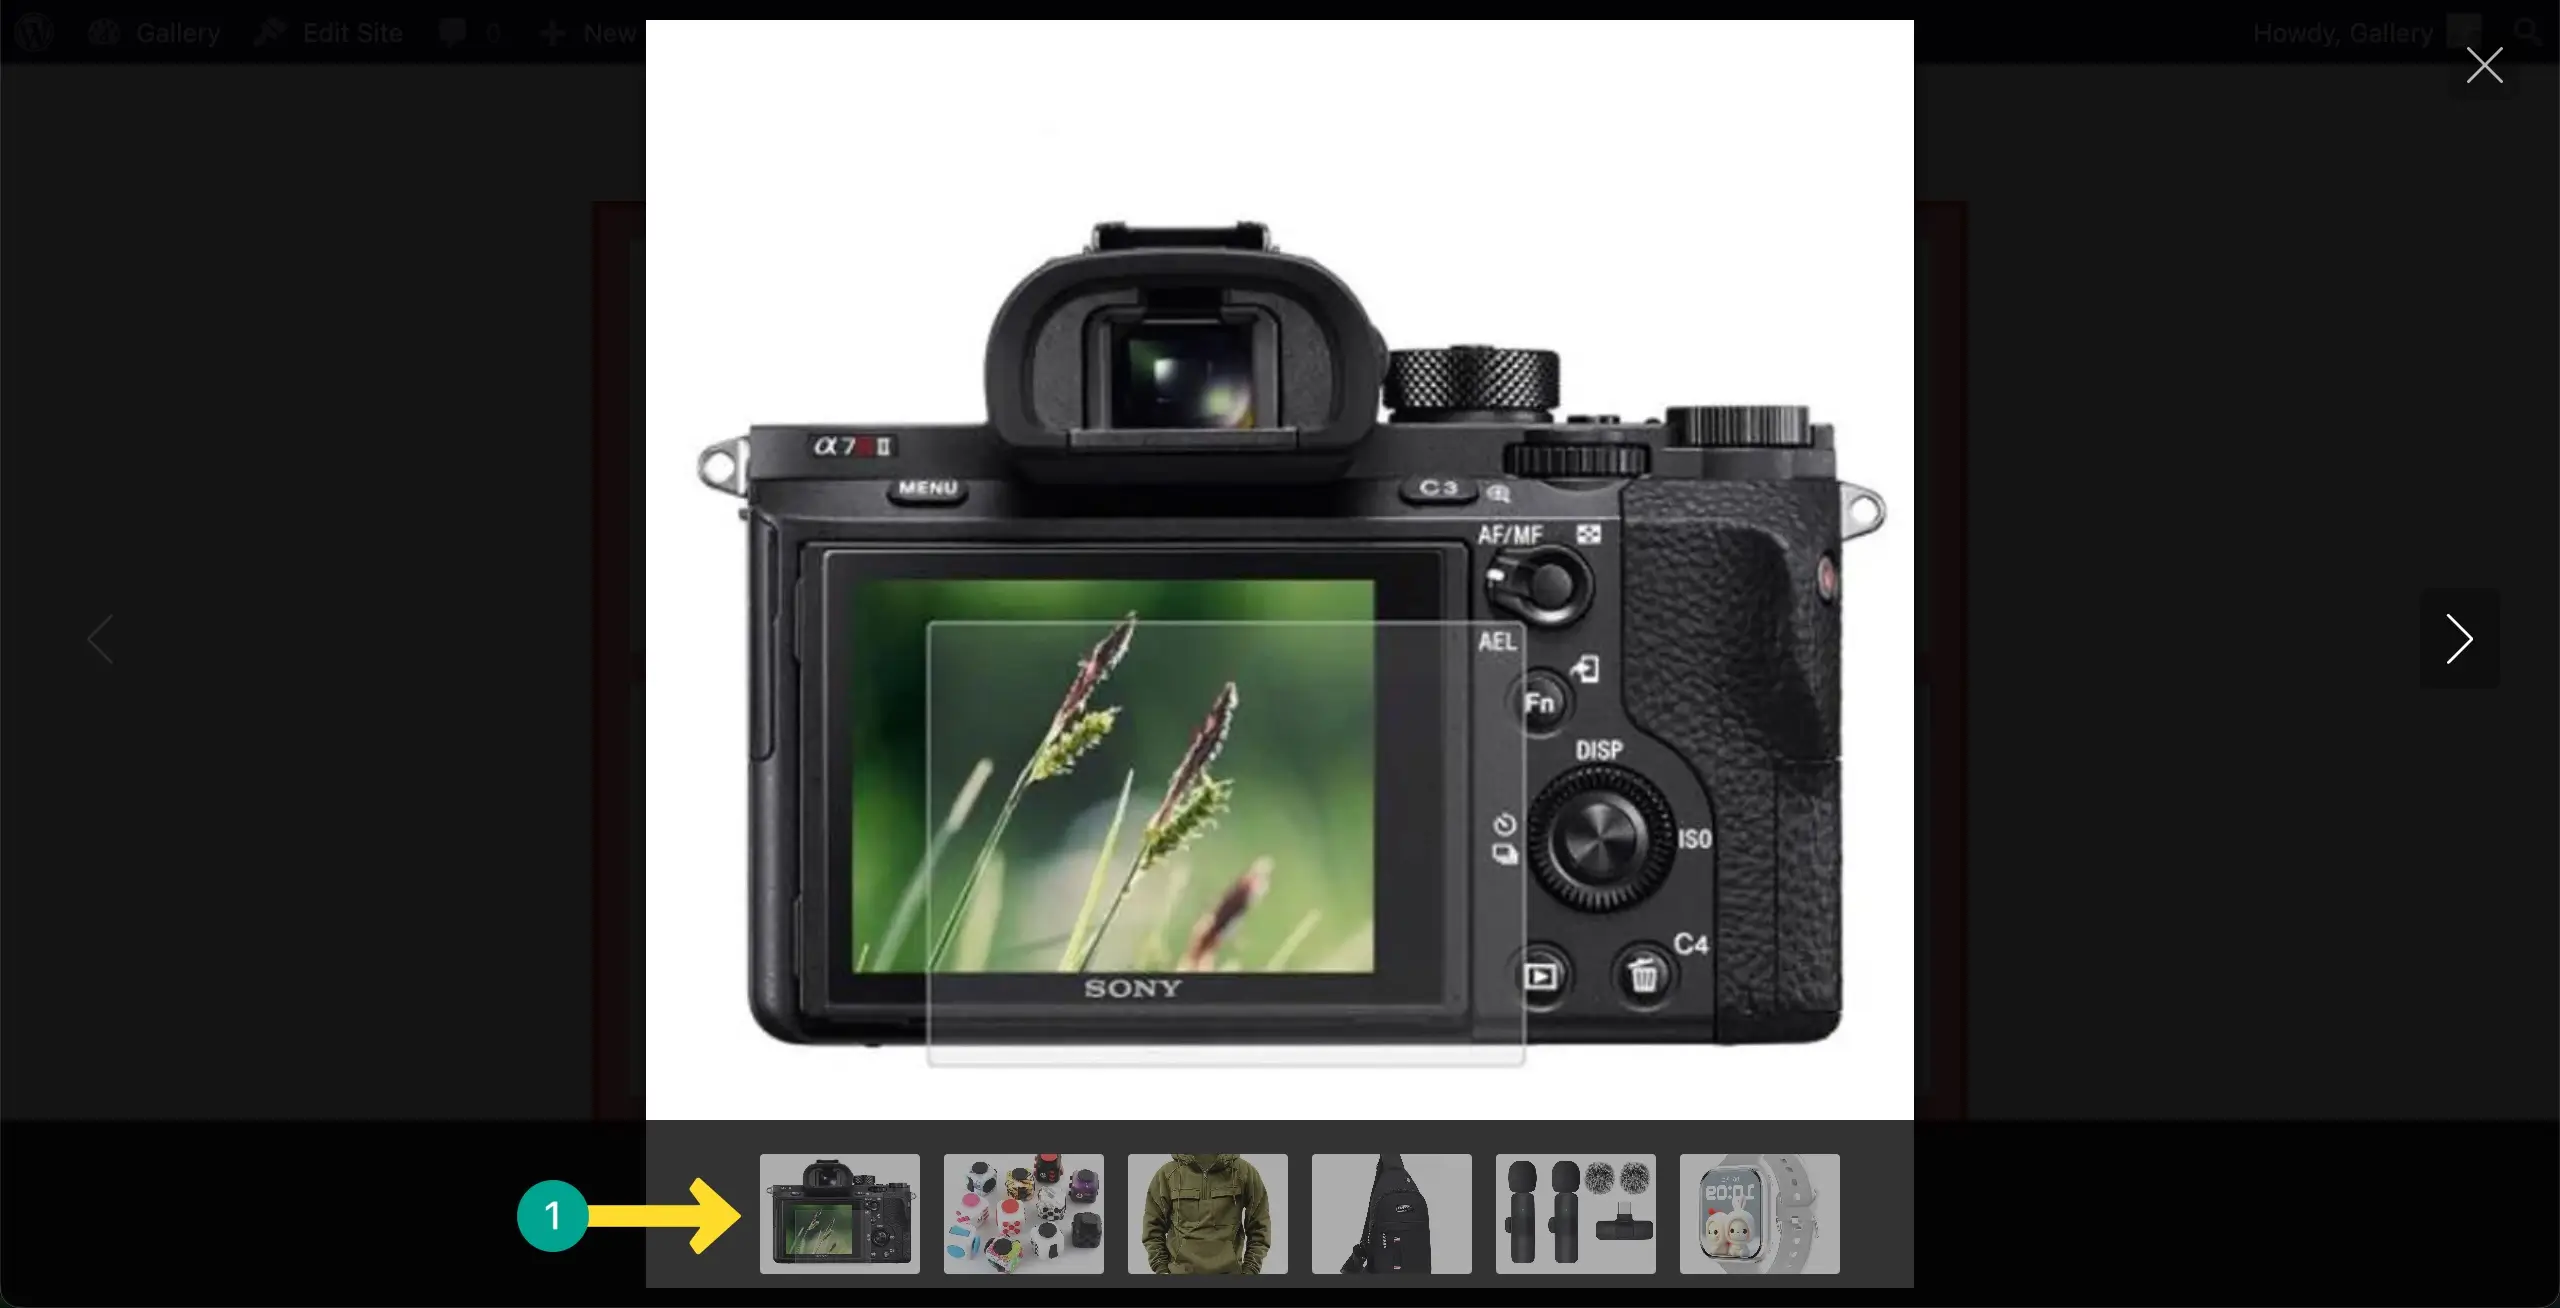
Come to the preview page. Click on any image. Once it opens with the Lightbox, you’ll see the image thumbnails below as your settings.
Conclusion #
Hope you enjoyed this post. Make sure to use the thumbnail strip only when the gallery has many images. Keep thumbnails clear and evenly sized. Avoid making the strip too large. And finally, ensure it works smoothly on mobile devices.


