A Masonry Gallery is a dynamic photo layout where images sit in a grid with different heights and widths. Each image fits together like bricks in a wall, so the gallery looks well-balanced even when the pictures are not the same size.
Let’s take a look at how to create a Masonry layout gallery in WordPress.
Adding the Masonry Layout Gallery #
Open your desired post/page. Click the plus (+) icon on the editor. Type Galleryberg in the search box. Once the block appears, add it to the editor.

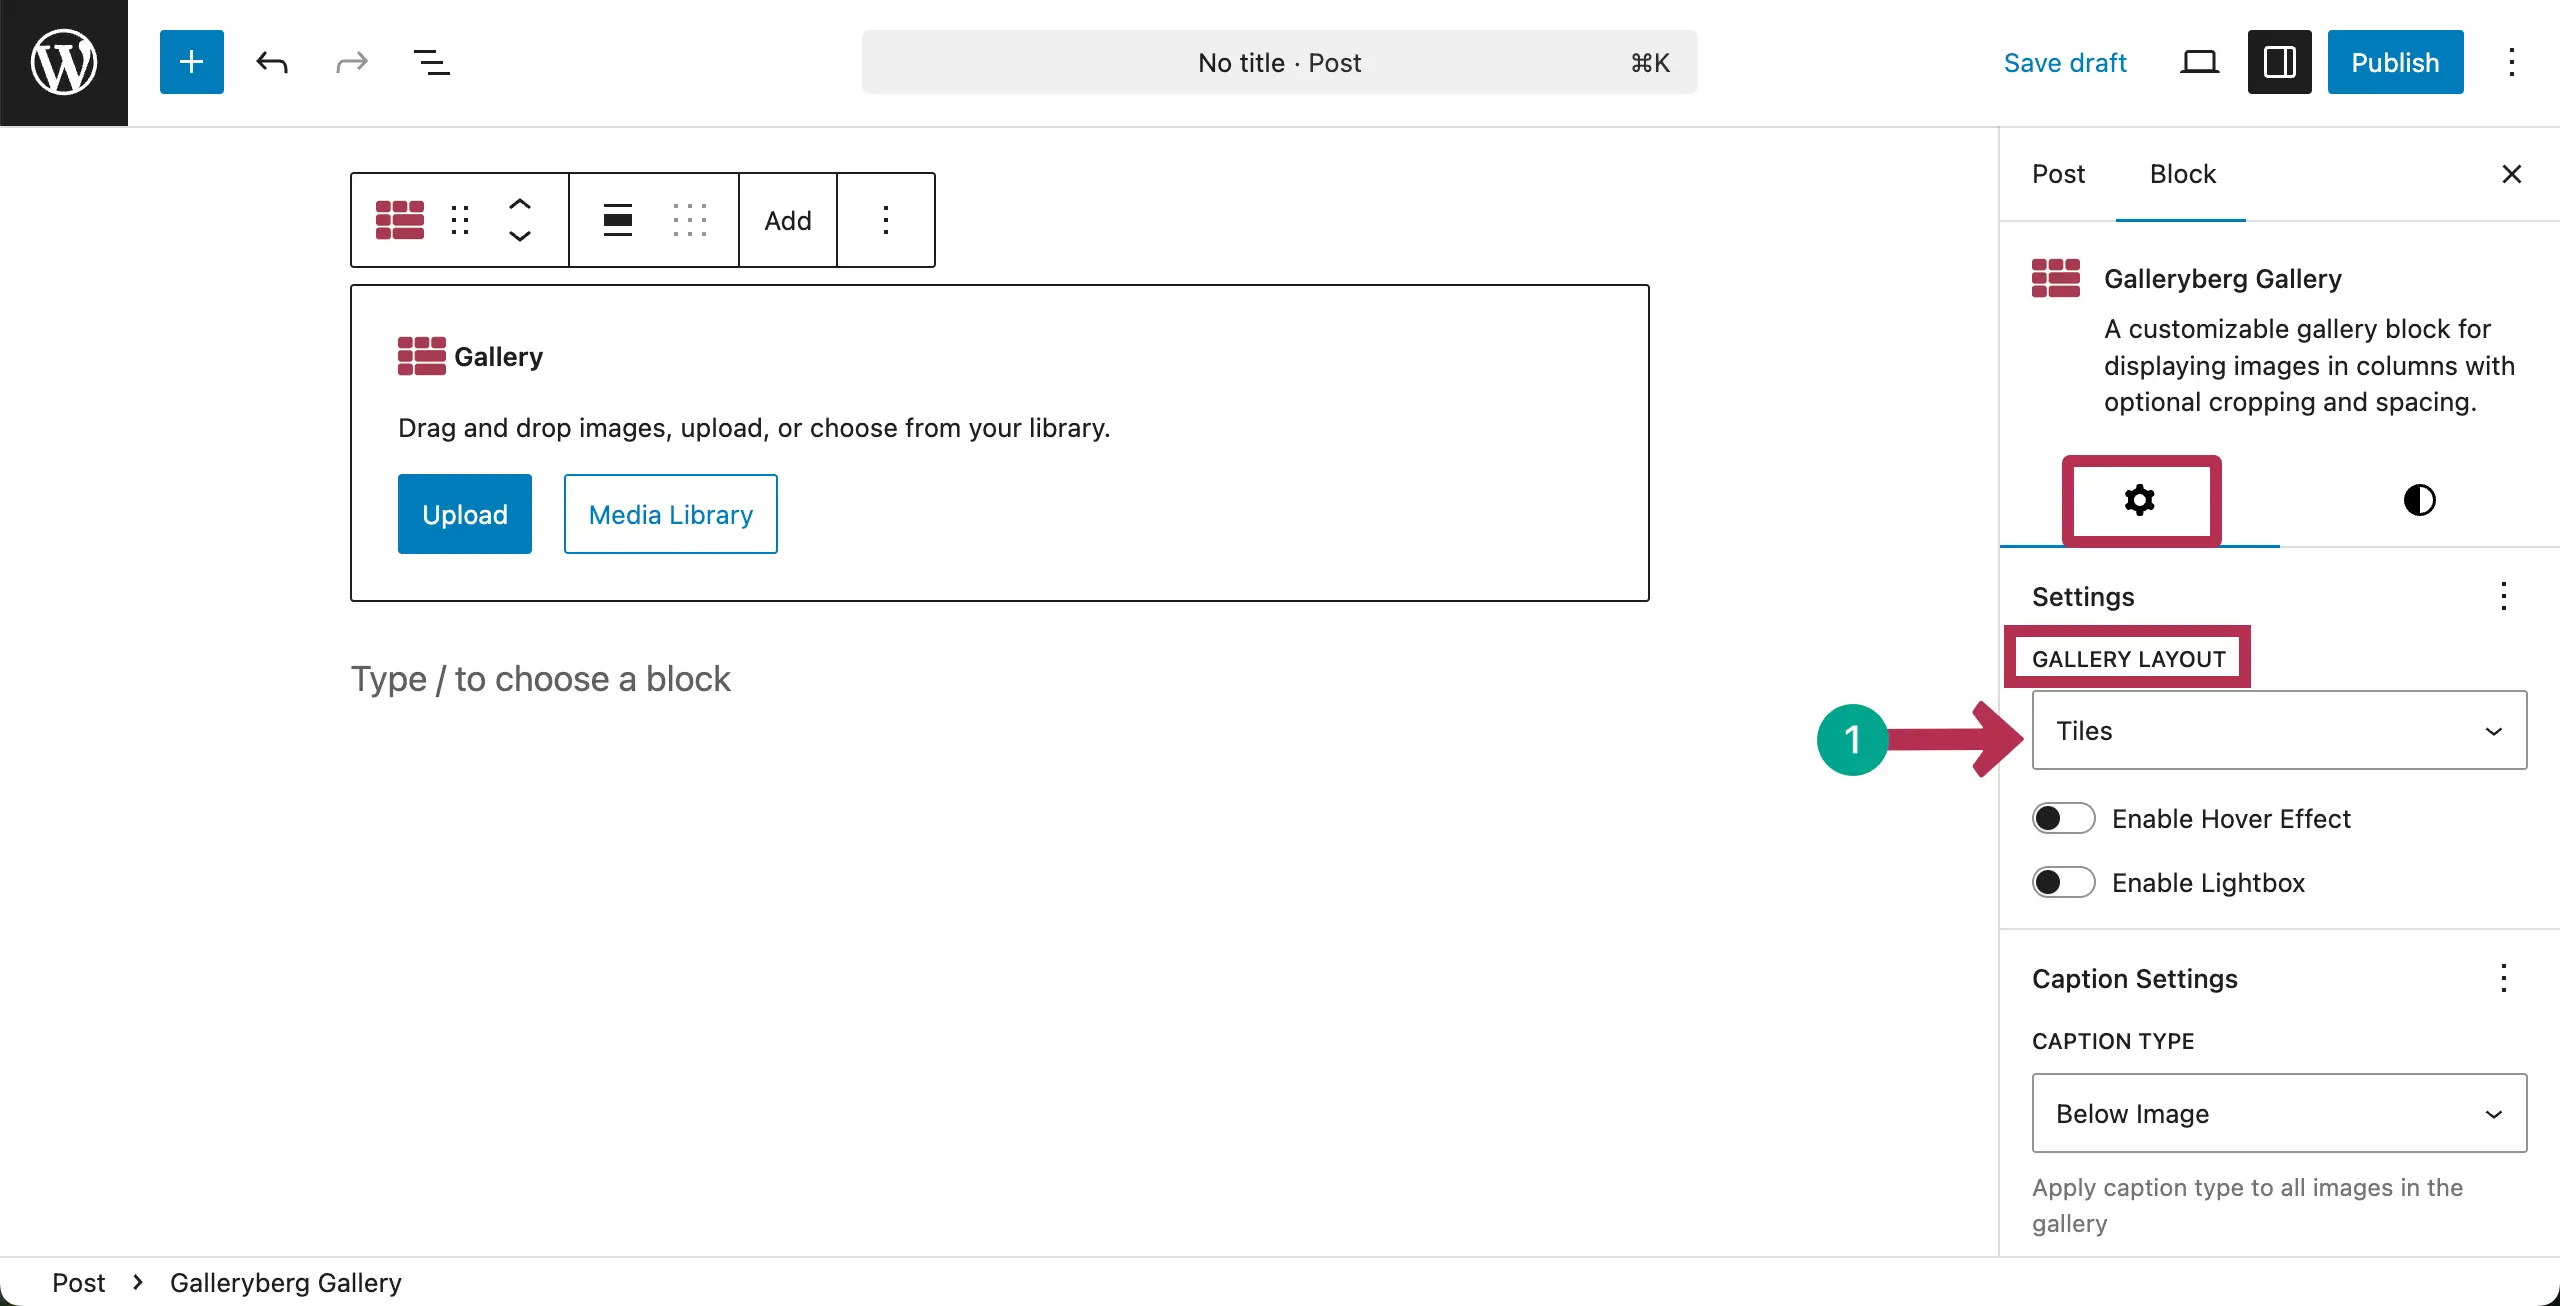
After the block is added, come to the settings tab on the right sidebar. Click the dropdown option under Gallery Layout.
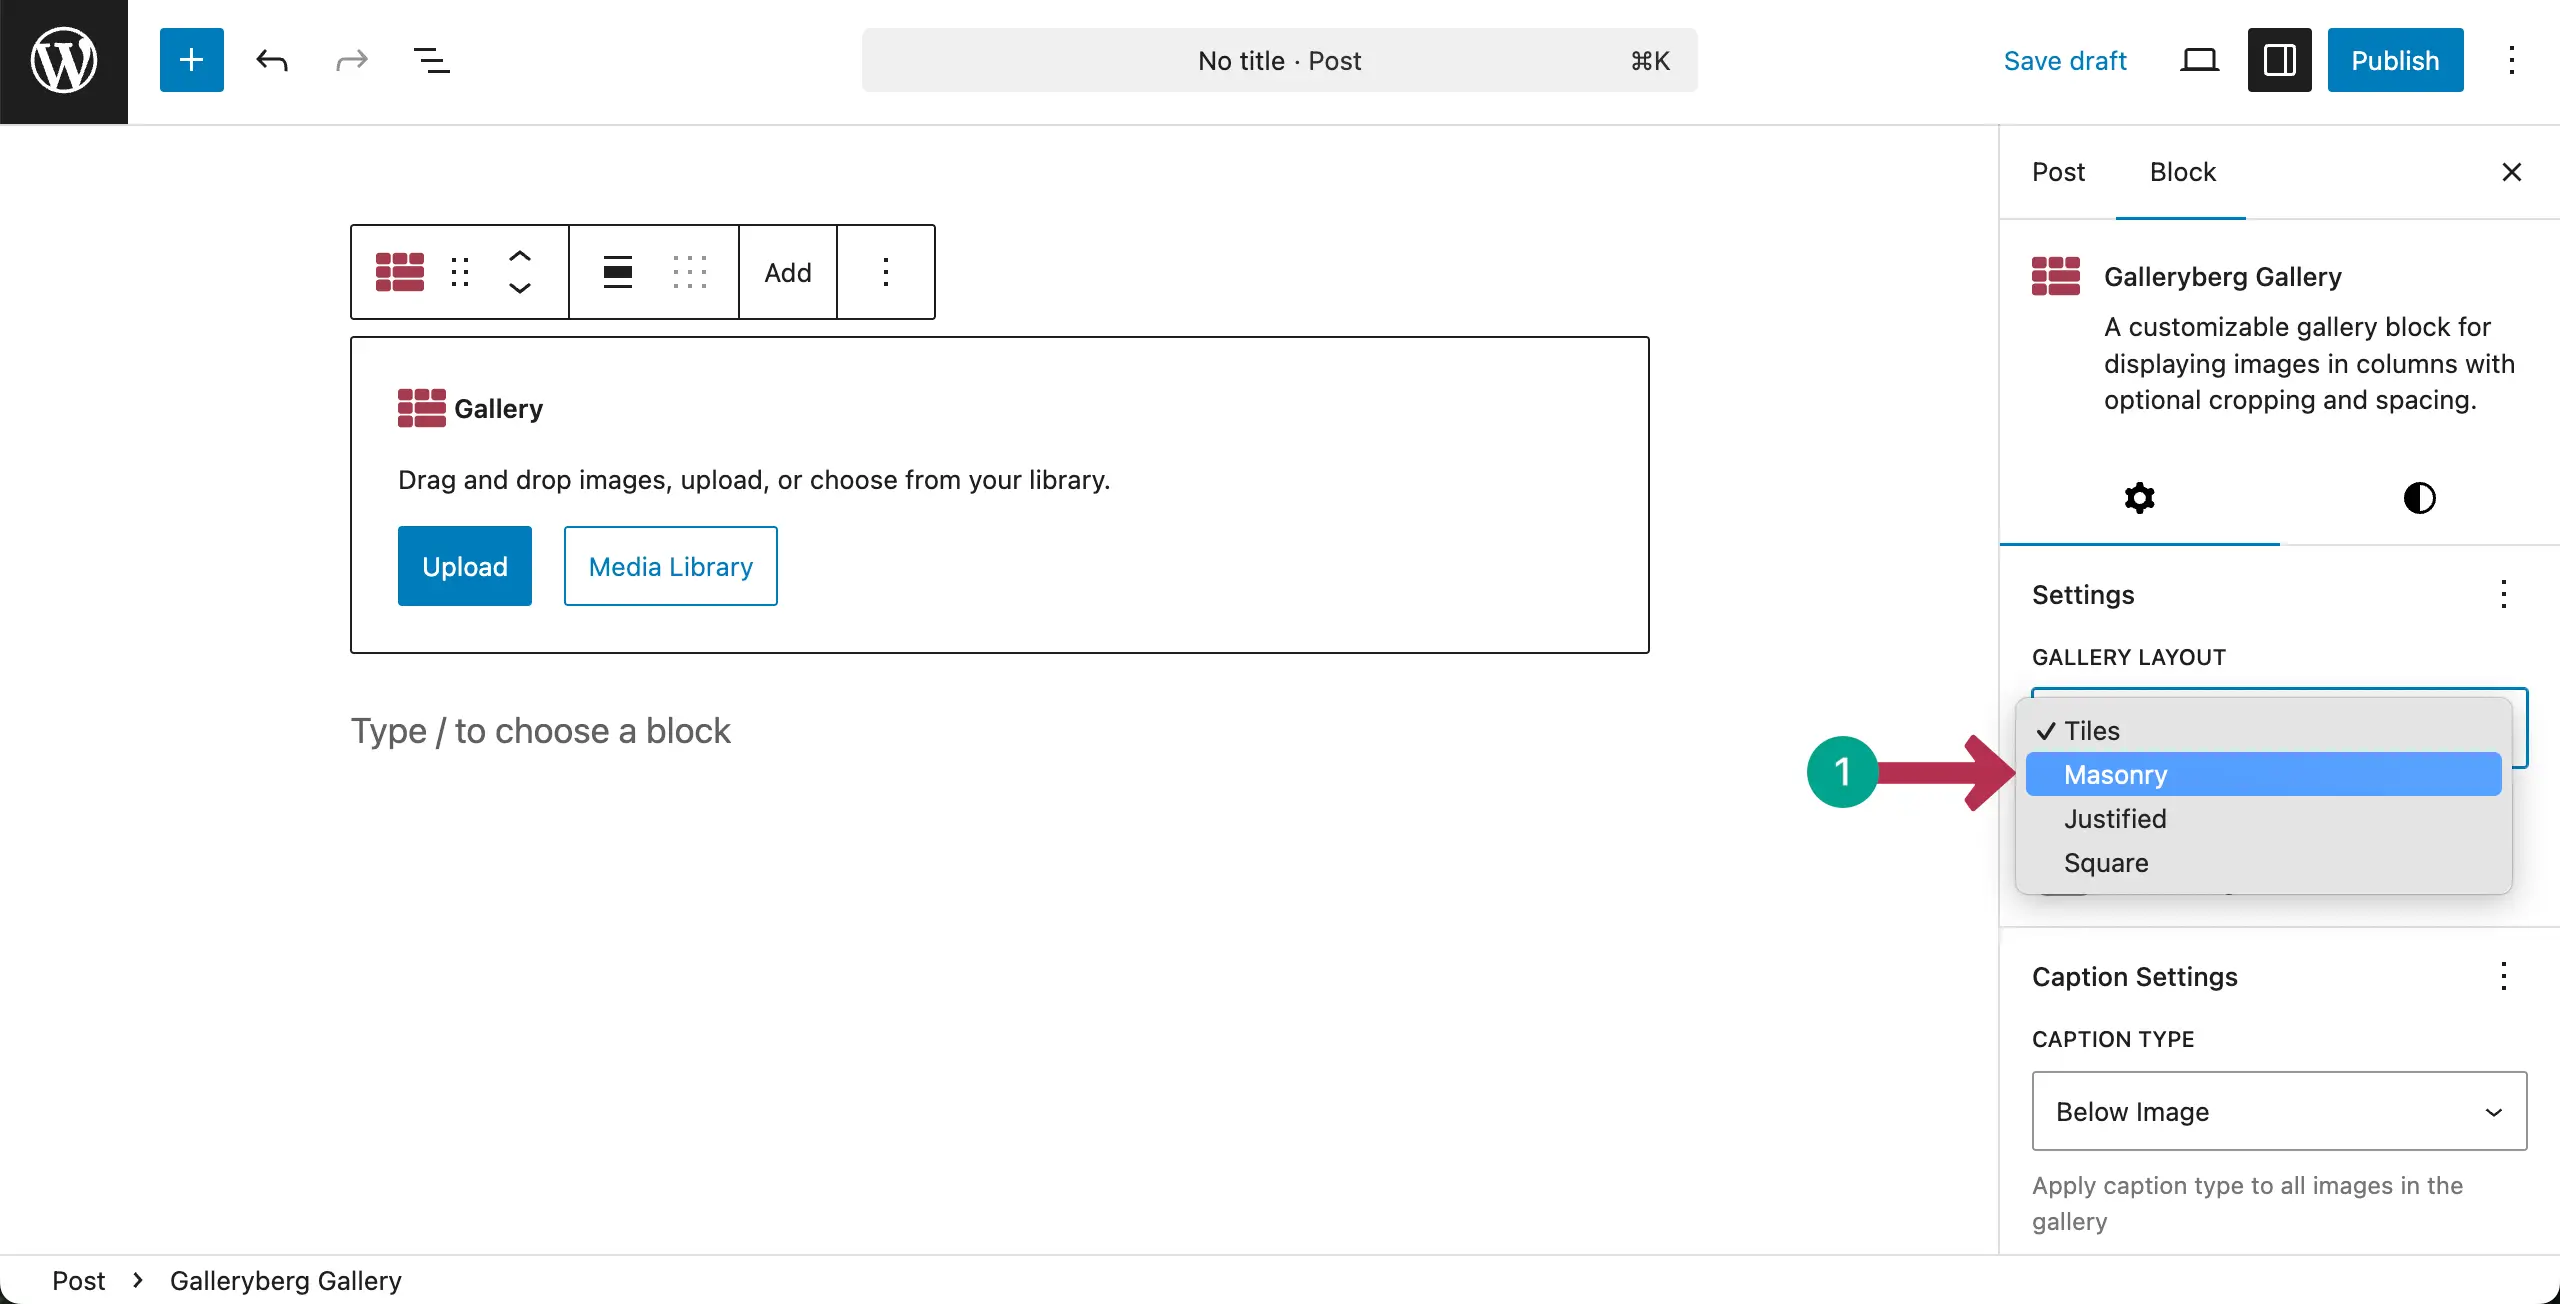
A dropdown list will show up from where you can select the Masonry layout type.
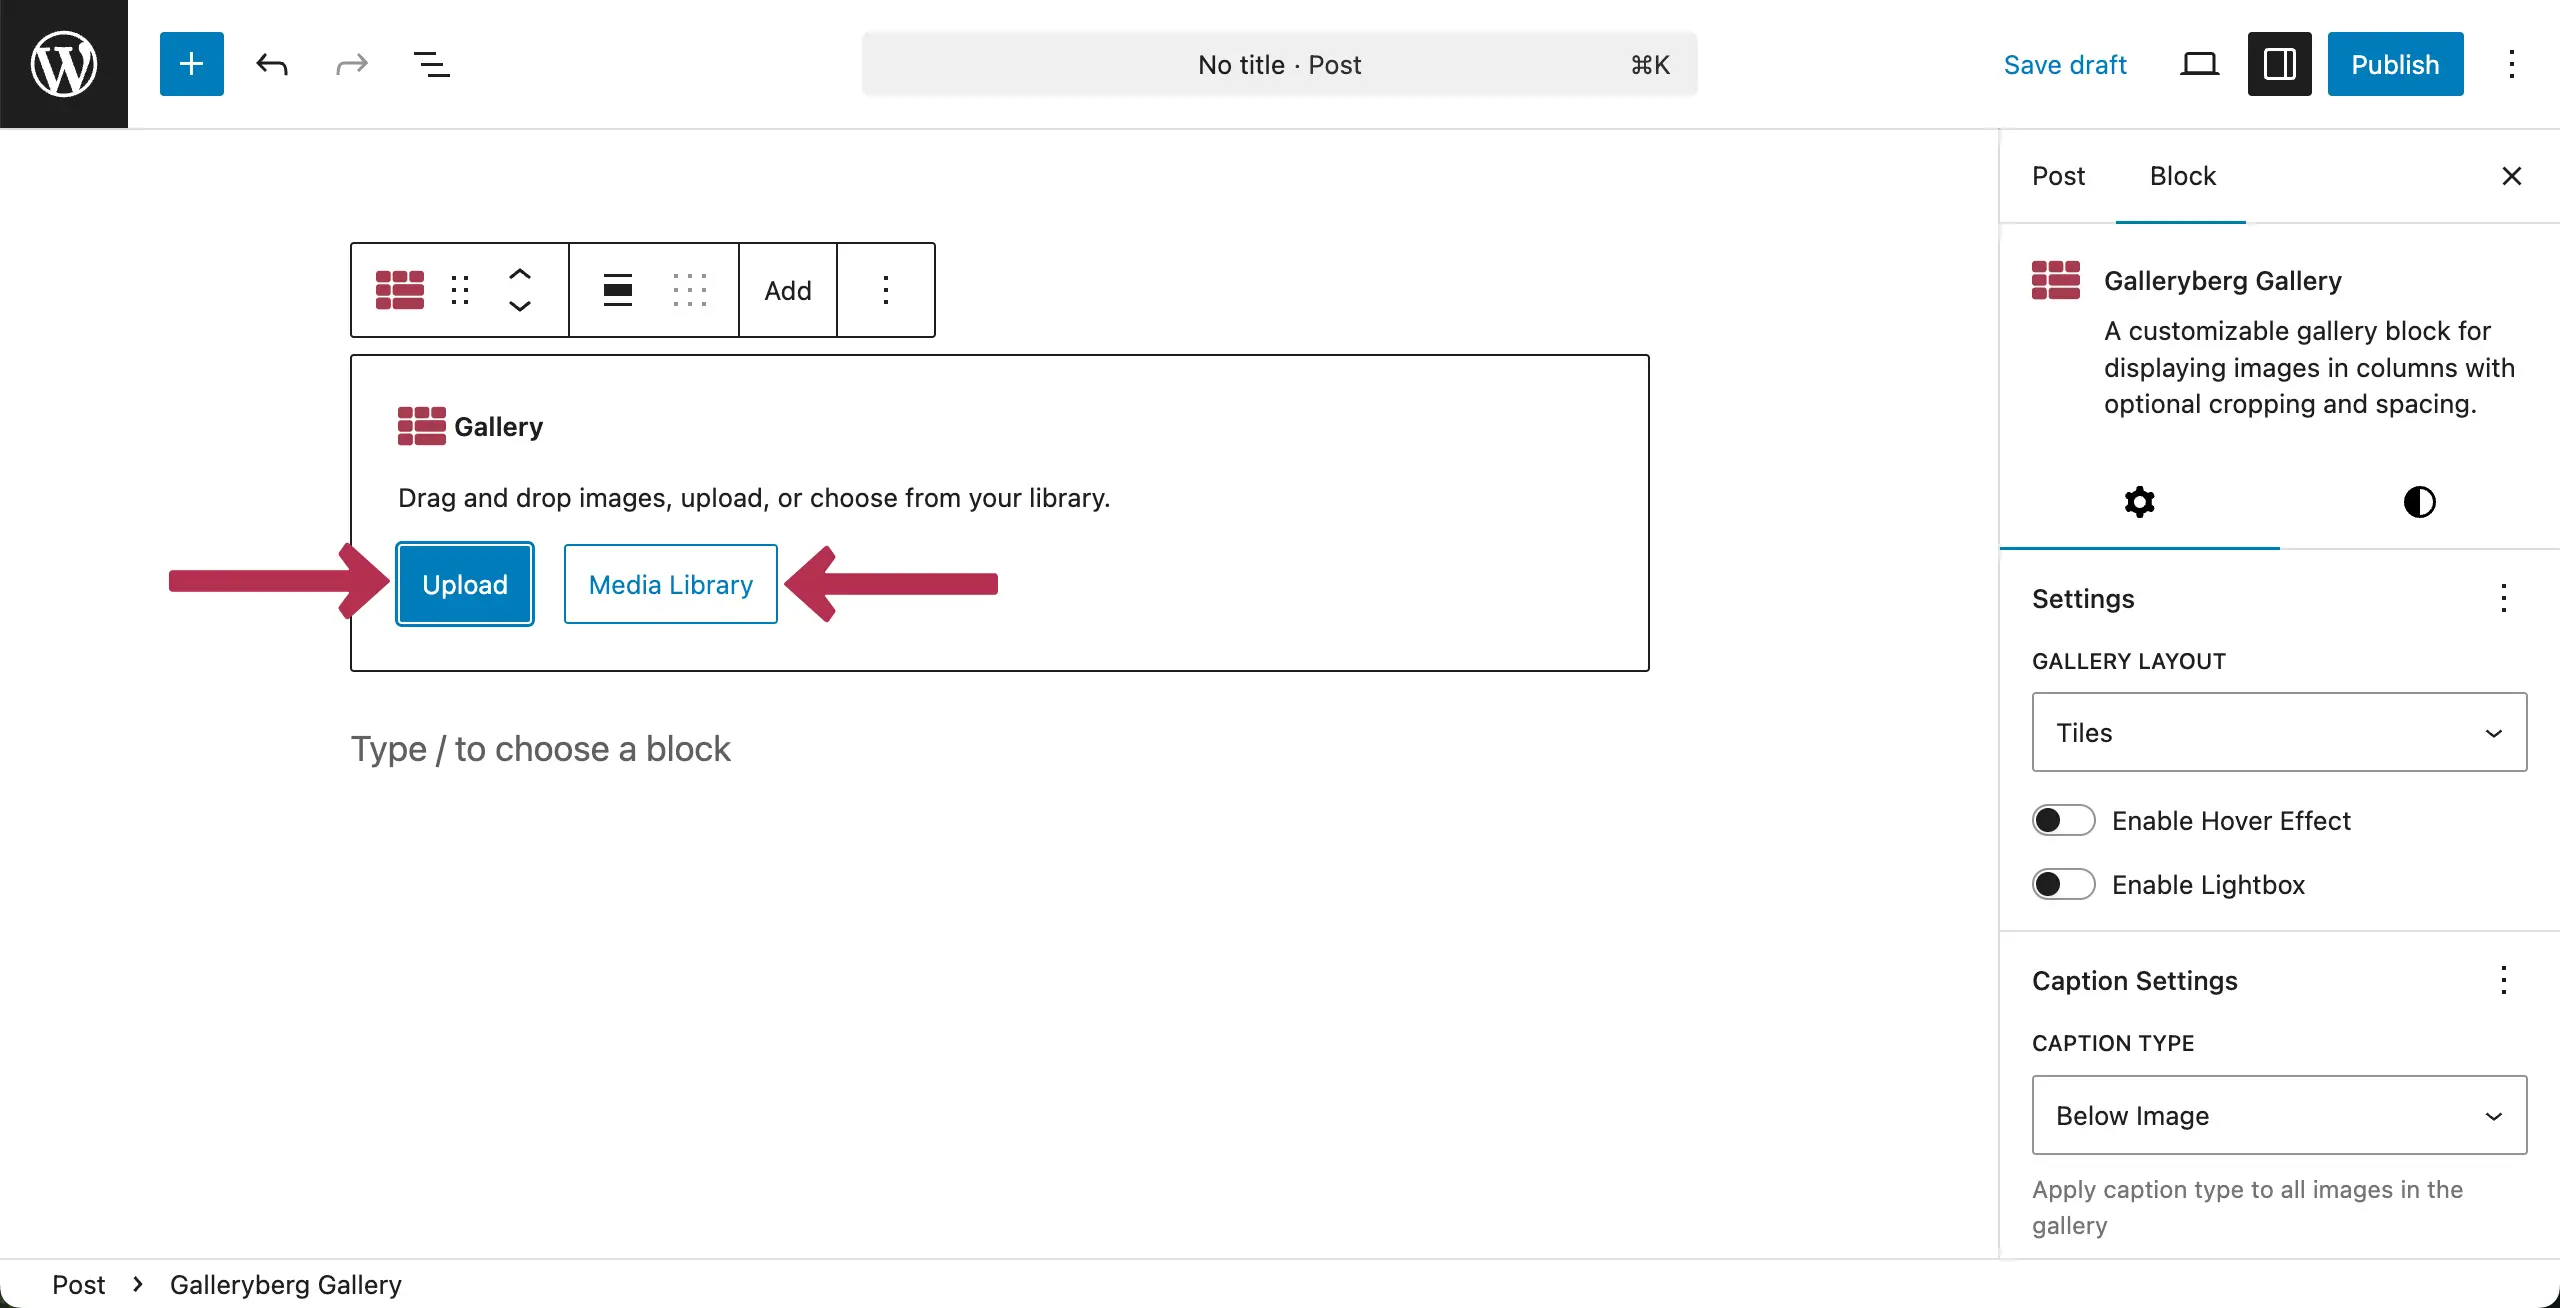
It’s now the time to add images to the gallery. Choose the Upload option if you want to add images from your local drive, or select Media Library if those images are already on your site.
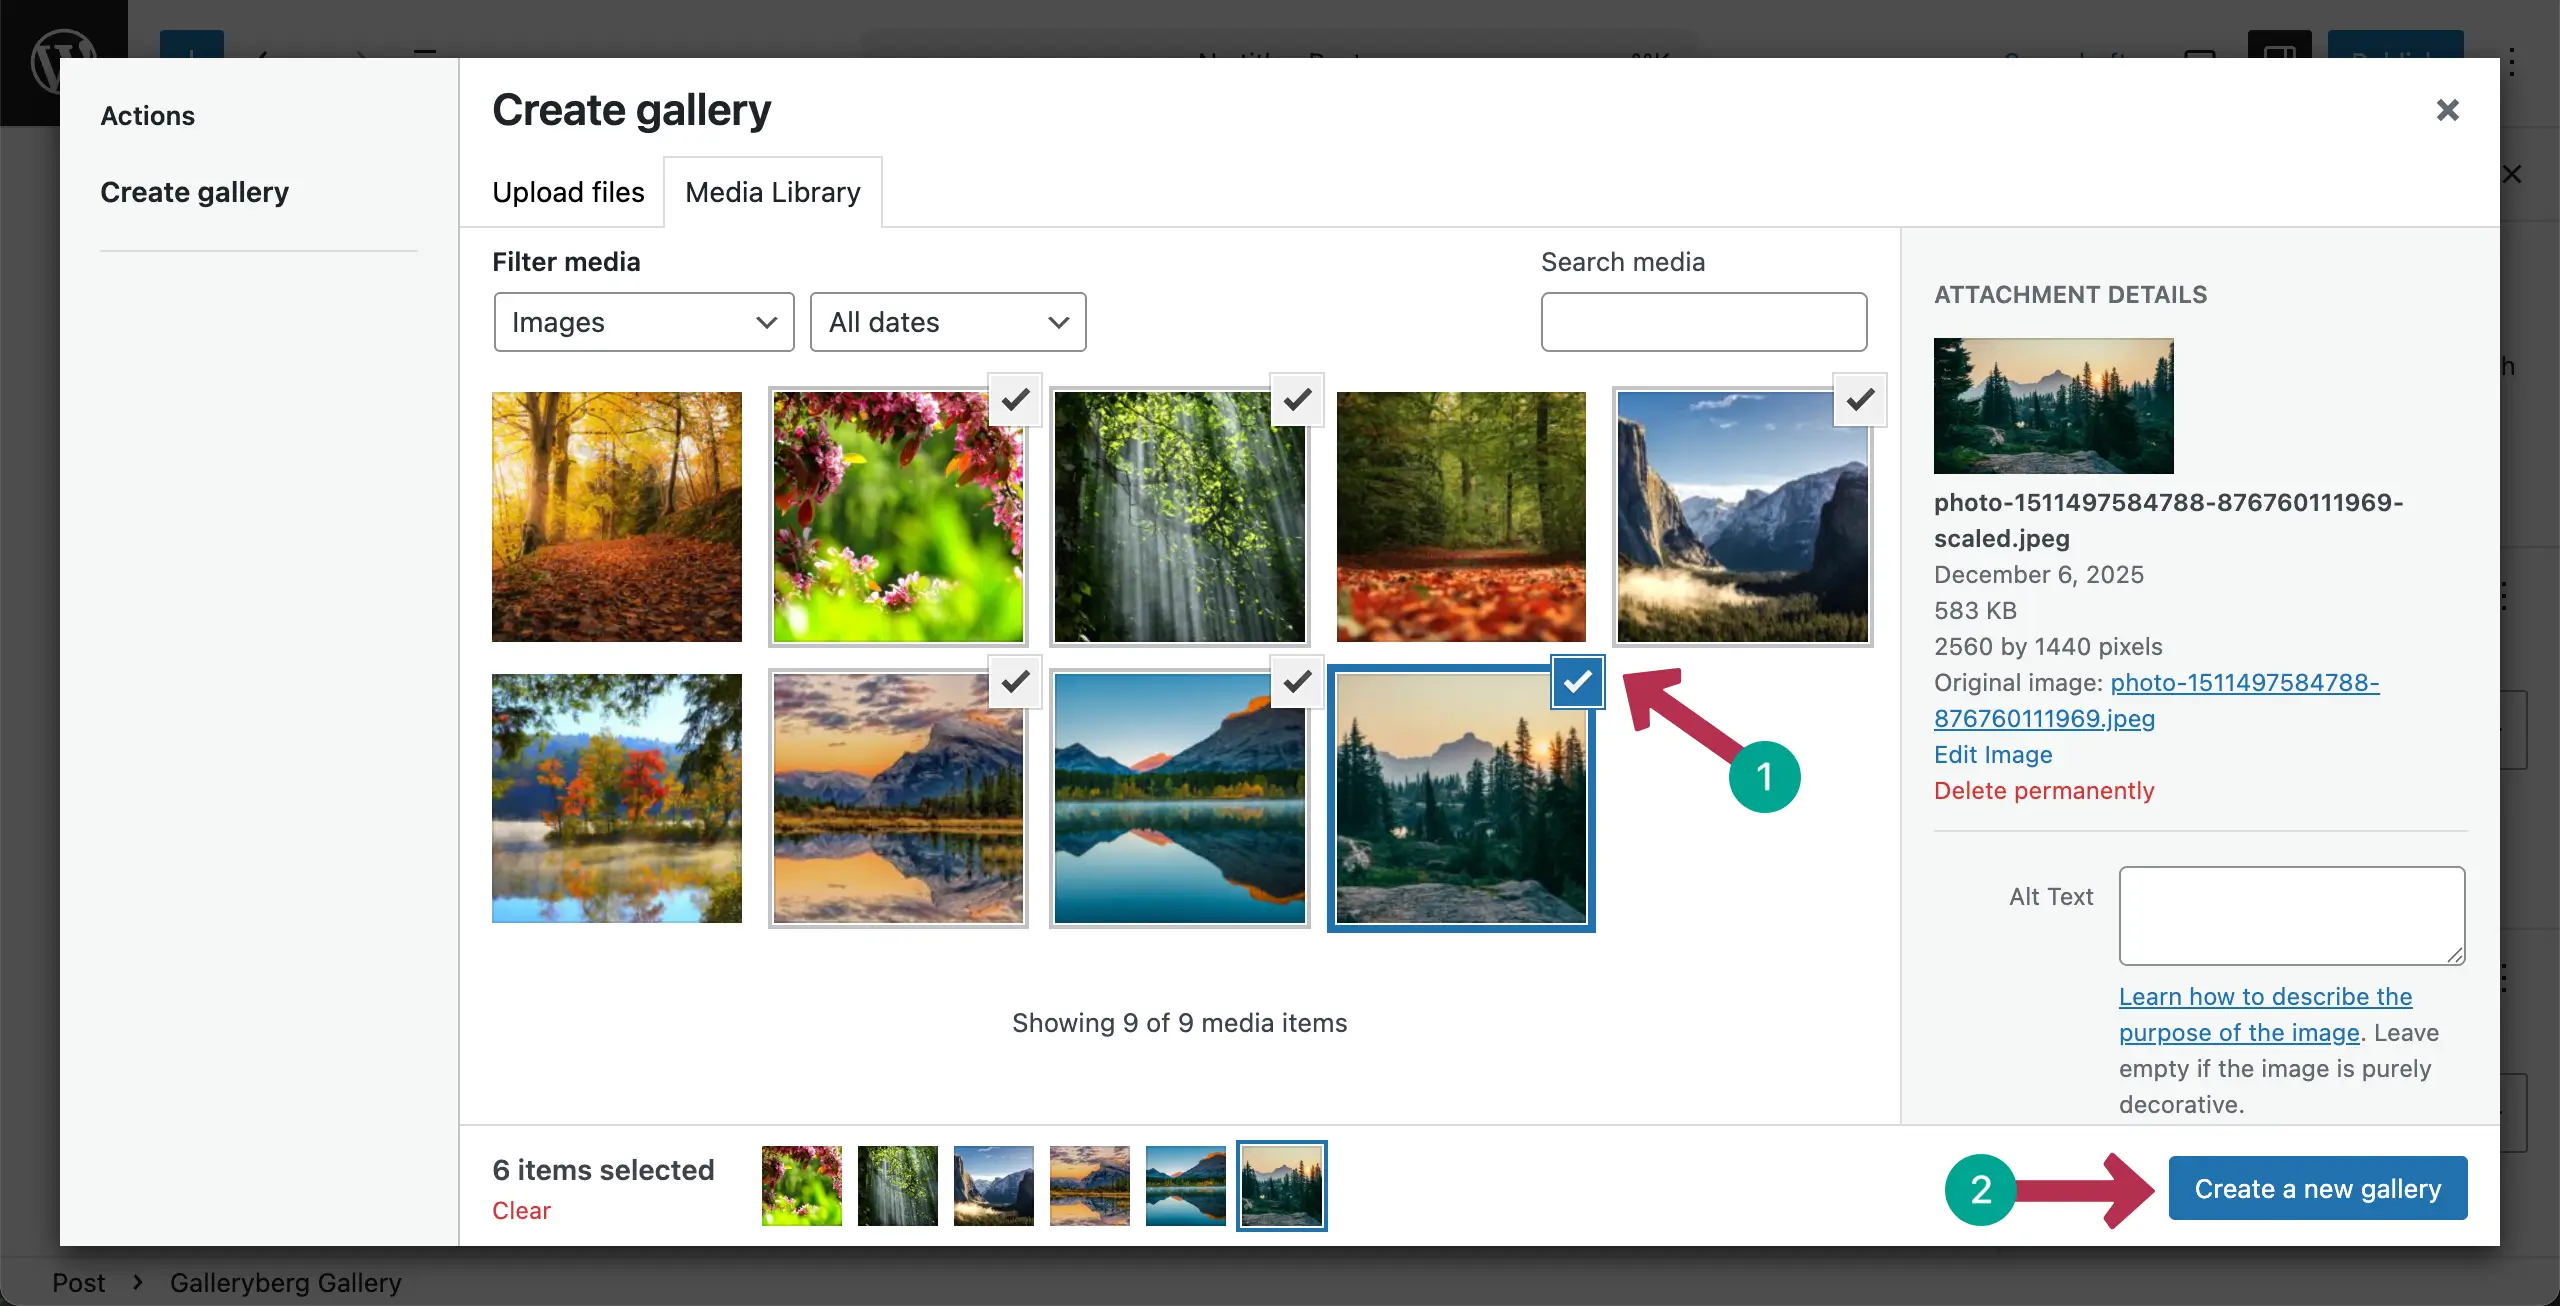
Choose the images you want to show in the gallery. Once they are selected, click the Create a new gallery button.
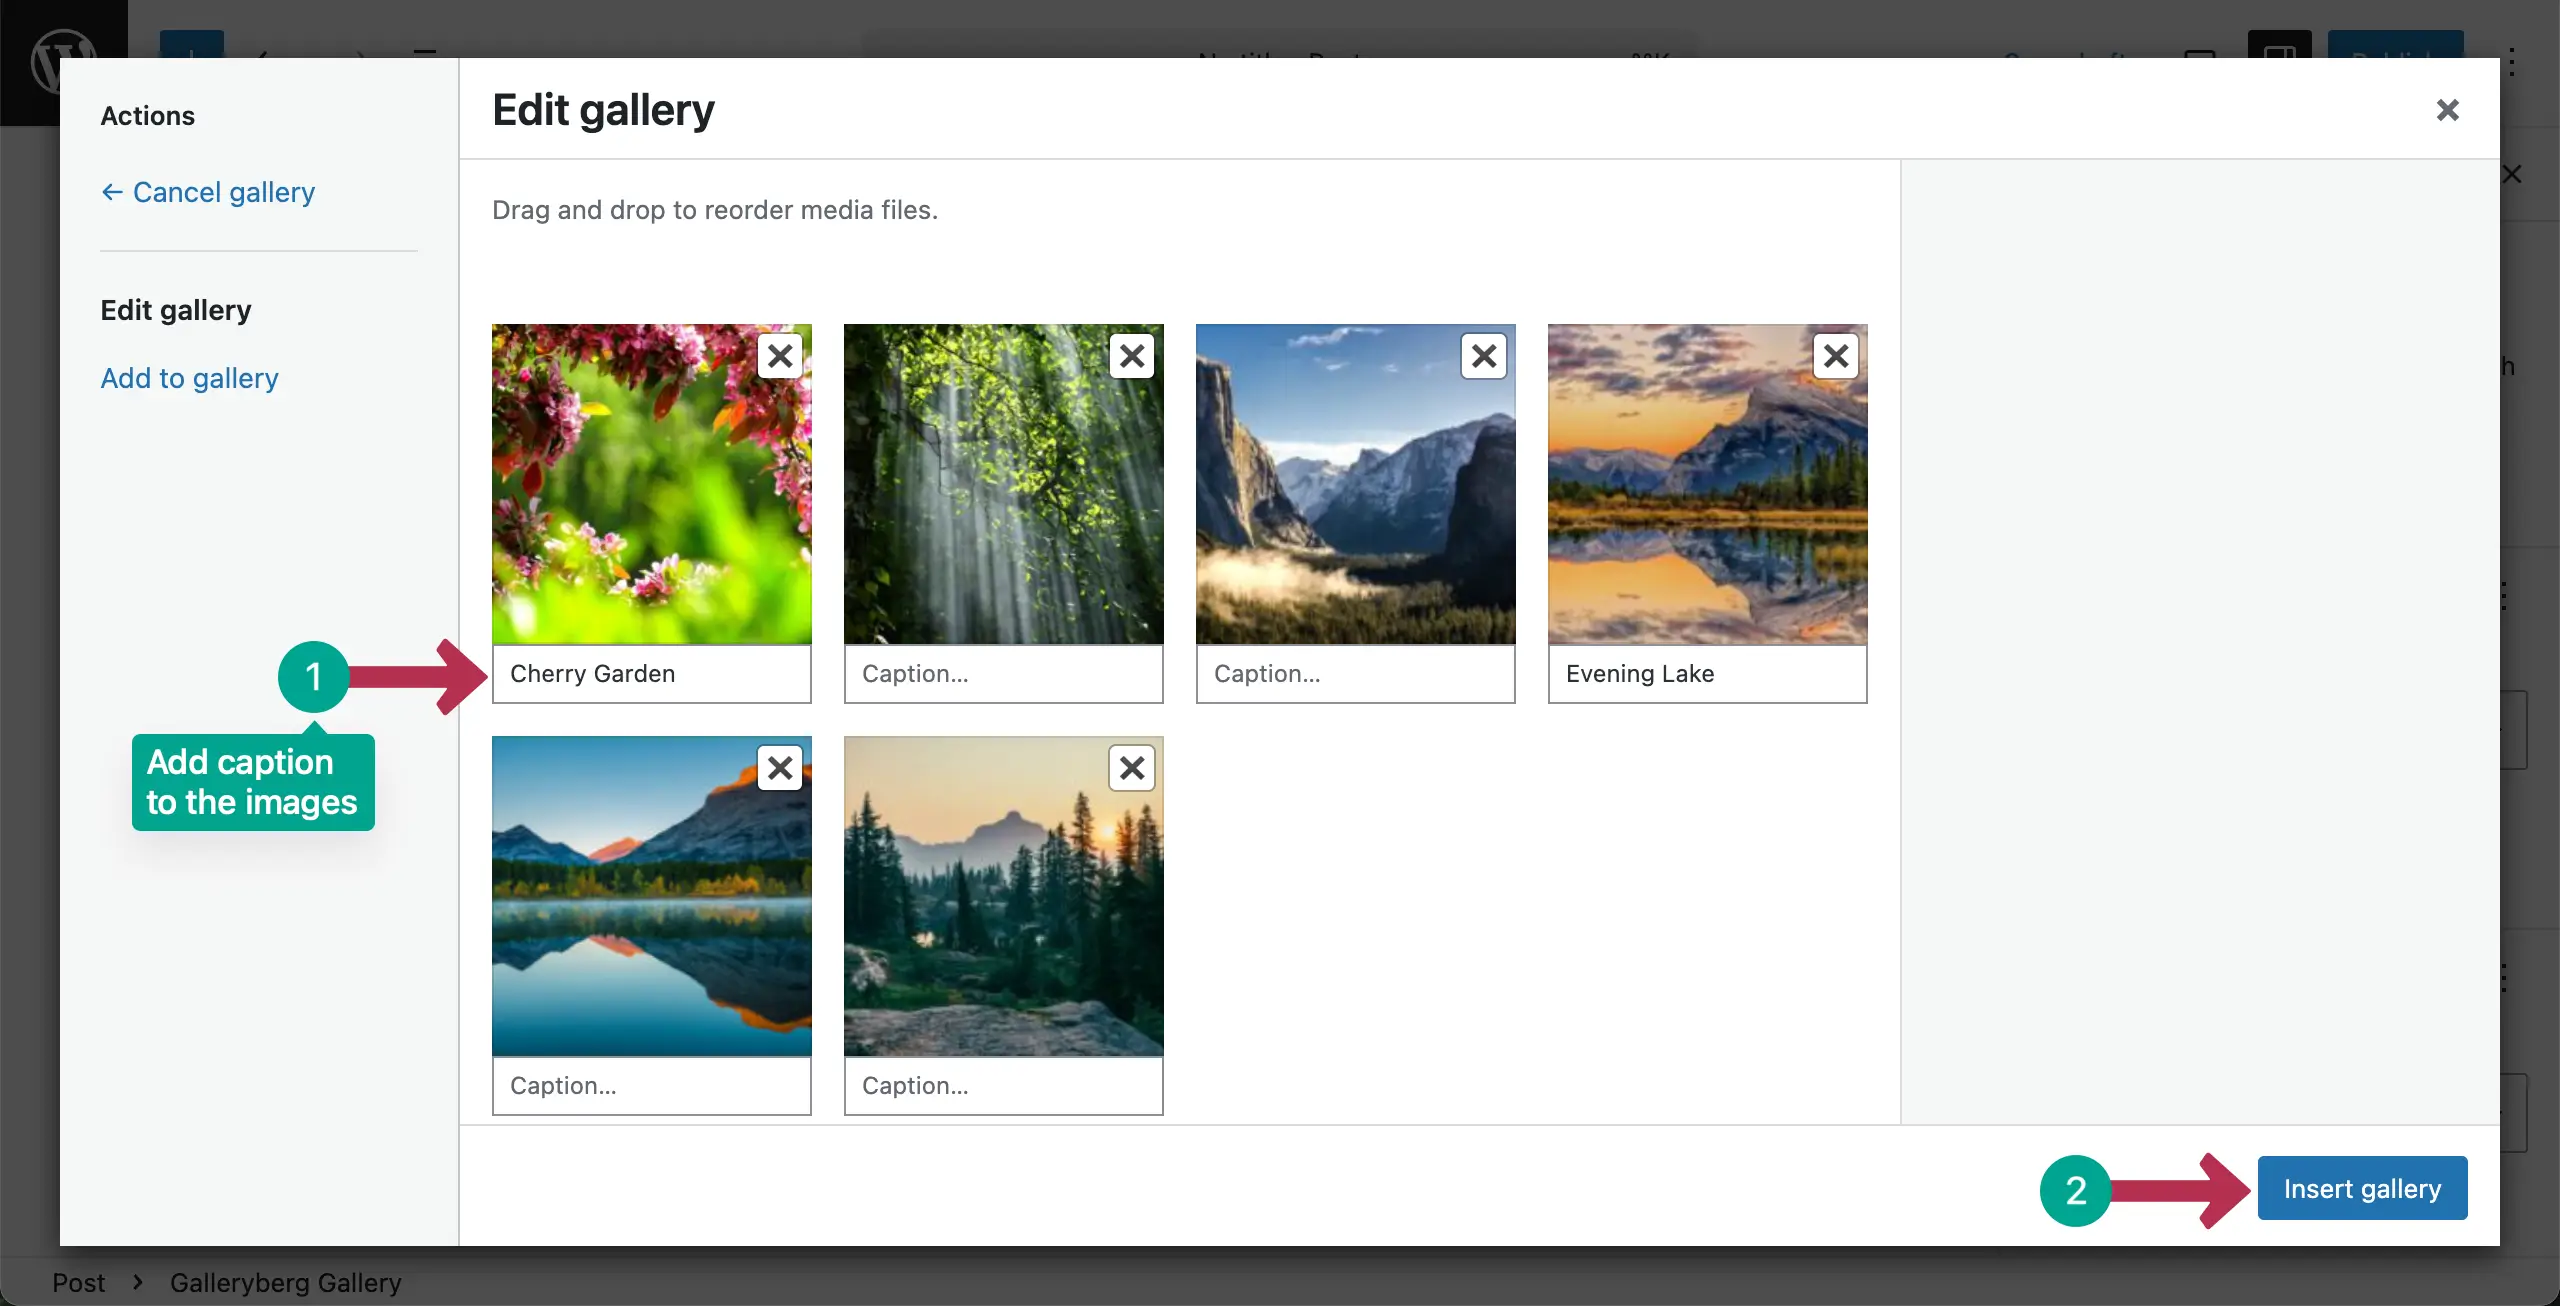
In the next screen, you’ll be allowed to write a caption for each image. Do this one by one or leave it blank. Once done, hit the Insert gallery button.
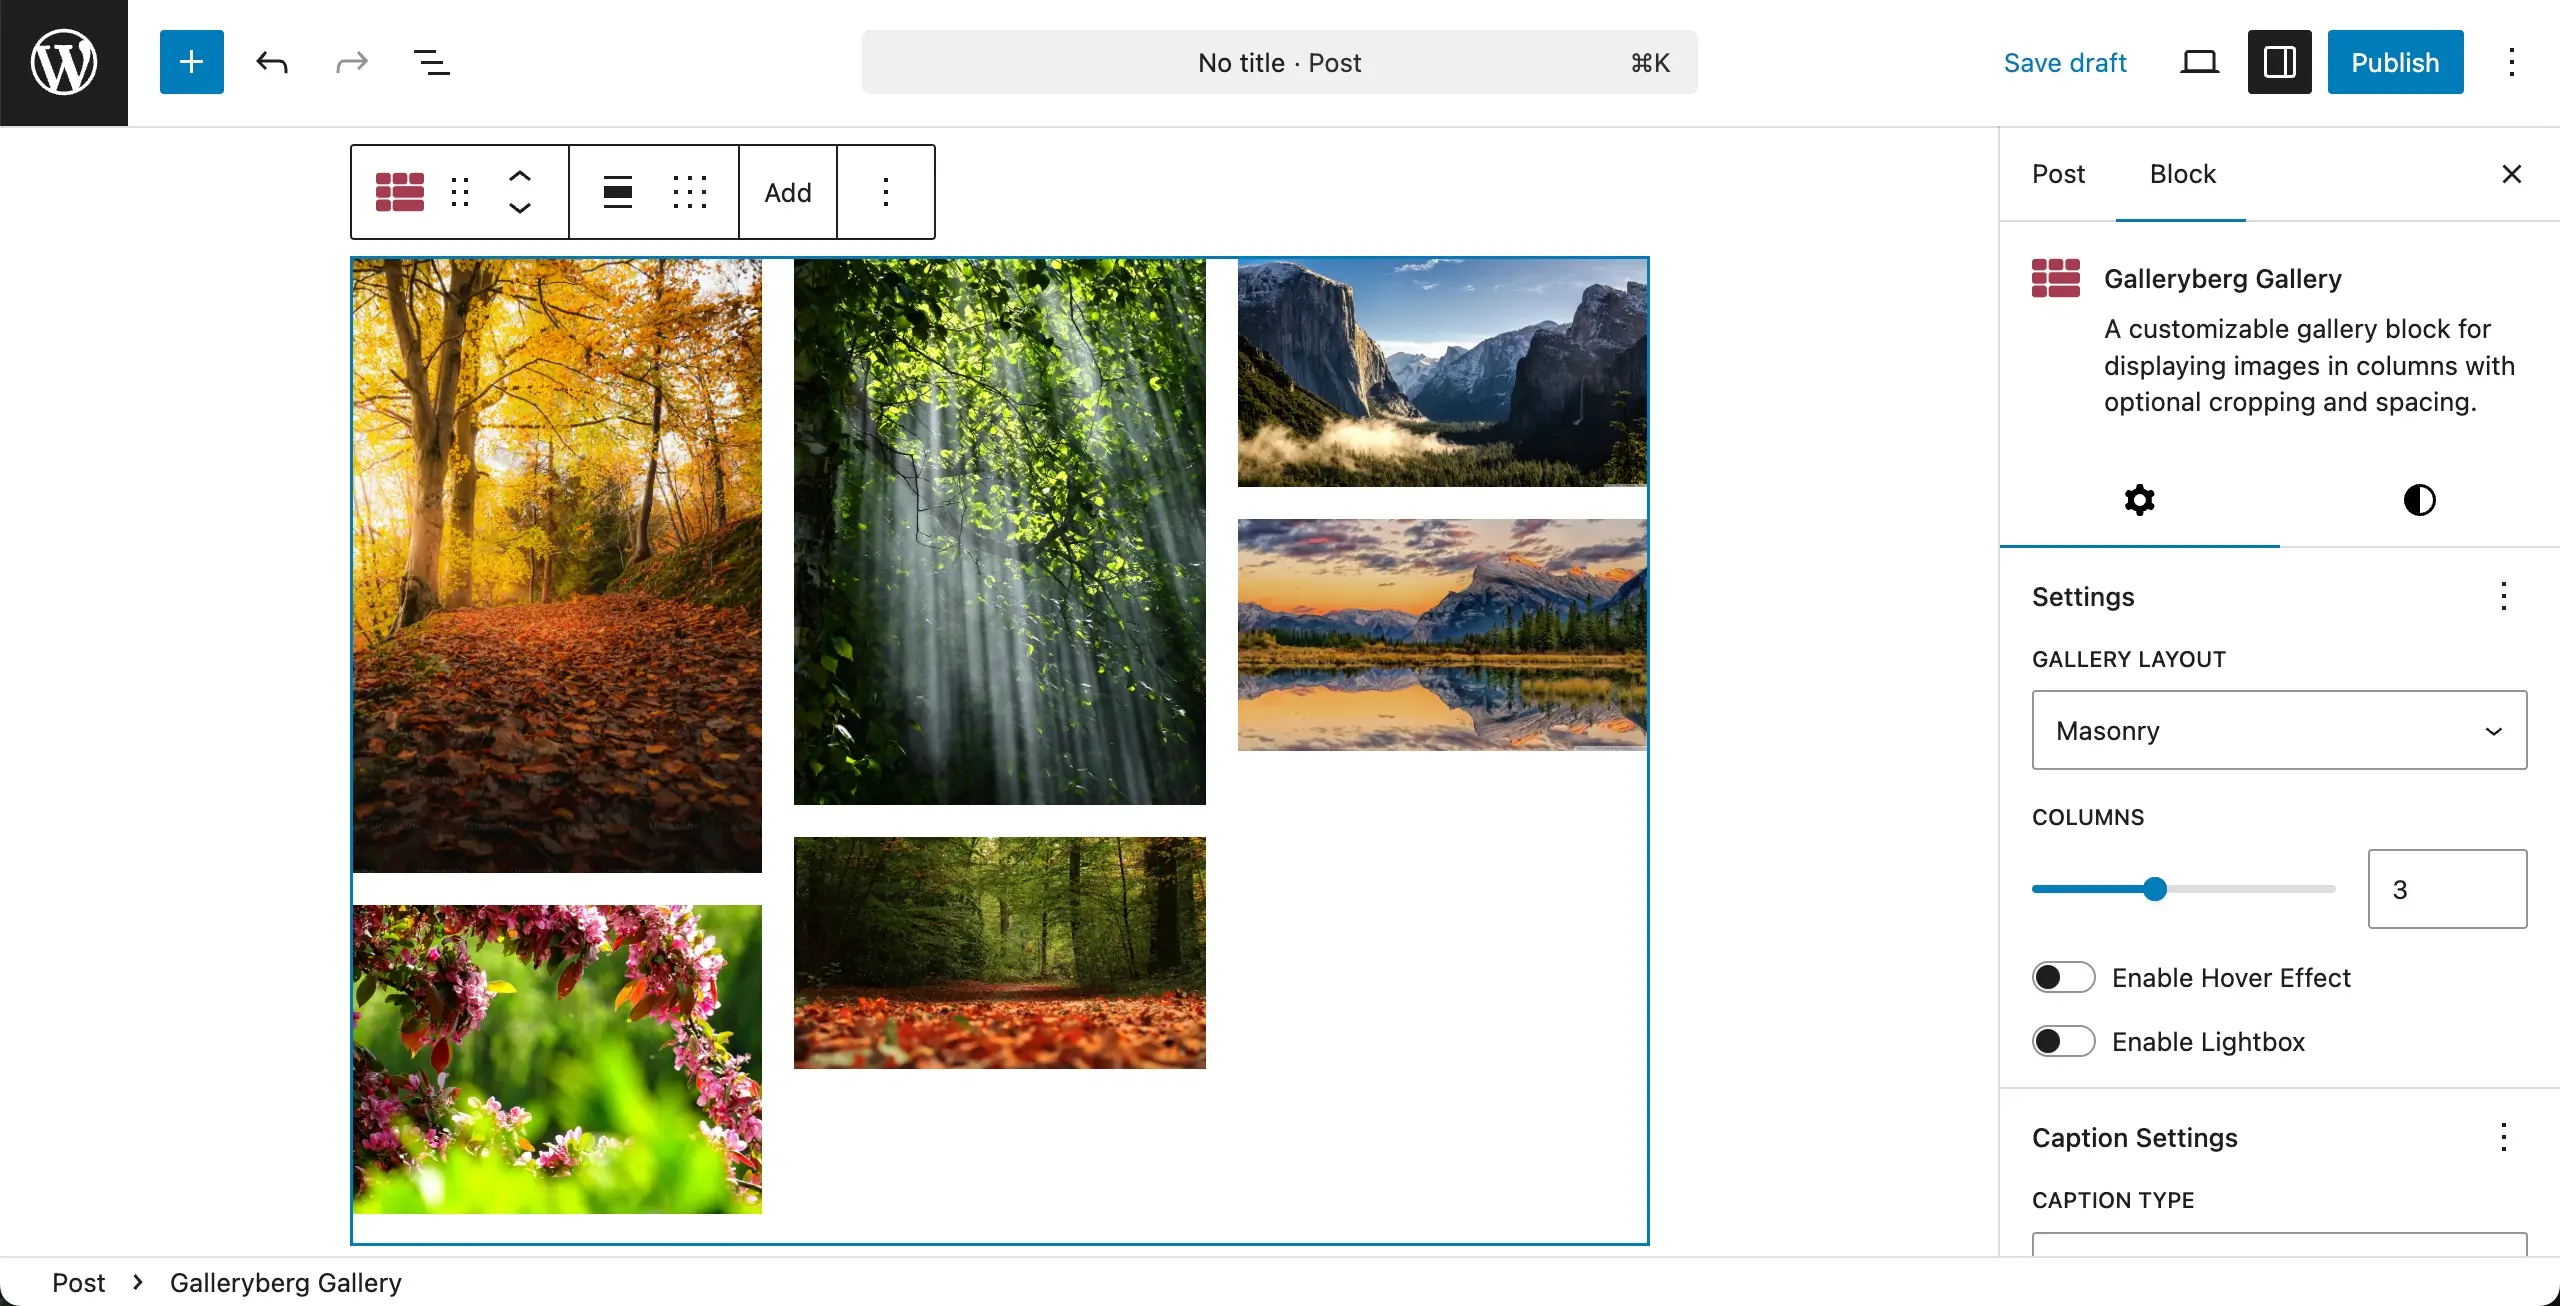
The gallery will be created instantly, as you can see below.
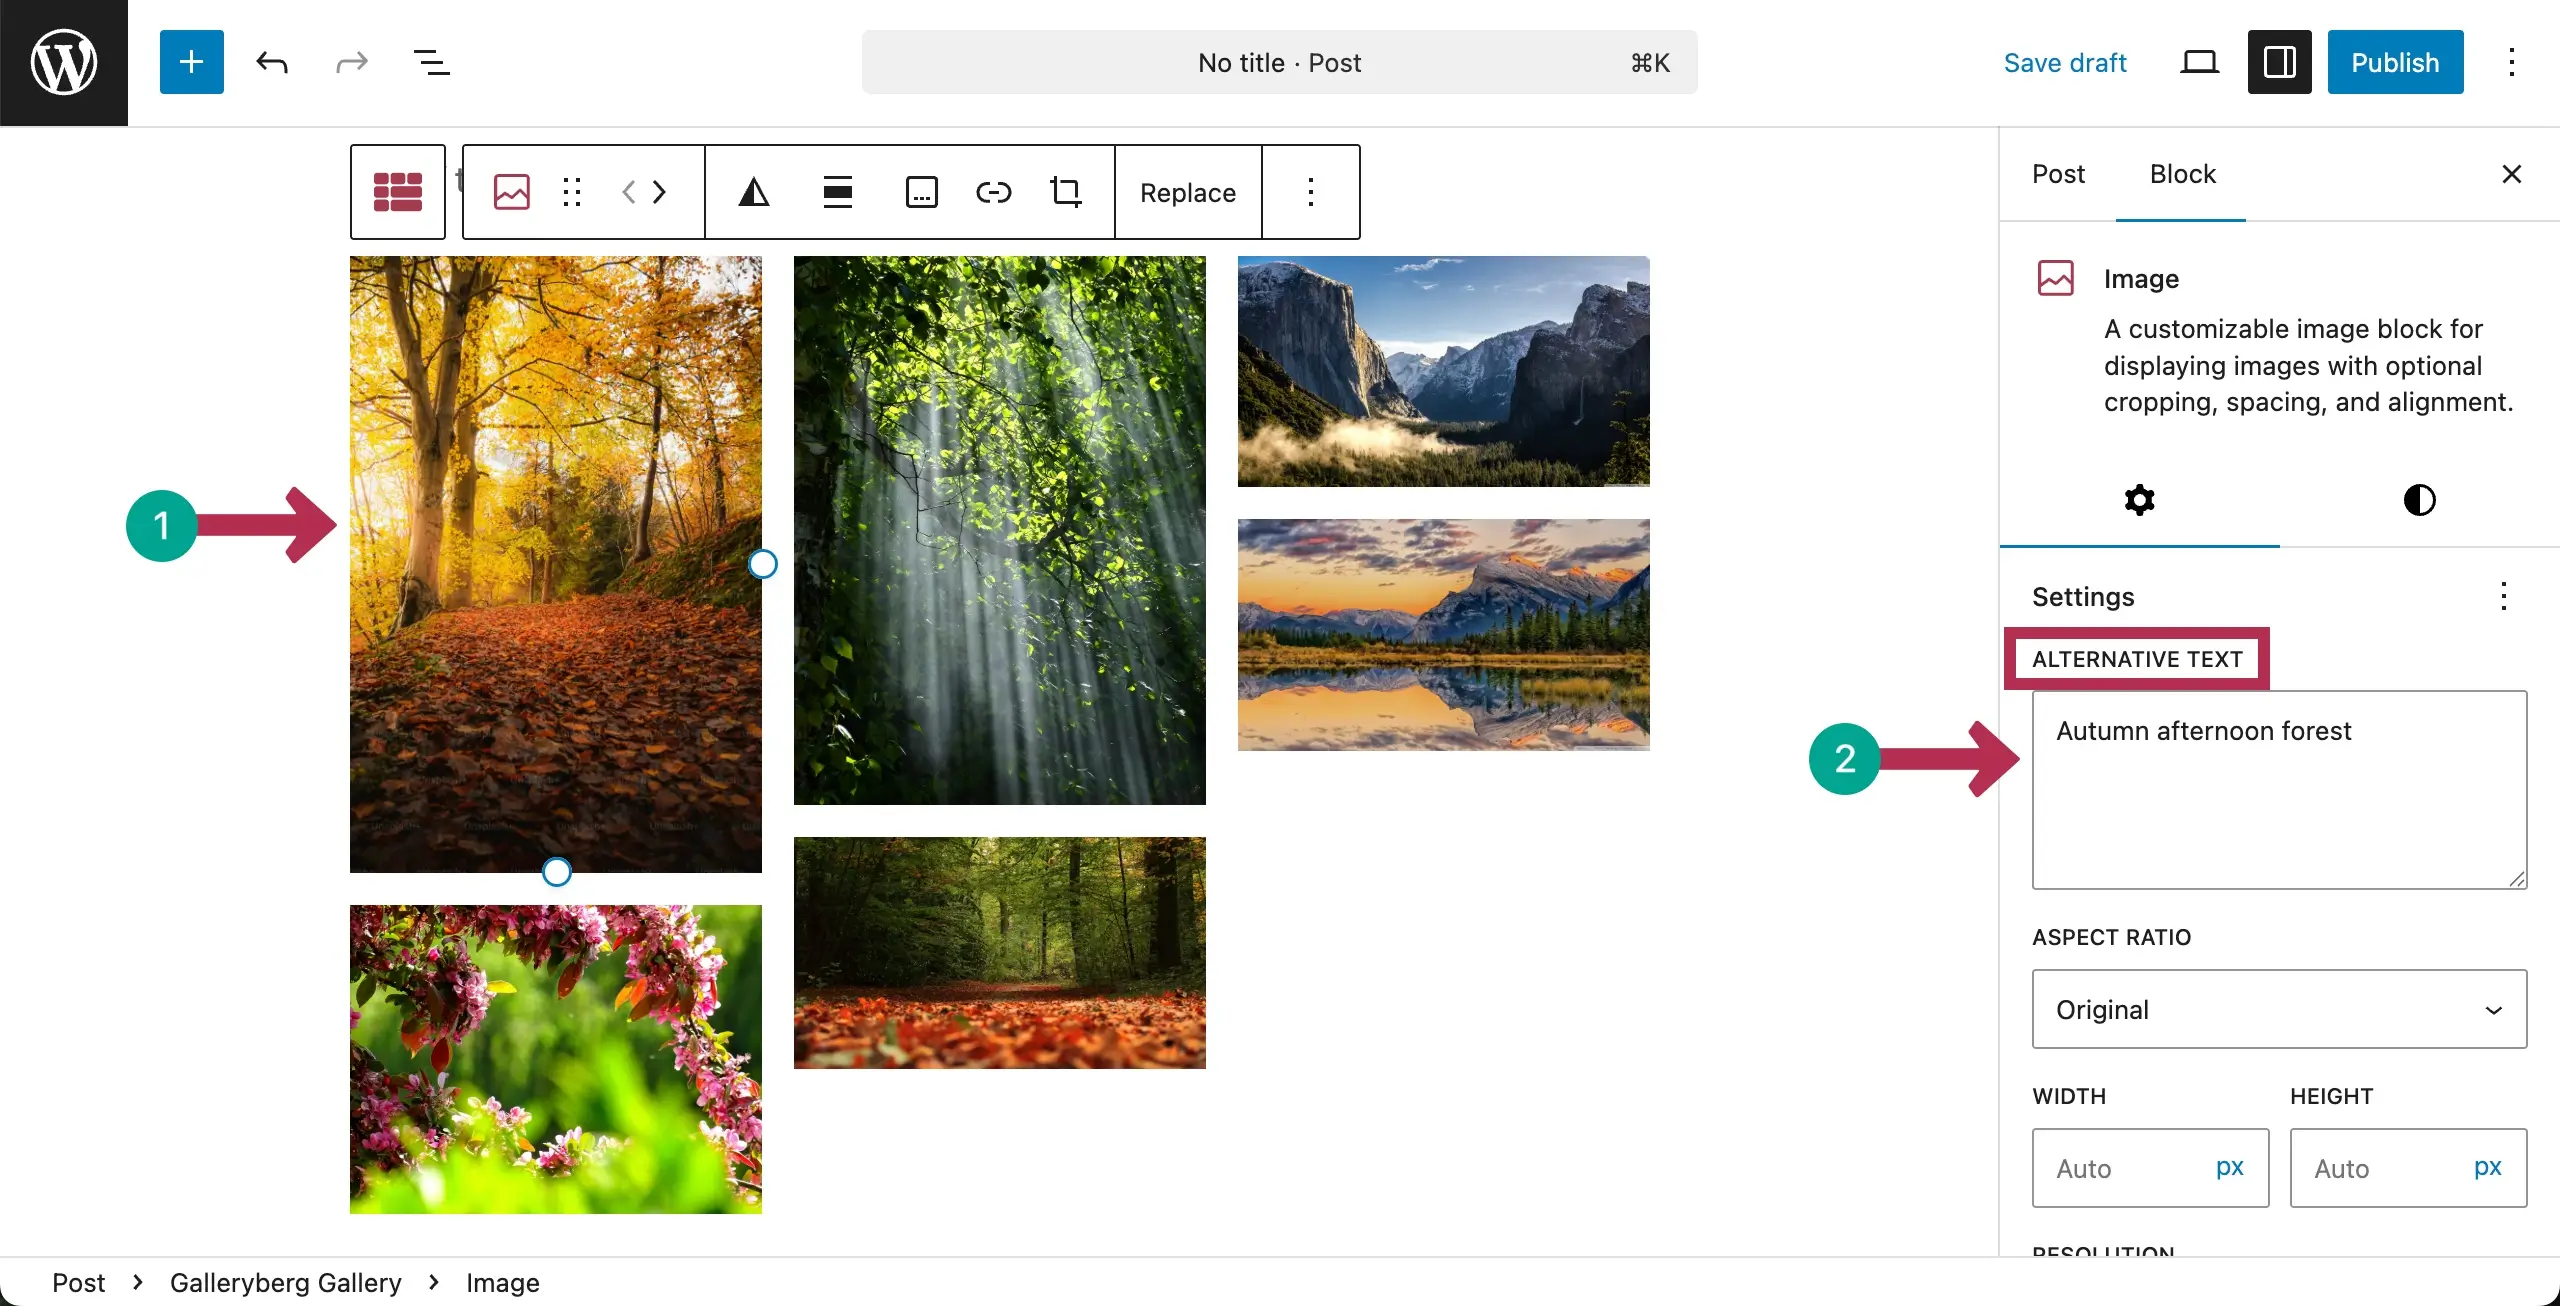
Now, you can add alternative text to the images individually by selecting them one by one.
Configuring General Settings #
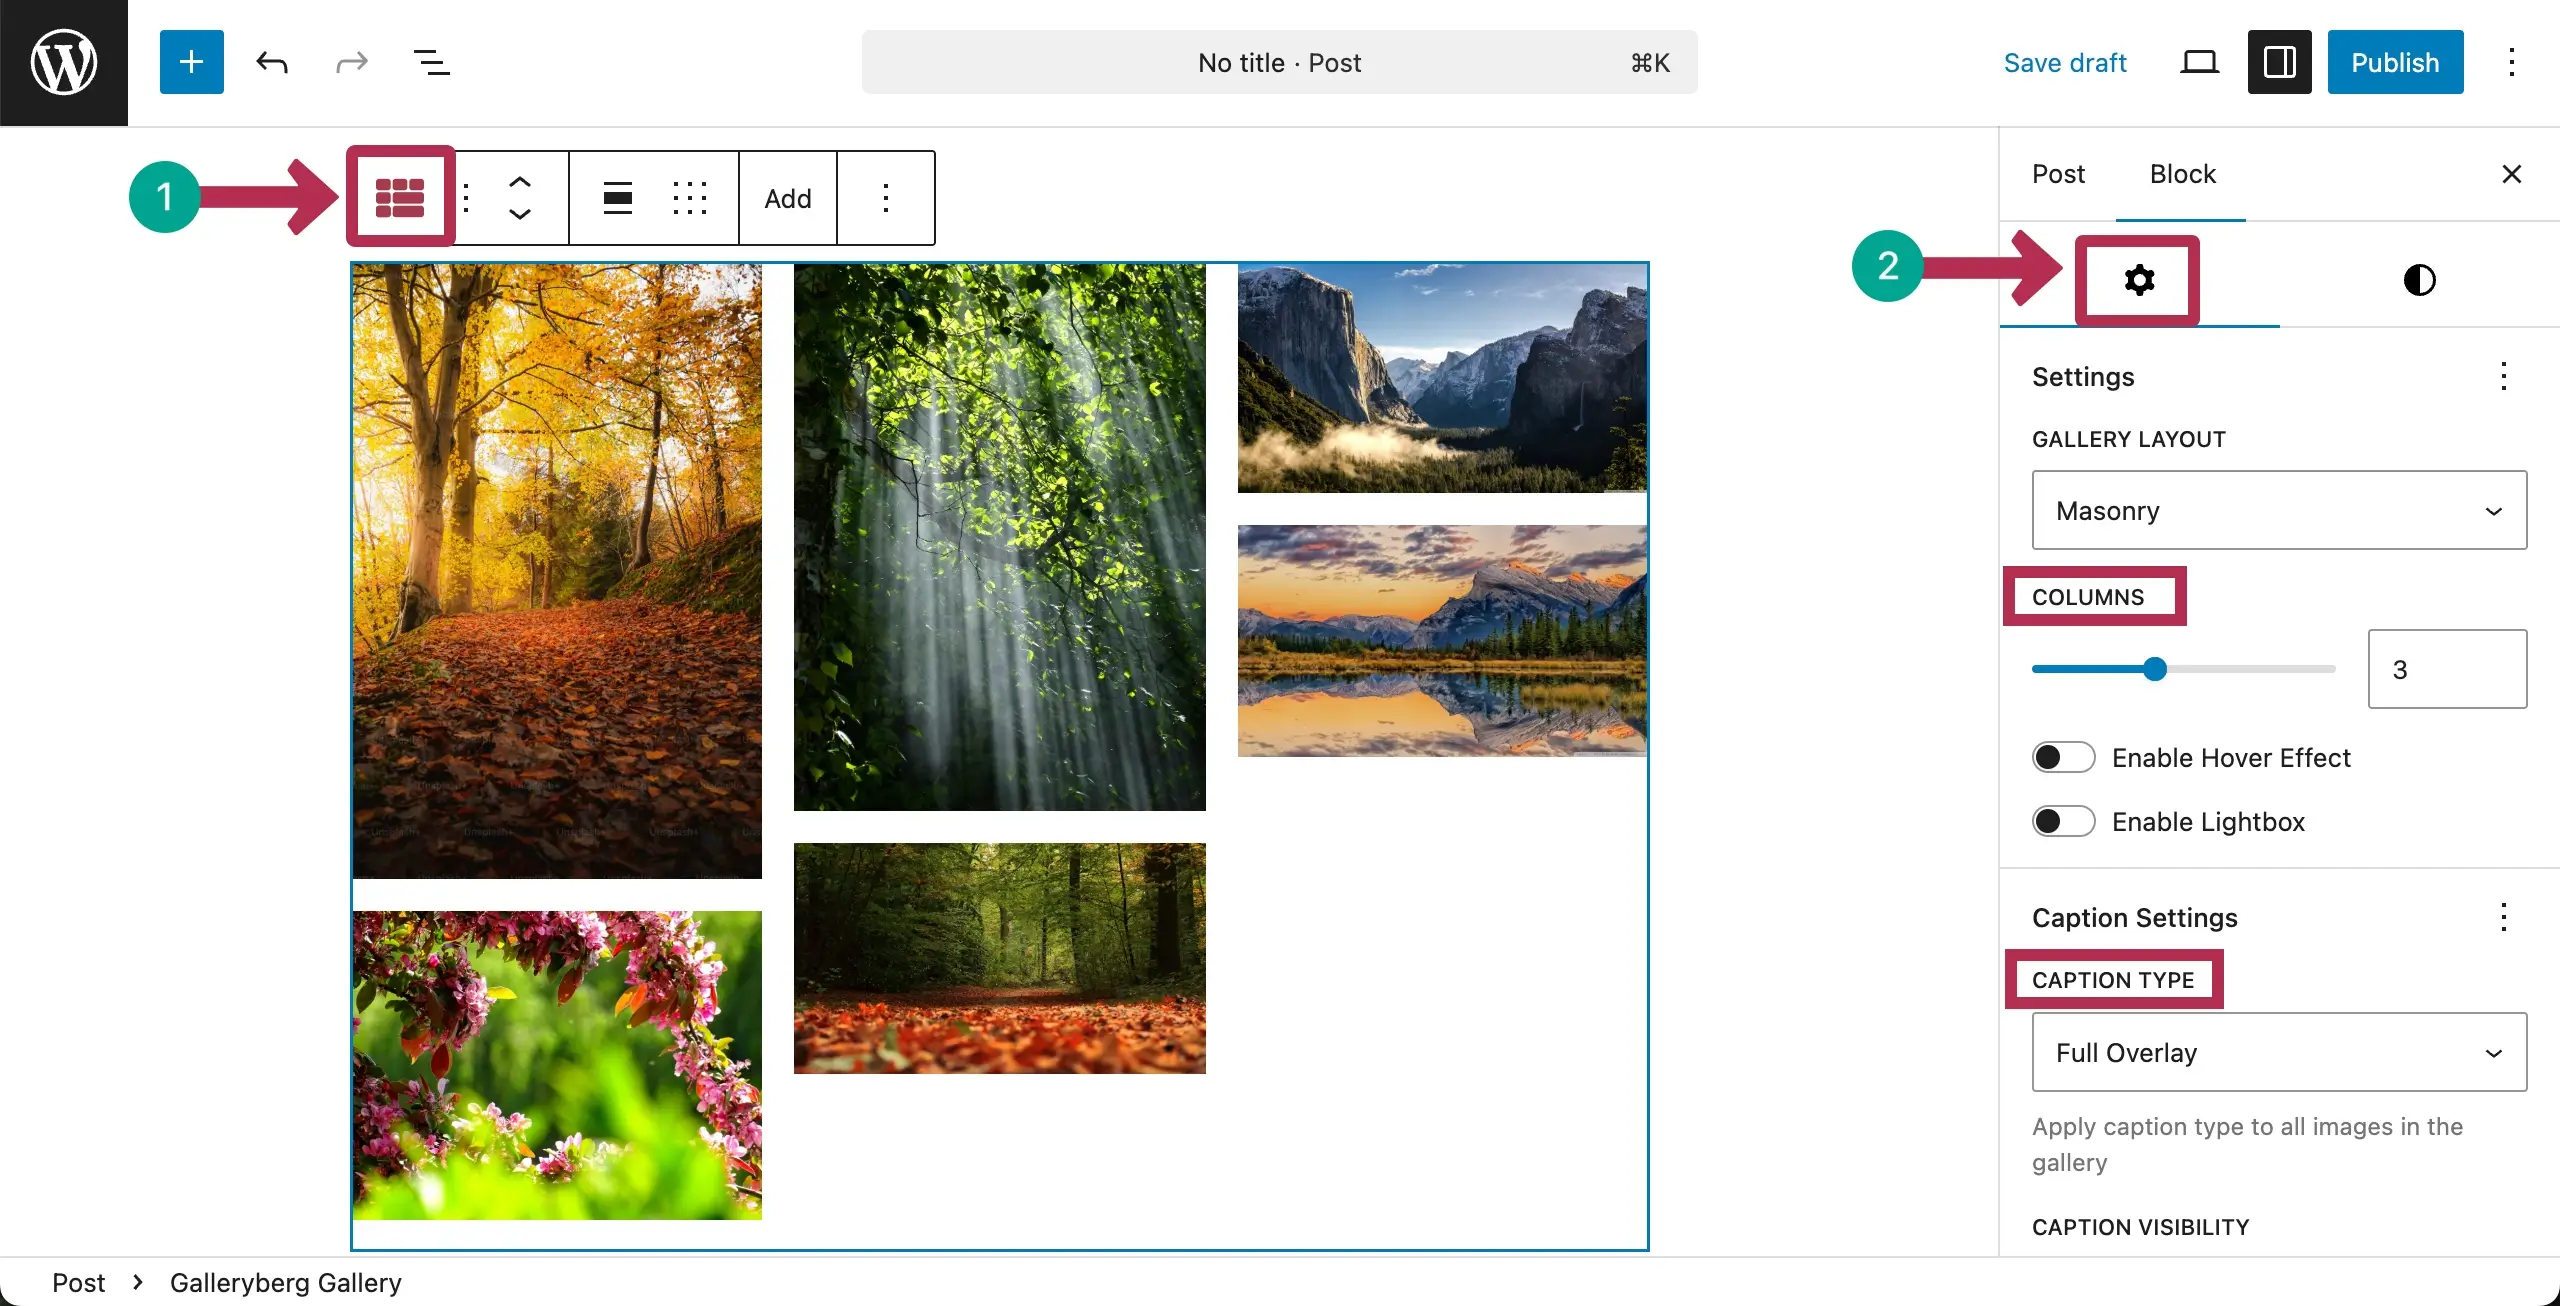
Select the entire Masonry gallery by clicking the Galleryberg icon on the toolbar. Then, come to the settings tab on the right sidebar.
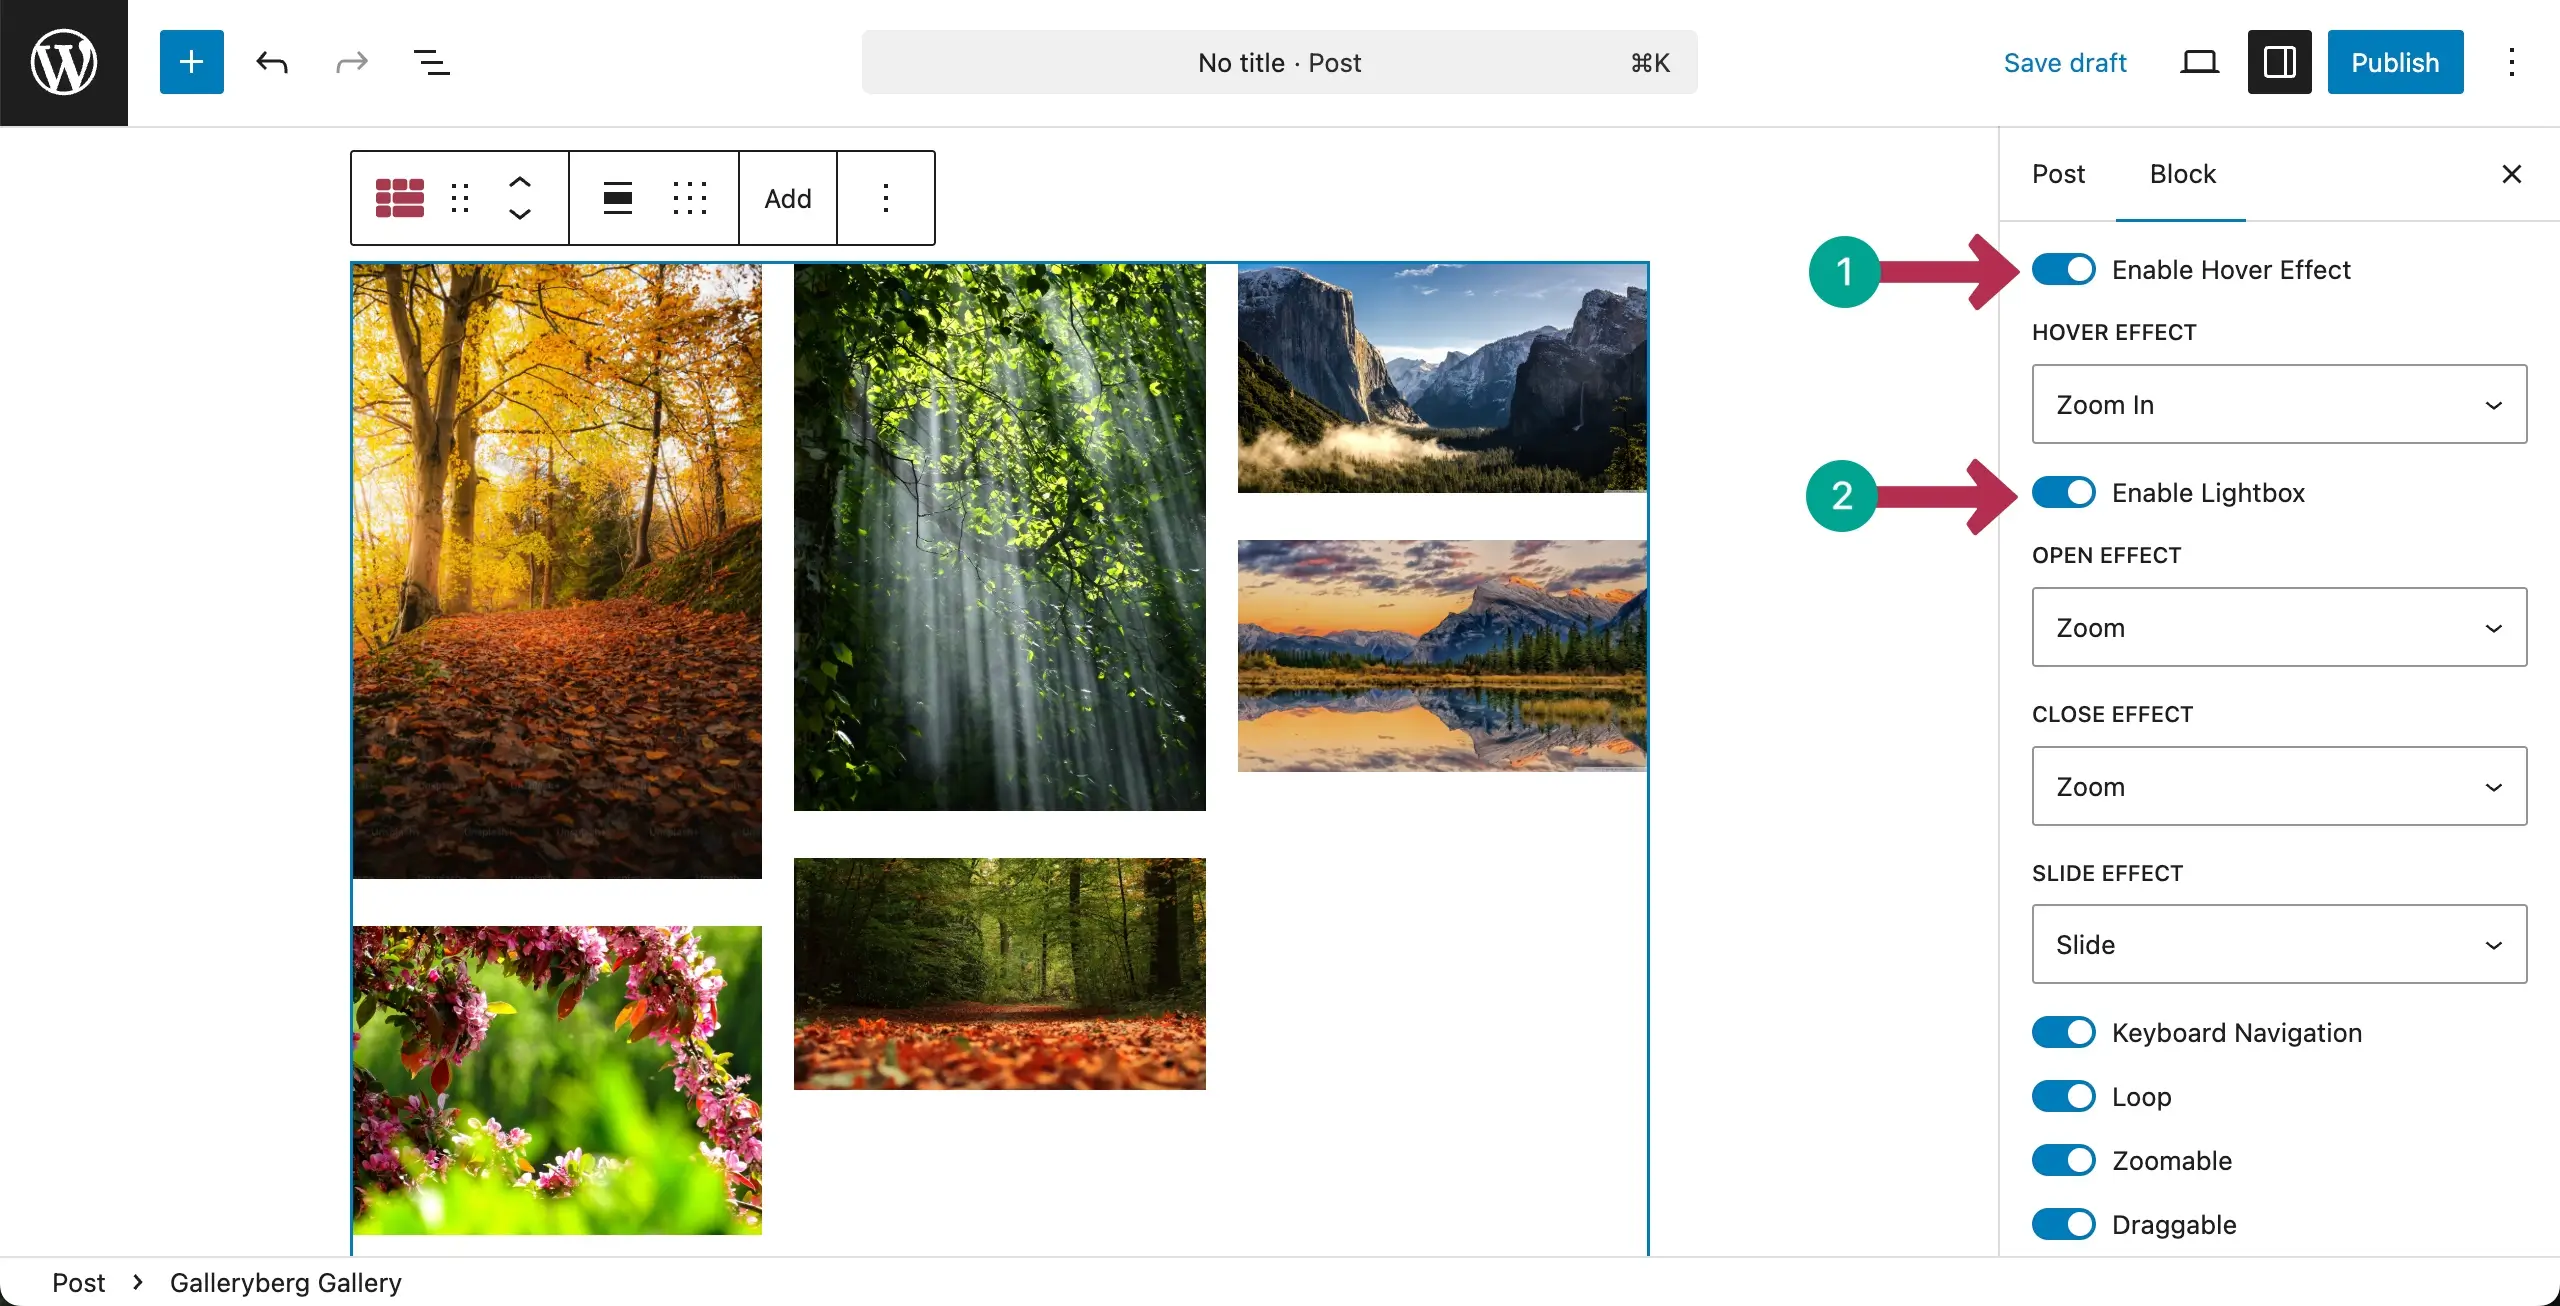
You can change the number of columns if you want. Next, you may enable/disable the hover effect and lightbox by hitting the toggle button.
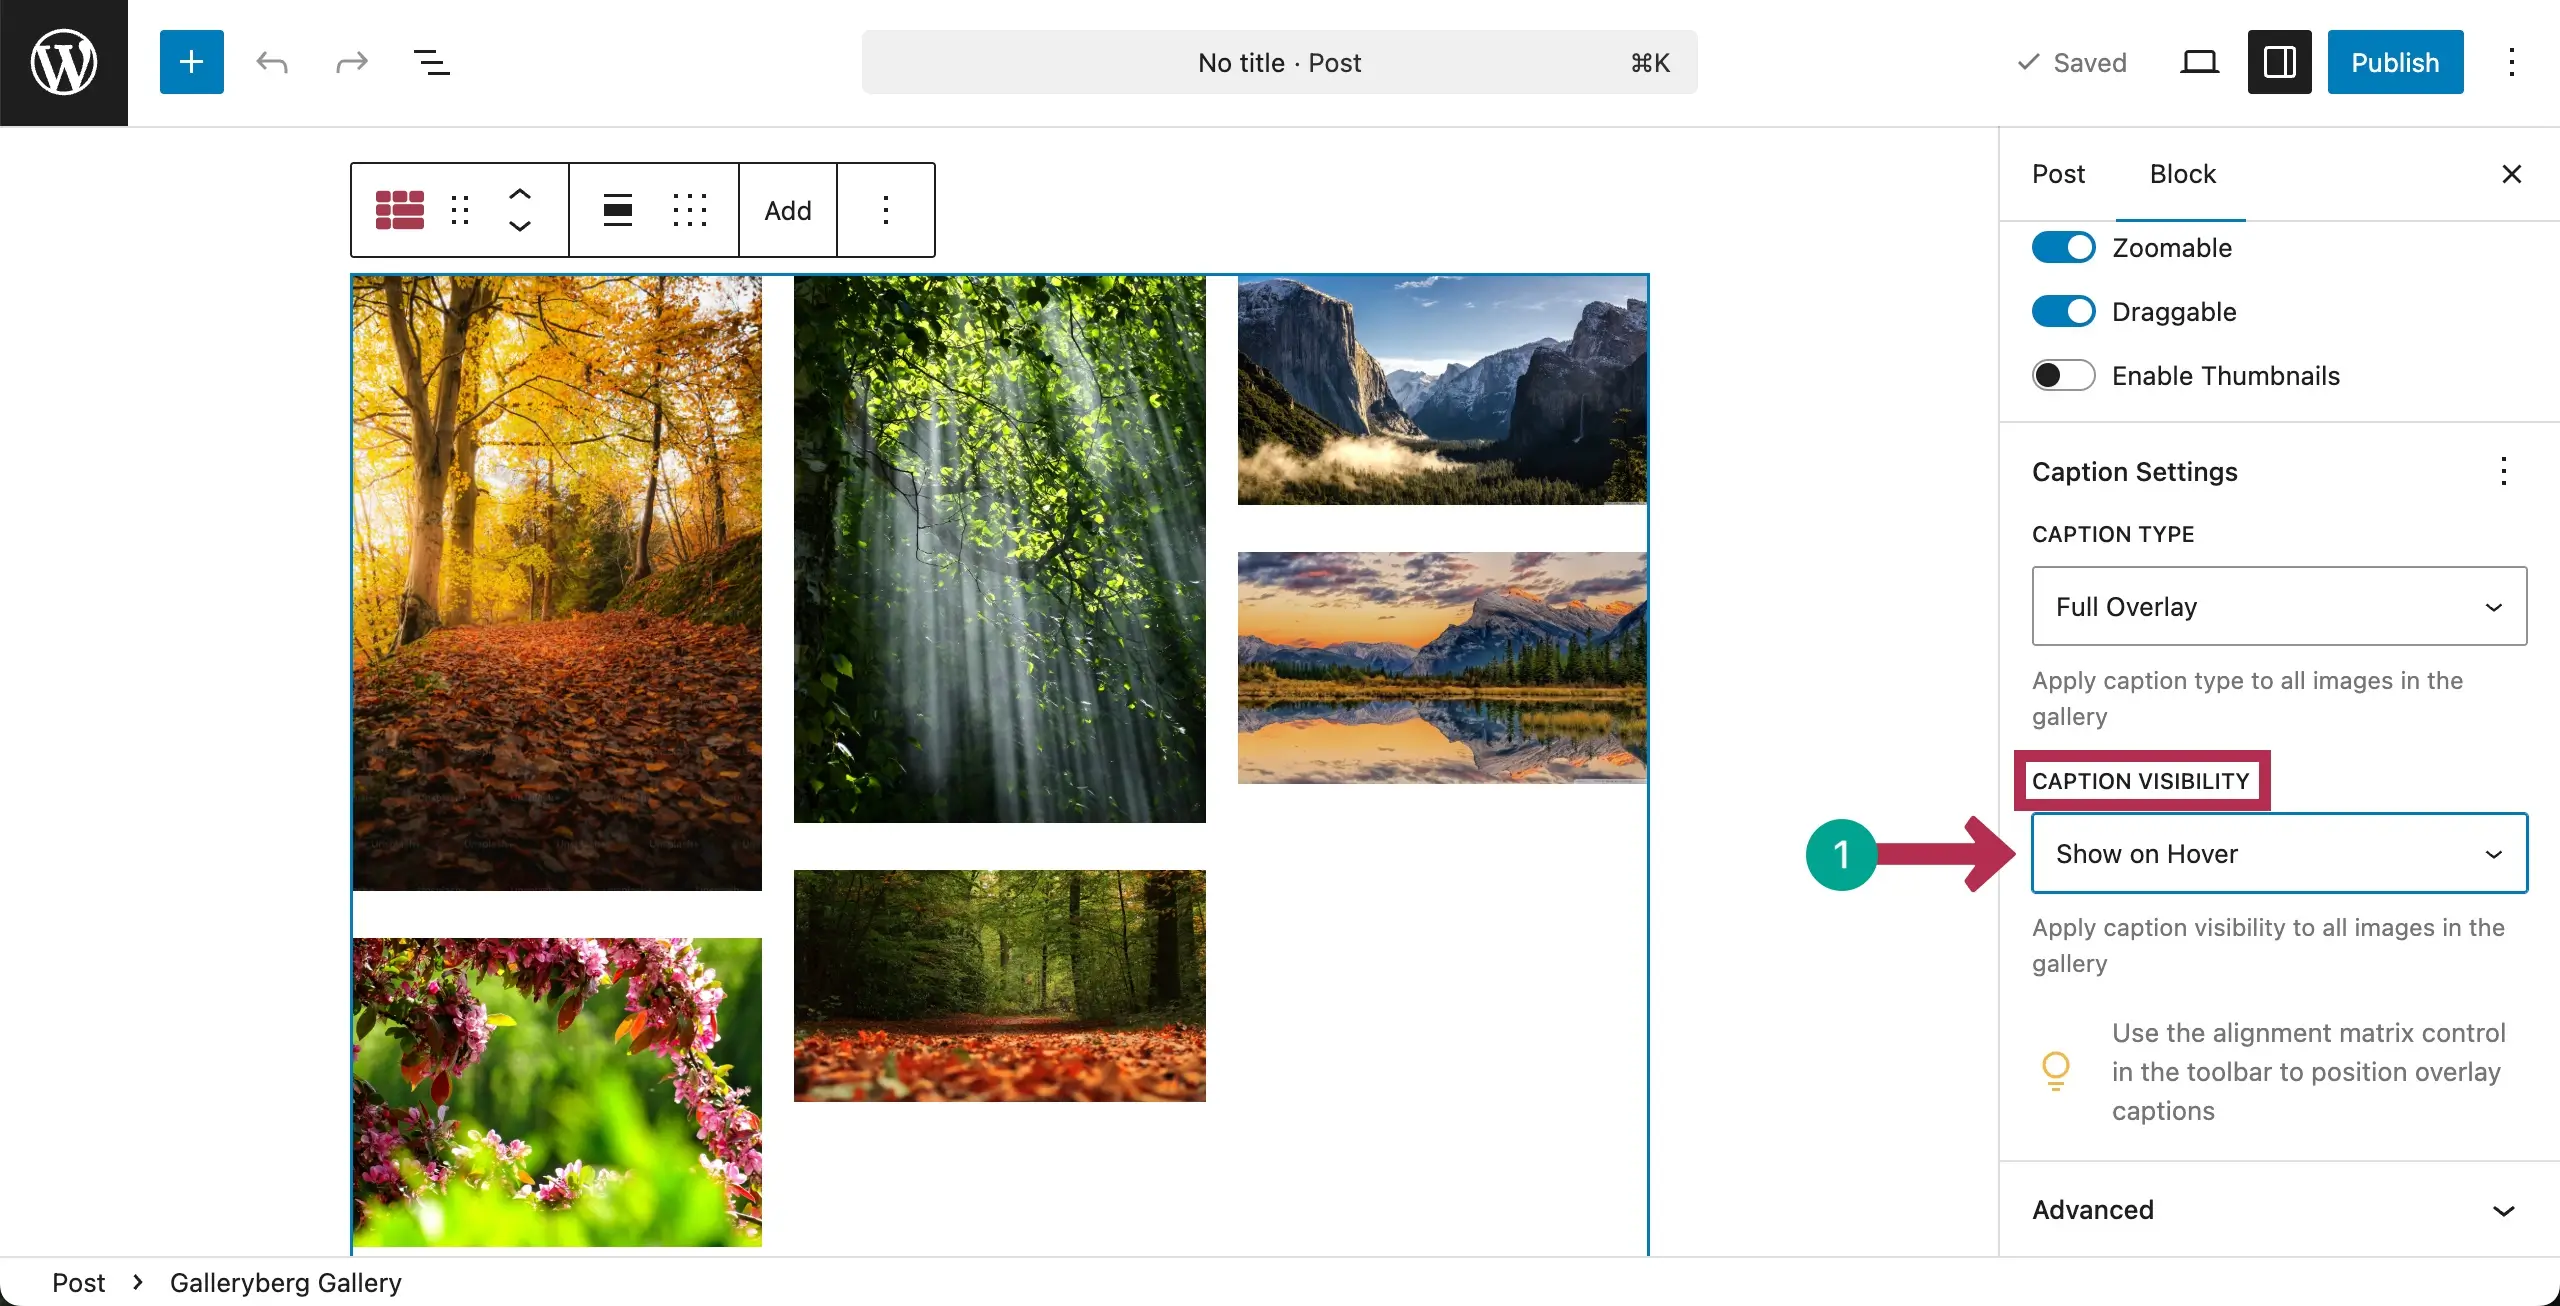
Specify the Caption Type where you want to display captions. There are three options: Below Image, Full Overlay, or Bar Overlay.
If the Hover Effect and Lightbox are enabled, some more options will appear immediately below. Hope you can explore them alone.
Scrolling down the settings tab a bit, you’ll see Caption Visibility to set how the caption will be visible. There are three options. They are: Always Visible, Show on Hover, and Hide on Hover.
Choose the option you like.
Customization #
Come to the Styles tab on the right sidebar.
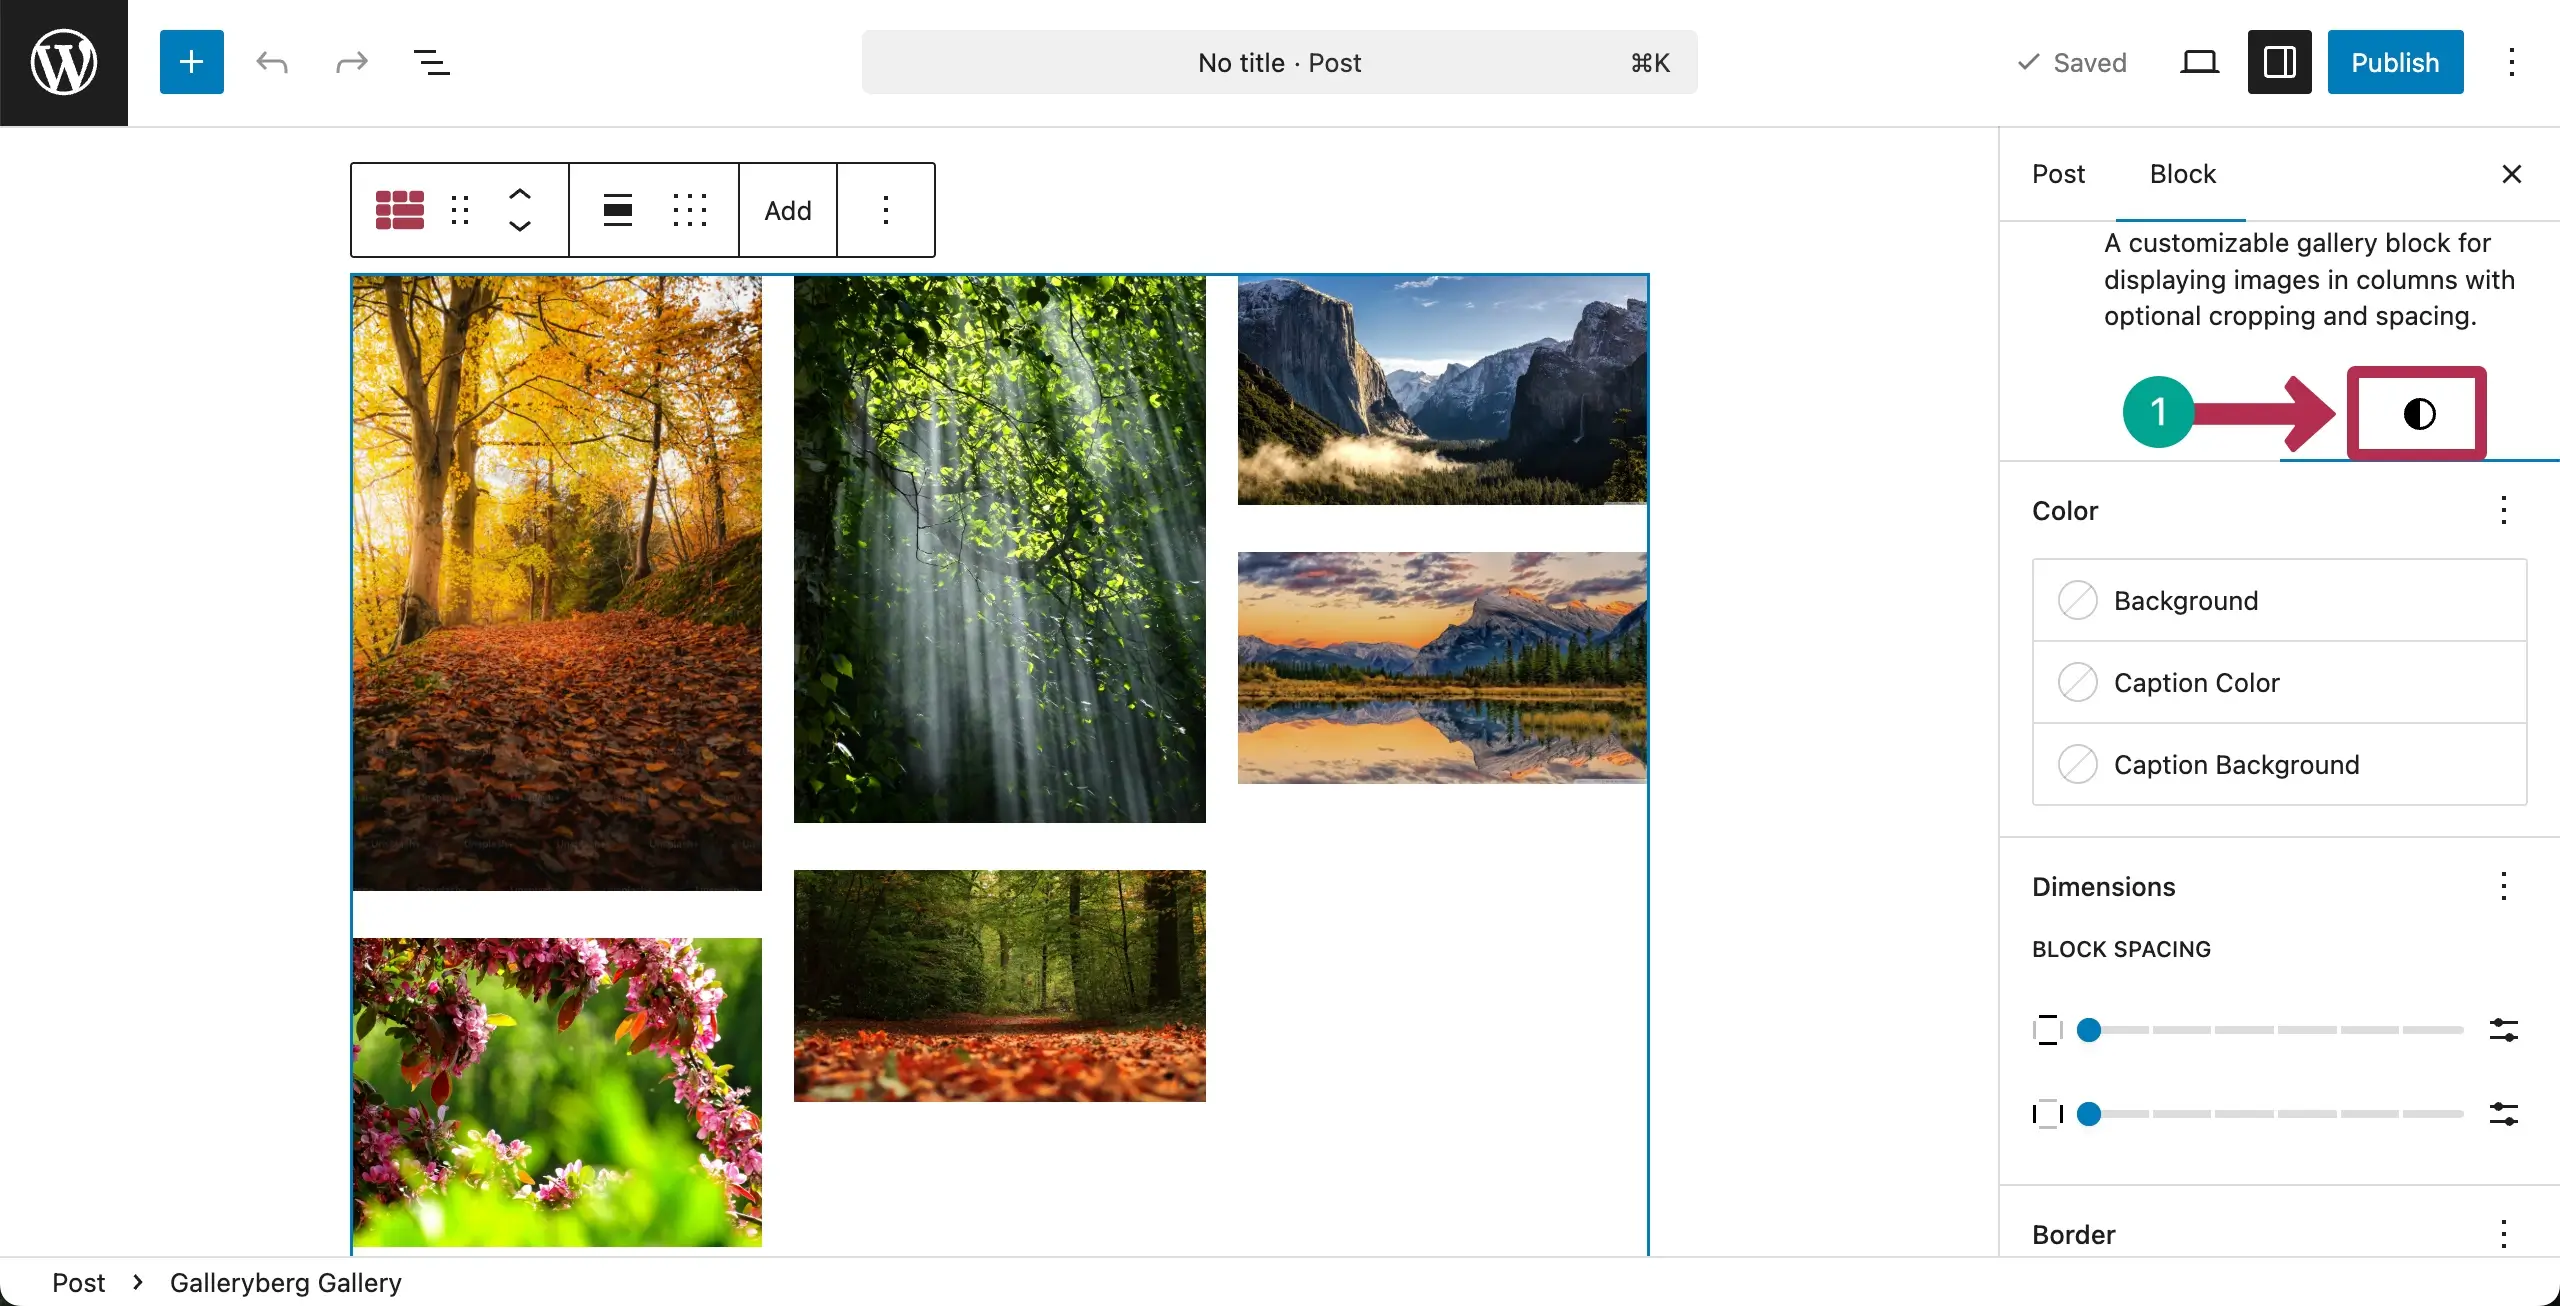
Let’s first colorize the gallery. There are three types of colors you can set. They are Background, Caption Color, and Caption Background Color.
You can see that we have already set the color for each of these types.
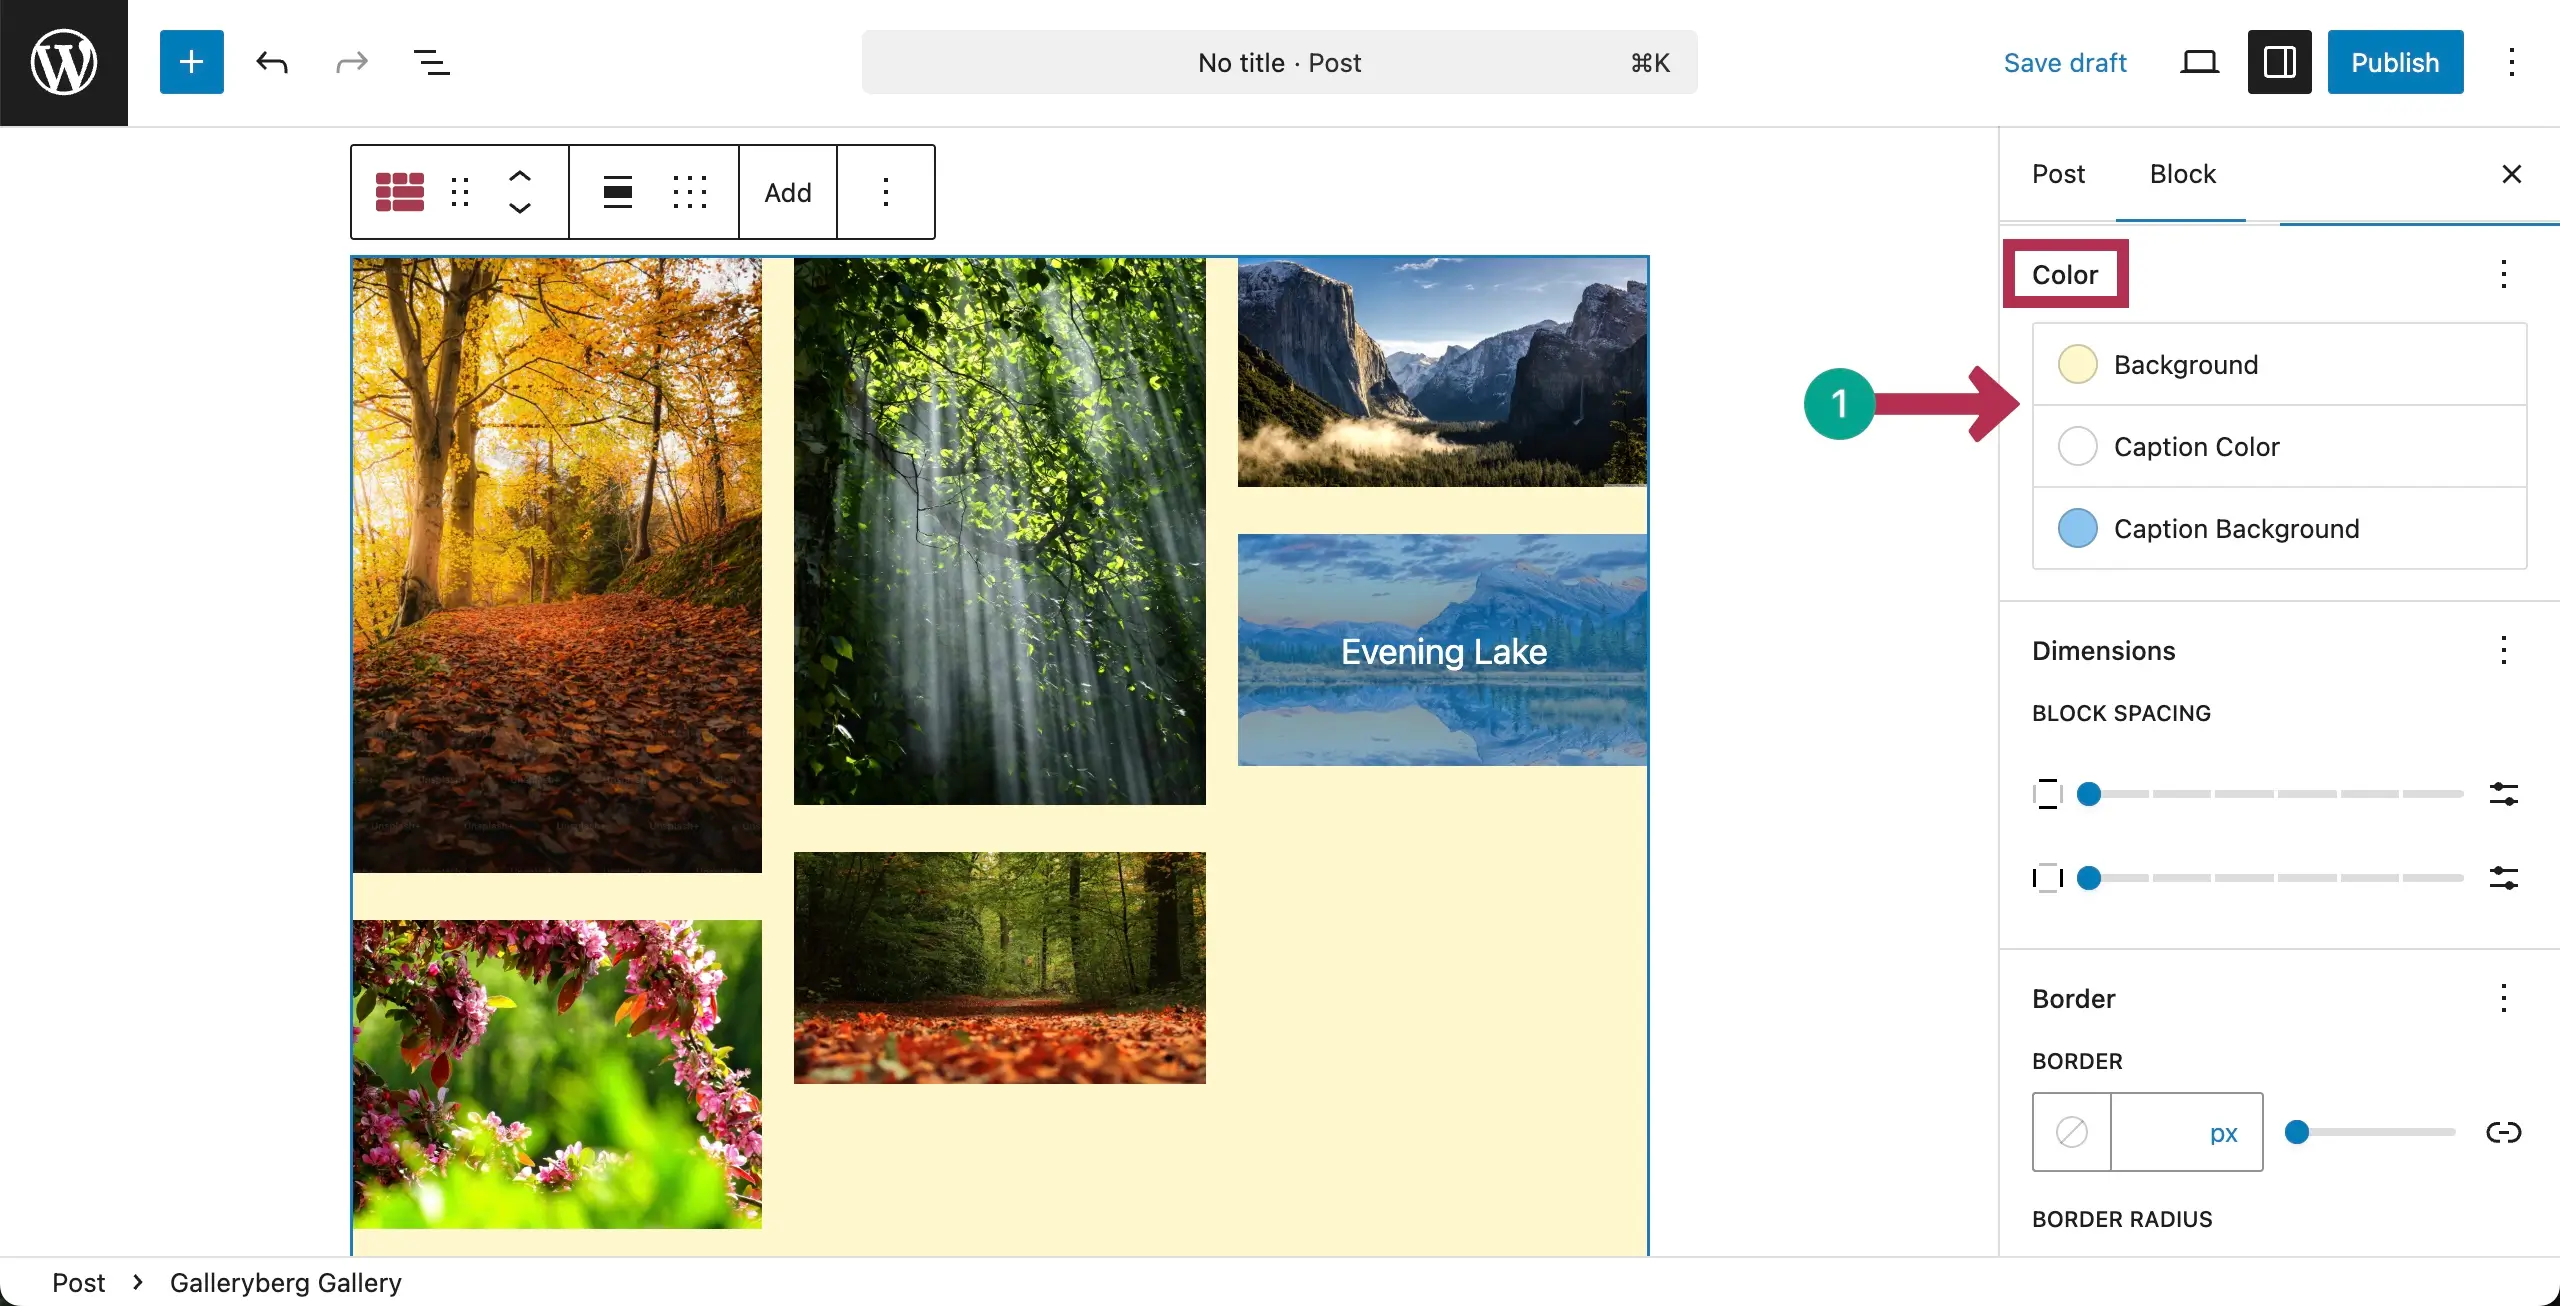
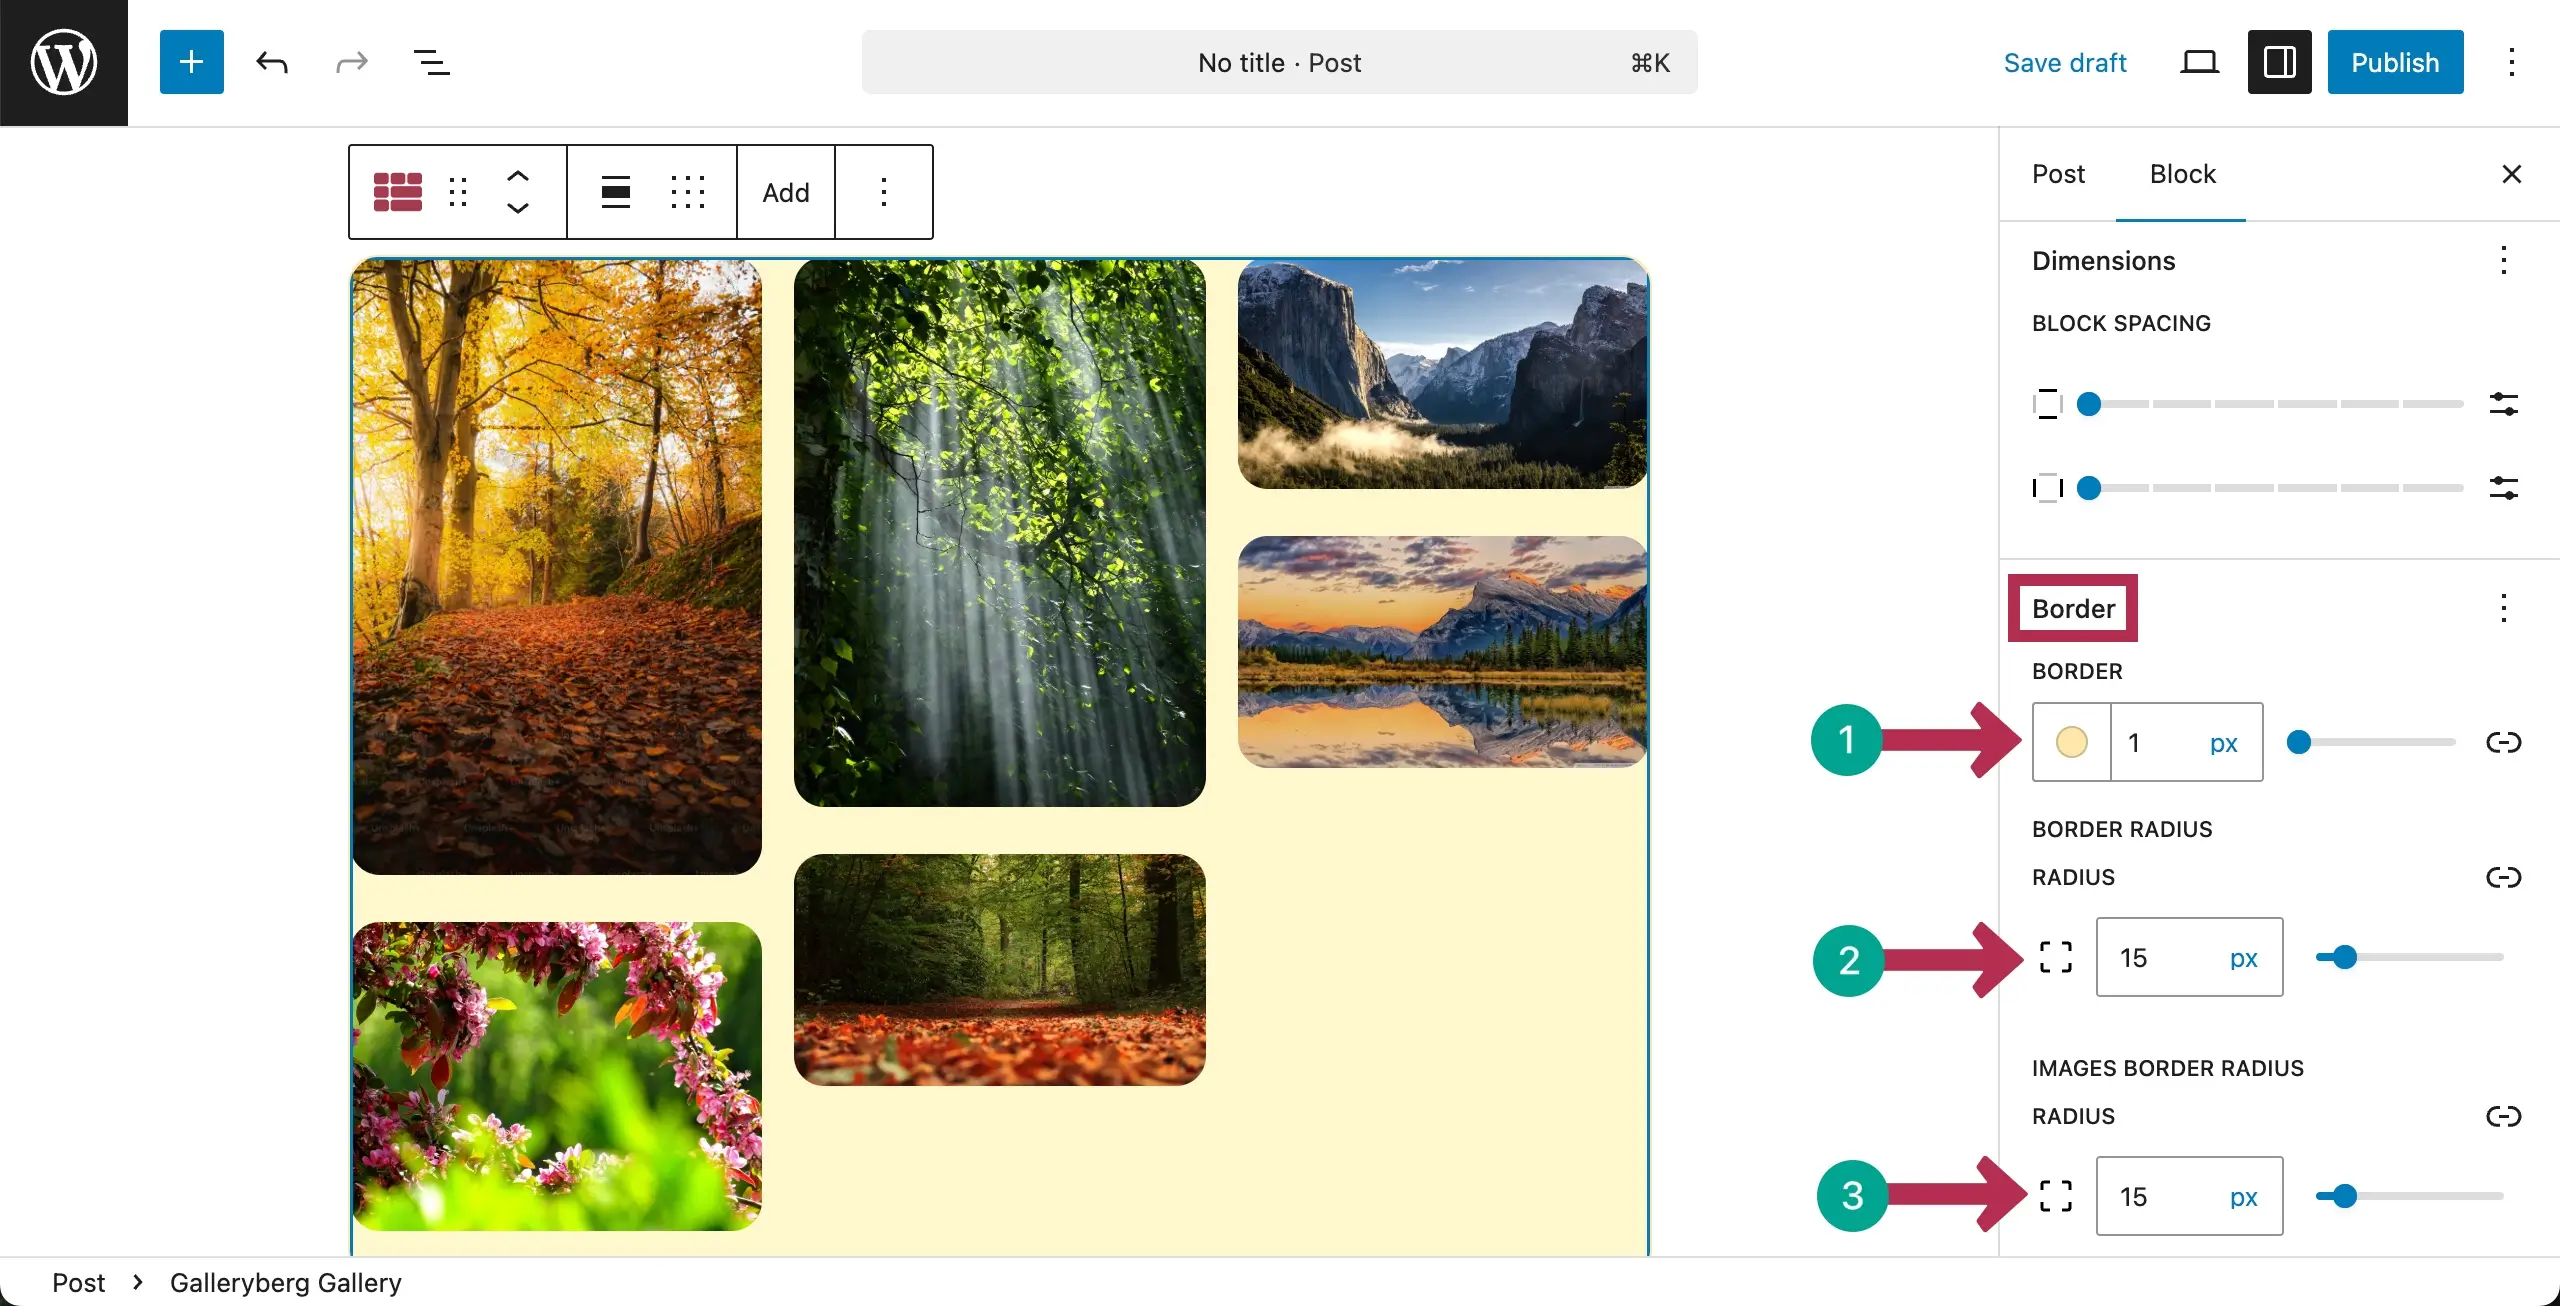
Scrolling down the sidebar, you’ll get options to set a color for the border, width, and radius.
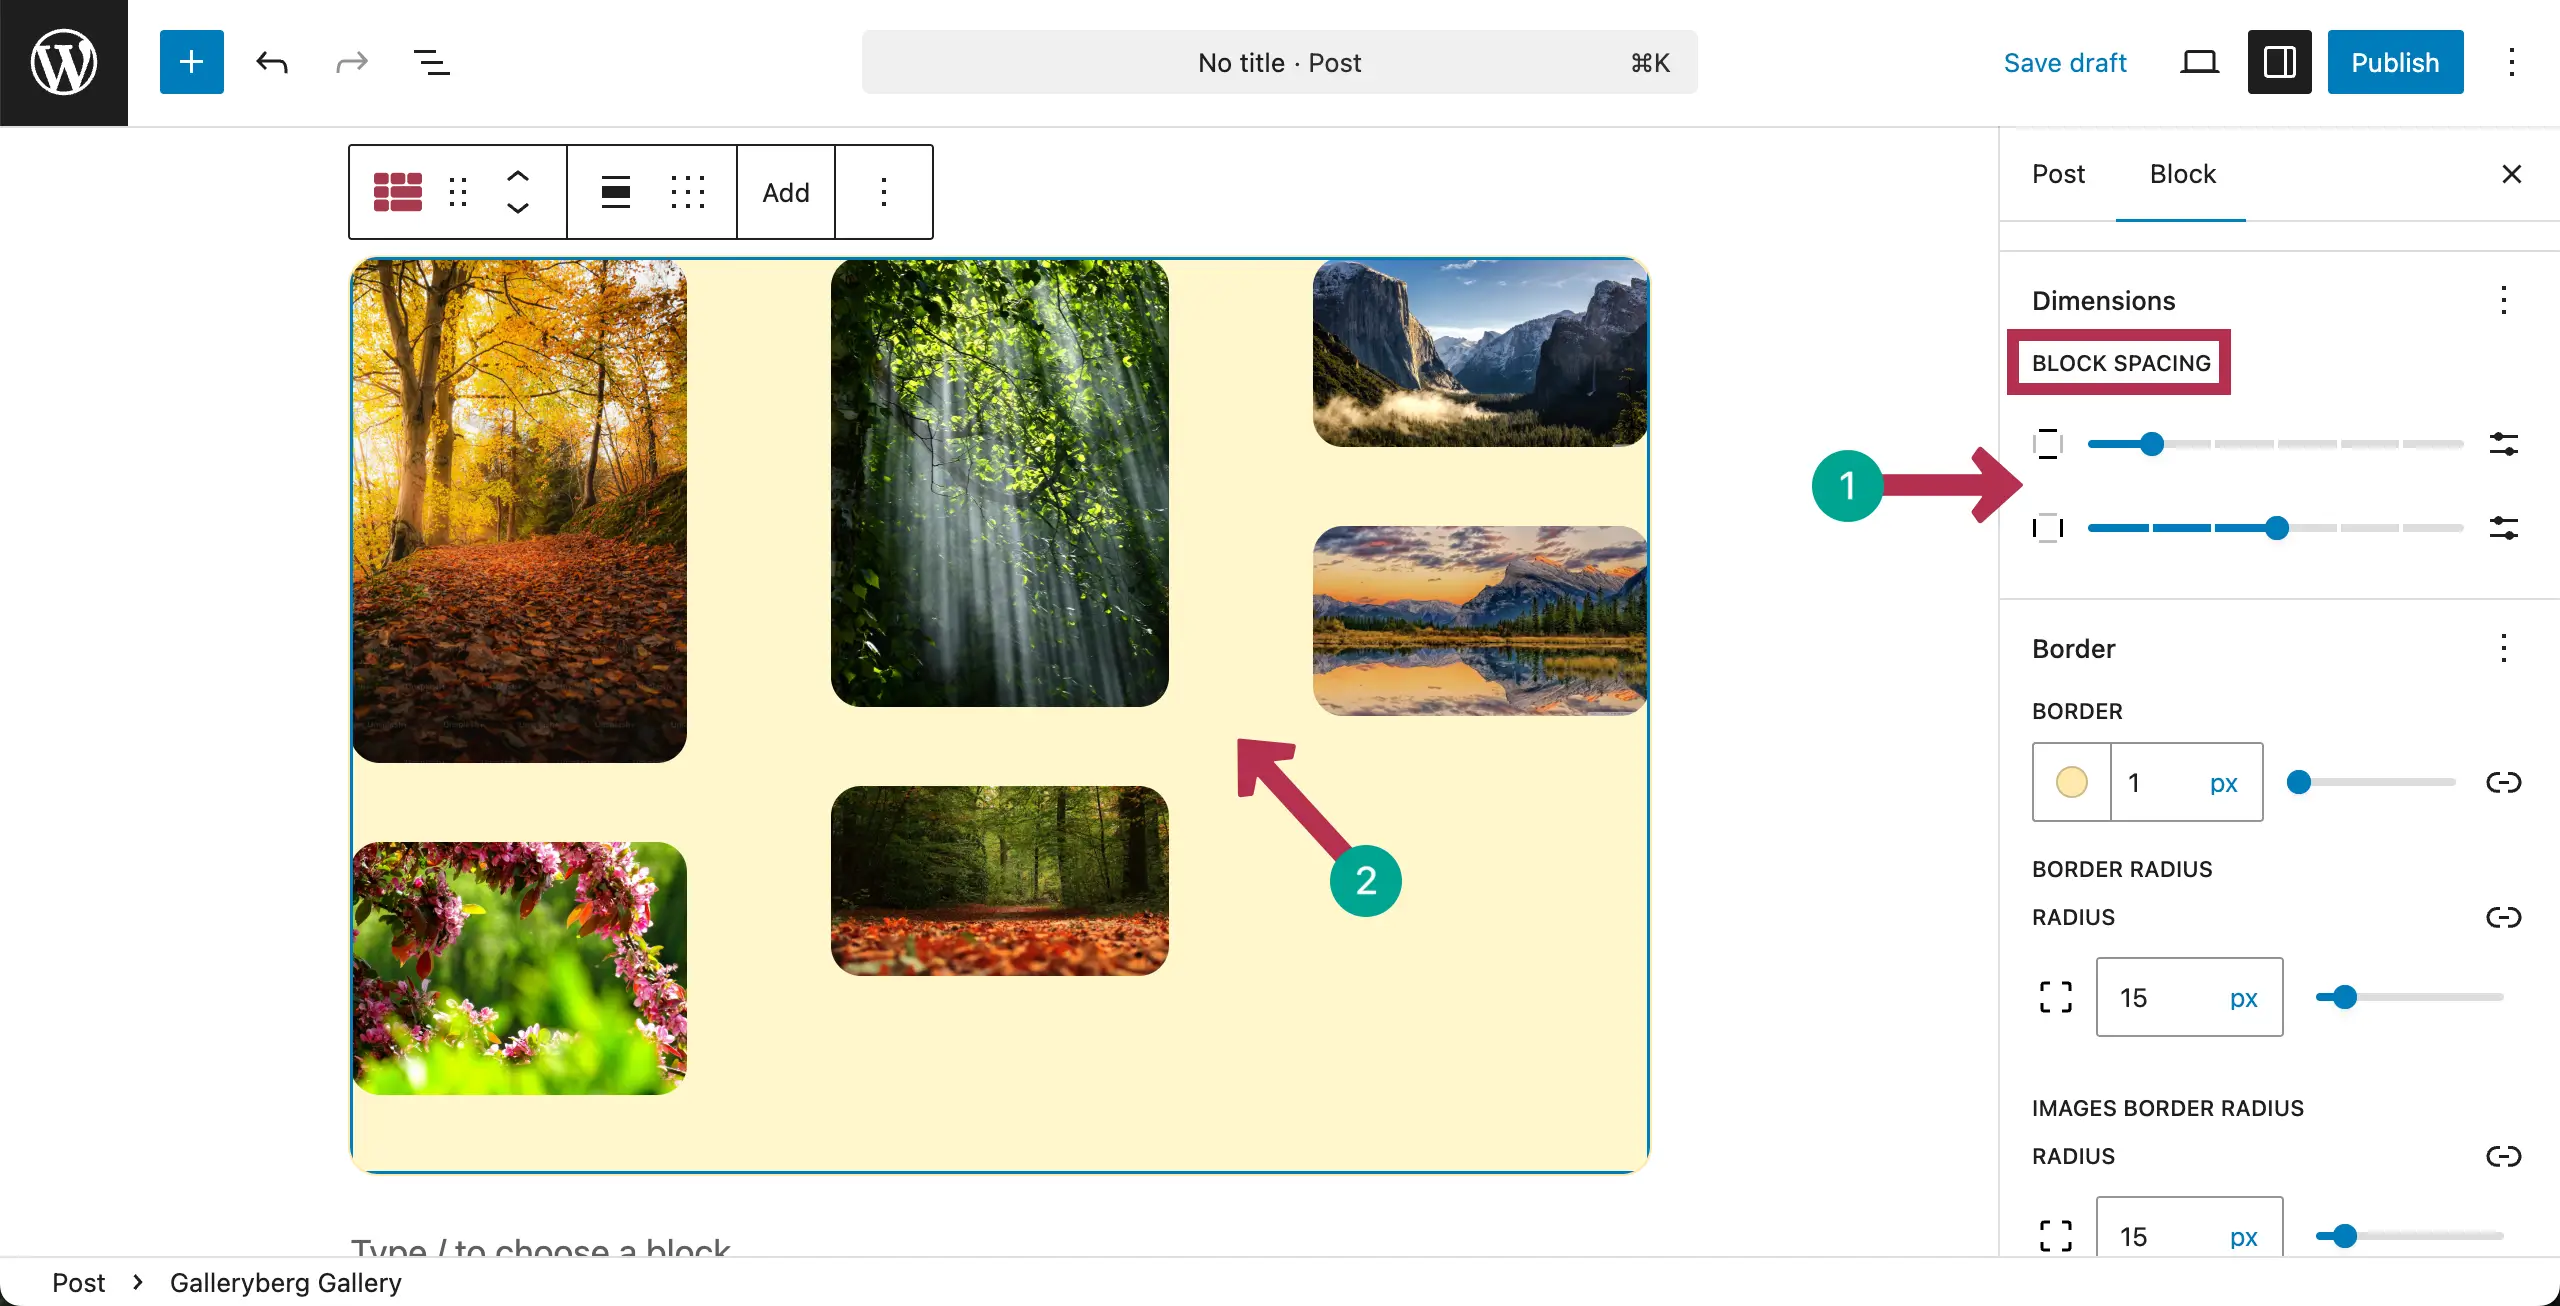
From the Block Spacing option, you can add spaces between the images in the gallery.
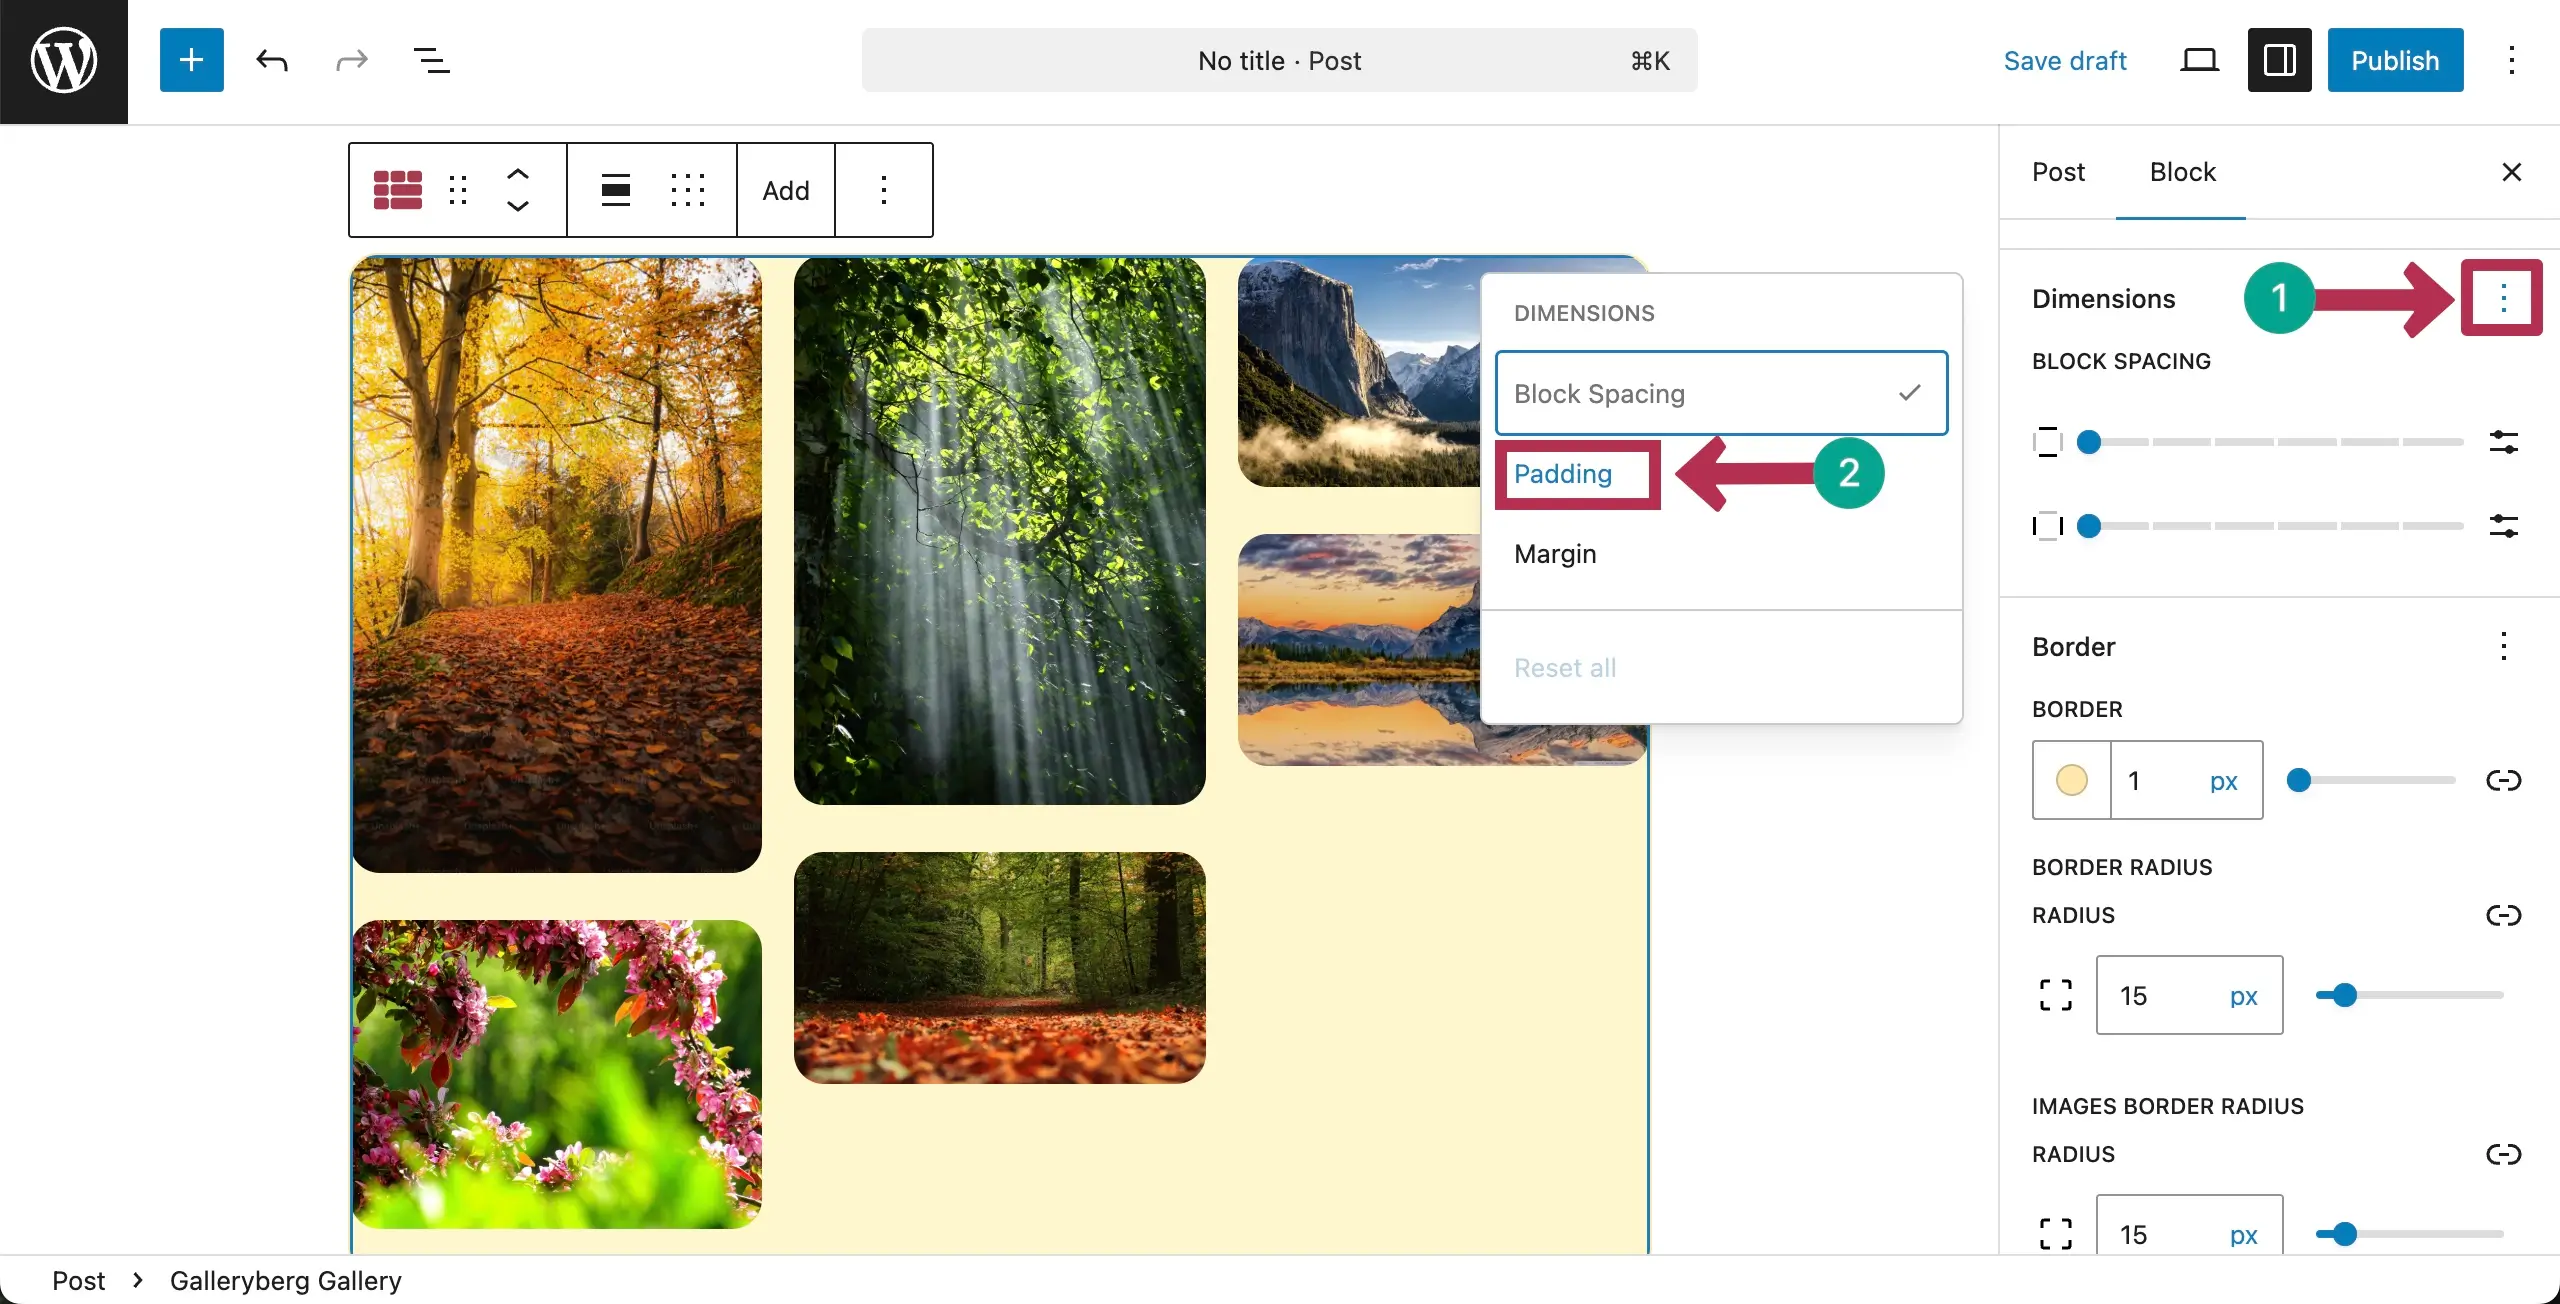
To get Padding and Marging options, click the three-dot icon next to Dimensions. A small popup will appear. Choose the option you like. For this documentation, we’re selecting the Padding option.
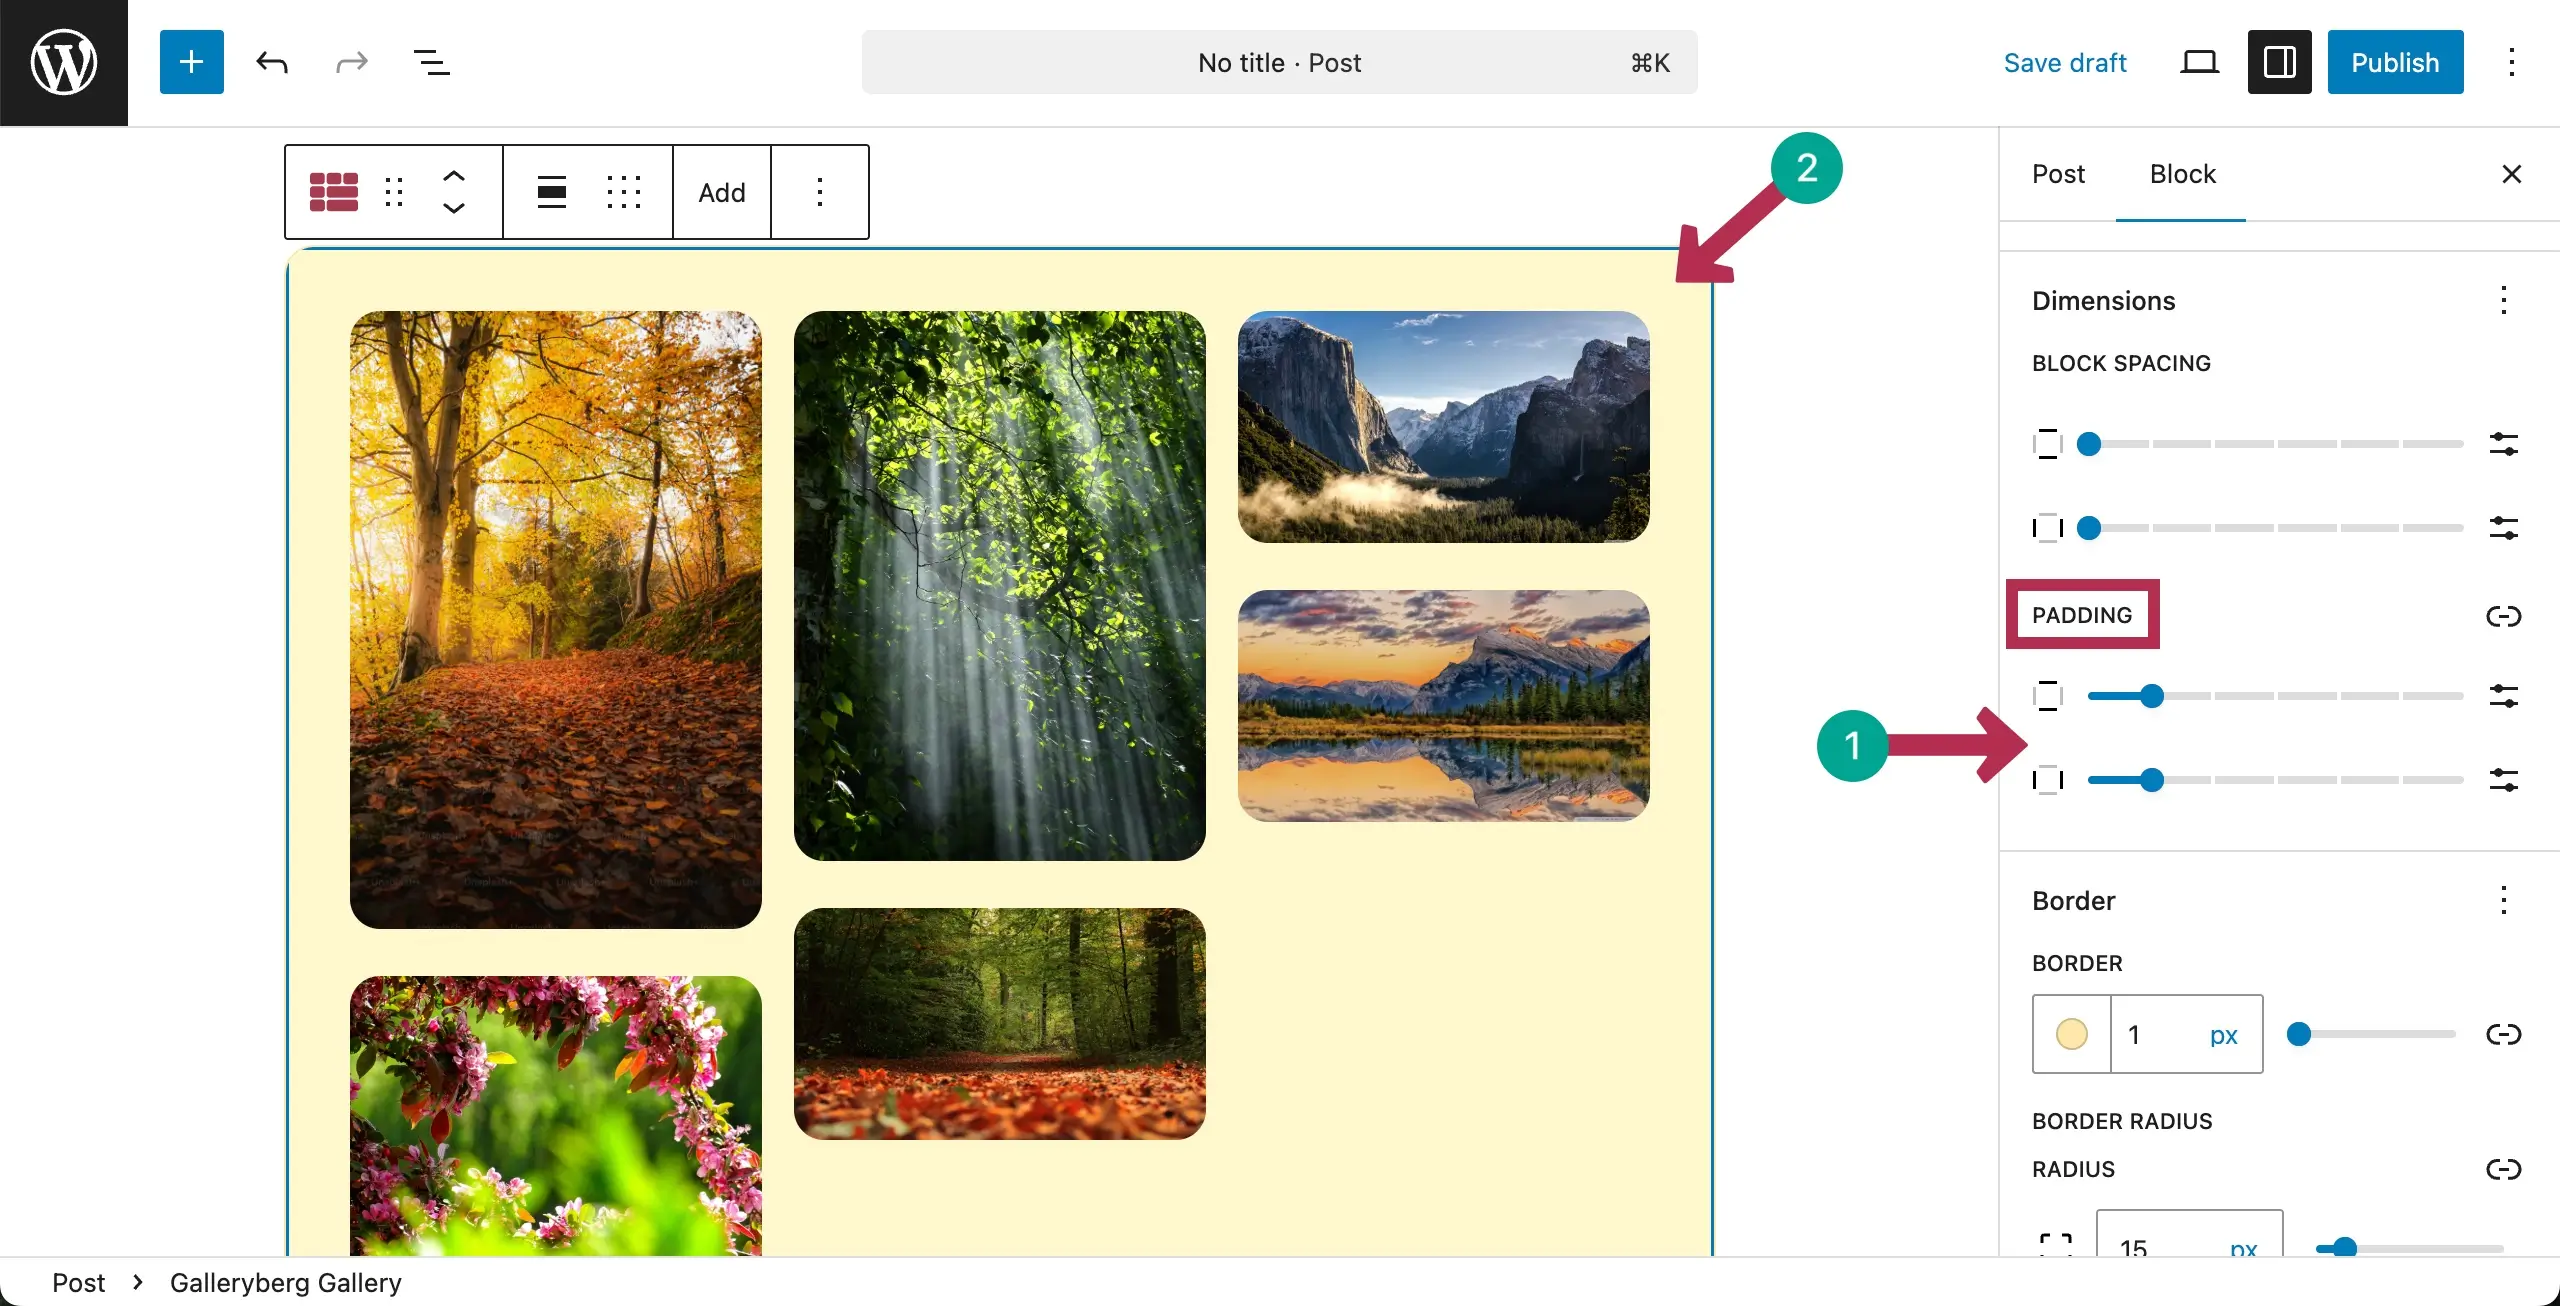
The Padding option will be added to the sidebar. Now, by moving the bar, you can set your desired padding around the Masonry gallery layout. You can see it in the screenshot attached below.
Conclusion #
Thus, you can easily create the Masonry layout gallery on the Gutenberg block editor using the Galleryberg plugin. But to get the best results, optimize image sizes, keep file weights light, choose clear thumbnails, maintain visual balance, and test the layout on mobile.


