
A photo grid is a layout that displays multiple images in a structured format using rows and columns. It helps present visuals in a clean, organized, and easy-to-browse way, making it a popular choice for showcasing portfolios, product images, travel photos, and other visual content.
In WordPress, there are multiple ways to create a photo grid, including using layout blocks like Columns or Grid blocks. However, the Gallery block remains the most commonly used option for creating image grids, especially for standard use cases.
In this guide, we’ll walk you through two practical approaches to adding a photo grid in WordPress. First, we’ll show you how to create a photo grid without a plugin using the built-in Gallery block. Then, we’ll explain how to build a more advanced photo grid using the Galleryberg plugin, so you can choose the method that best fits your needs.
Method 1: Using the Gallery Block (Without a Plugin)
The WordPress block editor includes a built-in Gallery block that allows you to display multiple images in a simple grid layout. This method is ideal if you want a quick and lightweight way to create a photo grid without installing any additional plugins.
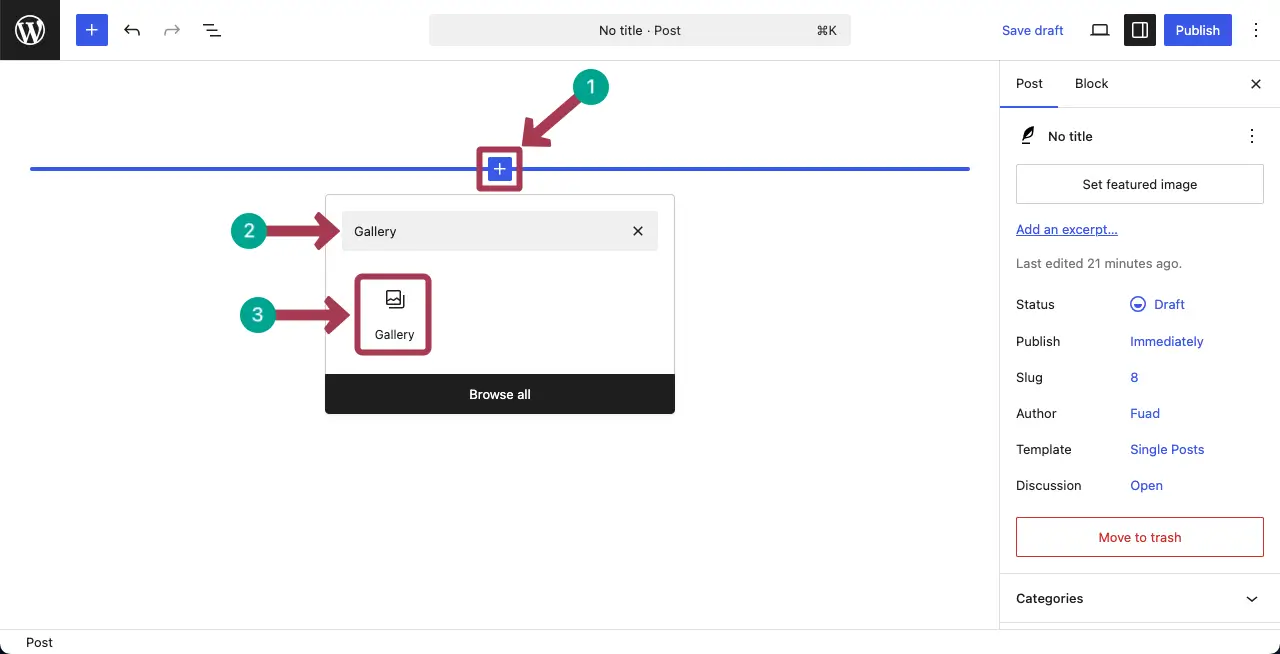
Step 01: Add the Gallery Block to the Editor
Open your desired post or page. Click the plus (+) icon on the editor. Type Gallery in the search bar. Once the Gallery block appears, add it to the editor.
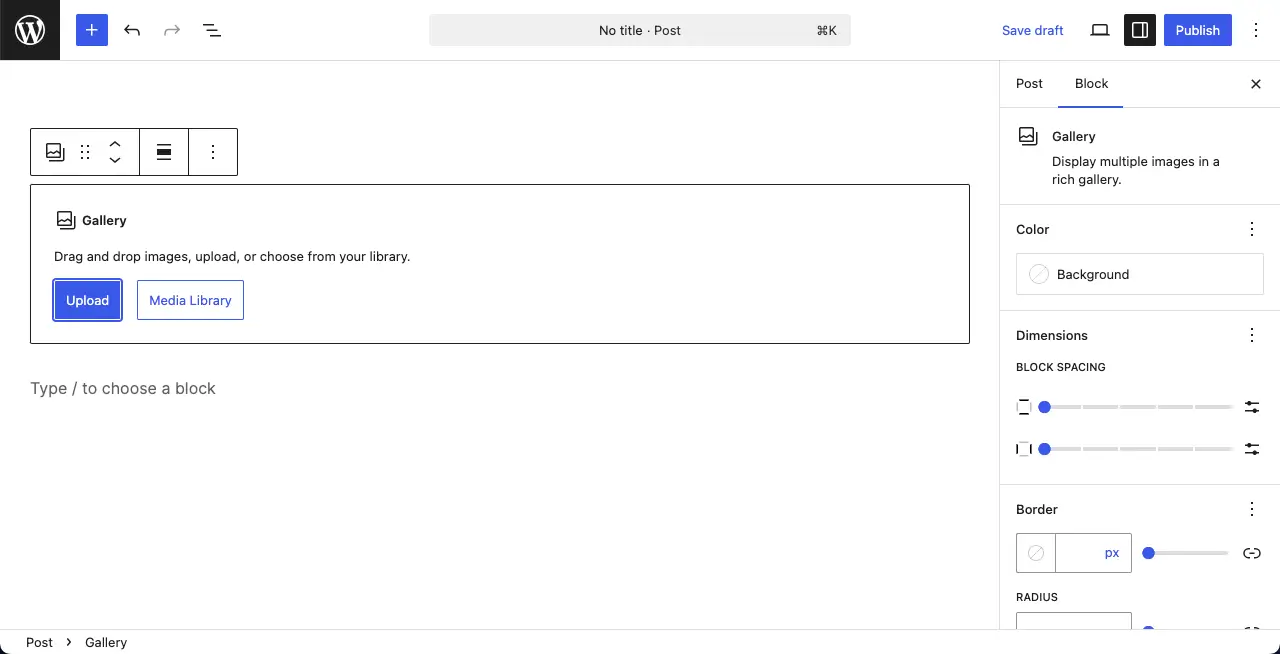
Step 02: Add Images to the Gallery
By the Upload button, you can add images from your local drives. And by the Media Library button, you can select and add images from your backend media library.
Do this part yourself.
For this tutorial, we’ll add images from the media library. Select the images one by one that you want. Then, hit the Create a new gallery button.
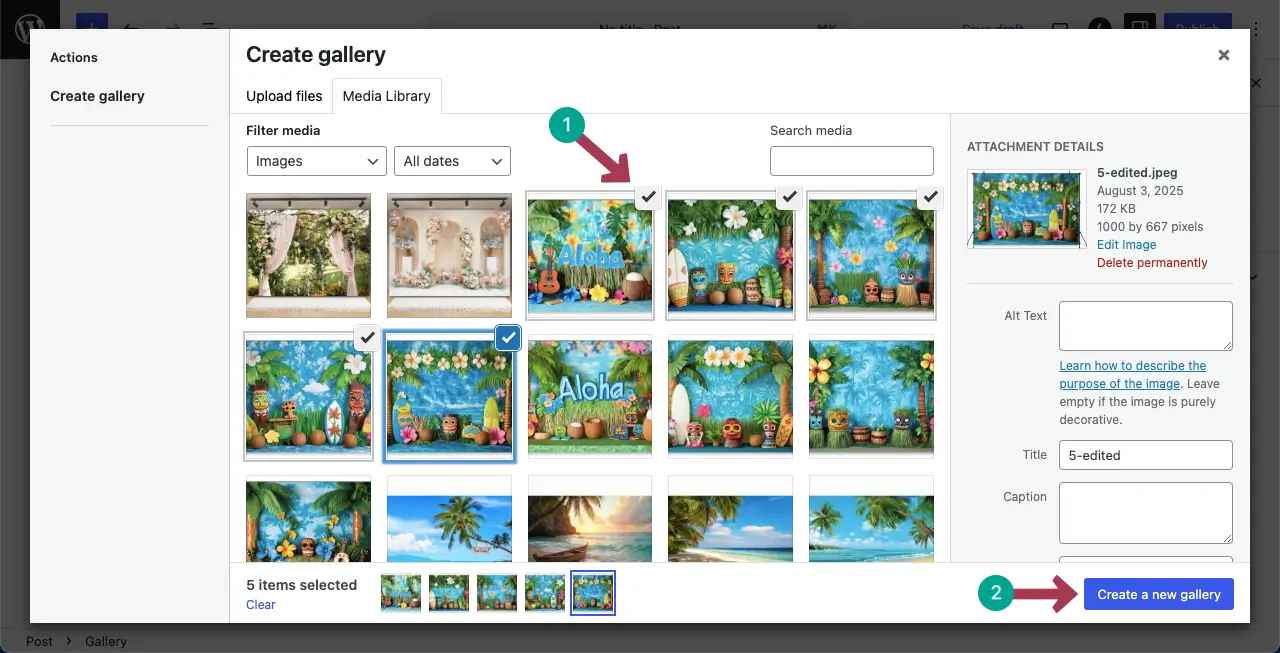
After images are selected from the media library, in the next step, you’ll be allowed to write a caption for each image. Next, hit the Insert gallery button.
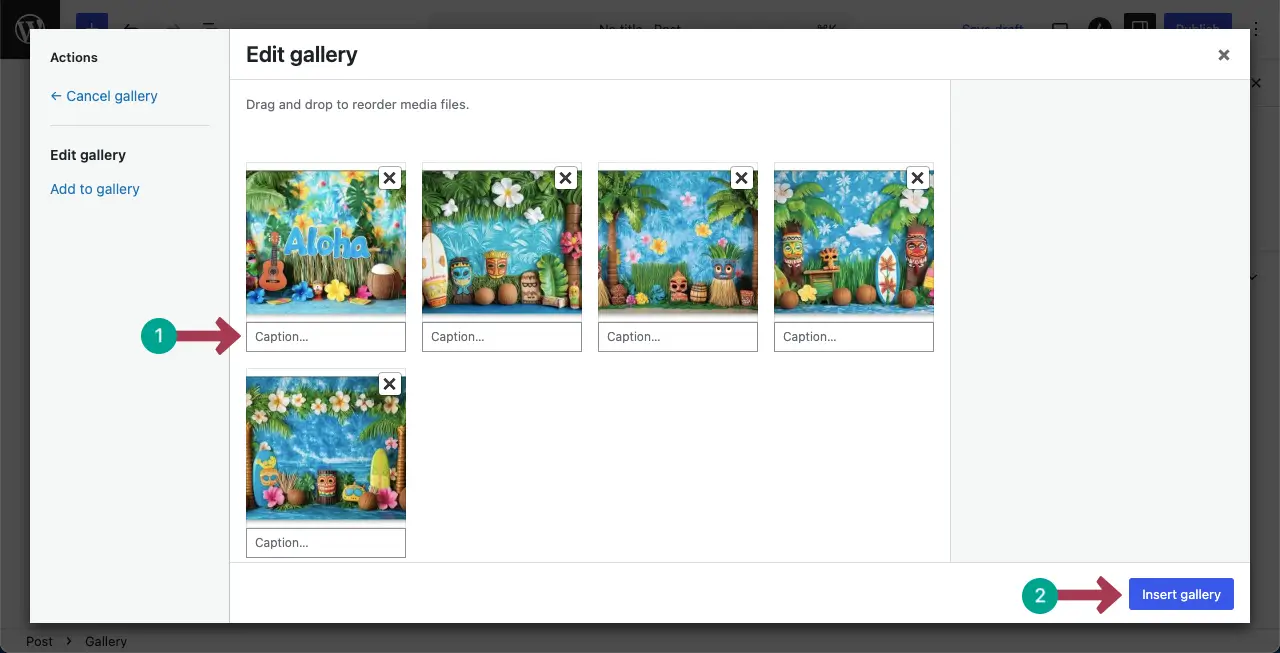
You’ll instantly see that the photos are displayed in a grid format on the editor.
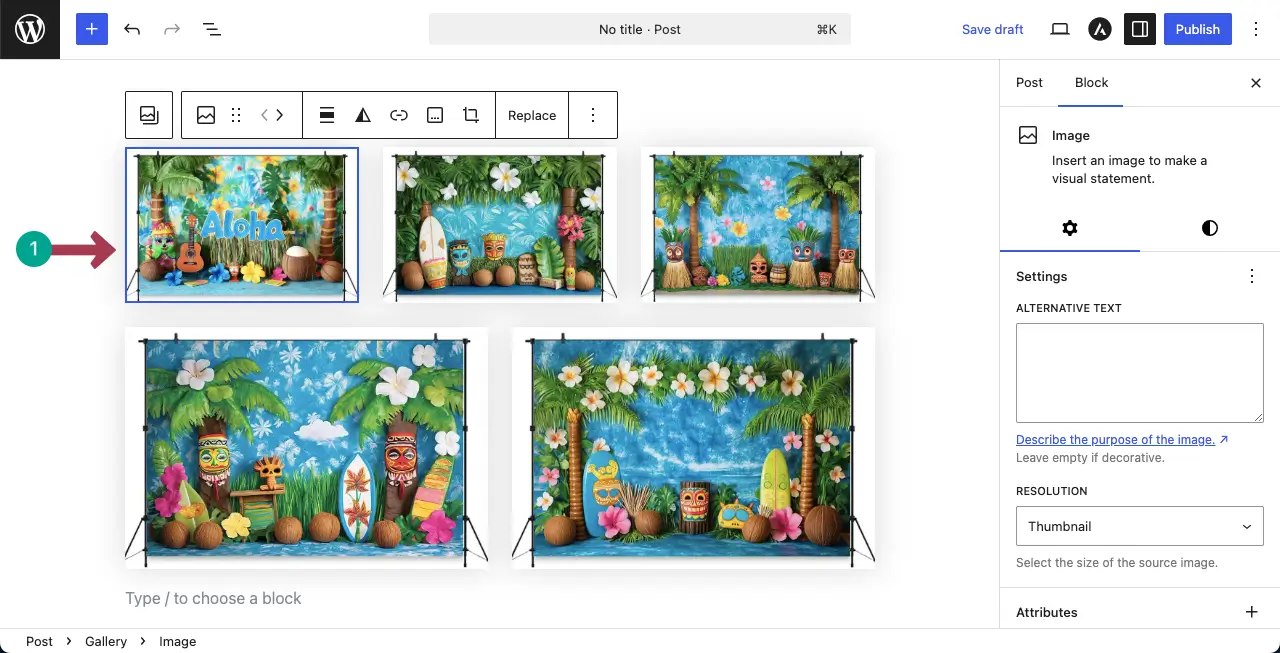
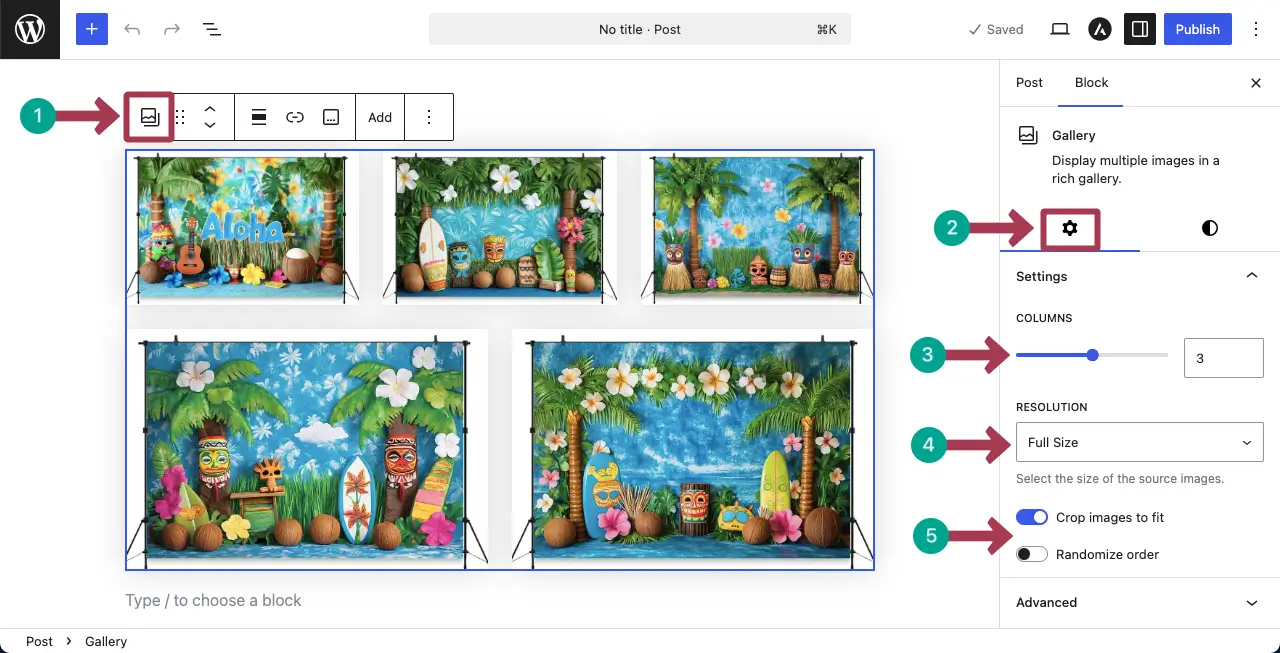
Step 03: Customize Settings of the Photo Grid
Select the entire grid by clicking the Gallery icon on the toolbar. This will show up the Settings tab on the right sidebar.
From the Settings tab, you can change the column number, resolution, ordering, and cropping option for the images in the gallery.
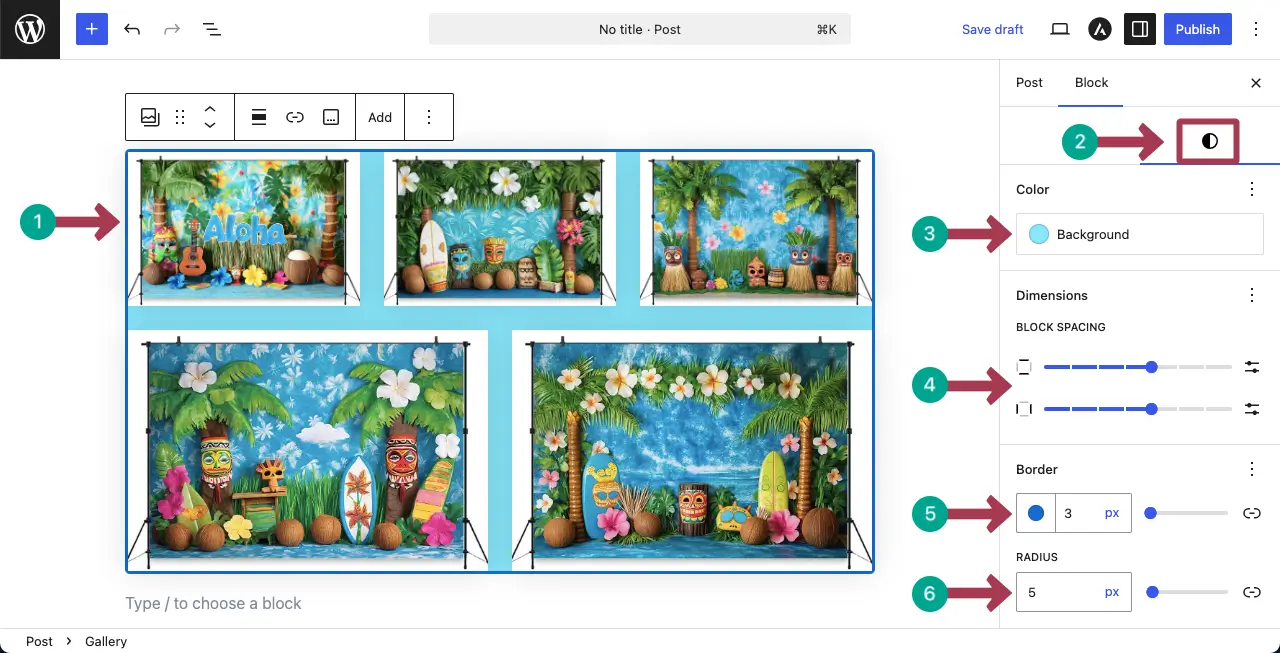
Step 04: Stylize the Grid
After that, come to the Styles tab. You can set a background color, padding, margin, border color, and radius for the border.
Hope you can do these changes yourself, following the step-by-step guide mentioned above.
Method 2: Using Galleryberg (Using a Plugin)
The default Gallery block is great for basic grids, but it has limited layout and customization options. If you want a more flexible photo grid with additional features (like advanced layouts, better styling controls, and enhanced image display options), you can use a gallery plugin like Galleryberg. (Read: Gallery Block vs Galleryberg)
Below is a step-by-step guide to creating a photo grid using Galleryberg.
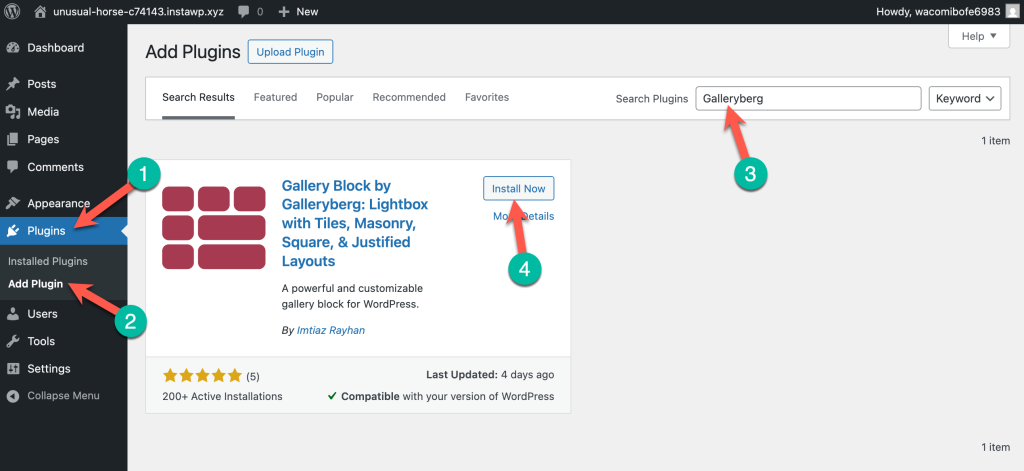
Step 01: Install and Activate the Galleryberg Plugin
Go to your WordPress dashboard and navigate to Plugins → Add New. Search for Galleryberg, then click Install Now and Activate.
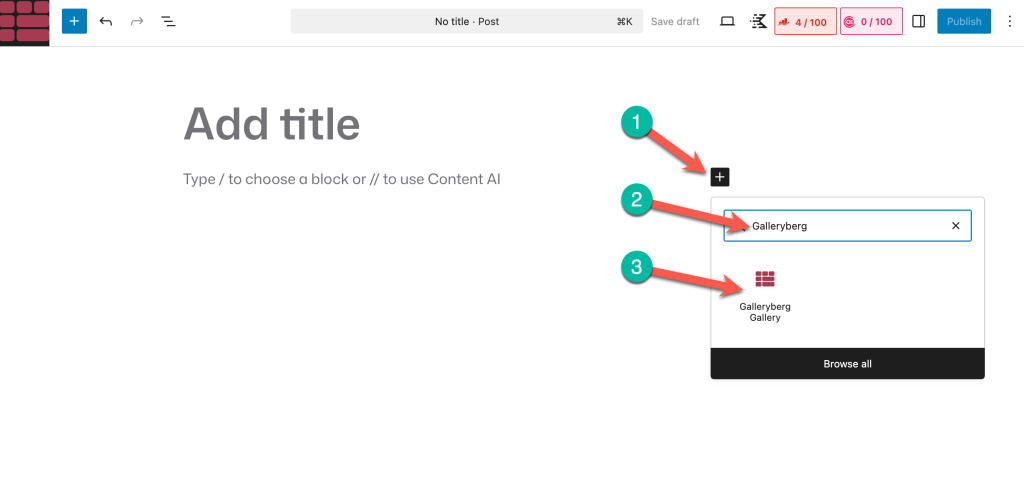
Step 02: Insert the Galleryberg Block
After activation, go to the post or page where you want to add the photo grid. Click on the + Icon to add a new block. Then search for ‘Galleryberg’ and insert the block.
Step 03: Add Images to the Gallery
Inside the gallery block, click the option to upload/select images.
You can either:
- Upload new images from your computer, or
- Select images from the Media Library
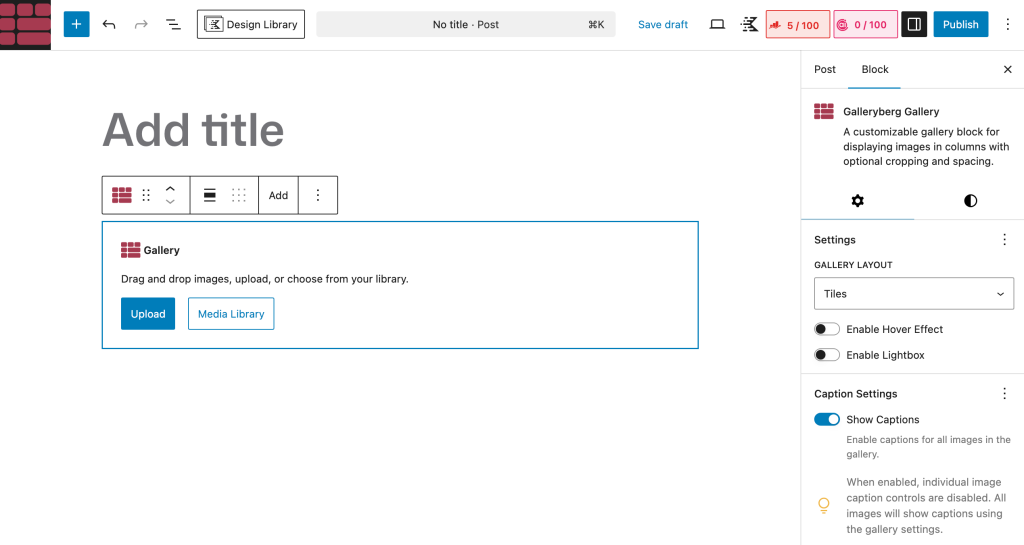
Once selected, confirm to add them to the gallery.
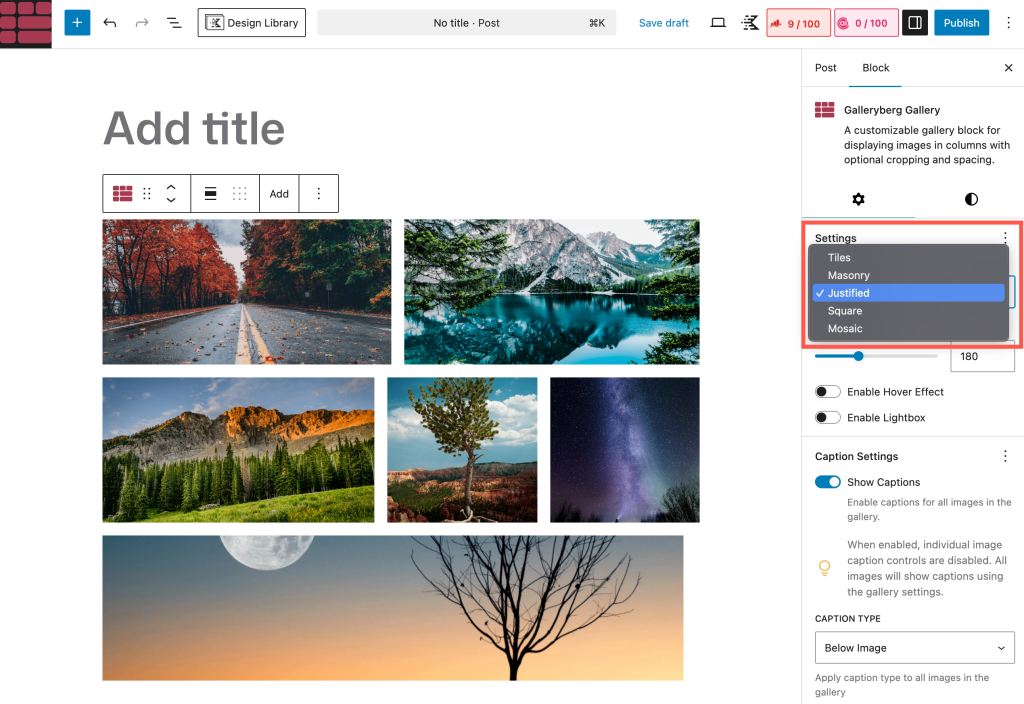
Step 04: Choose a Gallery (Grid) Layout and Configure the Settings
Now choose the layout you want for your photo grid. Galleryberg offers 5 layouts – Tiles, Masonry, Justified, Square, and Mosaic (Pro).
You can also control settings such as:
- Colors (Background, caption color, & caption background)
- Deminsions (Spacing, Padding, & Margin)
- Border & Border Radius
- Image Border Radius
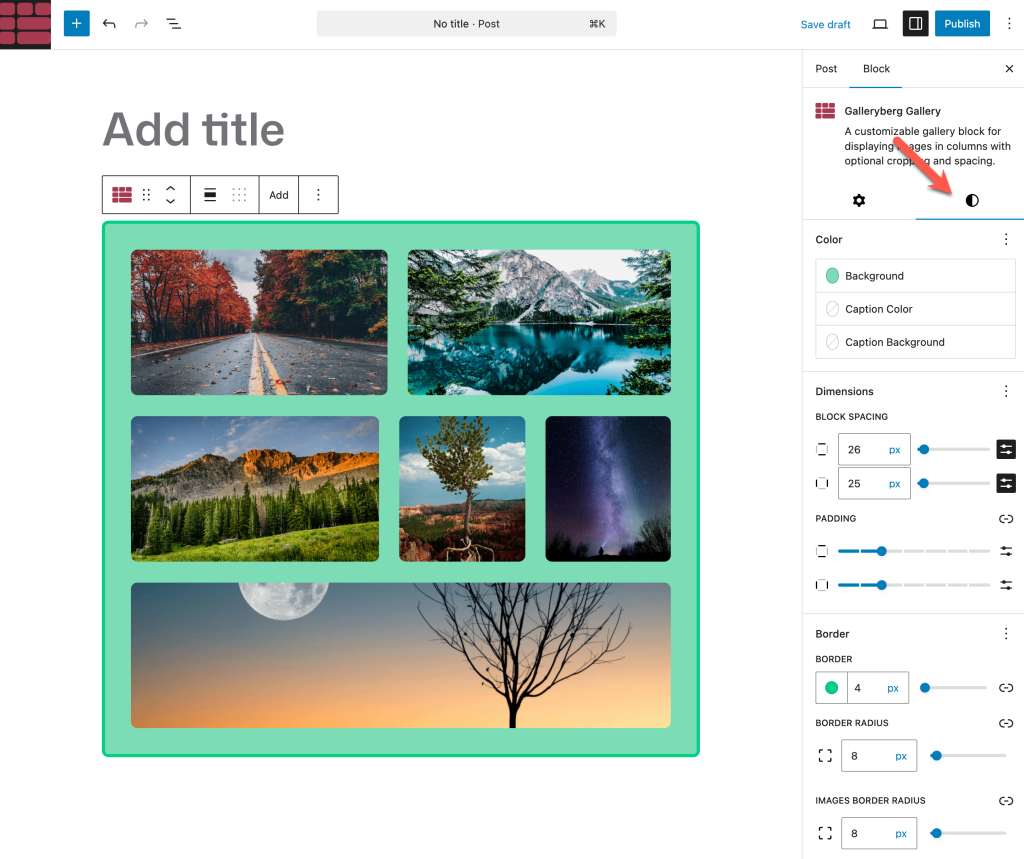
Adjust the settings until the grid looks the way you want.
Step 05: Enable Extra Features (Optional)
This is where Galleryberg usually goes beyond the default Gallery block. If available in your setup, you can enable options like:
- Lightbox (open images in a popup)
- Hover effects
- Captions display behavior
Turn on only what you actually need to keep the gallery fast and clean.
If everything looks good, Publish/Update your page.
Conclusion
Adding a photo grid in WordPress is a straightforward process, whether you choose a simple built-in solution or a more feature-rich approach. The default Gallery block works well for basic image grids and quick setups without relying on additional plugins.
However, if you need more control over layout, design, and image interactions, using a gallery plugin gives you greater flexibility and advanced options that go beyond what the native Gallery block offers.
Ultimately, the right method depends on your goals, the type of content you’re showcasing, and how much customization you need. By understanding both approaches, you can confidently choose the photo grid solution that best fits your WordPress site.
Also Read: Best WordPress Image Grid Plugins
Leave a Reply