
Pinterest changed how people enjoy pictures online. It made visual content feel fun, clean, and easy to scroll through. The card-style layout, also known as a masonry layout, is now popular on blogs, portfolios, travel sites, and online shops. It helps show many images at once without making the page look messy or heavy.
A Pinterest-style gallery can make your page look modern. It can also improve engagement because it encourages users to scroll more and stay for a long period of time. This layout works well for creative work, lifestyle content, recipes, event photos, or any website that depends on visuals.
If you are looking for a way to create Pinterest-style galleries on your WordPress site, we have a great solution. You can do it easily using the Galleryberg plugin. Let’s take a look at how to create Pinterest-style masonry galleries in WordPress.
How to Create Pinterest-Style Masonry Galleries in WordPress
Galleryberg is a Gutenberg-friendly gallery builder plugin. It enhances the default gallery block of the editor with numerous powerful features. It allows you to display galleries in WordPress in numerous layouts. Masonry is one of them. Here, we’ll show you how to create a Pinterest-style masonry gallery. Keep reading.
Step 01: Install and Activate Galleryberg
Log in to your WordPress dashboard. Navigate to Plugins > Add New. Type Galleryberg in the search box. Once the plugin appears, install and activate it.

Step 02: Add the Galleryberg Block to the Editor
Open a post or page where you want to create the gallery. Click the plus (+) icon on the editor. Type Galleryberg in the search box. Once the block appears, add it to the editor by clicking on it.

Step 03: Select the Masonry Gallery Layout
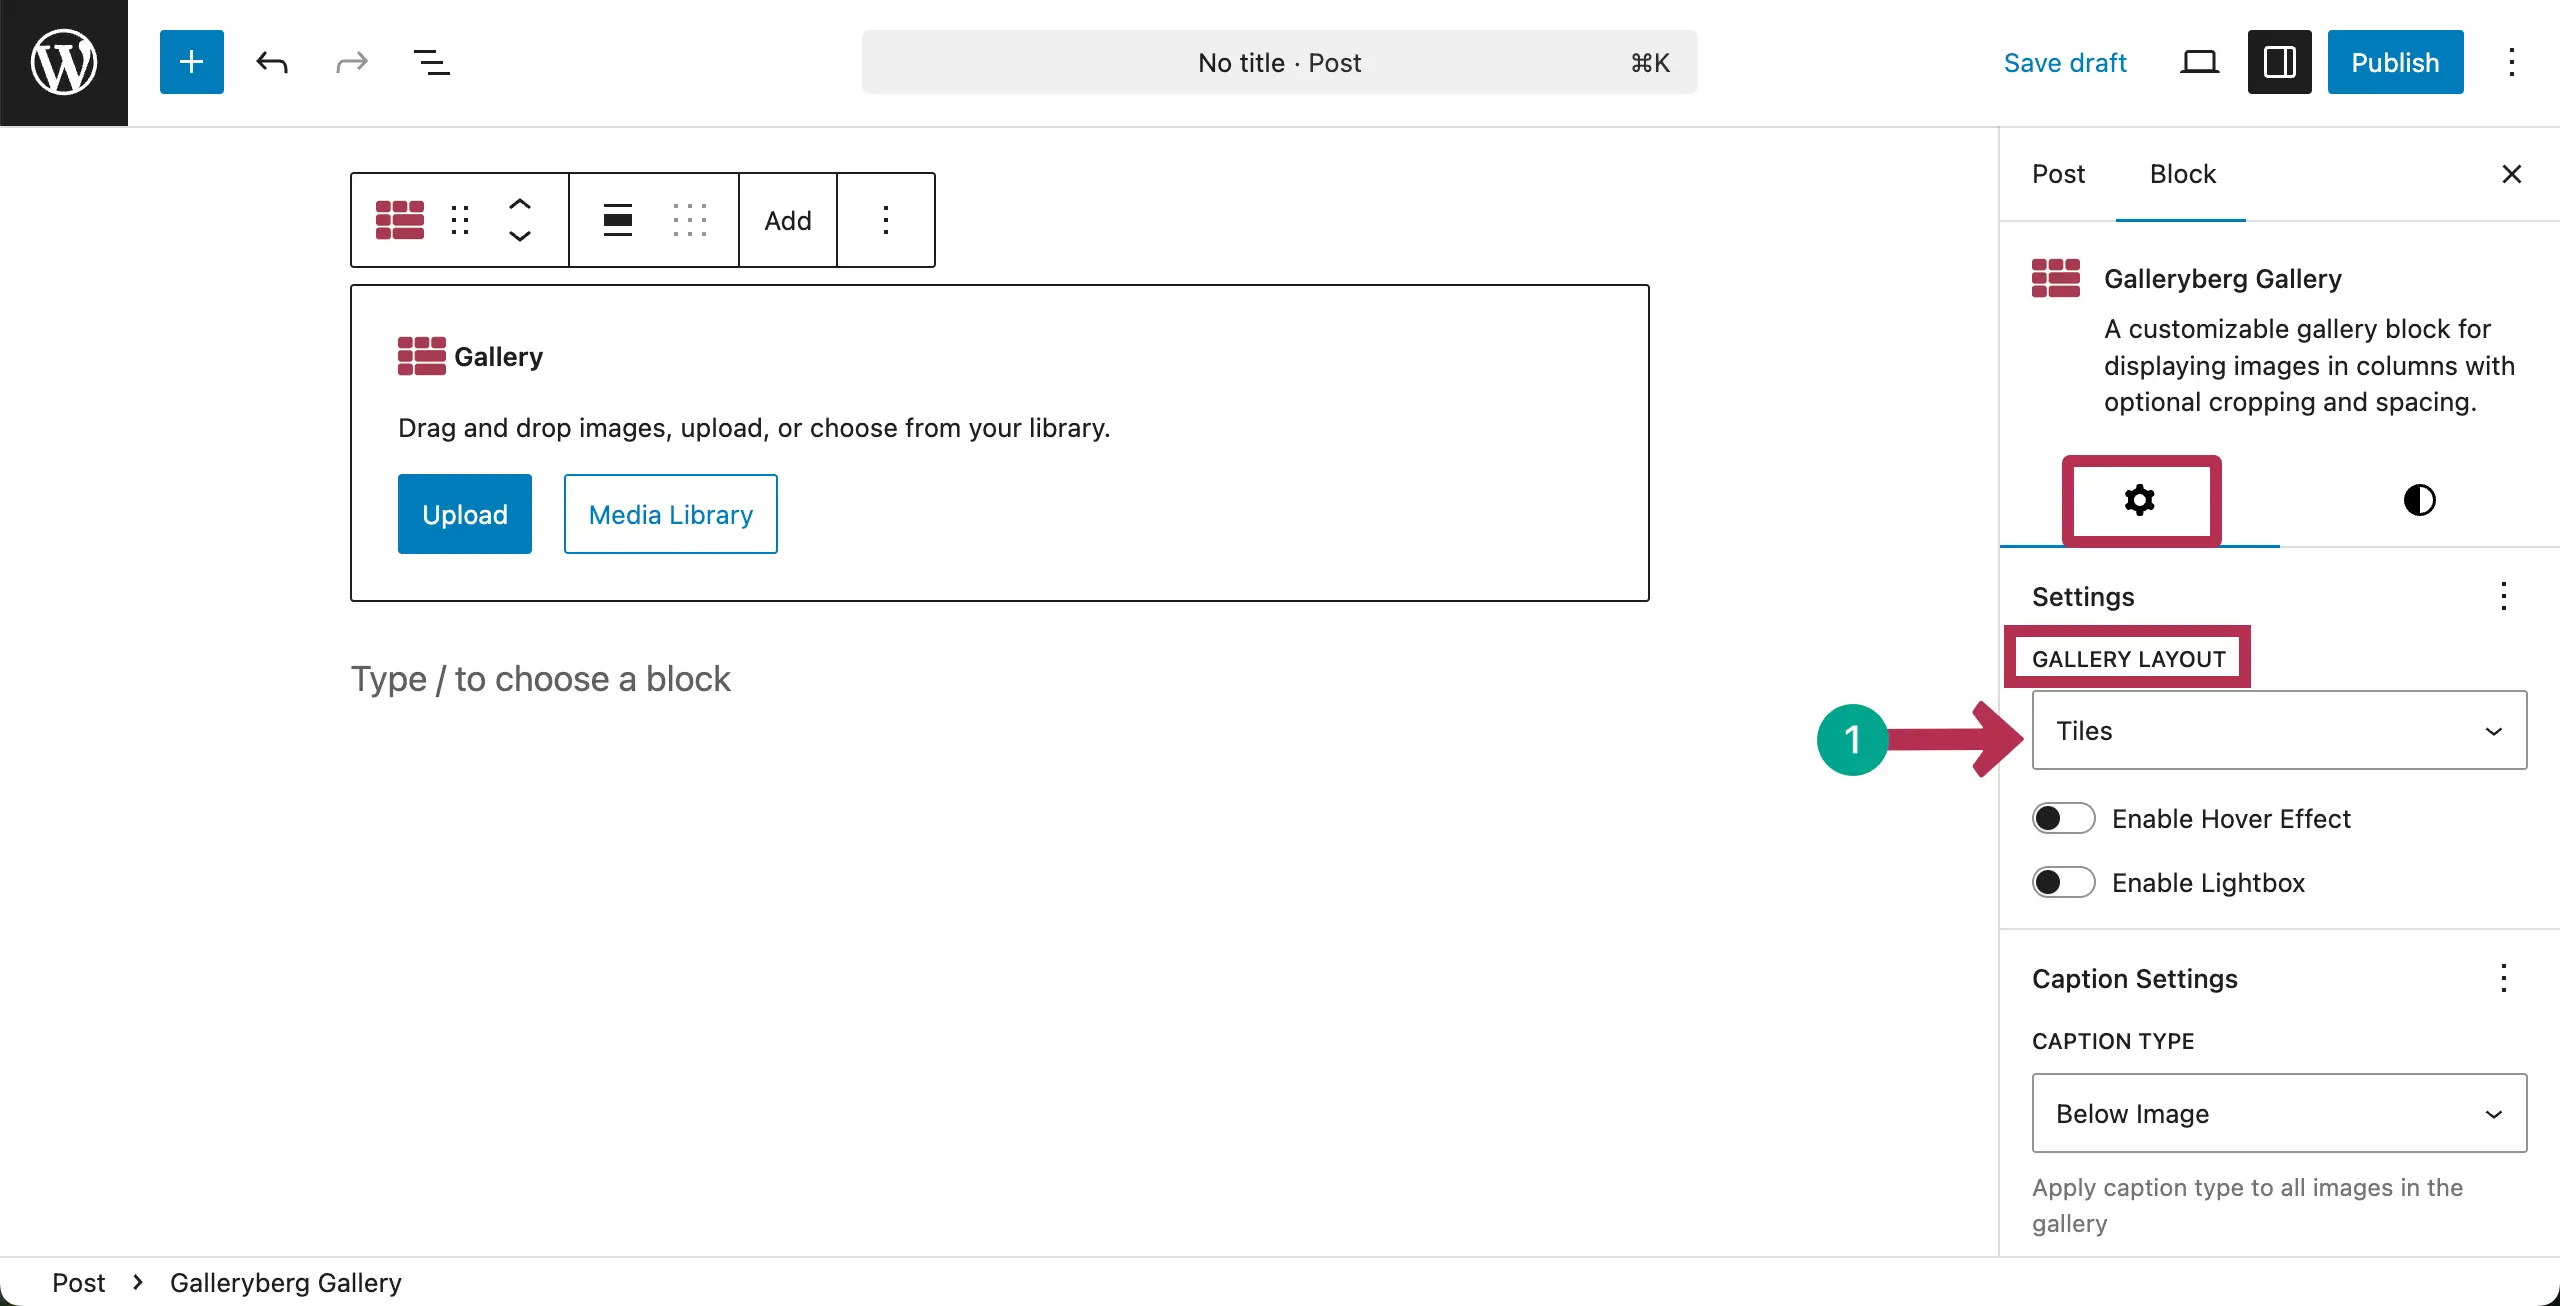
After the block is added, go to the settings tab on the right sidebar. Click the dropdown icon under the Gallery Layout option.
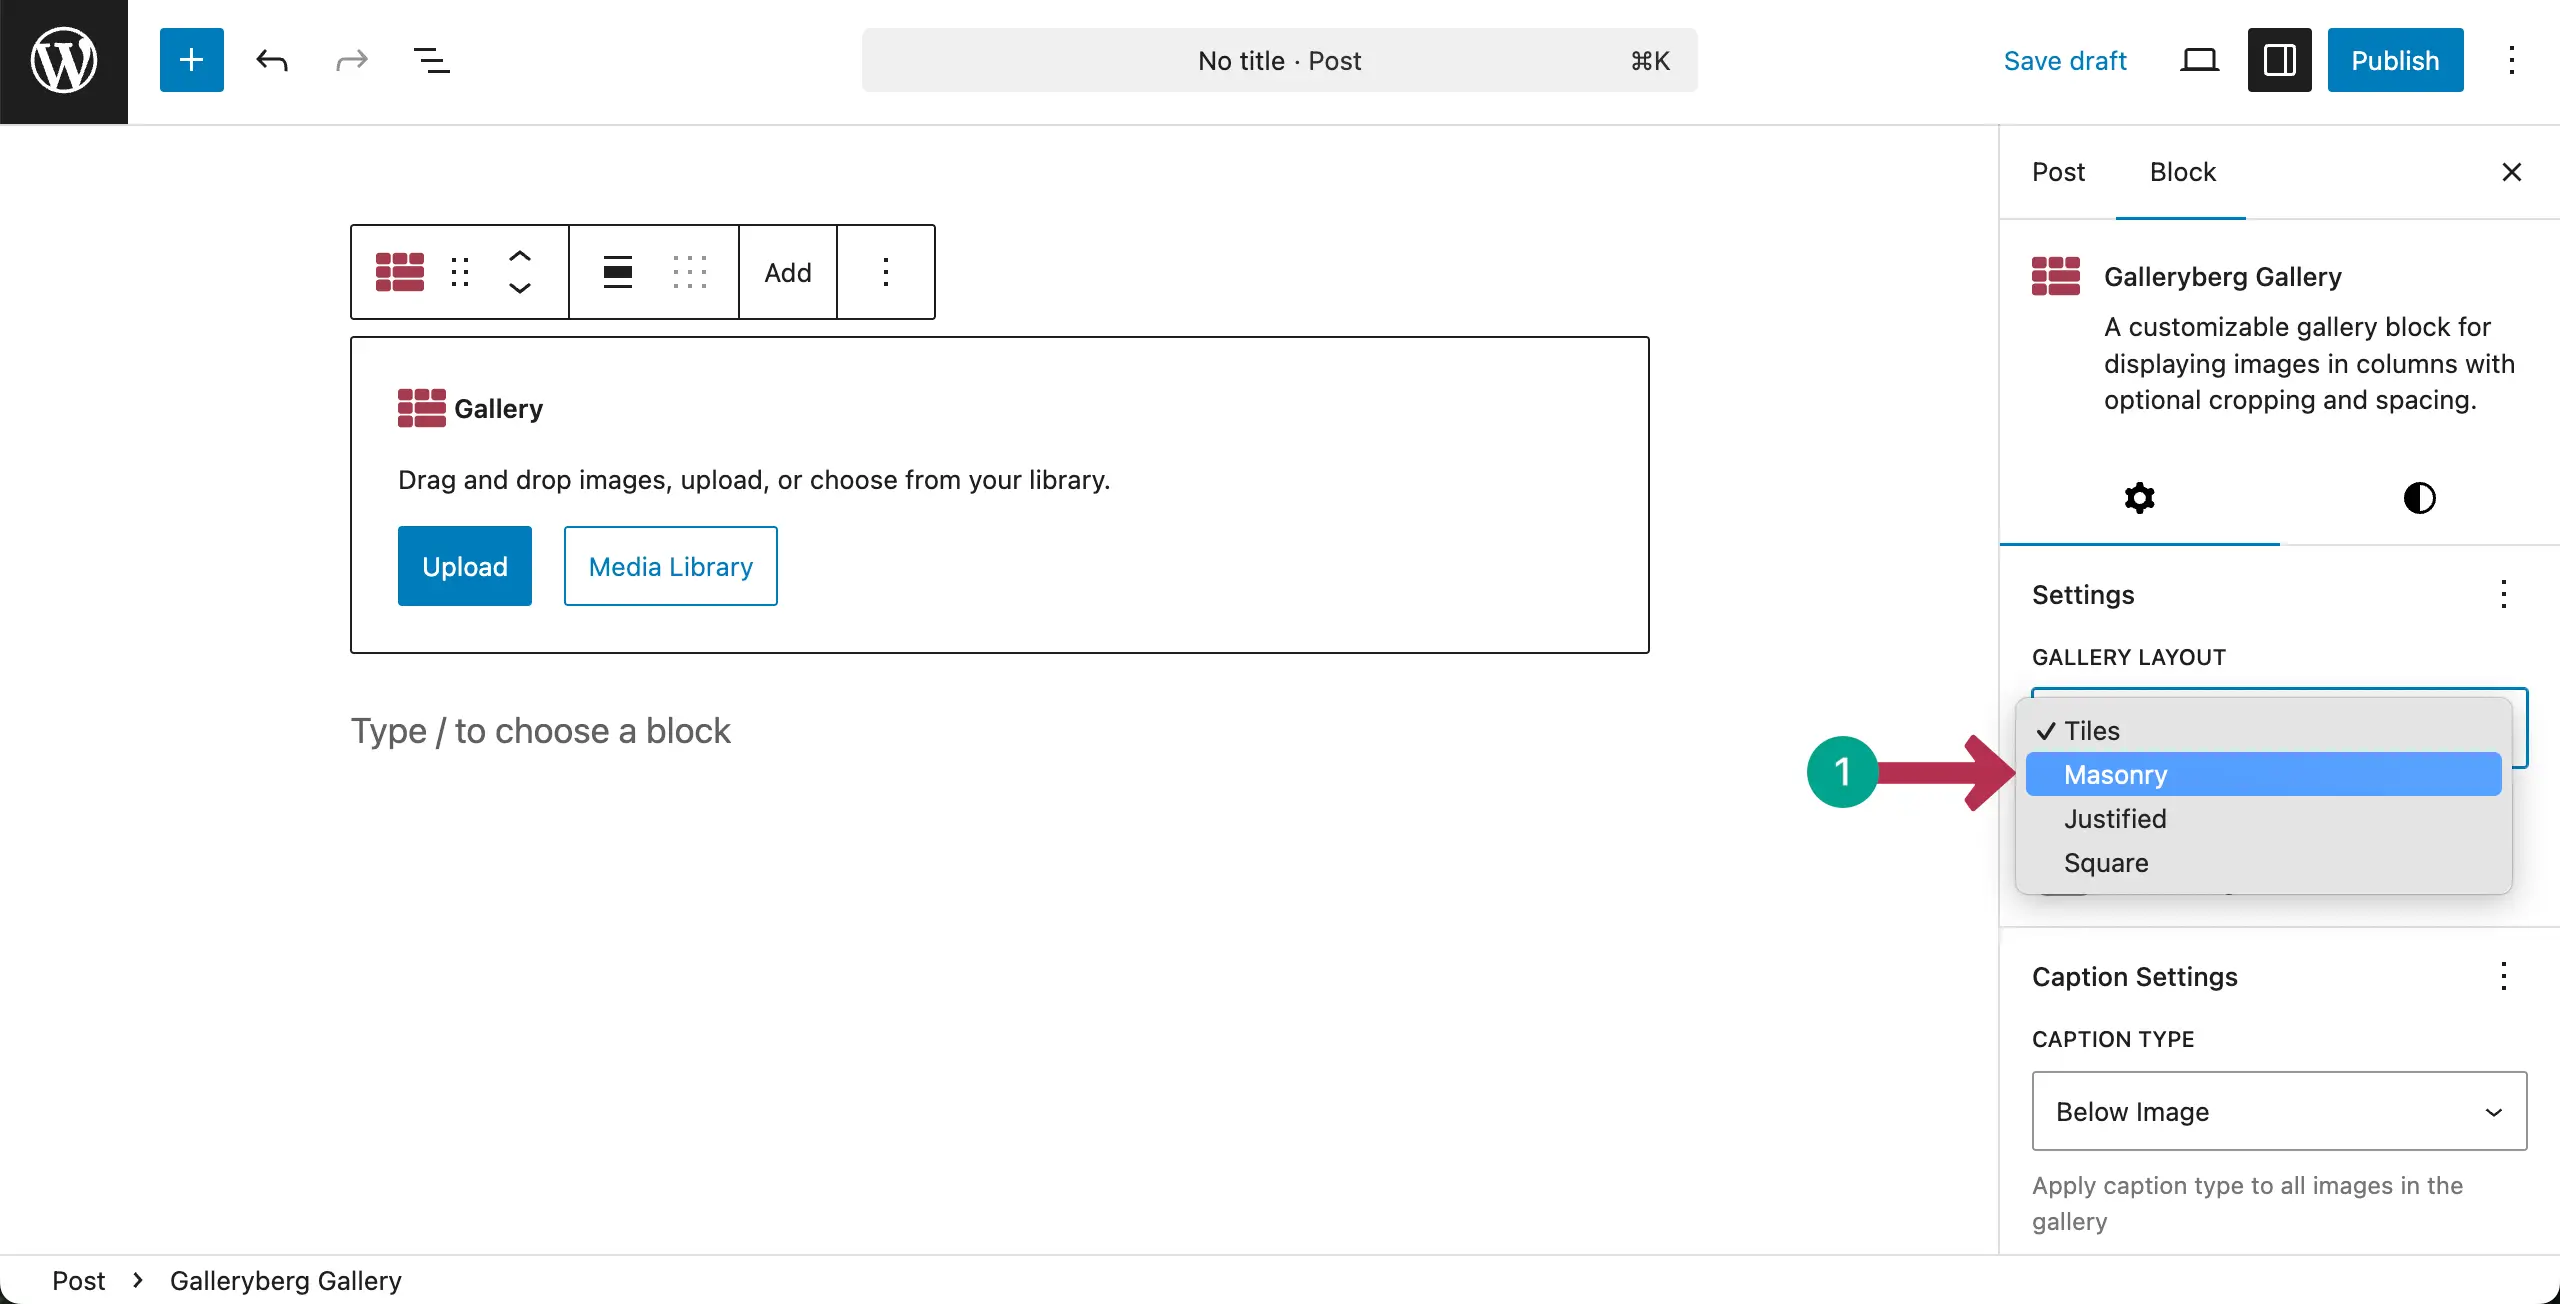
A list of many gallery layouts will show up. Choose the Masonry layout.
Step 04: Upload or Add Images to the Gallery
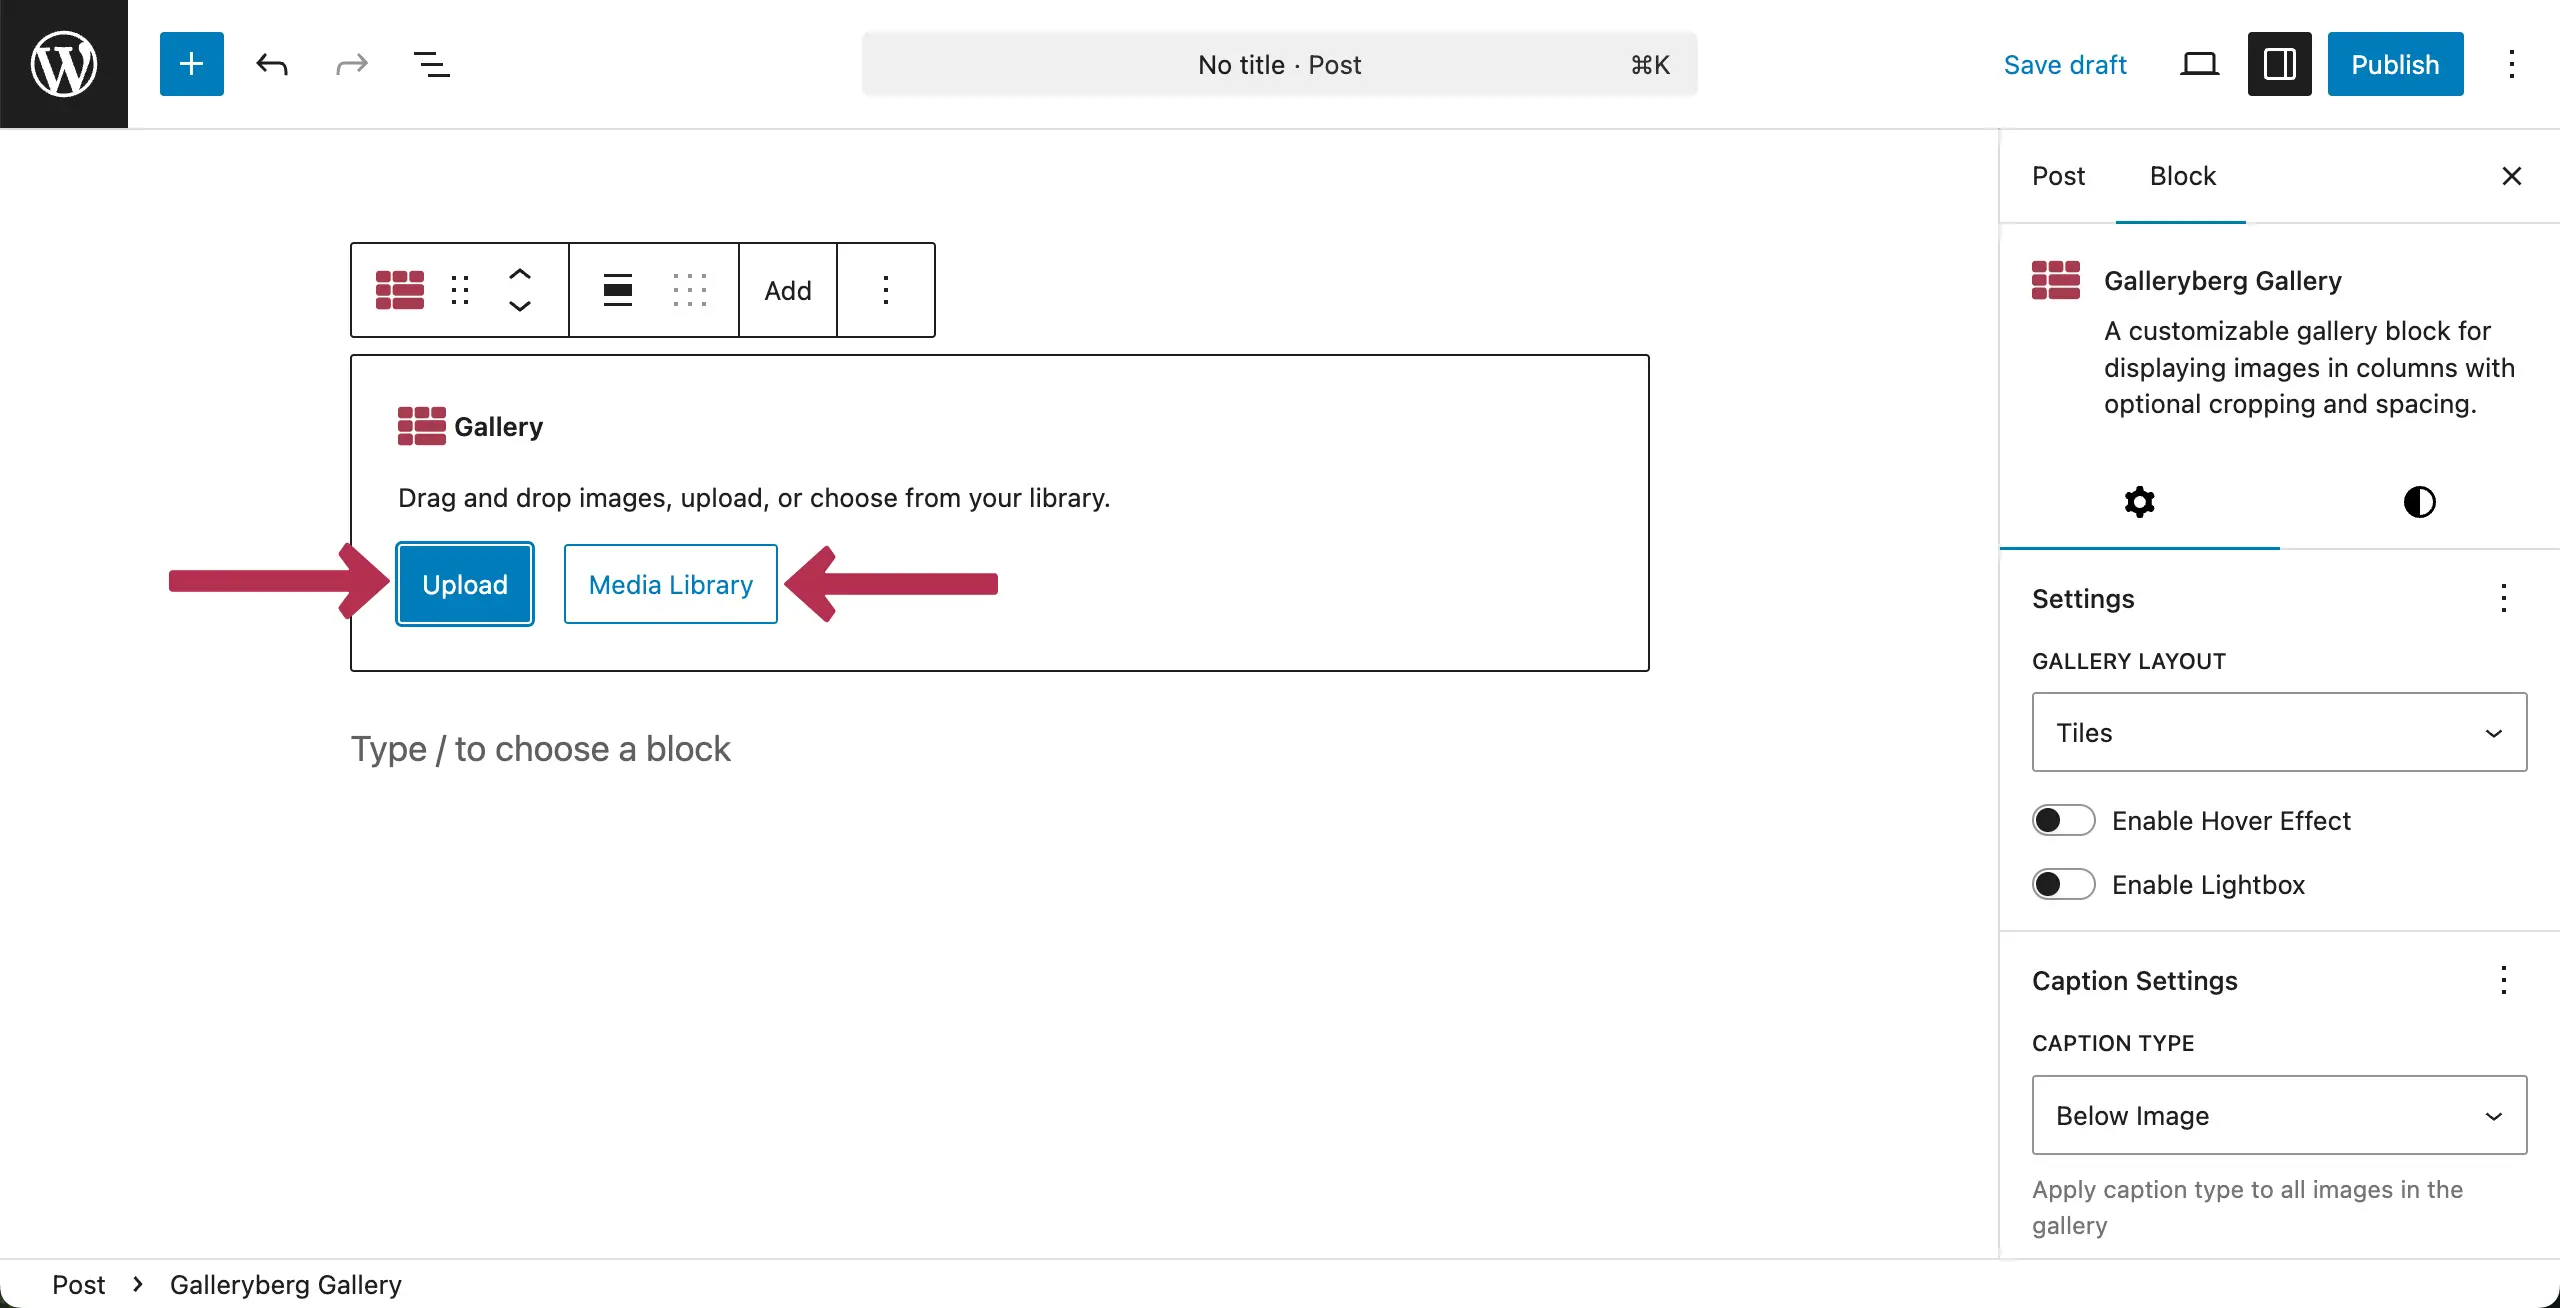
Now, it’s time to add or upload images to the gallery. Choose the respective option, as you can see in the image below. For this tutorial, we chose the Media Library option.
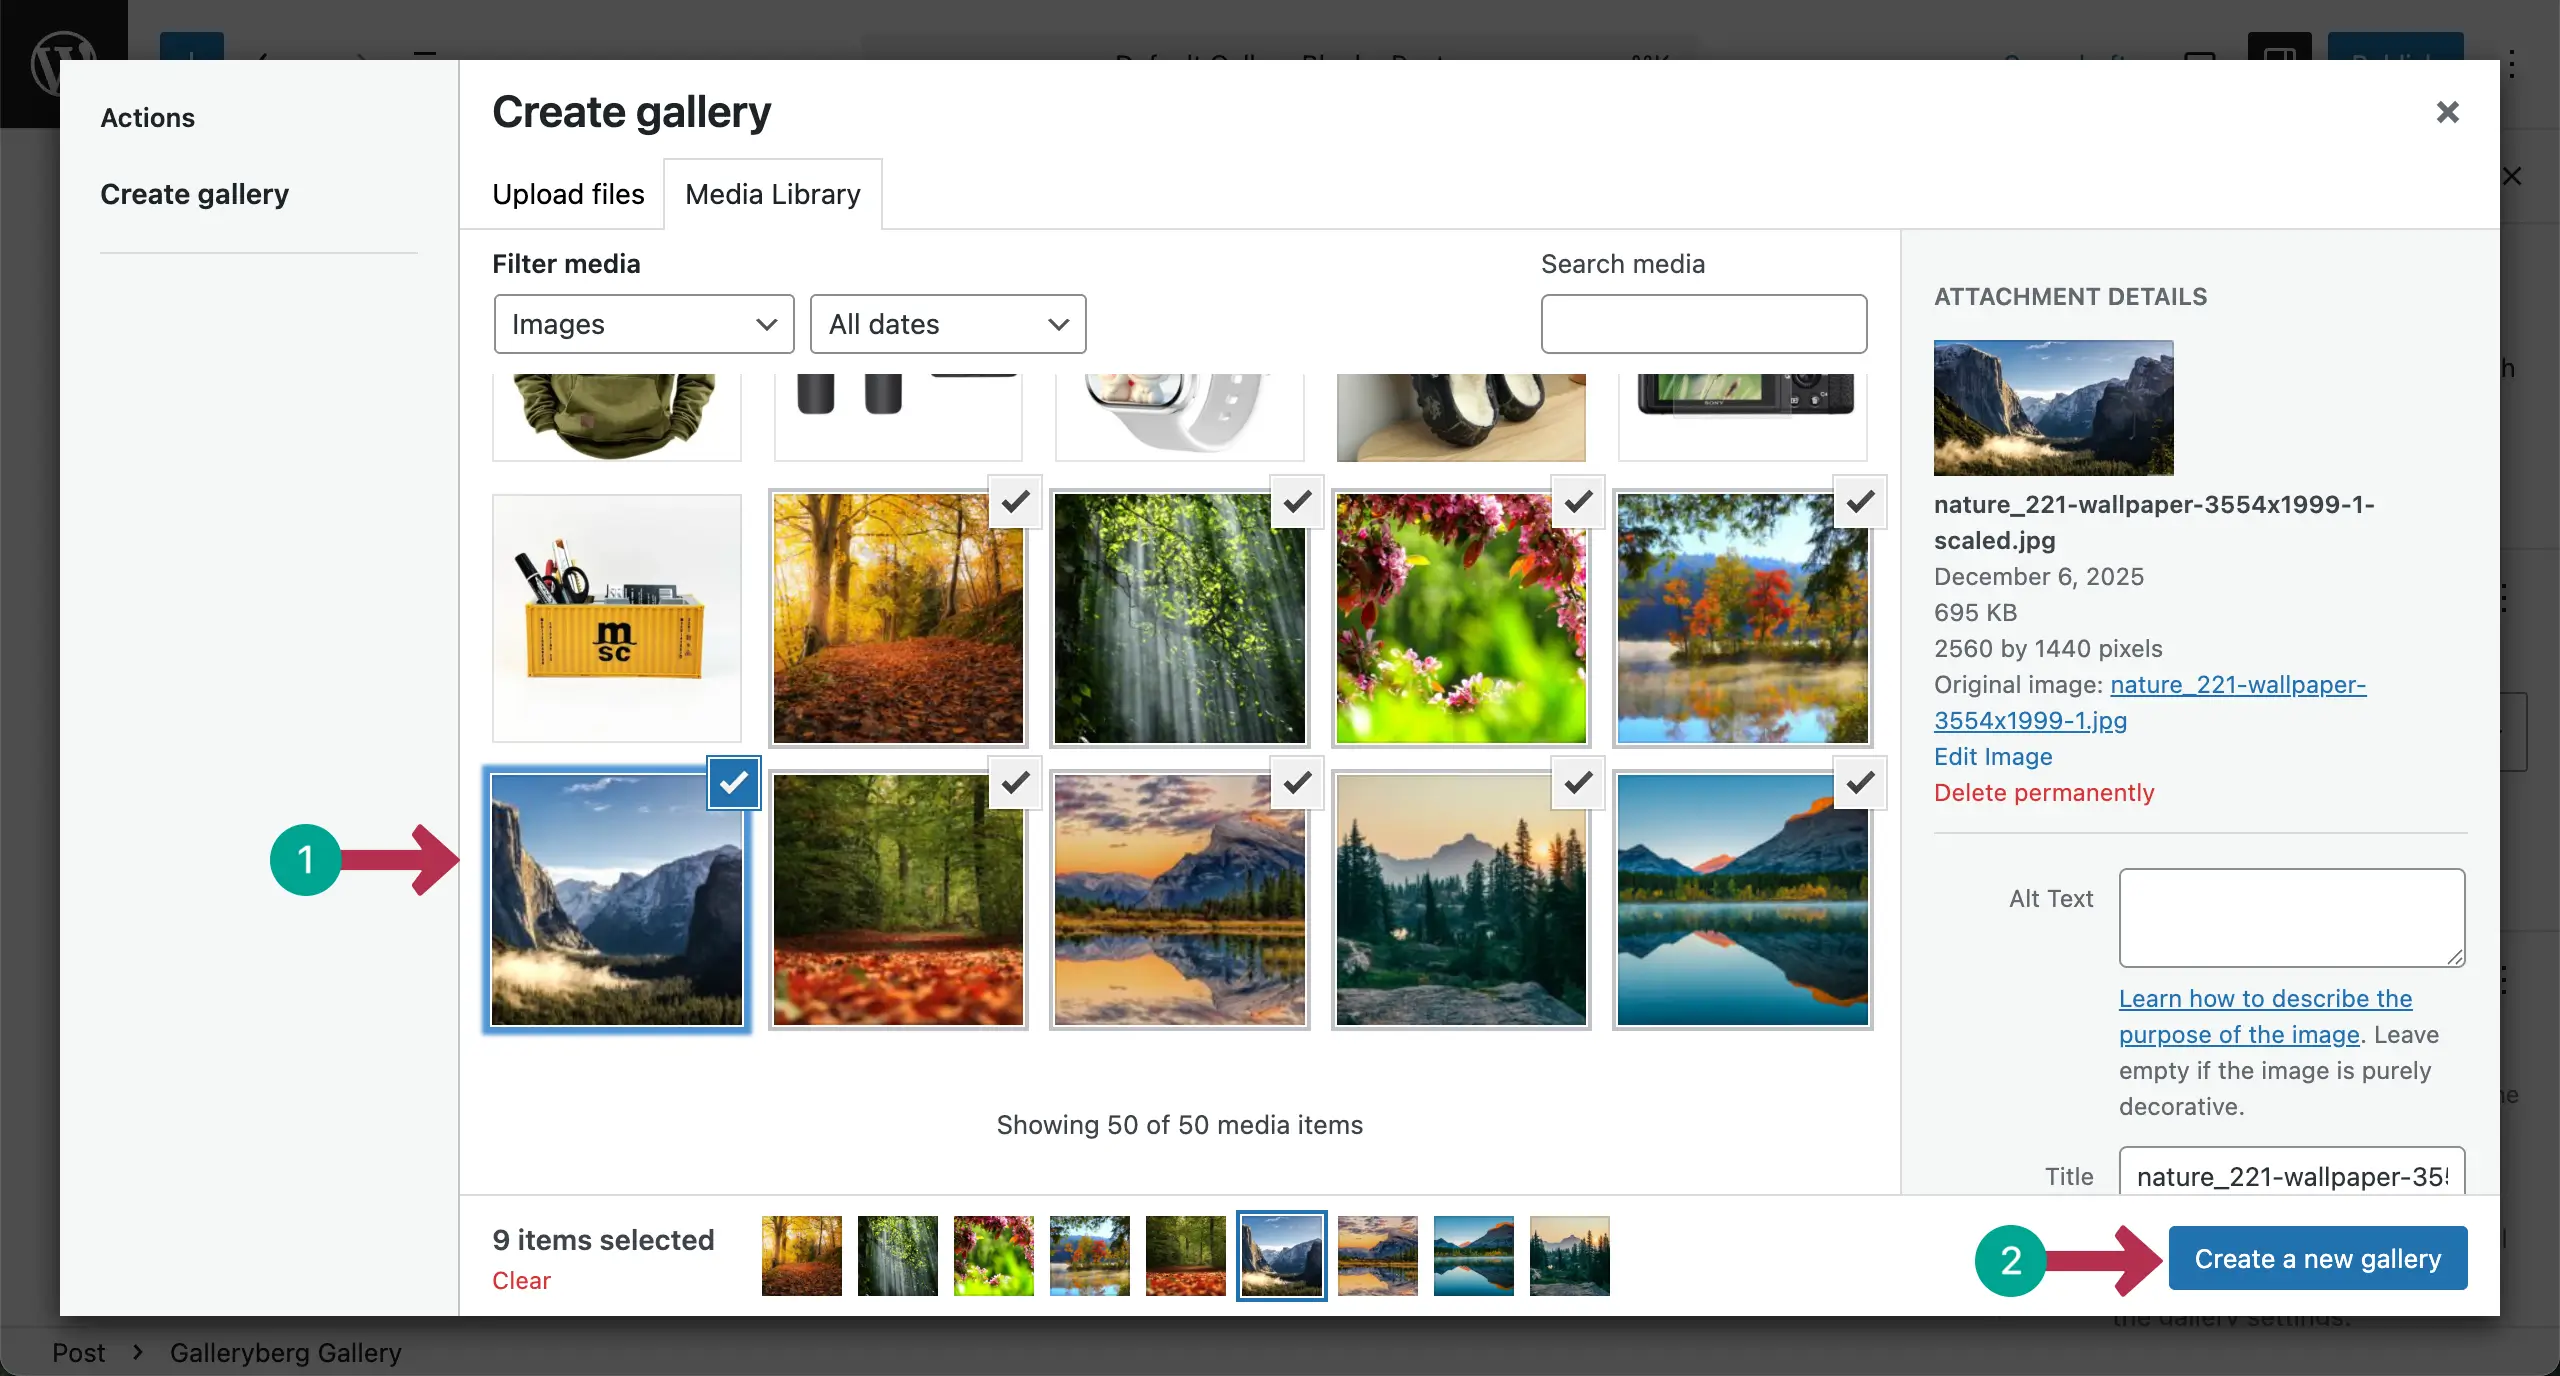
Choose the images you want to add to the masonry gallery. Once selected, click the Create a new gallery button.
In the next step, you’ll get options to add captions to the images. Finally, hit the Insert gallery button.
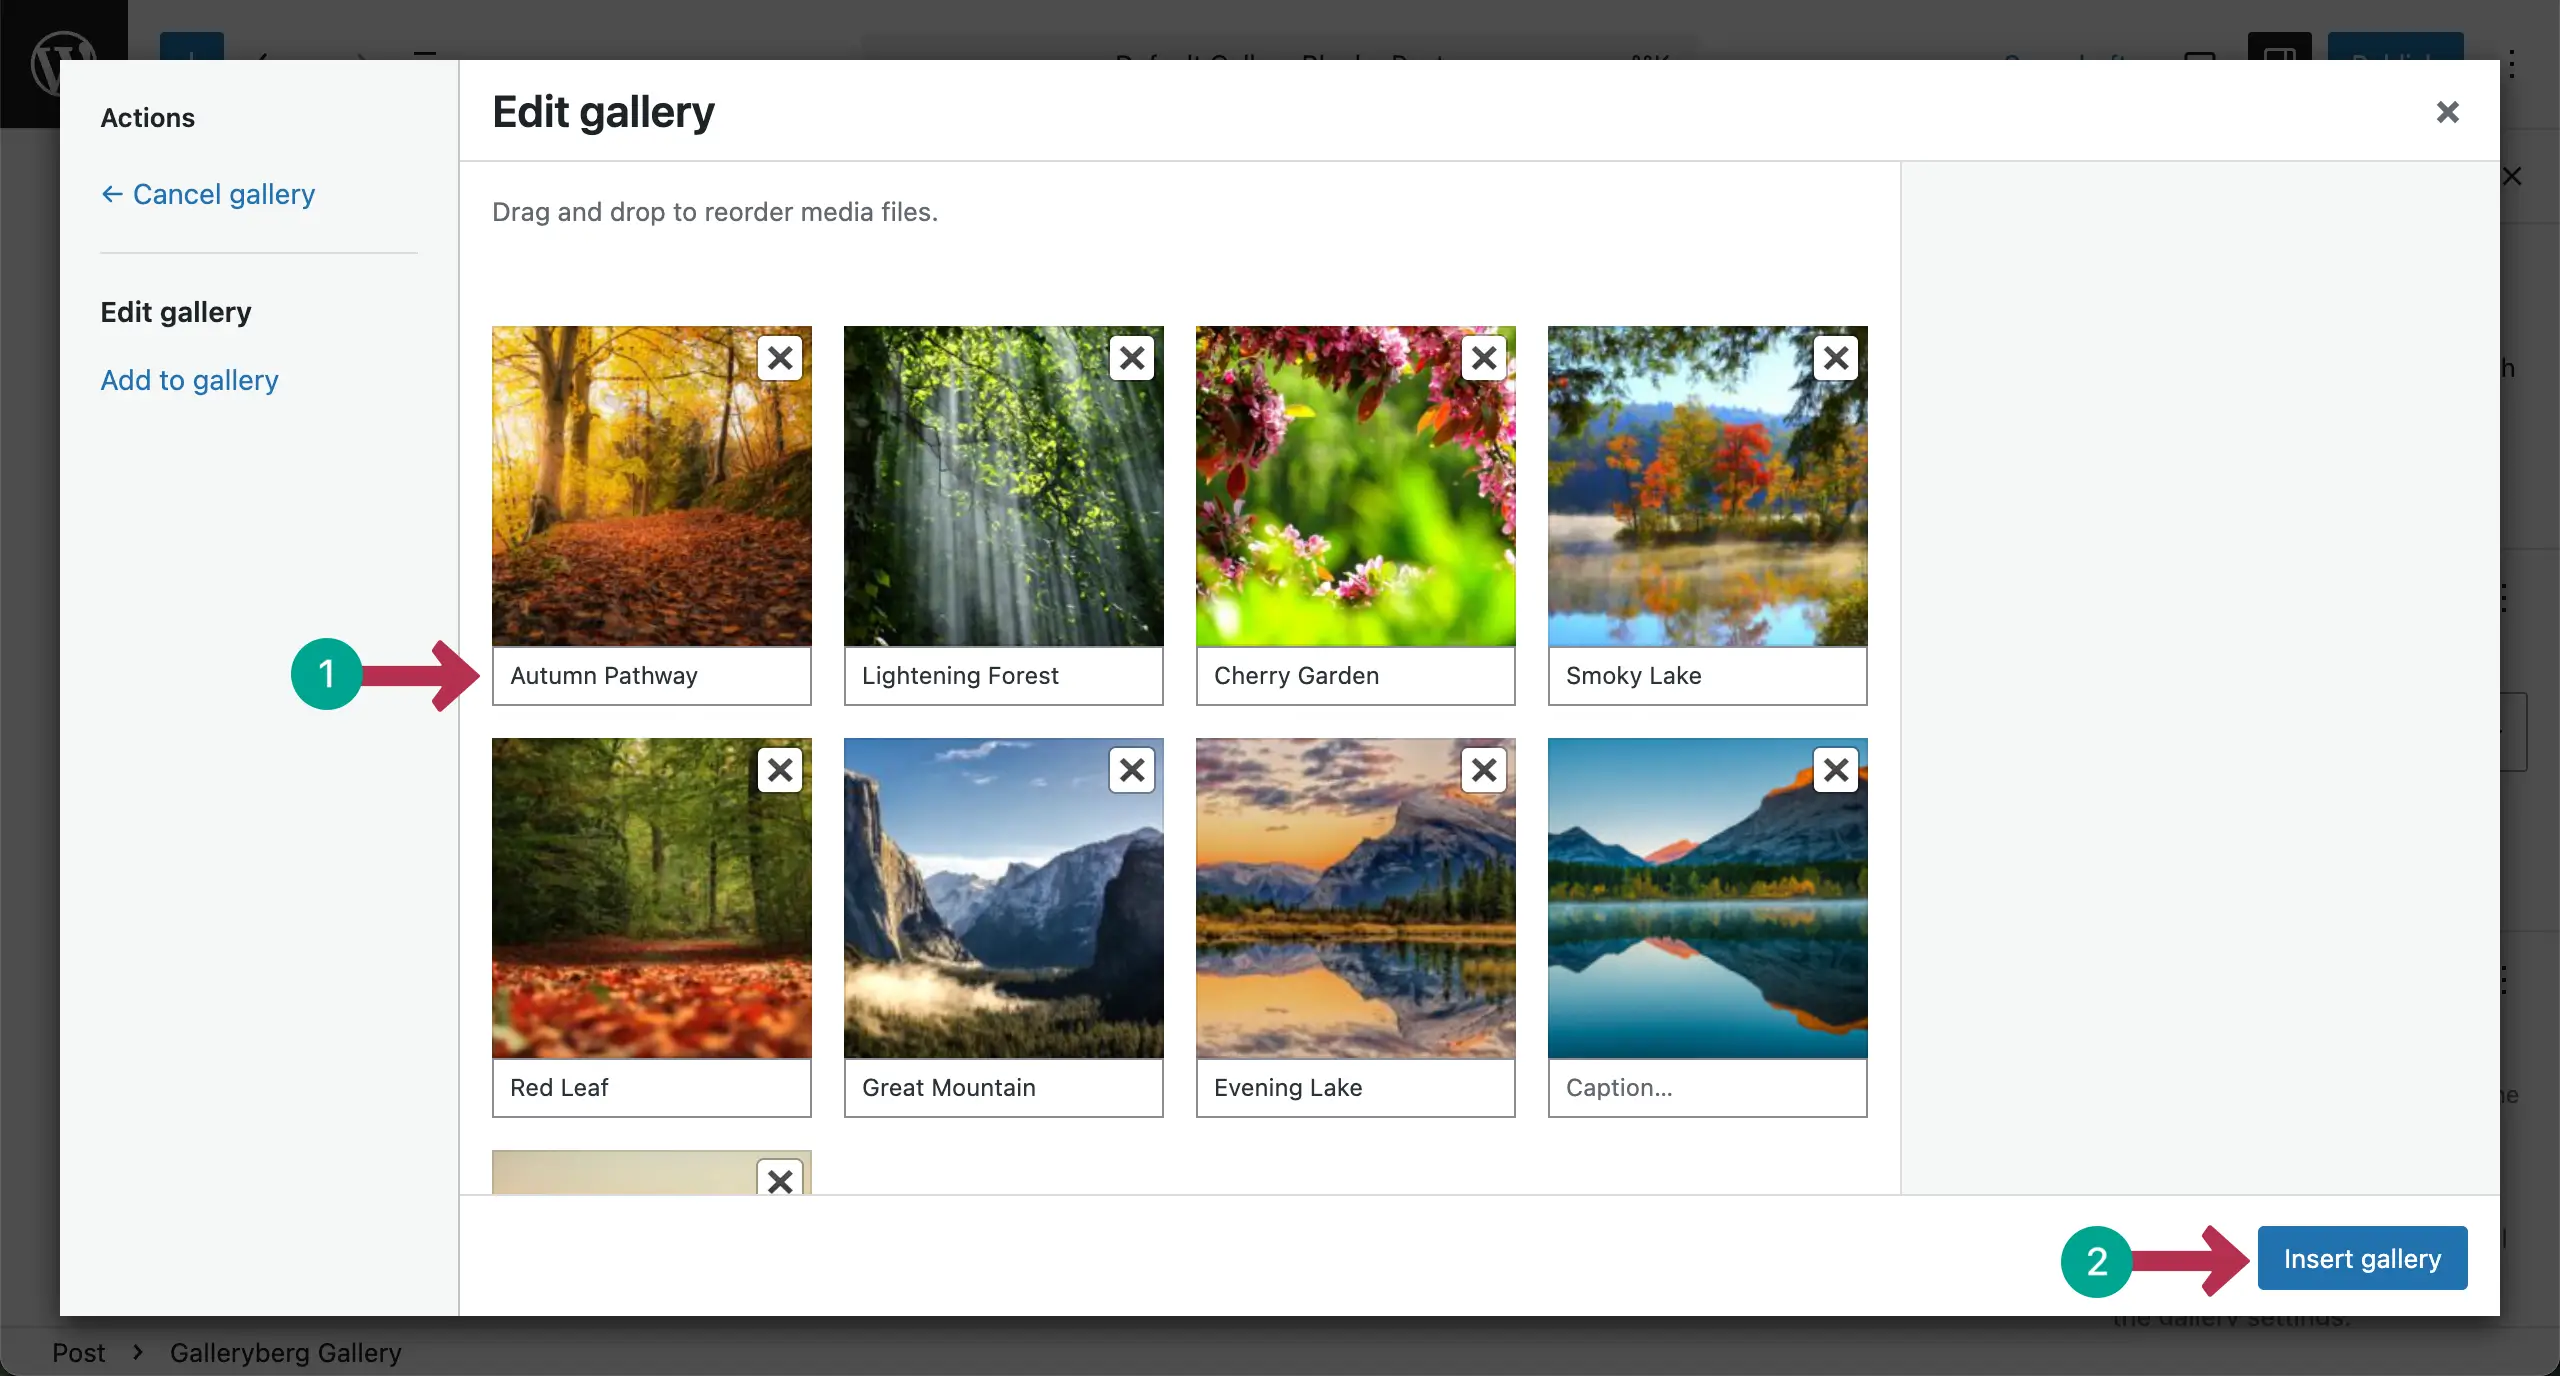
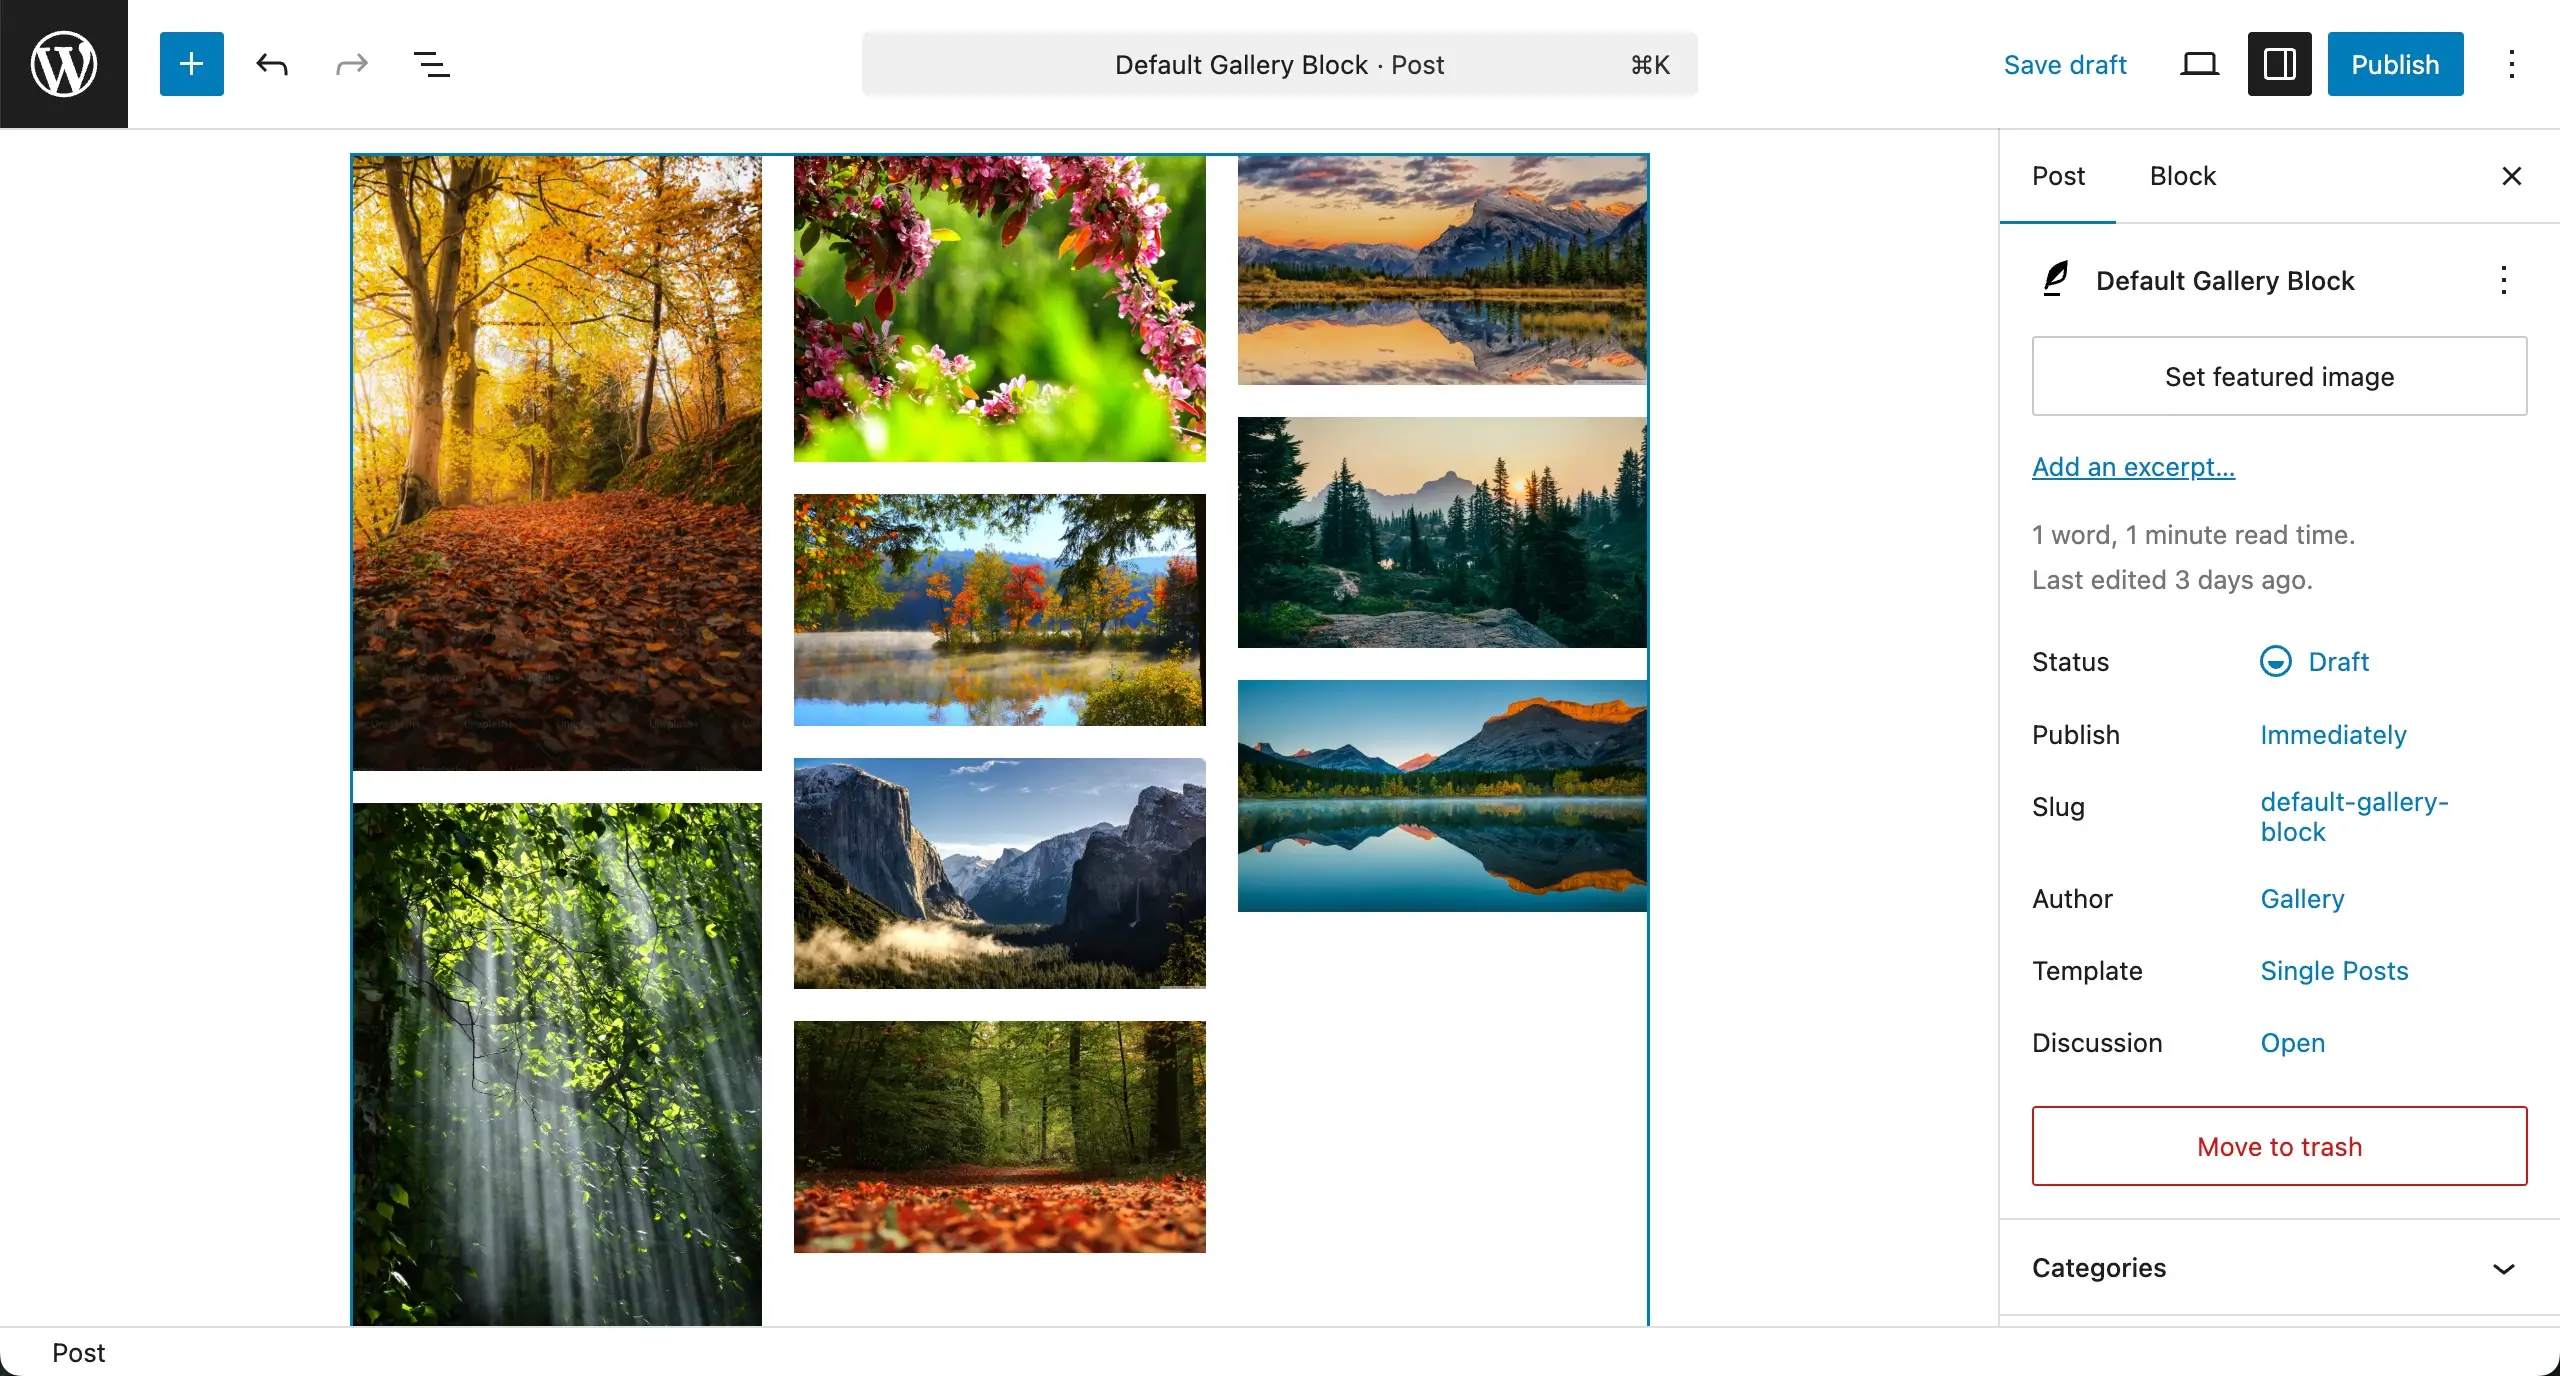
The masonry gallery will be created right away as you can see in the screenshot attached below.
Step 05: Configure Settings for the Gallery
From the settings tab, you can set a different number of columns separately for each device type. After that, you can enable the Hover Effect, Lightbox, and Captions, or leave them as they are.
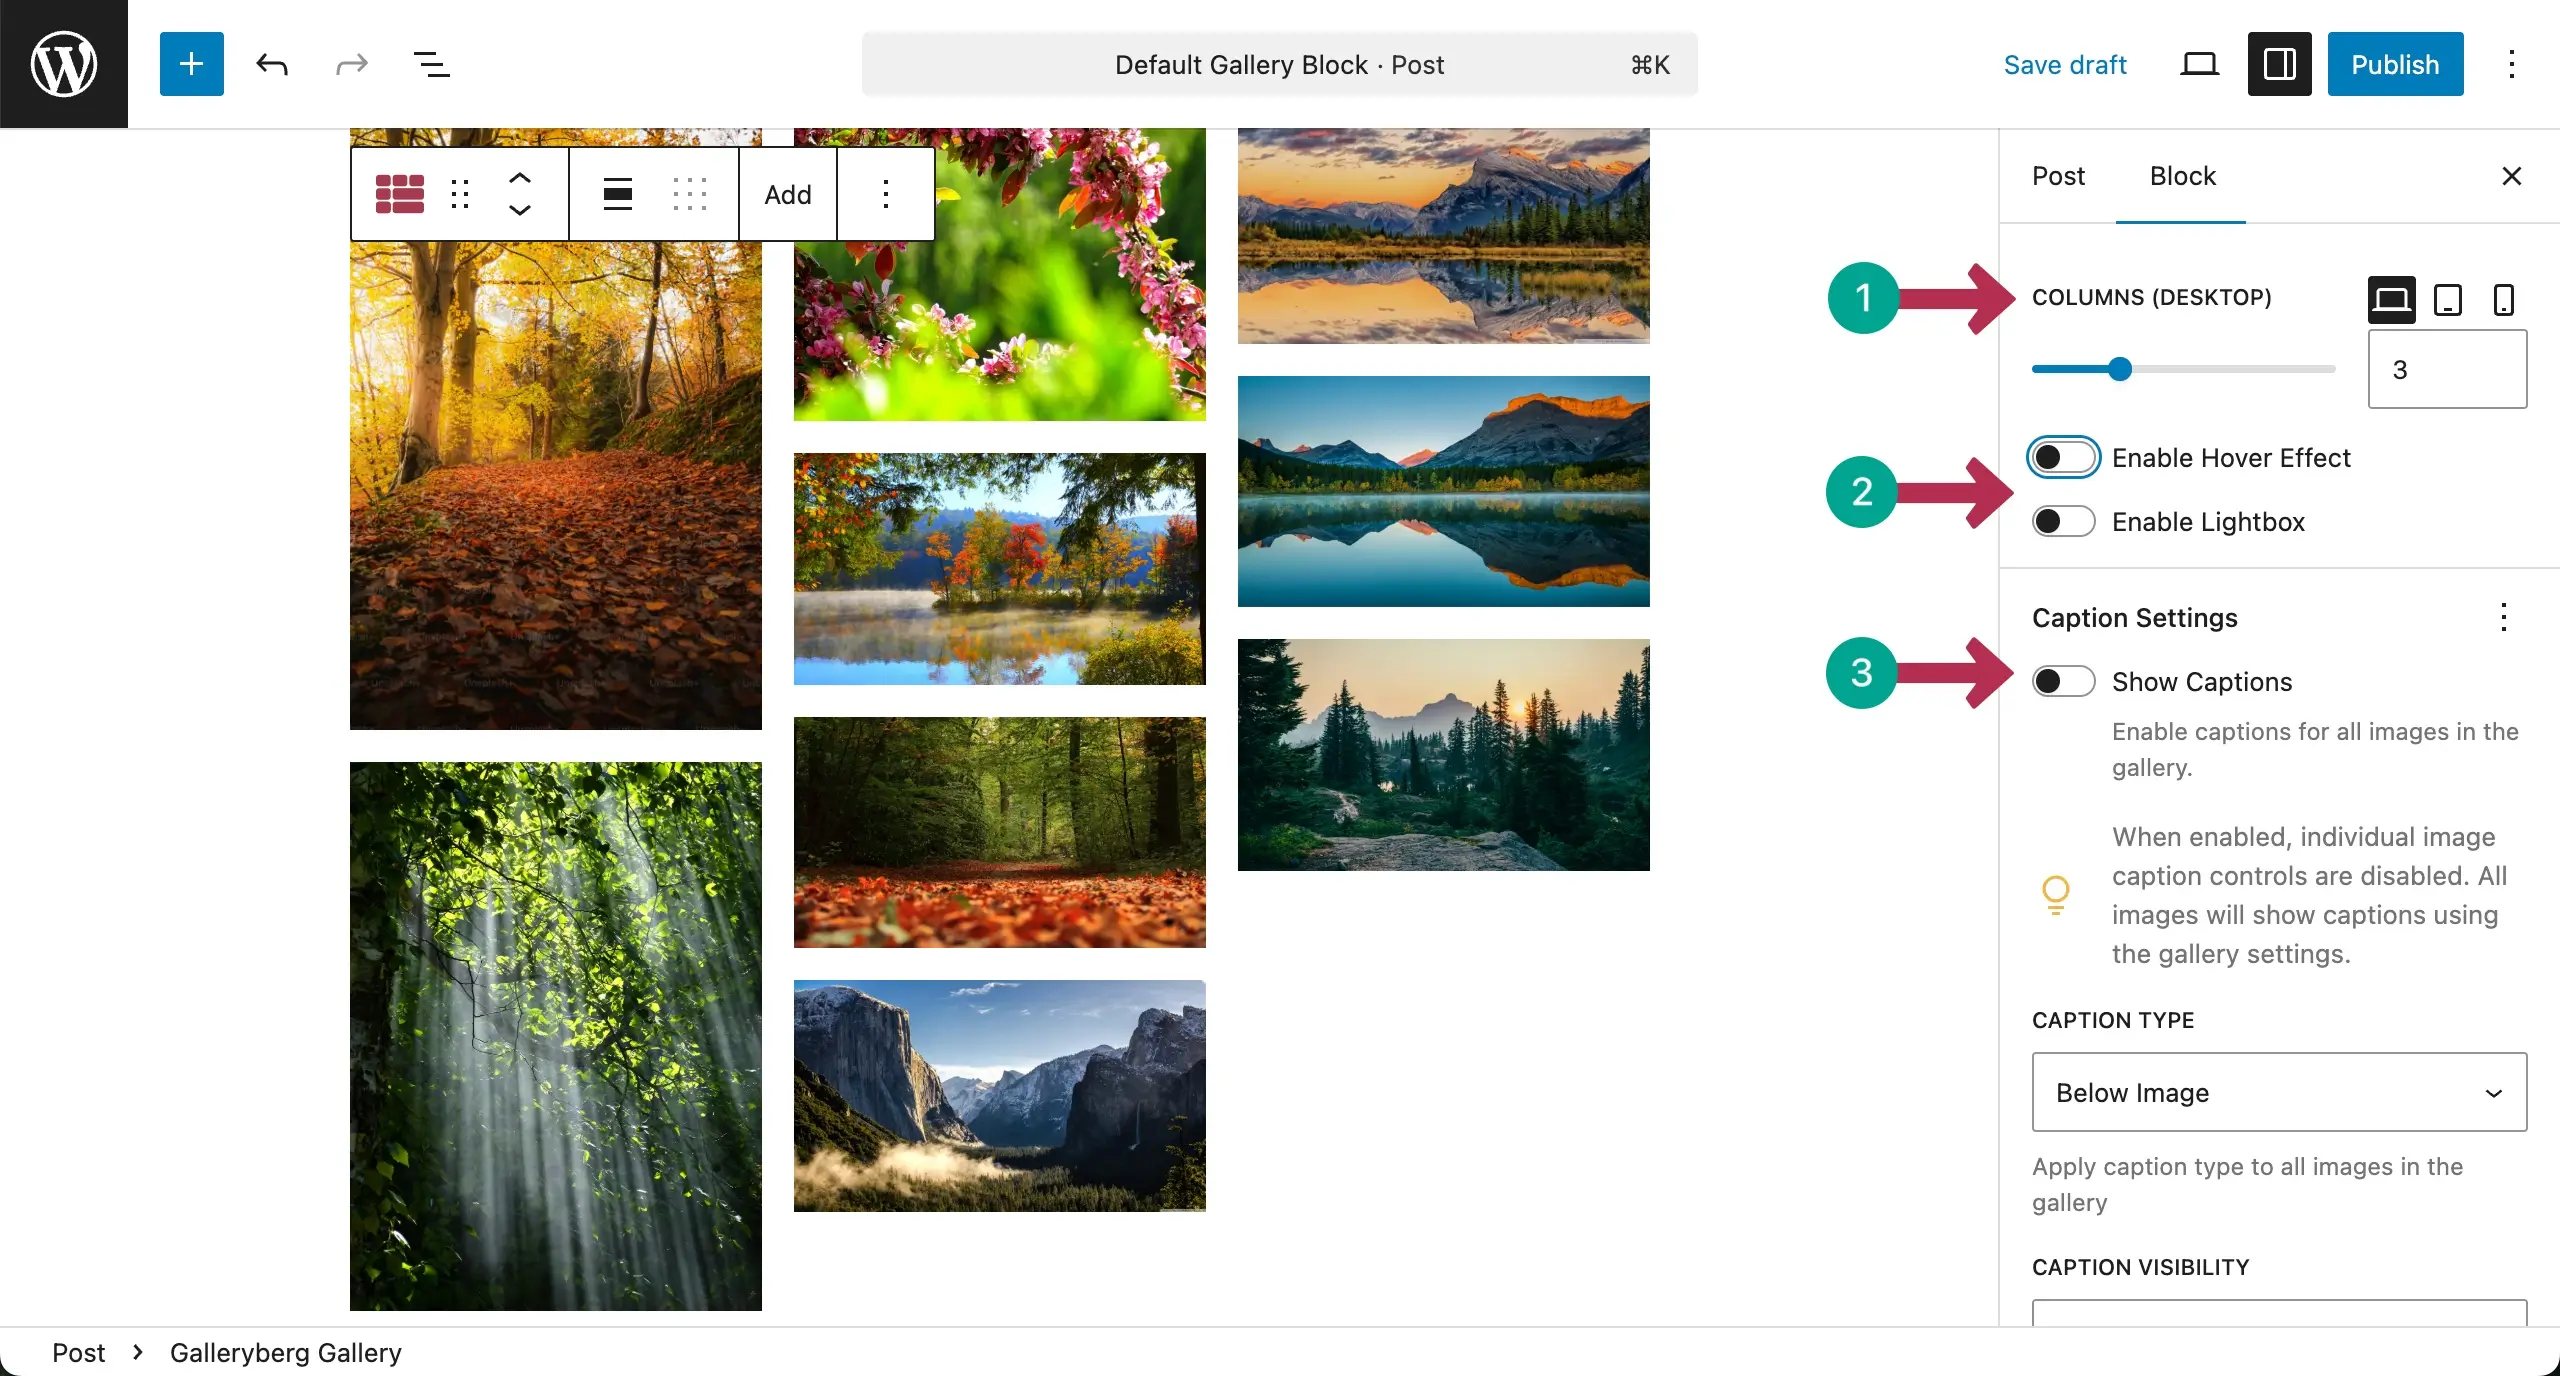
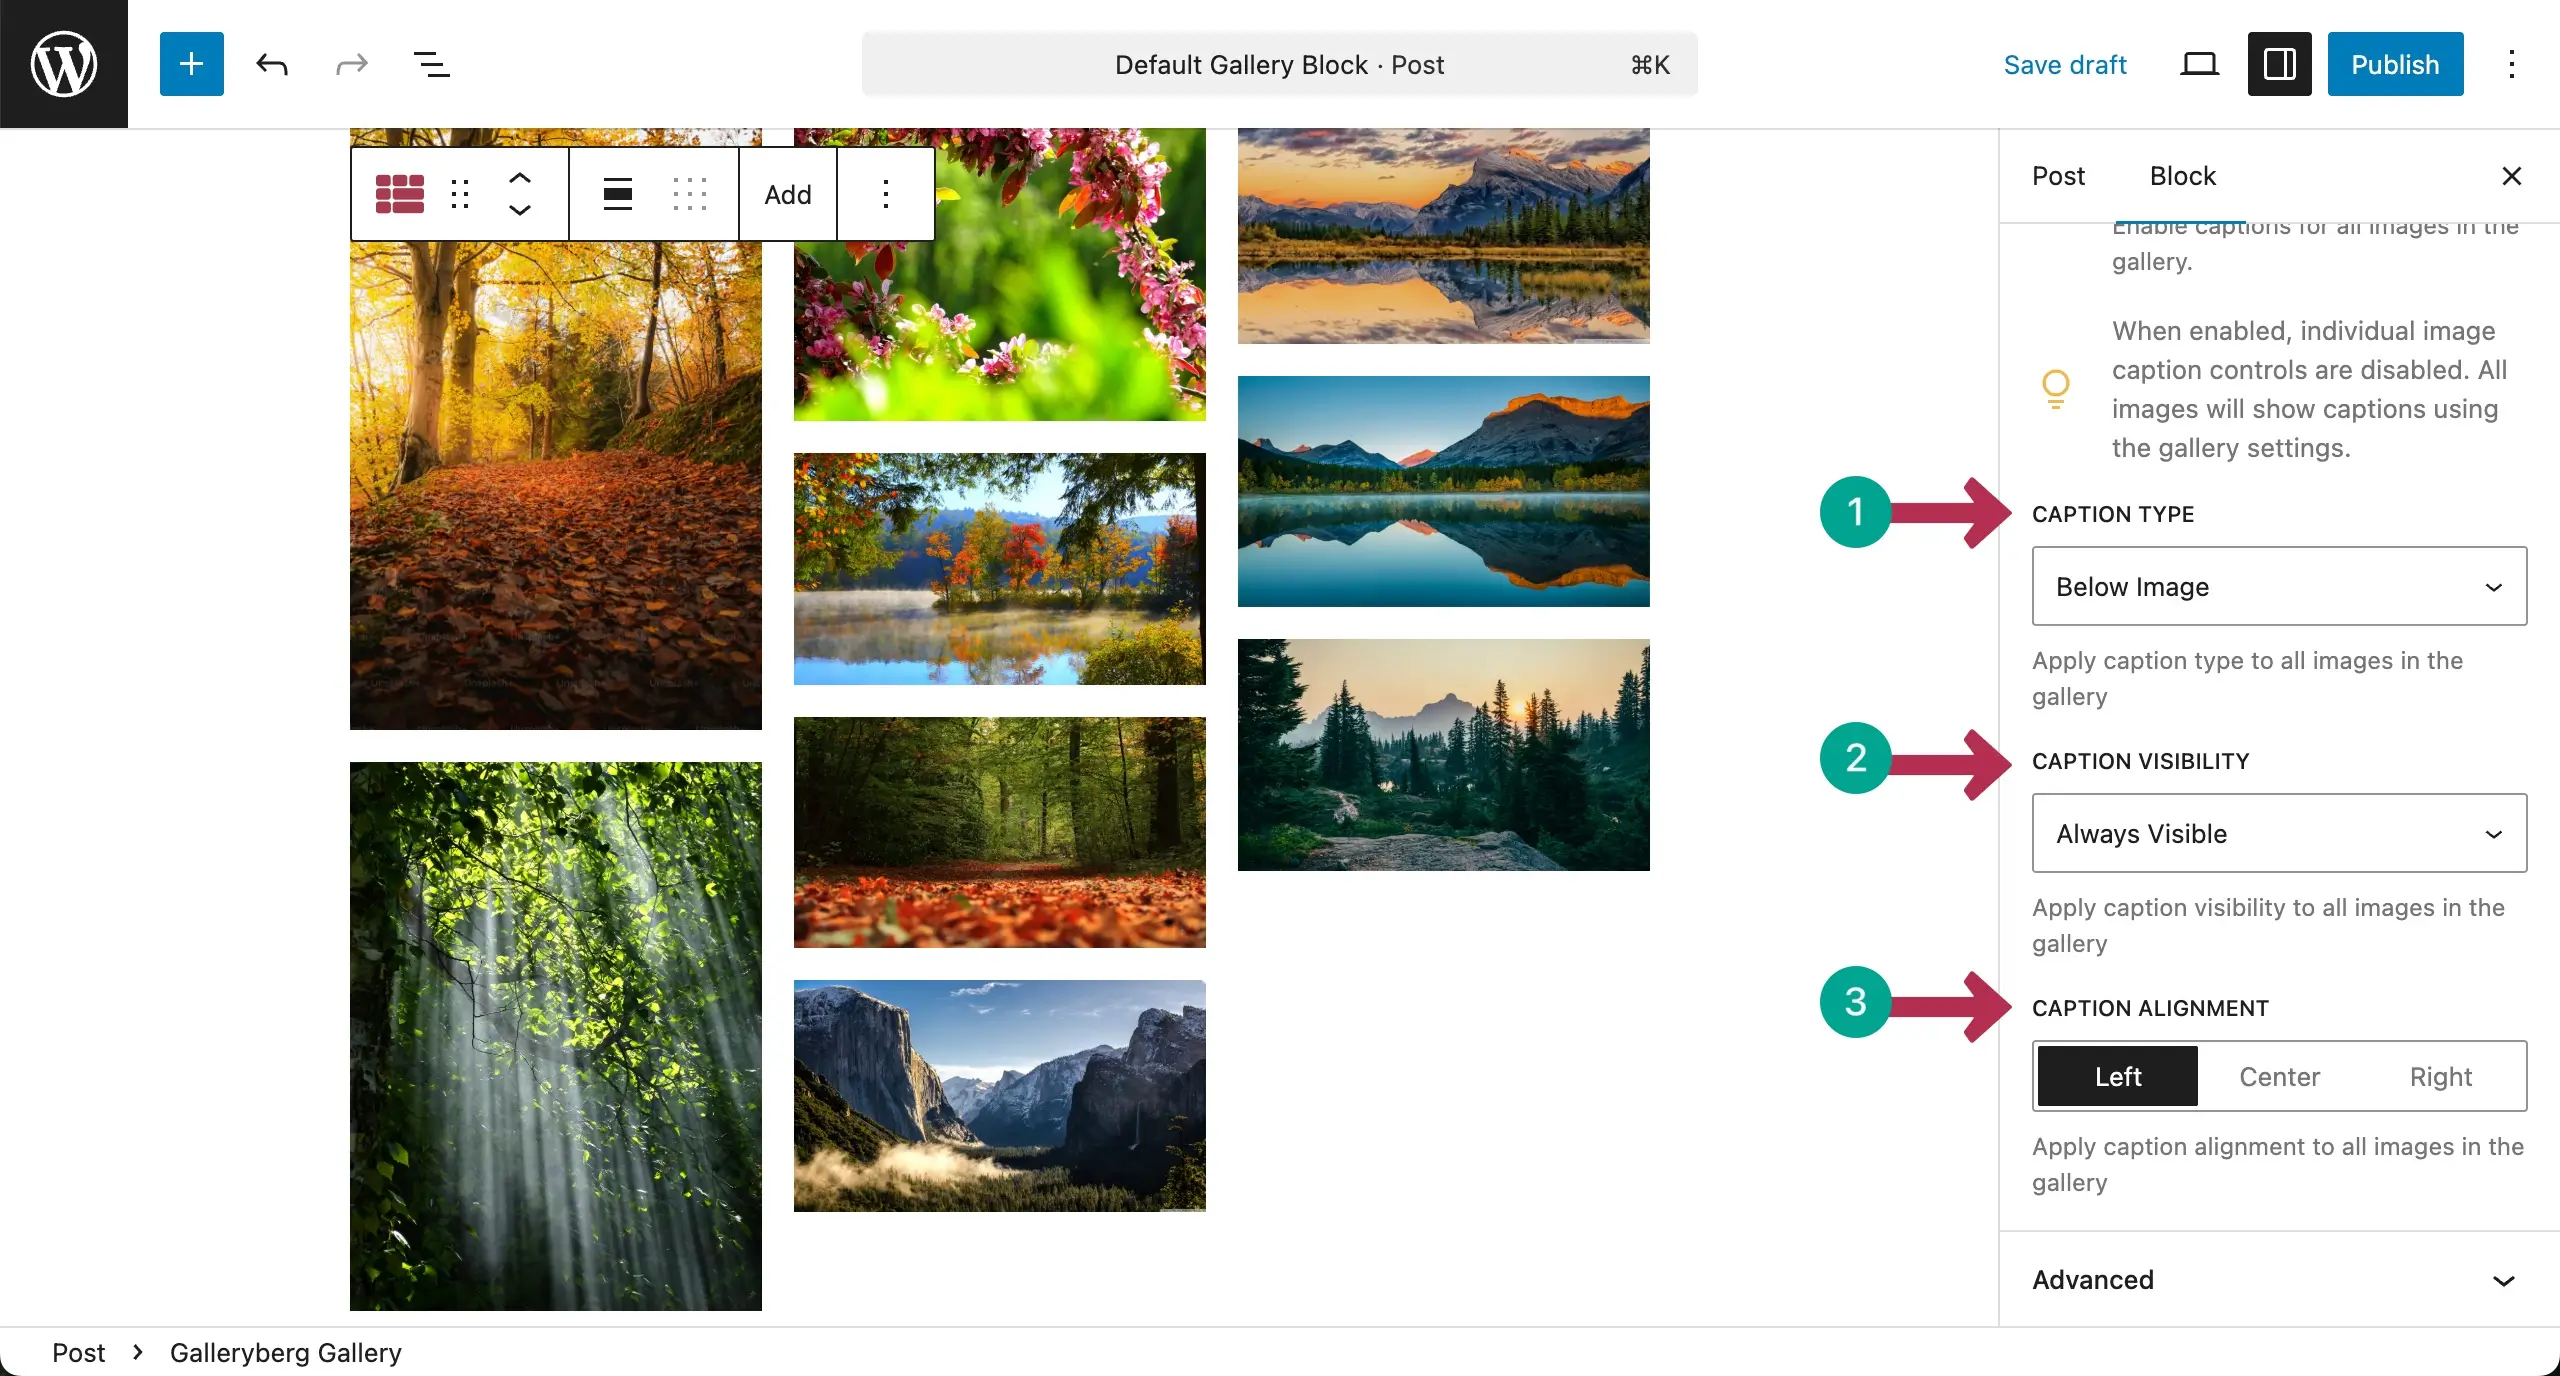
Scrolling down the tab a bit, you’ll find some more options by which you can configure caption settings for the gallery.
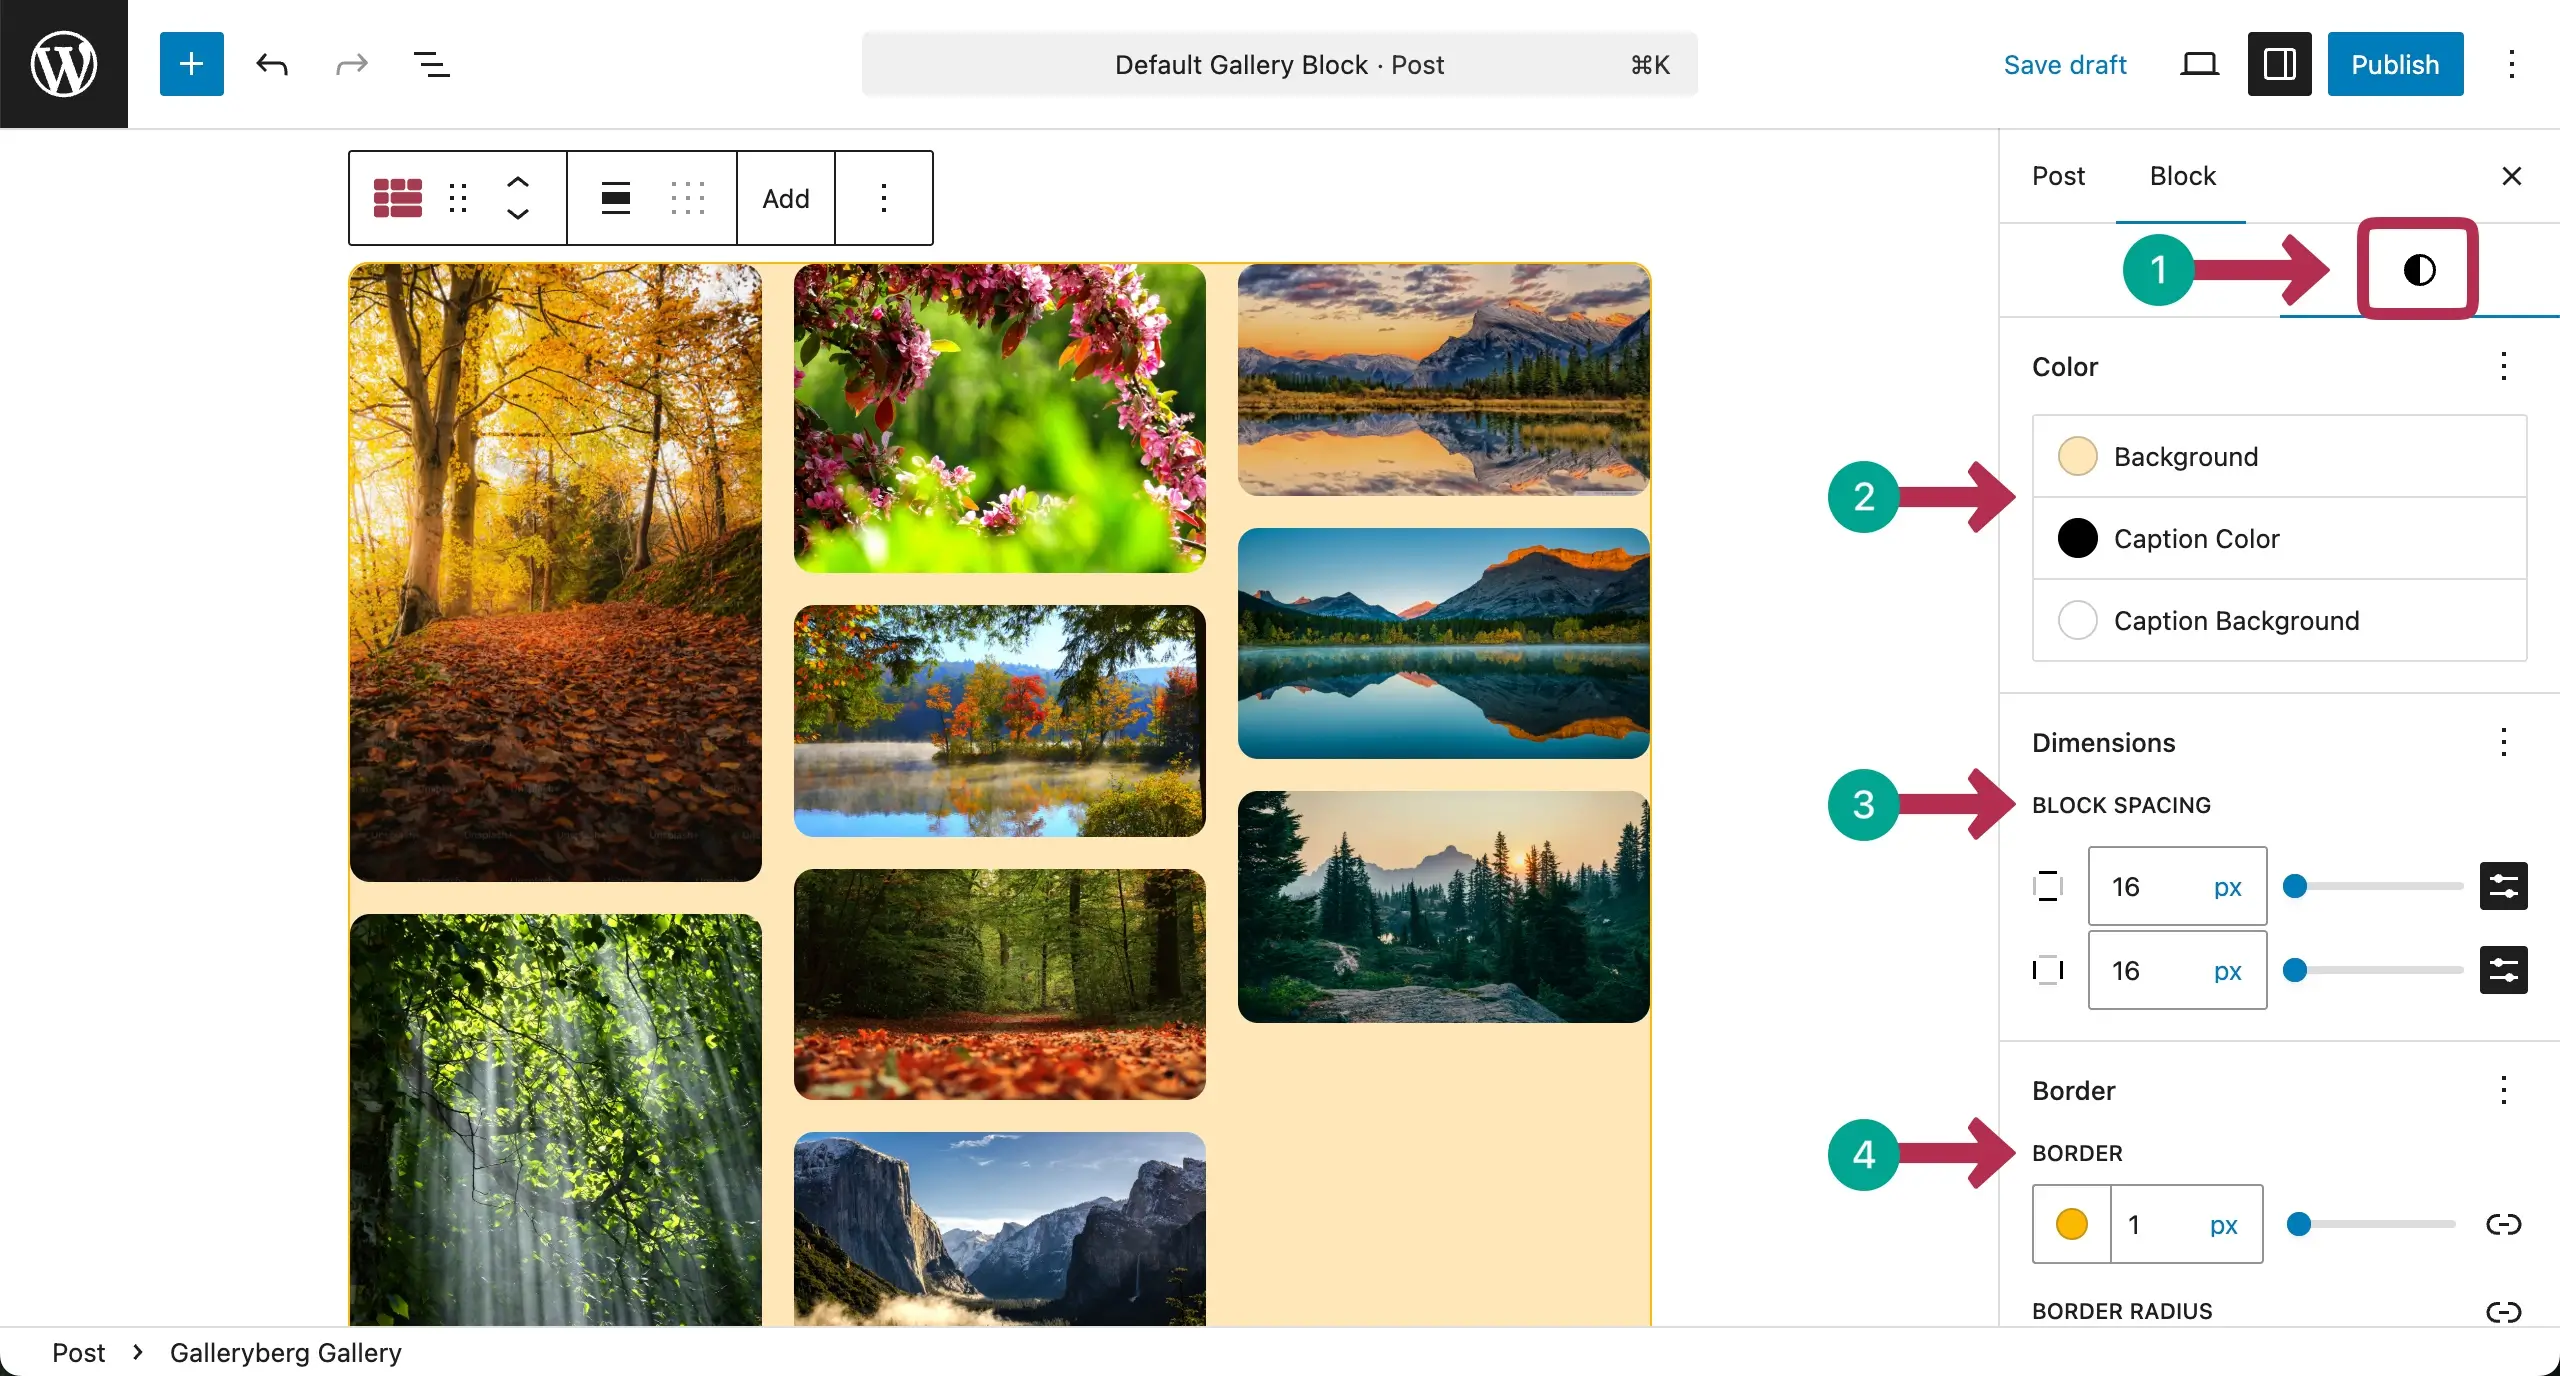
Step 06: Stylize the Masonry Gallery
Now, come to the Styles tab. From here, you can add colors, block spacing, border, and border radius to various aspects of the gallery.
Thus, you can easily create Pinterest-style image galleries in WordPress without taking much technical hassles. For more guidance regarding the Galleryber plugin, check our documentation.
Final Takeaway!
A Pinterest-style masonry gallery can bring life to your visual content in WordPress. It makes your images look organized and modern without extra effort. It also helps users discover more of your ideas, photos, or products by simply scrolling down the page. It is a strong way to build brand identity through visuals.
But to get the best results, use images with clear focus and good resolution. Compress large photos to keep the site fast. Keep image ratios mixed for a natural masonry look, but avoid very extreme sizes that break flow. Add short captions or hover titles when they make sense.
Finally, don’t forget to test the layout on mobile because most users browse from phones today. With these simple best practices, your masonry gallery will feel smooth, beautiful, and easy to explore.
Leave a Reply