
Adding a lightbox effect to your WordPress image galleries improves user experience by allowing visitors to view larger images without leaving the page.
Lightboxes reduce distractions, keep users engaged longer, and are especially useful for photography, portfolios, and visual blogs.
In this guide, you’ll learn three practical ways to add a lightbox to WordPress galleries, starting with the built-in WordPress option and moving to more advanced gallery plugins.
What Is a Lightbox in WordPress?
A lightbox in WordPress is a feature that opens an image in a full-screen or modal overlay when clicked. The background content is dimmed, allowing users to focus entirely on the image.
Typical lightbox features include:
- Enlarged image display
- Navigation arrows to move between images
- Keyboard or swipe navigation
- Captions and image titles
- Close button or click-to-close behavior
Not all WordPress lightboxes offer the same functionality. Some are very basic, while others provide sliders, animations, and advanced controls.
Method 1: Add a Lightbox Using the Default WordPress Gallery Block
The default WordPress Gallery block includes a built-in option called Enlarge on click, which opens images in an overlay similar to a lightbox.
However, it’s important to understand the limitation upfront:
This method provides basic image enlargement, but it does not support sliding or navigating between gallery images like a full-featured lightbox plugin.
Still, for simple use cases, it’s a clean and plugin-free solution. Now let’s see how to do it.
Step 01: Add a Gallery Block in the Editor
Open a post or page using the Gutenberg editor.
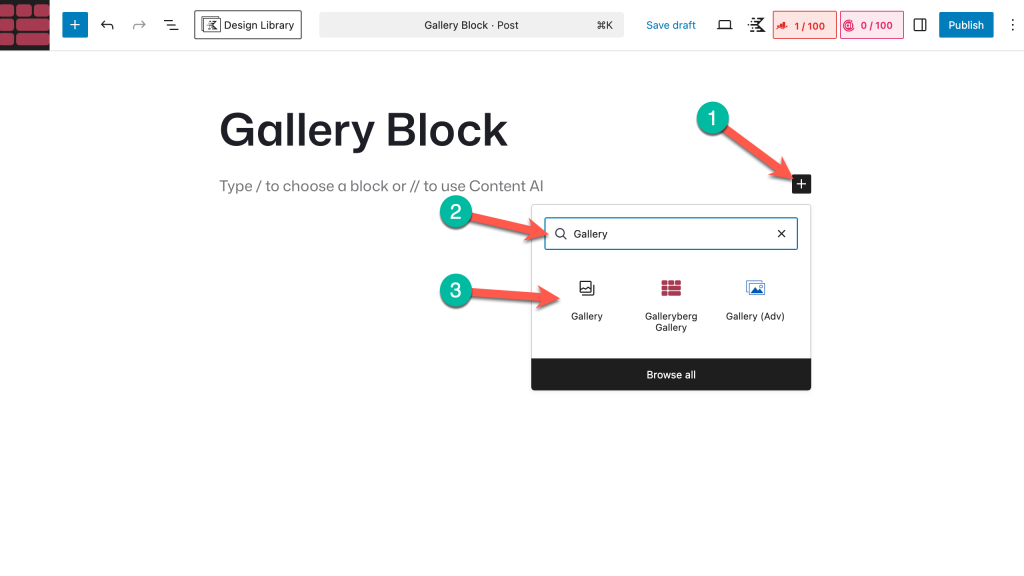
- Click the + (Add block) button
- Search for Gallery
- Insert the Gallery block into the editor
Step 02: Upload or Select Images
You can now add images to your gallery:
- Upload images from your local device, or
- Select existing images from the Media Library
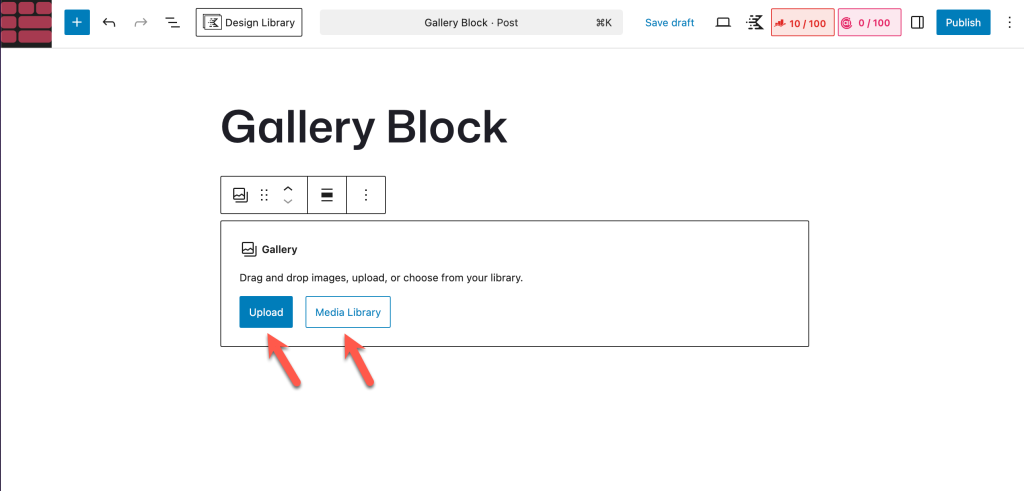
After selecting the images, click Create a new gallery to insert them into the block.
Step 03: Enable “Enlarge on Click” (Lightbox-Style Overlay)
Once the gallery is added, select the Gallery block and click on the ‘Link’ icon and enable ‘Enlarge on click’ option.
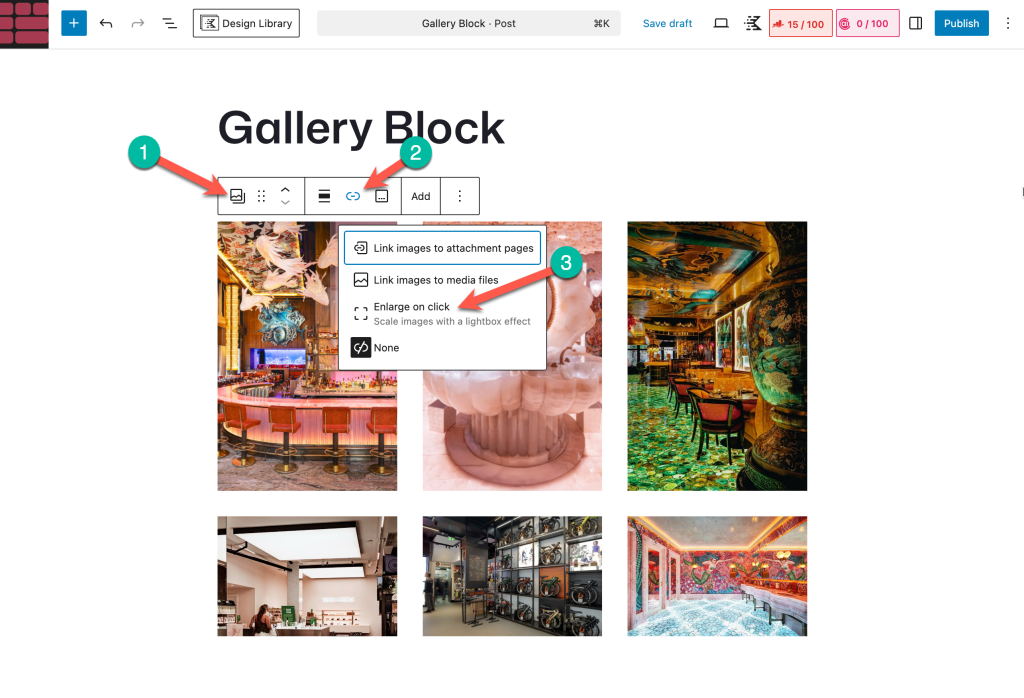
Once enabled, clicking an image on the front end will open it in a modal overlay with the background dimmed.
Step 04: Preview the Gallery
Preview or publish the page and click on a gallery image.
You should see:
- The image opening in an overlay
- The background content dimmed
- A close option to exit the view
⚠️ You will not see:
- Next/previous arrows
- Image sliding between gallery items
Each image opens individually.
When This Method Is a Good Choice
This approach works best if:
- You want a simple, no-plugin solution
- You only need basic image enlargement
- You don’t require sliders, navigation, or advanced styling
If you want a true lightbox experience with sliding images, the next method using a gallery block plugin is the better option.
Method 2: Adding a Lightbox Using a Gallery Block Plugin (Recommended)
The default WordPress gallery block doesn’t have the Lightbox Effect. You need an additional plugin to add this feature to WordPress galleries. We’ll introduce you to such a plugin and explain the process in the discussion covered below.
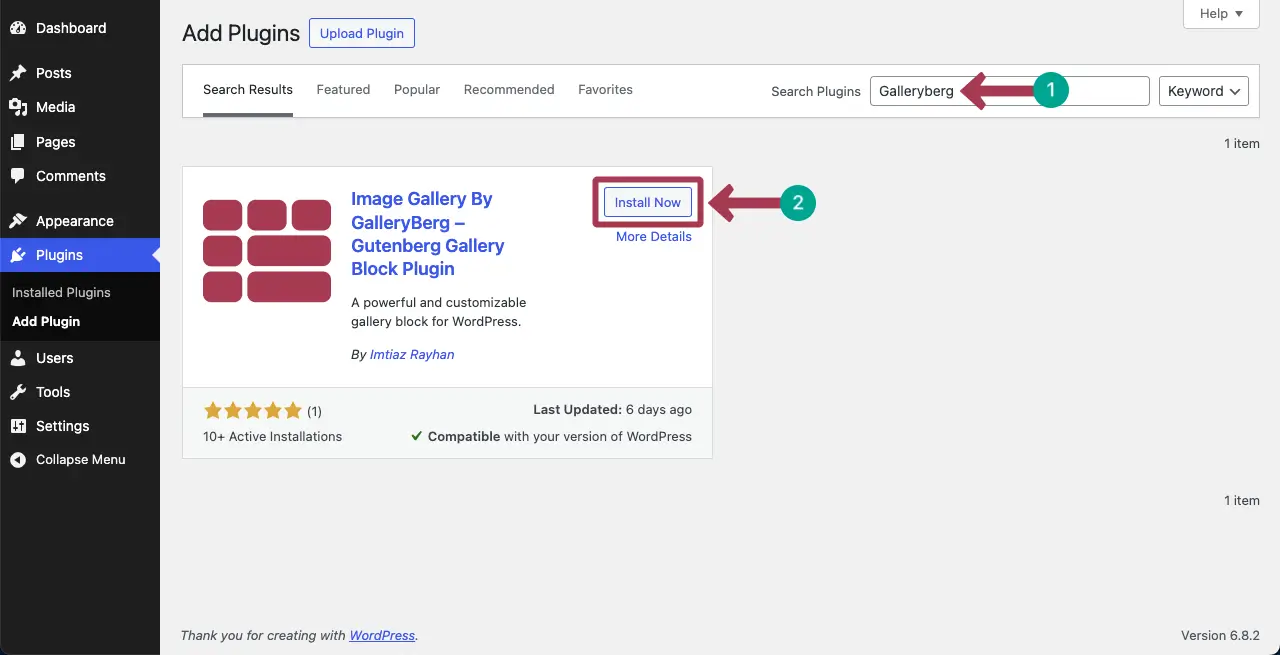
Step 01: Install the Galleryberg Plugin
Galleryberg is a block-based advanced gallery-builder plugin. The process of creating galleries with the plugin is quite similar to the default gallery block. It has both a free and a premium version. Get them by clicking the buttons below.
Once you get the plugins, install and activate them on your website. The process is quite simple, like any other plugin.
Step 02: Create a Gallery
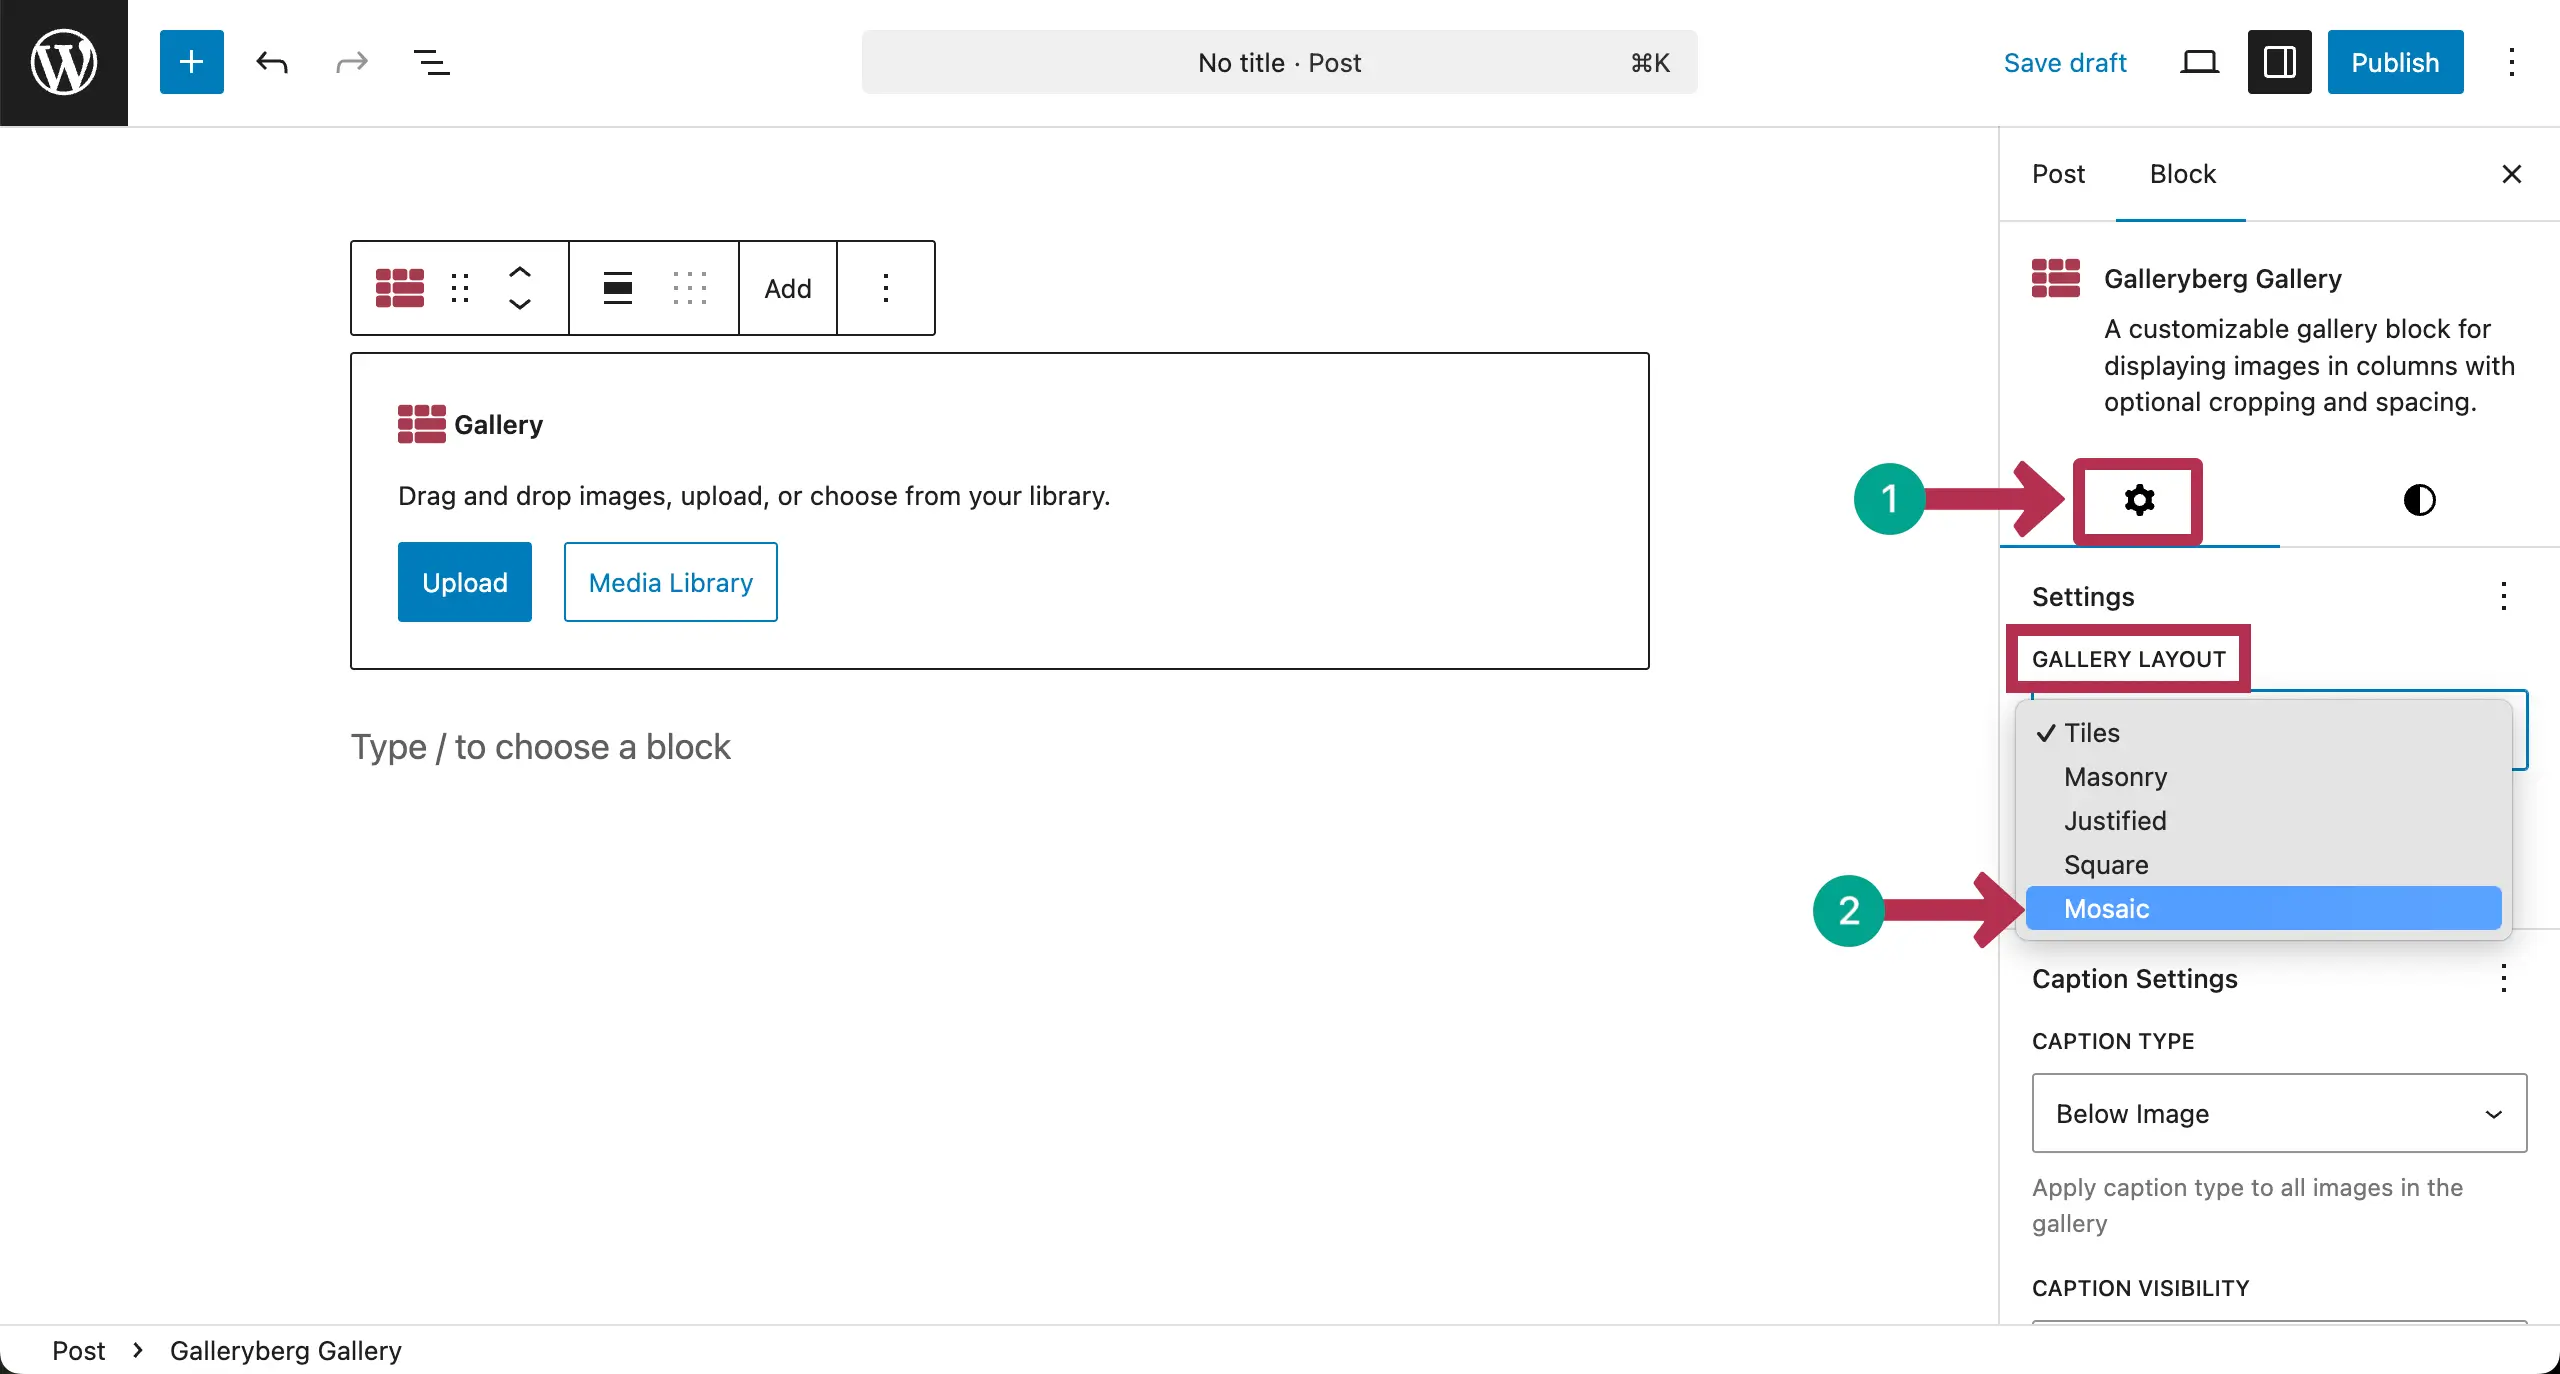
After the plugin is installed, come to the editor. Add the Gallerybreg block to the editor.

You can create different types of gallery layouts with the plugin. Go to the Gallery Layout option under the settings tab on the right sidebar.
Choose the type of gallery layout you want. For this tutorial, we’re choosing the Mosaic type.
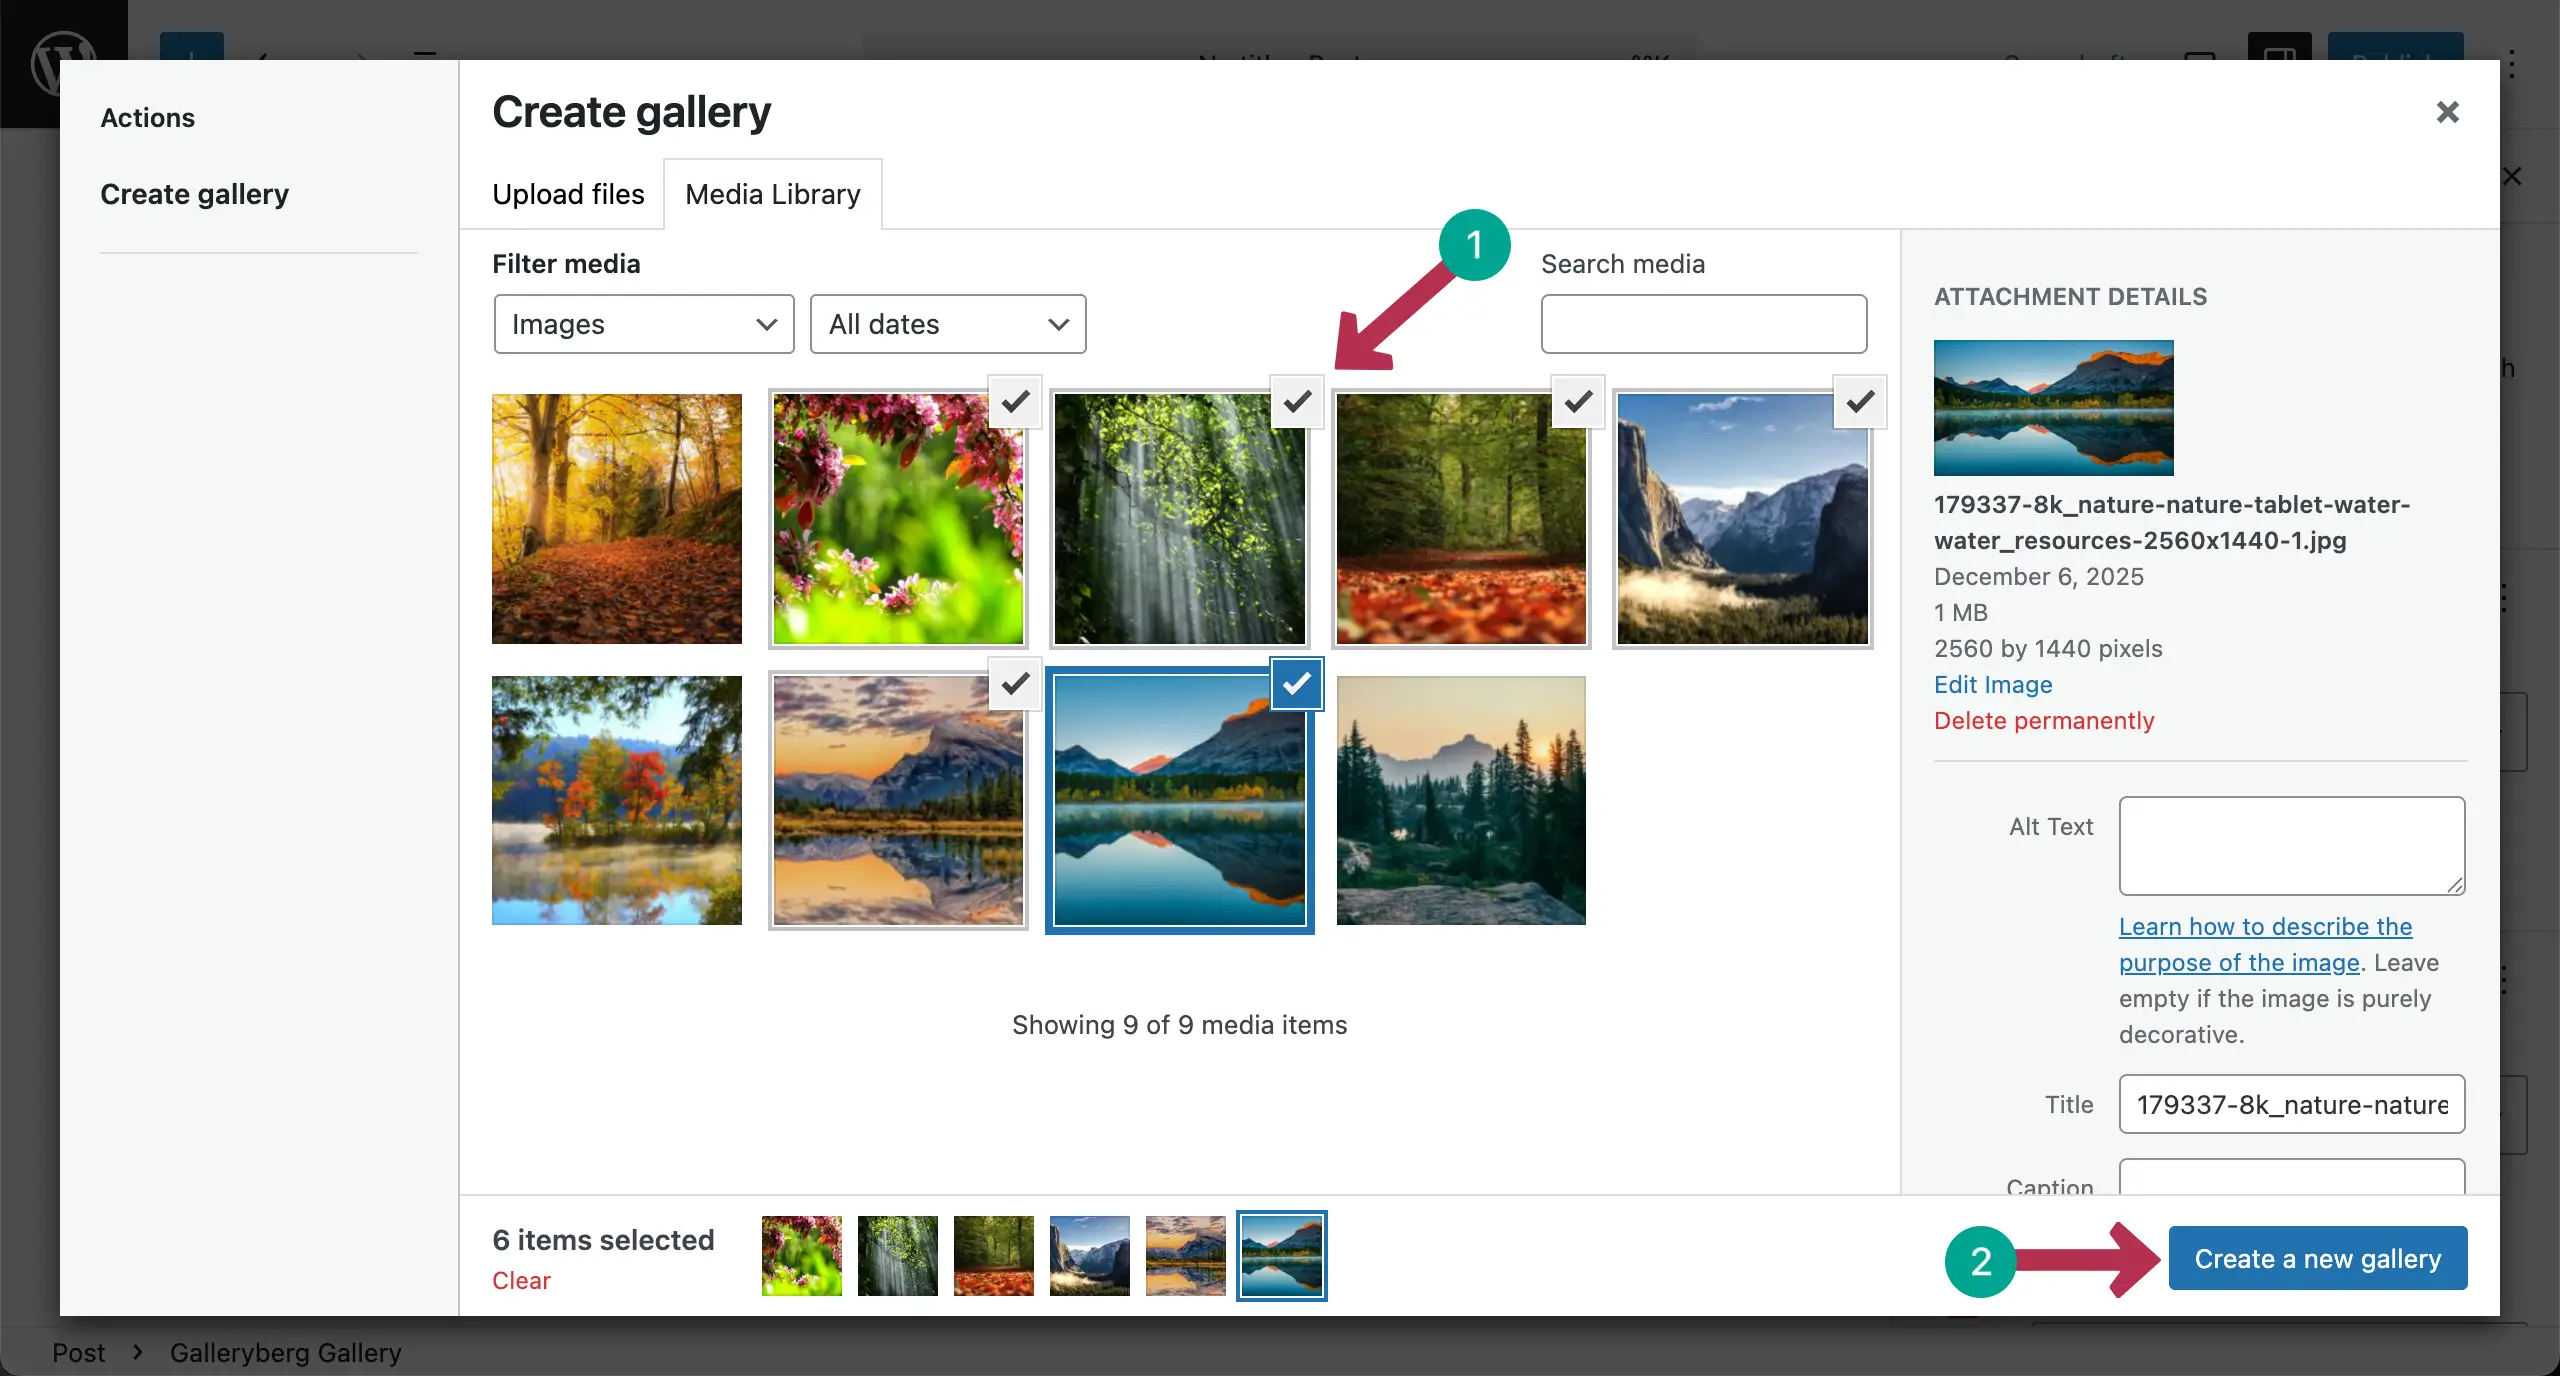
Now, it’s time to add images to the gallery. You can do it from your local drive or the media library.

After images are uploaded, you’ll get a chance to choose the ones you want to display on the gallery. Select those images and hit the Create a new gallery button.
In the next step, you’ll get the option to add captions to the images one by one. Once you are done with this, click the Insert gallery button.

The gallery will be created right away.

Check how to create mobile responsive galleries in WordPress.
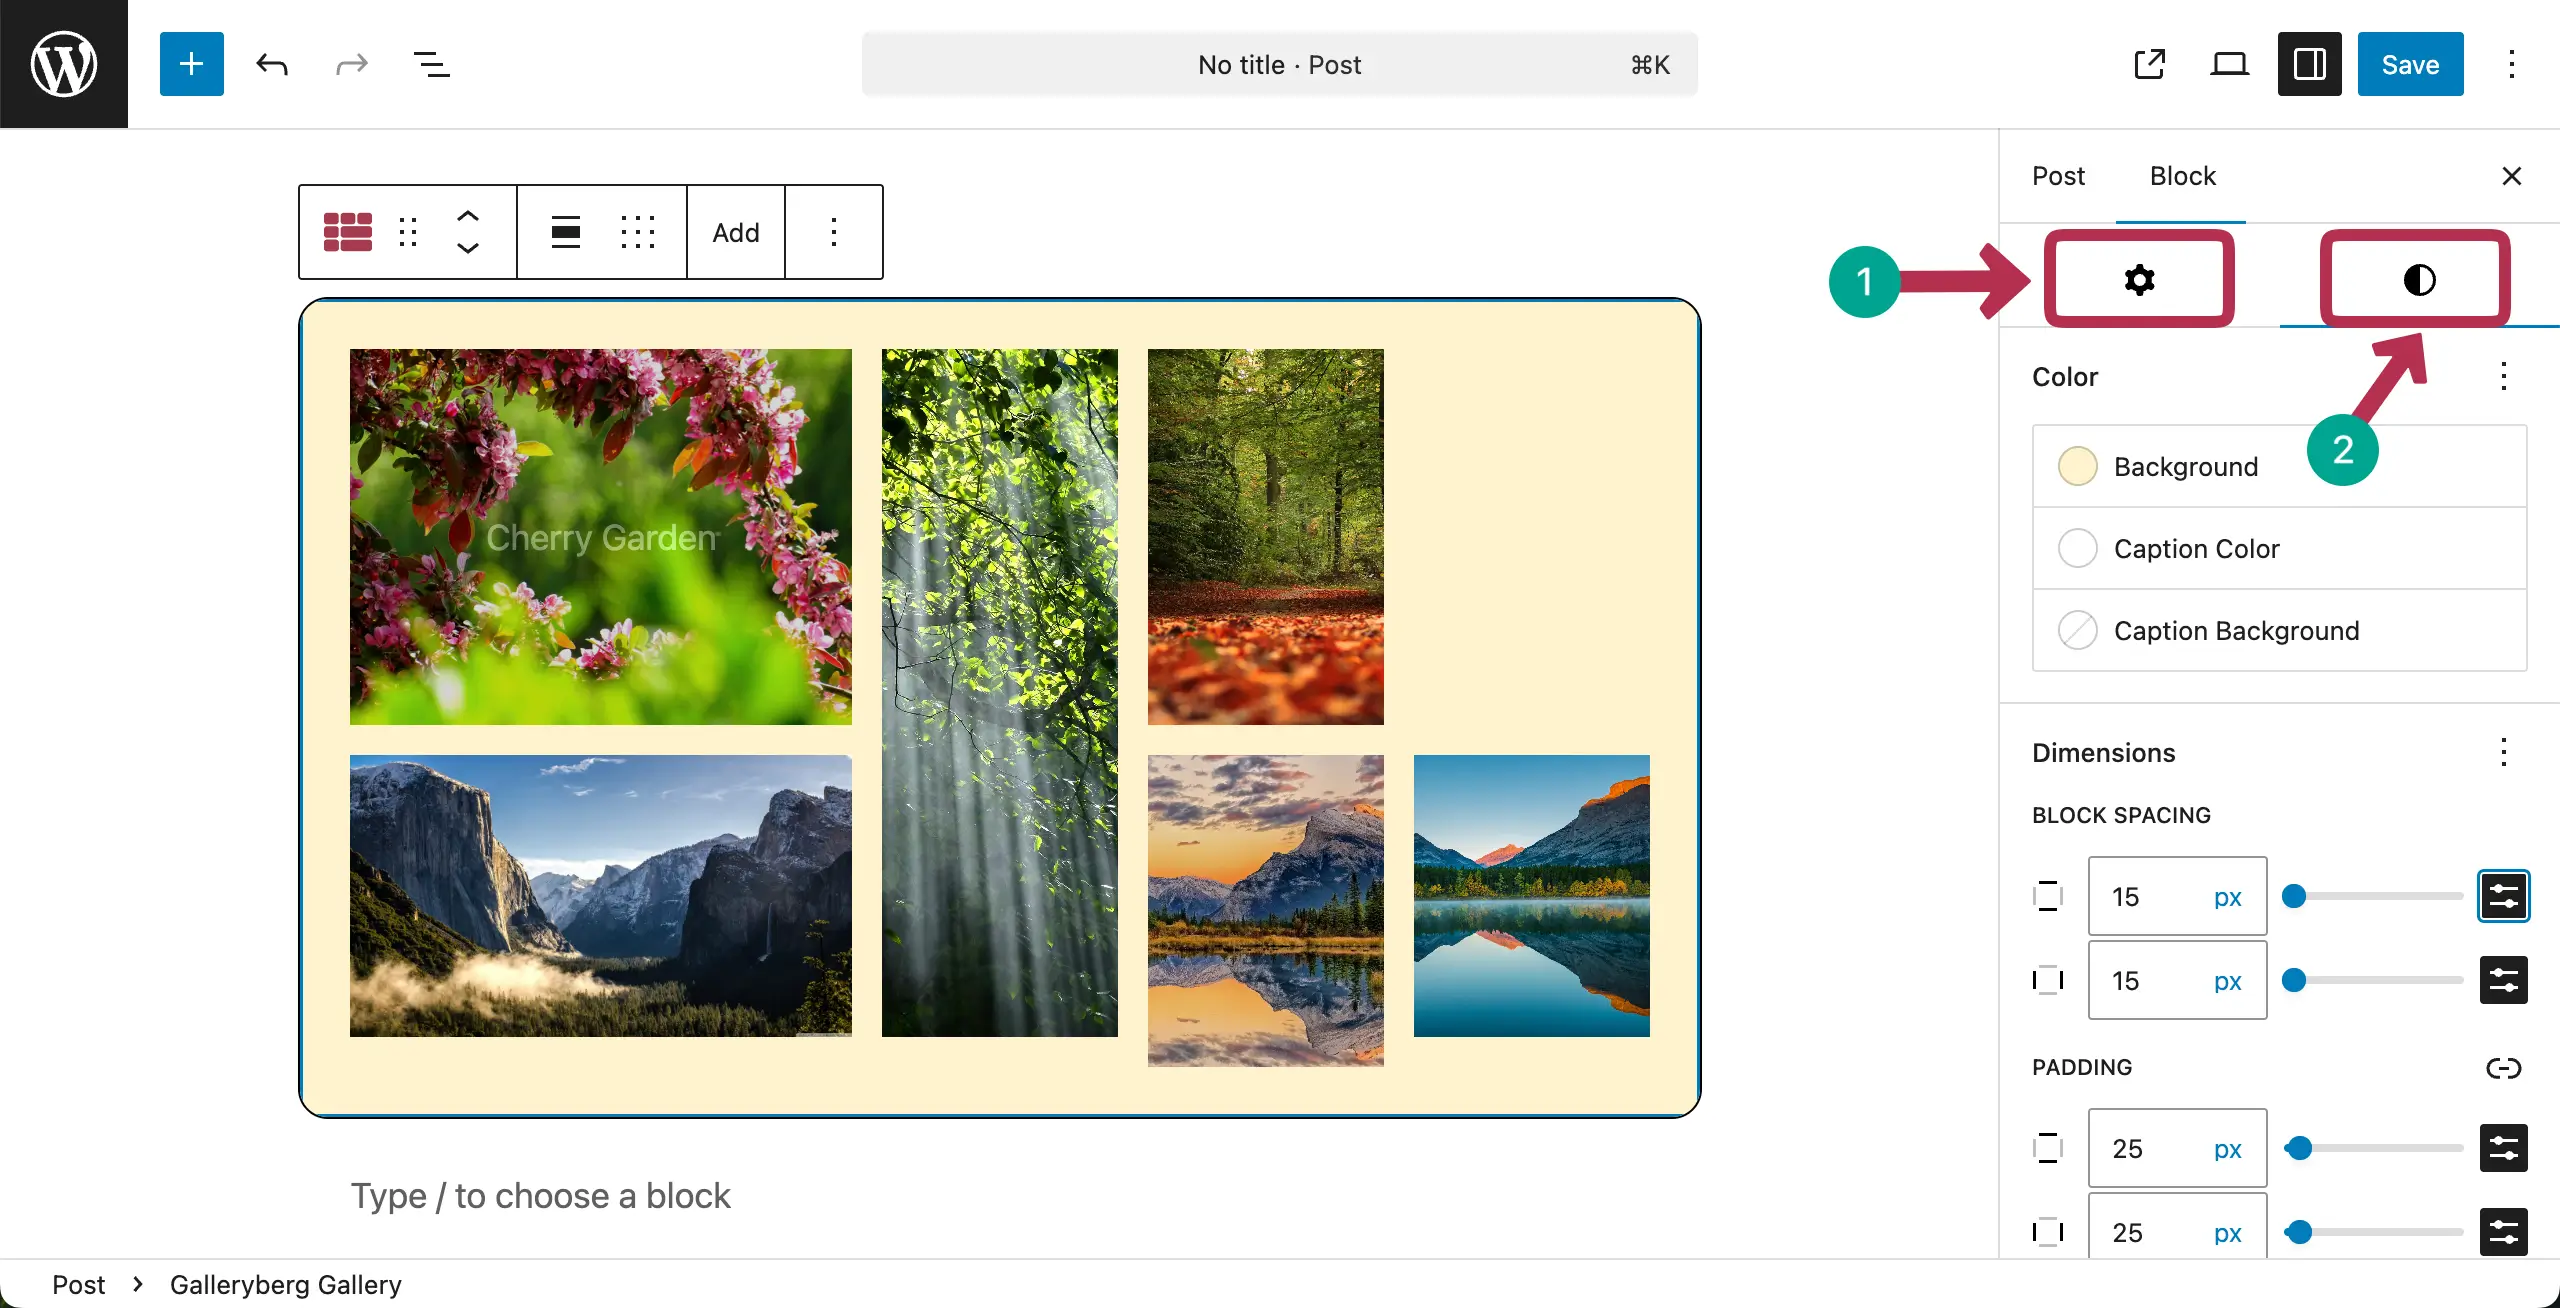
Step 03: Stylize the Gallery
On the right sidebar, you’ll get the Settings and Styles tabs. From there, you can change the number of column, coloring, block spacing, padding, margin, and various other options of the gallery.
Here’s a detailed guide on how to customize and stylize WordPress galleries. Hope you can explore and do these changes yourself, exploring these guides.
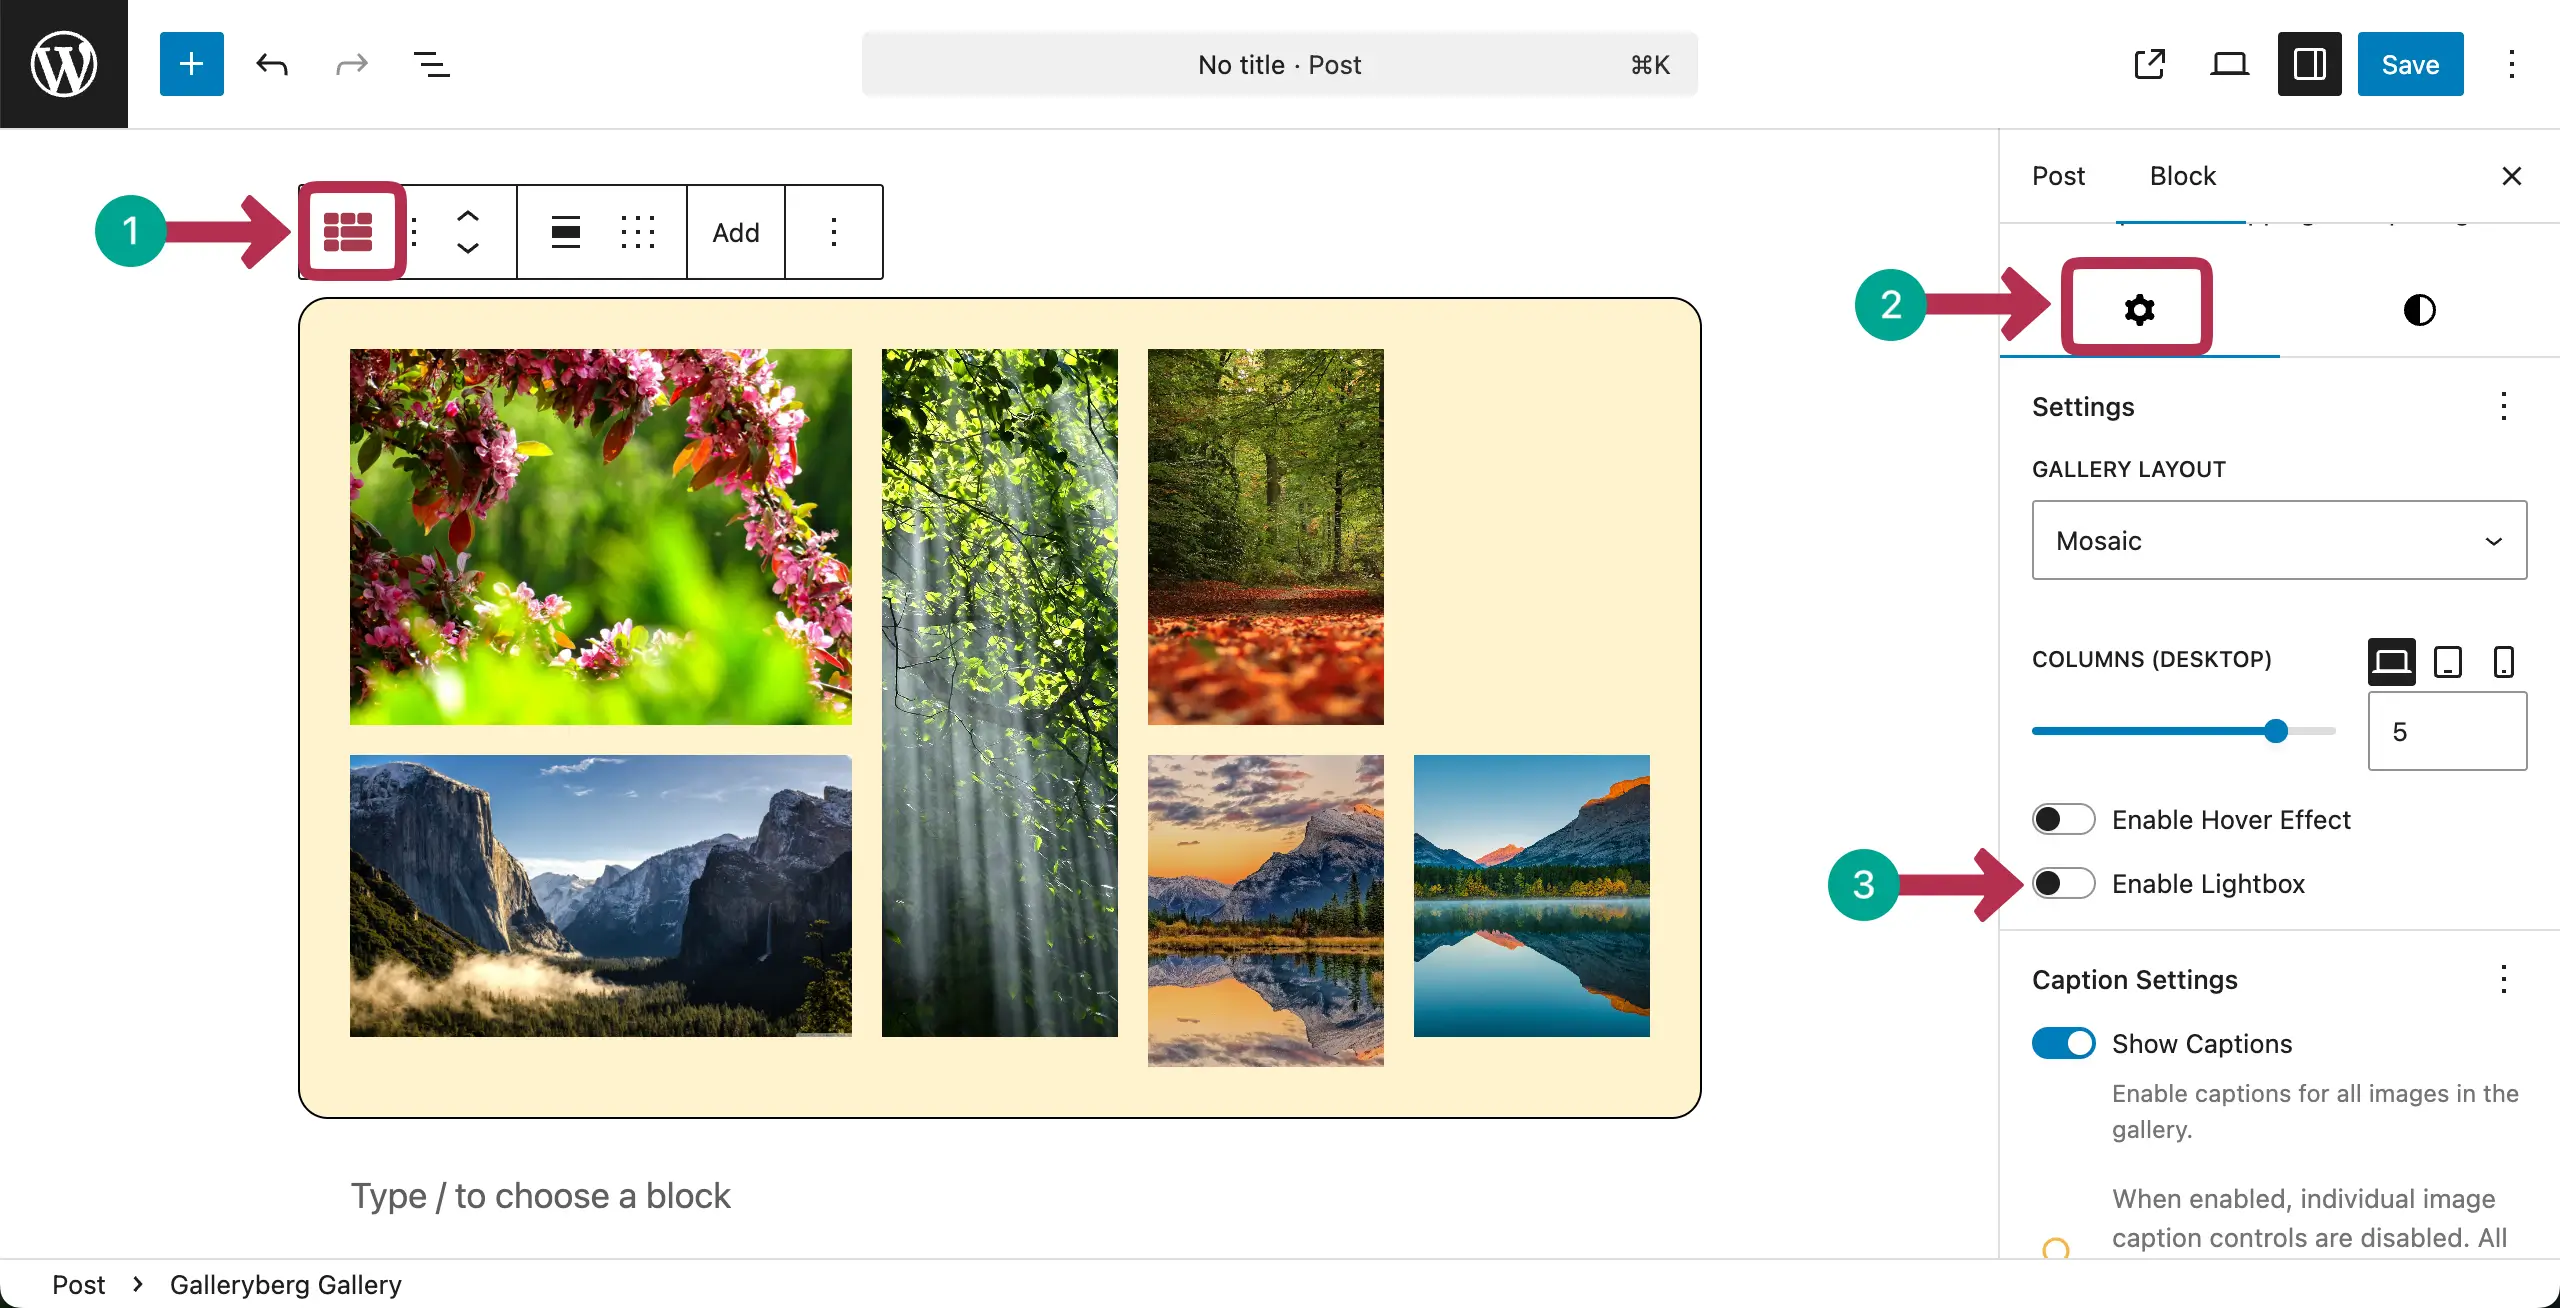
Step 04: Enable the Lightbox Effects for the Gallery
Finally, it’s time to add the Lightbox Effects to the gallery for which we are writing this post. Select the entire gallery by clicking the Galleryberg icon on the toolbar.
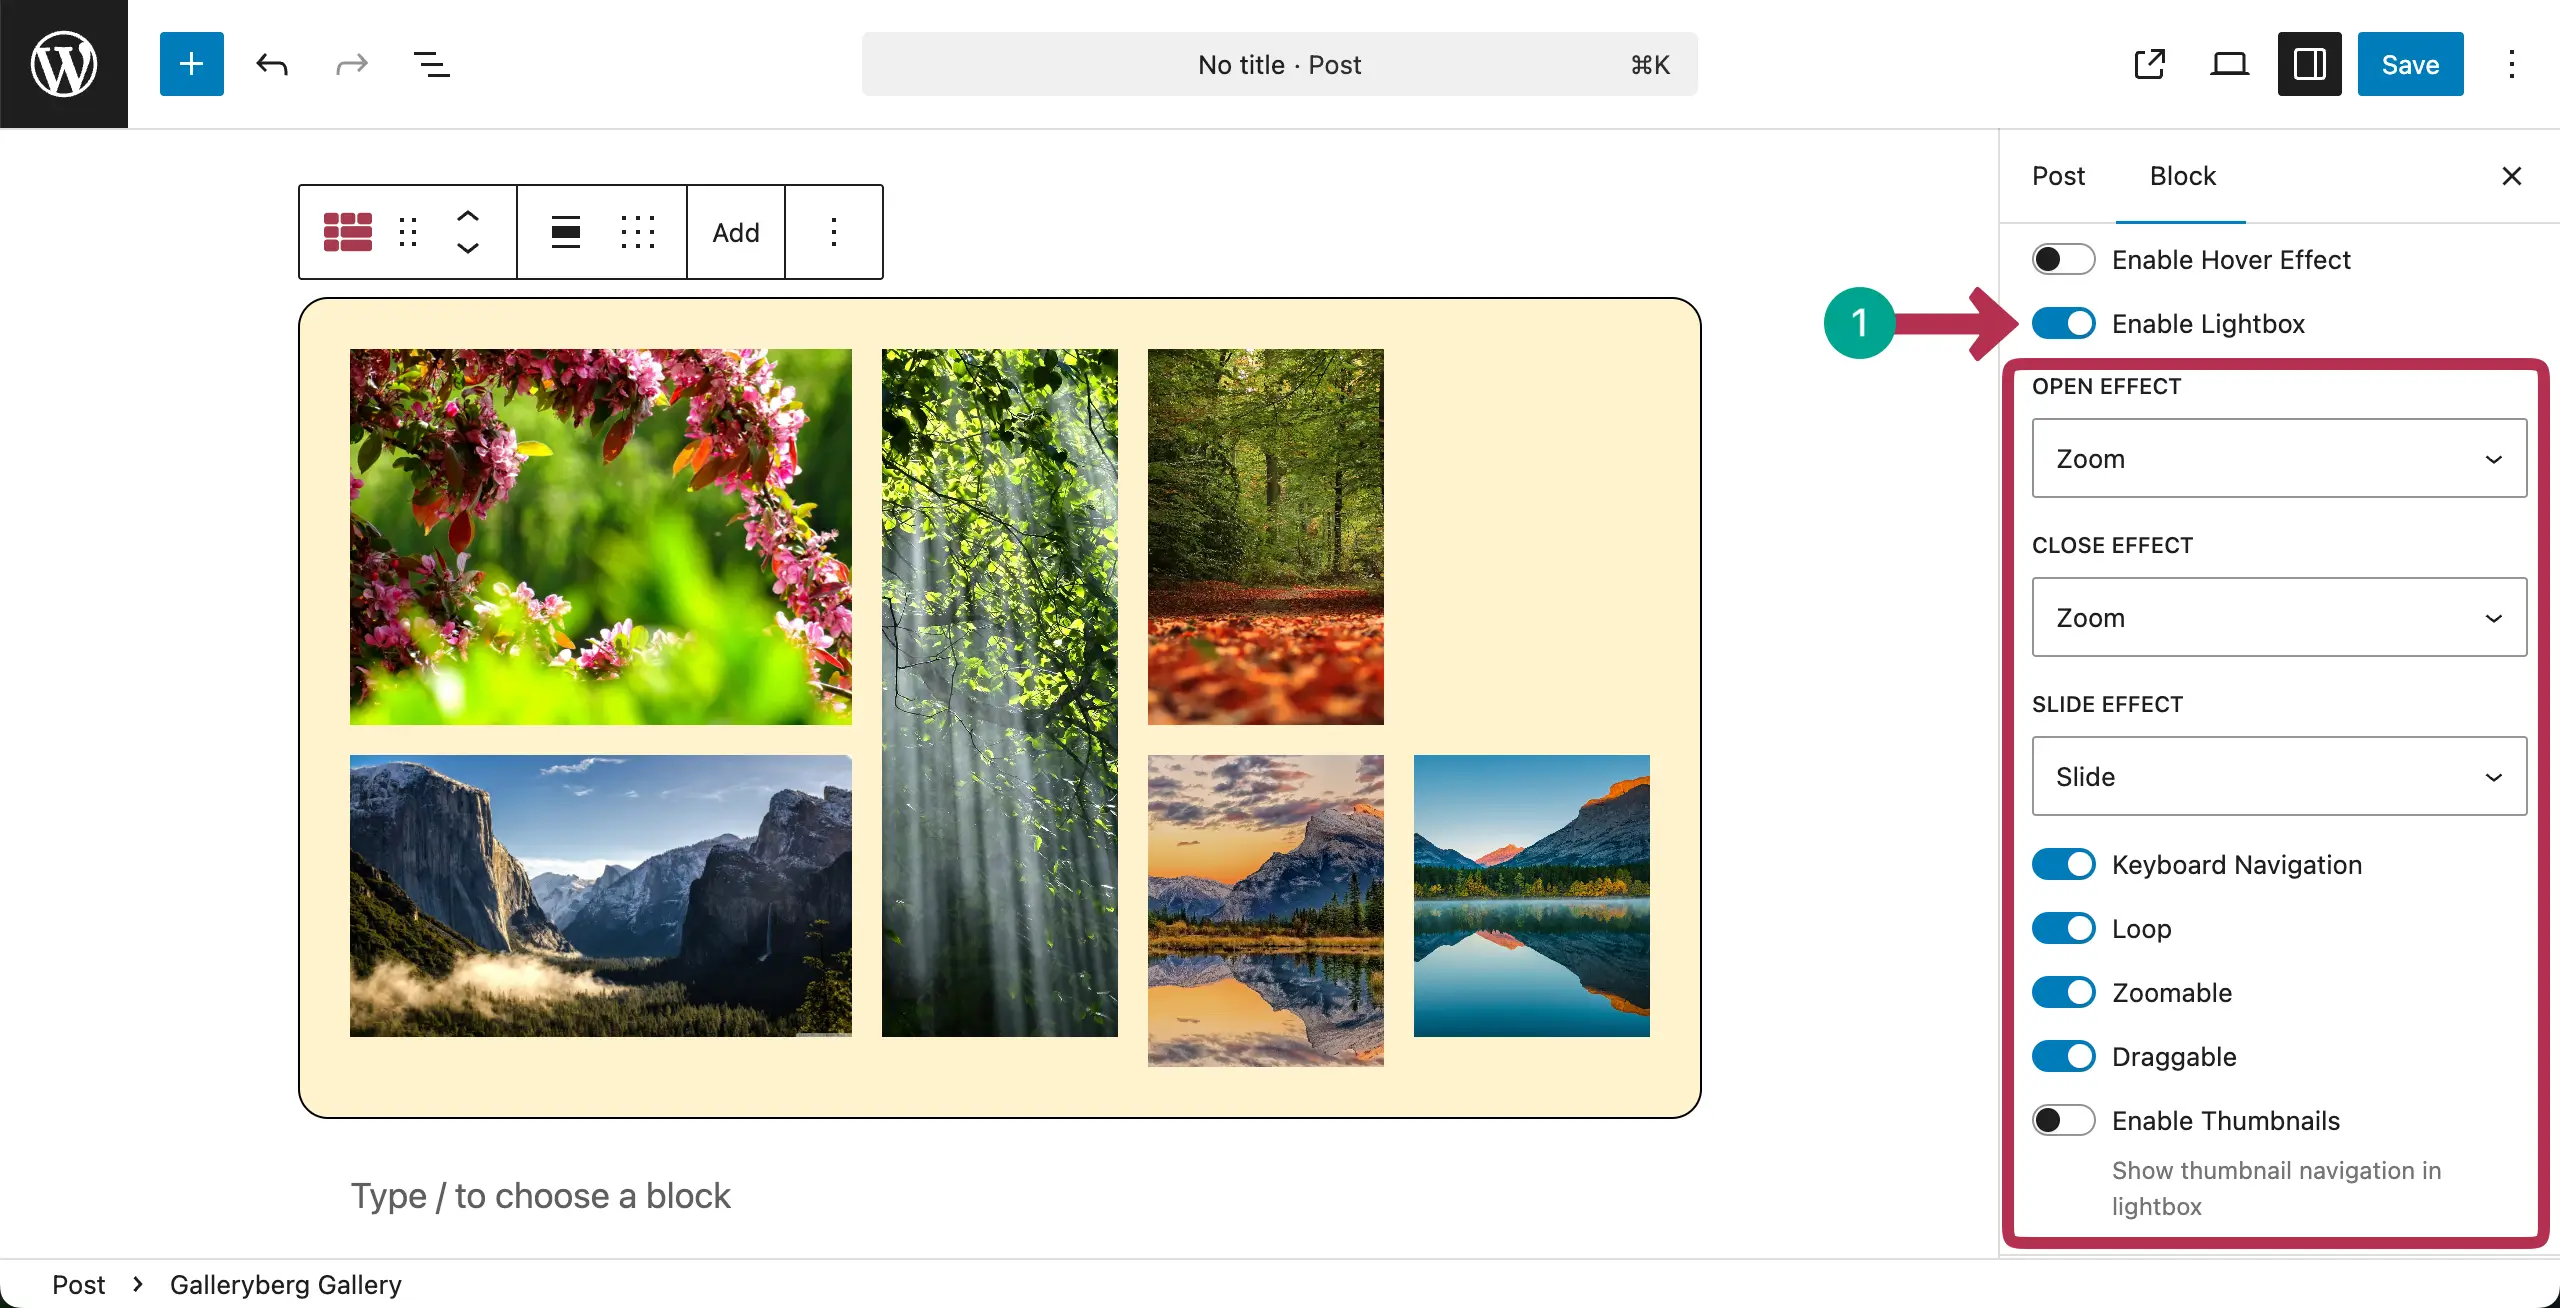
Come to the settings tab on the right sidebar. Toggle on the Enable Lightbox option.
After it’s enabled, you’ll get numerous options to configure Lightbox settings. Hope you can explore and do these configurations yourself.
Step 04: Preview the Lightbox
When everything is done, go to the preview page and check if the lightbox works or not. Hope you can see that our lightbox is working perfectly in the video clip attached below.
In the same way, you can create feature-rich galleries and enable lightbox effects using the Galleryberg plugin. Explore the best Gallery block WordPress plugins.
Method 3: Using Dedicated WordPress Lightbox & Gallery Plugins
In addition to gallery block plugins, there are full-featured gallery and lightbox plugins that work independently of the block editor.
Popular WordPress Lightbox & Gallery Plugins
- Envira Gallery – Advanced galleries, albums, and lightbox themes
- WP Lightbox 2 – Simple, lightweight lightbox for images
- NextGEN Gallery – Powerful but heavier, suited for large image libraries
When to Use These Plugins
- You need albums, filtering, or advanced layouts
- You manage large image libraries
- You want prebuilt lightbox themes and effects
⚠️ Note: Some of these plugins can add extra scripts, so performance optimization is important.
Final Words!
Adding a lightbox effect to WordPress galleries is a smart move for any website. It improves image viewing and keeps visitors focused on your content. A good lightbox makes your gallery look clean and professional. It also helps users enjoy images without extra clicks or page reloads.
For best results, always use high-quality but optimized images. Do not overload a gallery with too many photos at once. Make sure the lightbox works well on mobile devices.
Check our detailed documentation posts covered on the Lightbox of the Galleryberg plugin.
Leave a Reply