
Lightbox is a must-have feature in galleries on any website today. It lets visitors click on an image and view it in full-screen mode in a pop-up without leaving the page. This makes image viewing more attractive and user-friendly.
Unfortunately, the default Gallery block in WordPress does not include a lightbox. When someone clicks on an image, it either opens the file directly or redirects them to a separate attachment page. So, to enable this feature, you need an extra plugin.
Galleryberg is a feature-rich and easy-to-use plugin that adds lightbox support. In this blog post, we’ll show you how to add a lightbox to the Gutenberg Gallery block.
How to Add a Lightbox to the Gutenberg Gallery Block
Galleryberg is a dedicated and advanced gallery plugin. Not only images, but it also allows you to add video content to the gallery. Let’s now take a look at how to add a lightbox to the Gutenberg gallery block using this block.
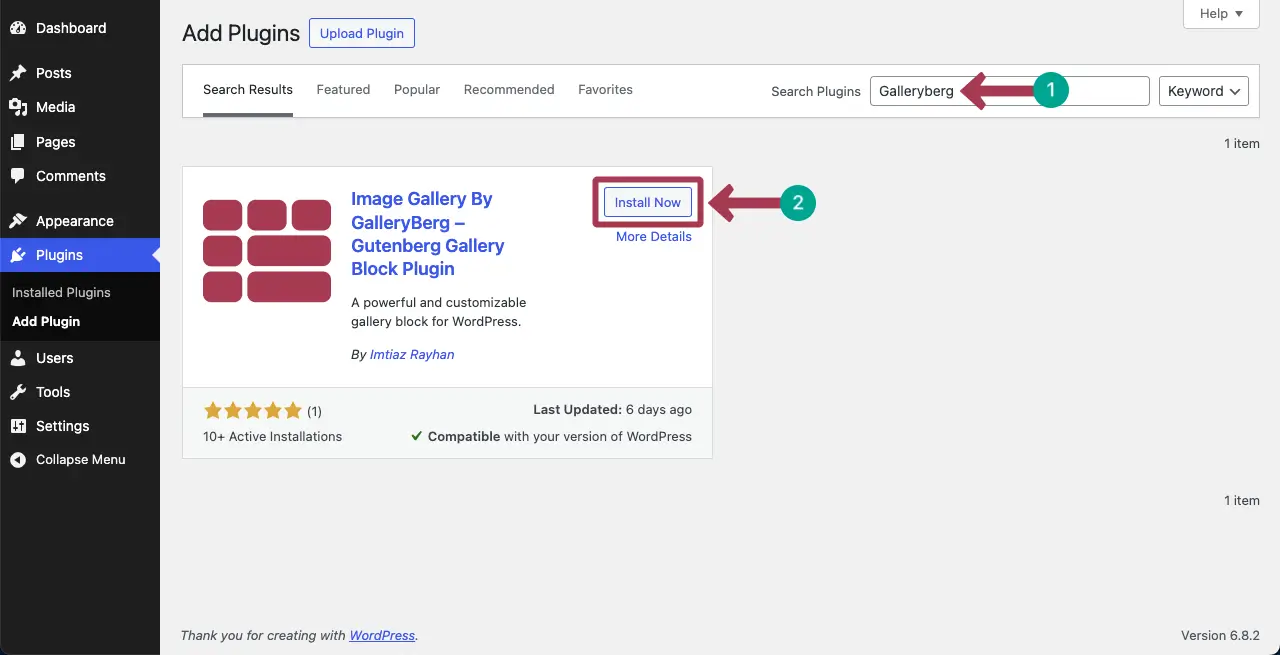
Step 01: Install and Activate the Galleryberg Plugin
Go to Plugins > Add Plugin. Type Galleryberg in the search box. When the plugin appears, install and activate it.
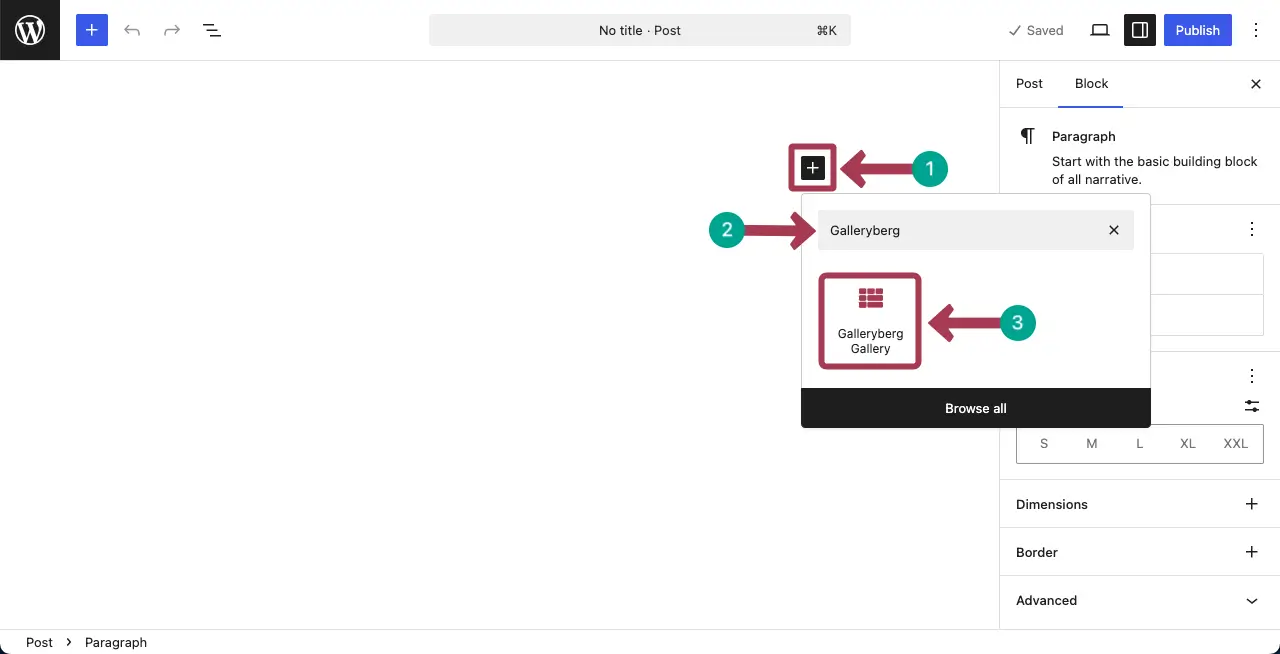
Step 02: Create a Gallery with the Plugin
Open a post/page. Find and add the Galleryberg block to the.
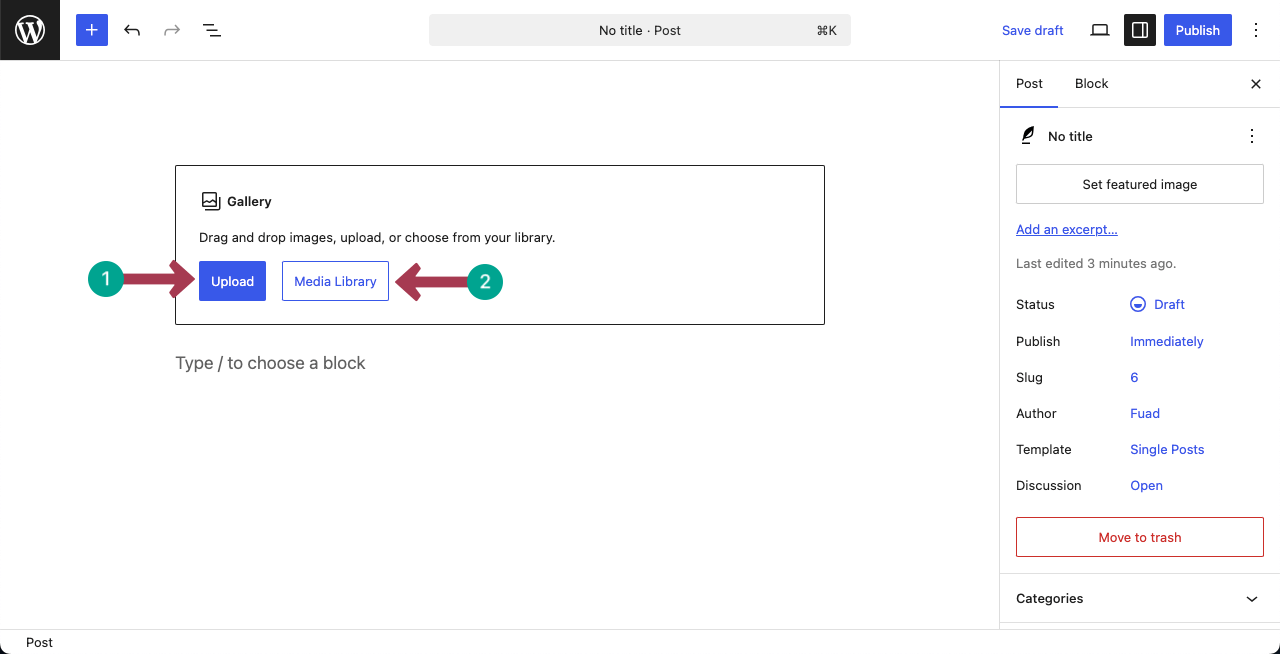
After the block is added, you’ll get two options. One for uploading images from the local drive and the other from your media library.
Explore the best WordPress portfolio gallery plugins.
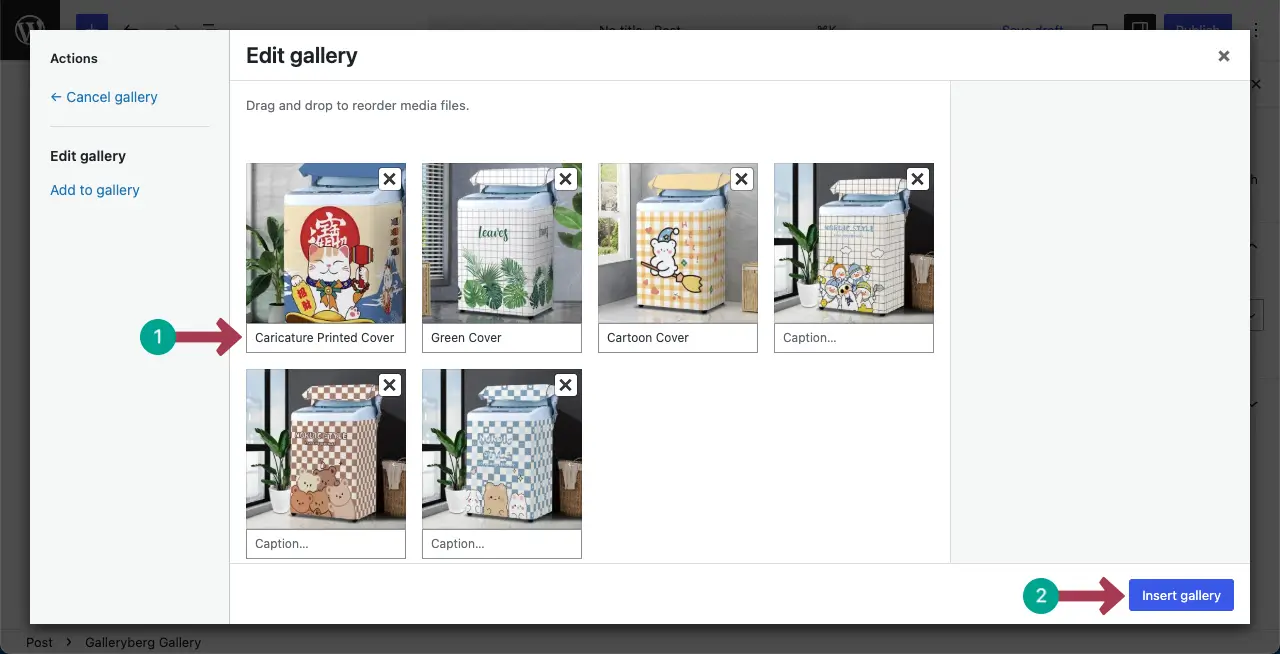
Step 03: Add Alt-Text to the Images
After the images are selected, you’ll get options to add alternative texts to the images. Then, hit the Insert gallery button.
Step 04: Enable Lightbox for the Gallery
After images are added to the gallery, select the entire Gallery block by clicking the icon on the toolbar.
Then, toggle on the Enable Lightbox option under the Settings tab on the right sidebar.

Step 05: Configure Lightbox Settings
When the Lighbox option is enabled, numerous options will appear. Using them, you can configure open effect, close effect, slide effect, and more.
Do these configurations as needed.

Step 06: Select a Layout for the Gallery
It’s optional. Galleryber so far includes four layouts for the gallery. By selecting any style, you can switch to a different layout for the gallery.

Step 07: Preview Lightbox
When your gallery is ready, save and preview it. Hope it will work fine on your end. You can see in the video clip attached below that it’s working fine on our end as well.
Take a look at the best Gutenberg gallery block plugins for WordPress.
Conclusion
So, it’s very simple. Anyone, even beginners, can add a lightbox to gallery images using the plugin. Now, when using the lightbox feature in your gallery, make sure to follow some best practices. Don’t overload a page with too many large images, as it can slow down your site.
Use high-quality but optimized images to balance speed and quality. Also, always test your gallery on mobile devices to make sure the lightbox works smoothly on all screen sizes. A well-set lightbox not only looks good but also keeps your visitors engaged longer.
If you have any questions, mention them in the comment box below.
Leave a Reply