
If you are thinking of creating galleries on WordPress for free, you can do it easily using the Gallery block. It’s a default block of the editor by which you can add multiple images in a clean layout, without depending on any extra plugin.
Not only images. It also supports videos, GIFs, and other visual elements. You have to upload or select images from the Media Library and arrange them in a grid. You can set the column number, add captions, and specify how they should be displayed.
So, whether photographs, graphic design, arts, or eCommerce products, you can display their images nicely with a block. Here, we’ll cover a quick step-by-step tutorial on how to use the WordPress gallery block. Get started!
How to Use the Gallery Block in WordPress
Like any other block, Gallery is one of the easiest Gutenberg blocks. No steep learning curve. You’ll be able to use it like a pro from the very early stage.
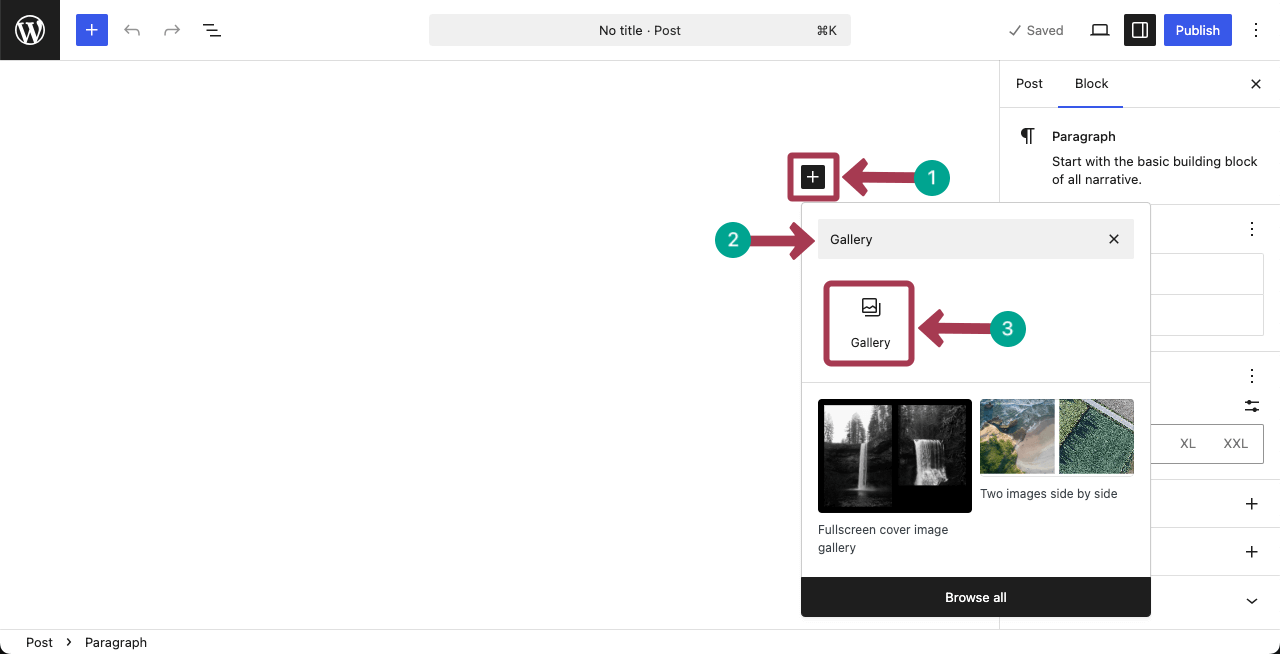
Step 01: Add the Gallery Block to the Editor
Hit the plus (+) icon on the editor. Type Gallery in the search bar. Once the block appears, add it to the editor by clicking it.
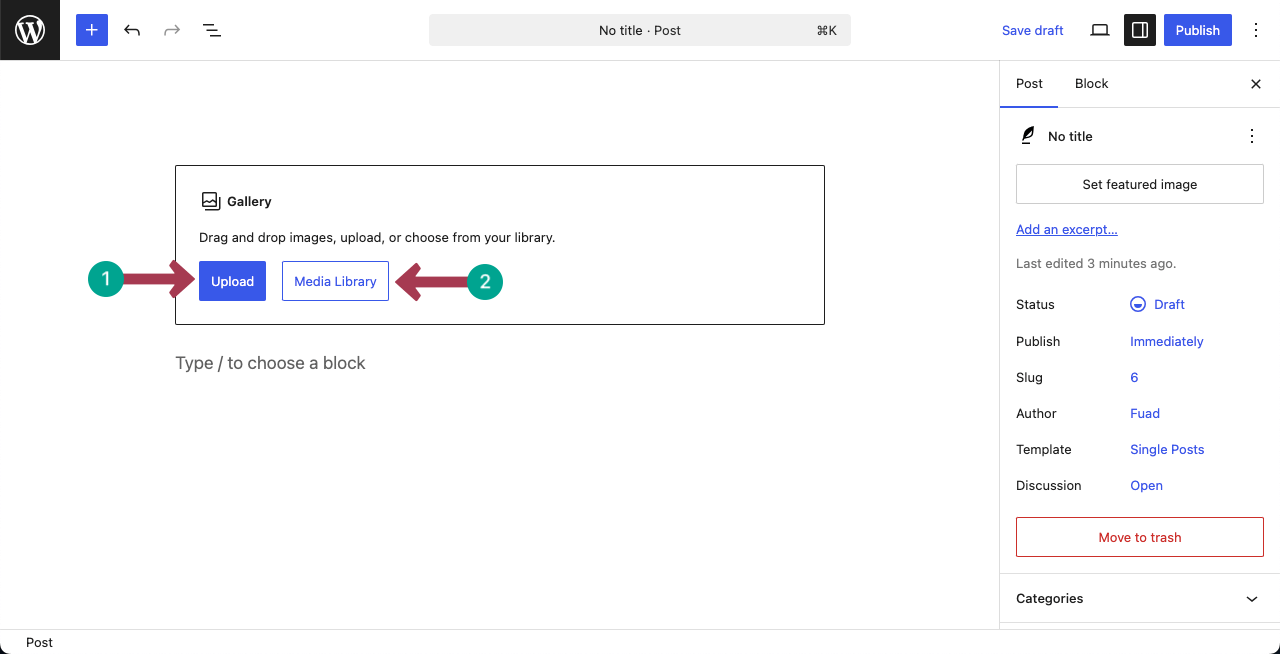
Once the block is added to the editor, you’ll get two options to add images. By clicking the Upload option, you can add images from your local drives.
By the Media Library option, you can add images that are already saved in the backend of your site’s library.
Explore the best Gutenberg gallery plugins.
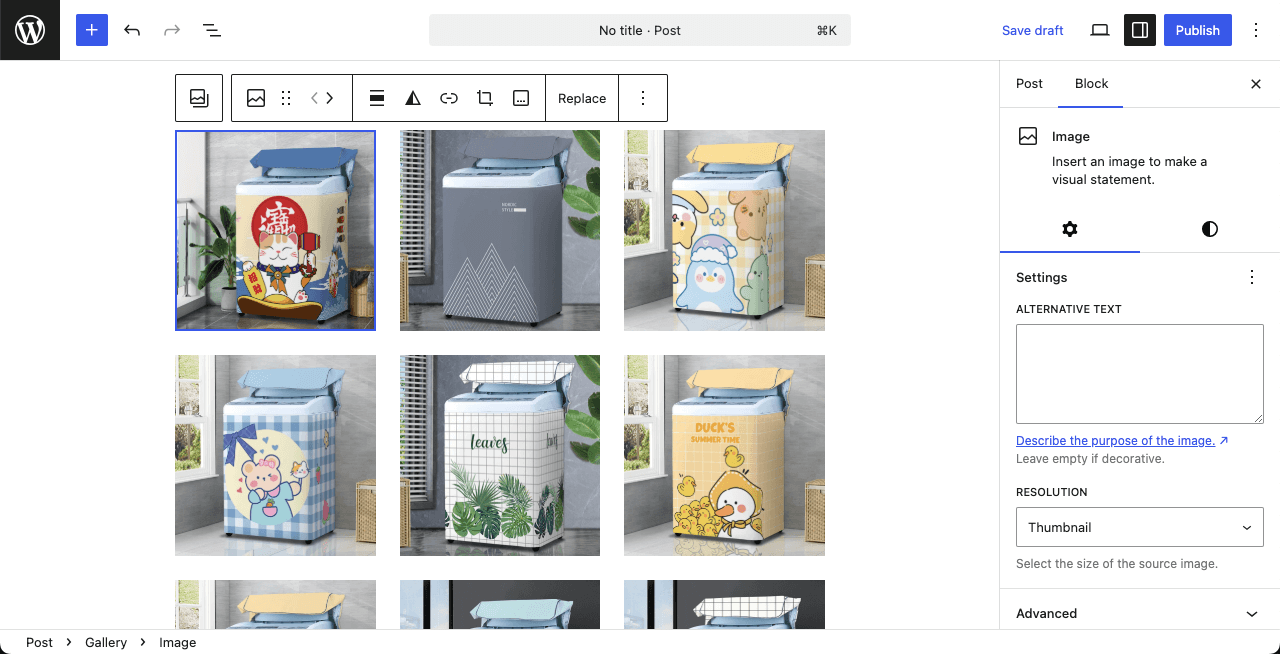
Step 02: Add Images to the Block
As already said, by clicking any suitable option as said above, you can add/upload images to the block. You can see in the below image that, we have already added lots of images to the block that are appearing in a grid format.
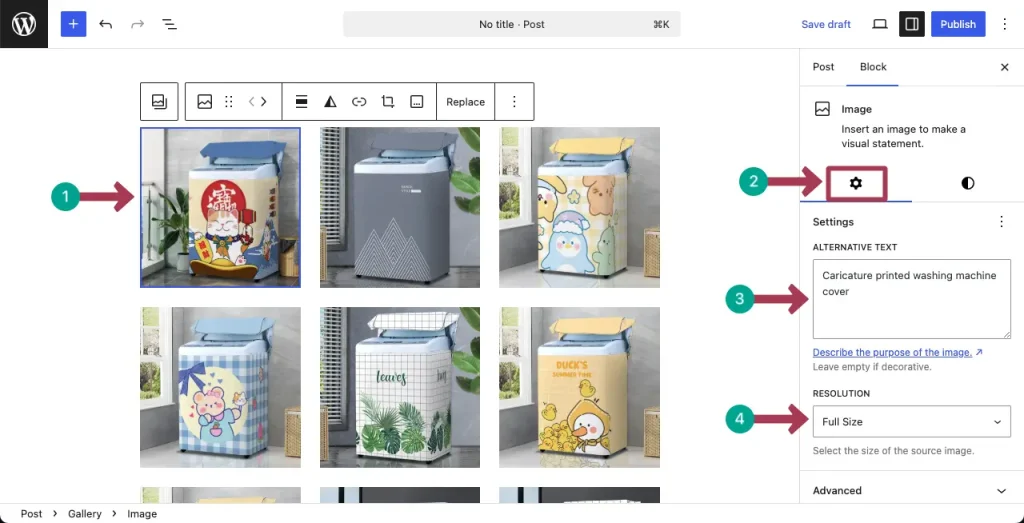
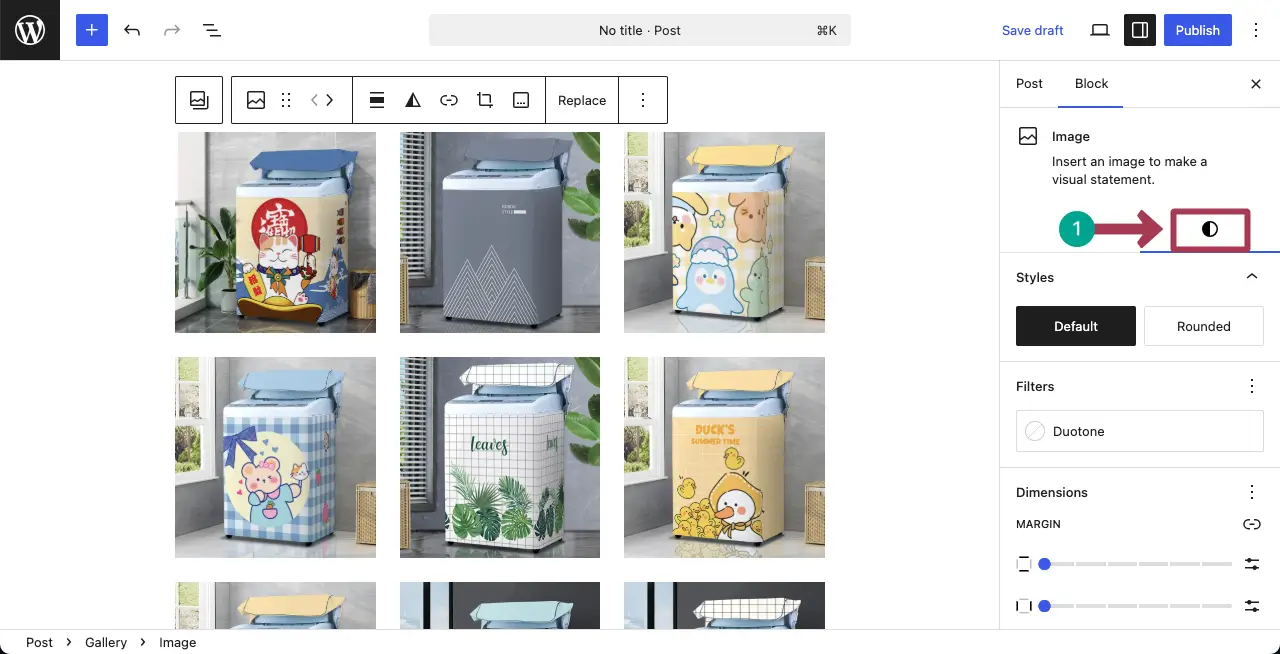
Step 03: Customize Each Image Added to the Gallery
Start one by one images. Once you click an image in the gallery, you’ll see the Alternative Text option under the Settings tab on the right sidebar.
Write your desired alt-text that describes the image. Then, select a suitable Resolution for the image.
In the same way, go to the Styles tab.
From the Style tab, you can add a duotone filter, padding, margin, border, and radius. It’s simple. Hope you can do it yourself alone.
Step 04: Crop Image in the Gallery
If necessary, you can crop images. To do this, select an image you want, and click the Crop option on the toolbar.
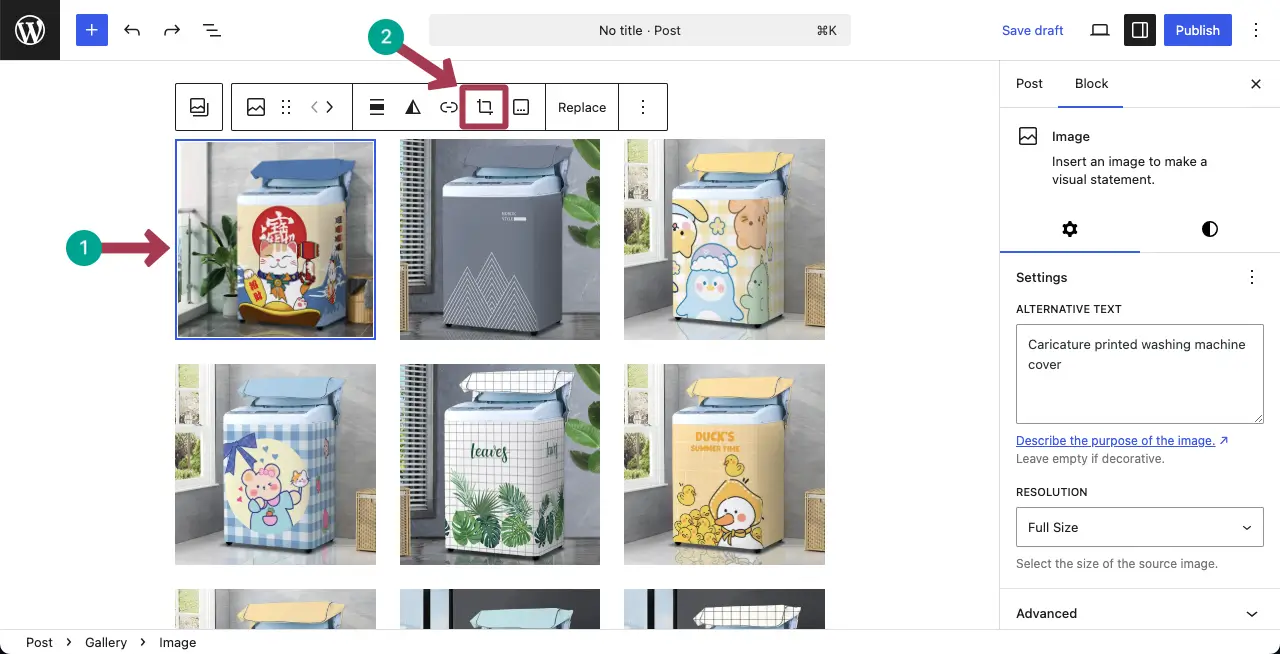
Once the crop option is clicked, choose your suitable cropping size and then, hit the apply button. The process is shown in the video clip attached below.
There are many more options in the toolbar you can use to further customize the images in the gallery.
Check the best YouTube gallery WordPress plugins.
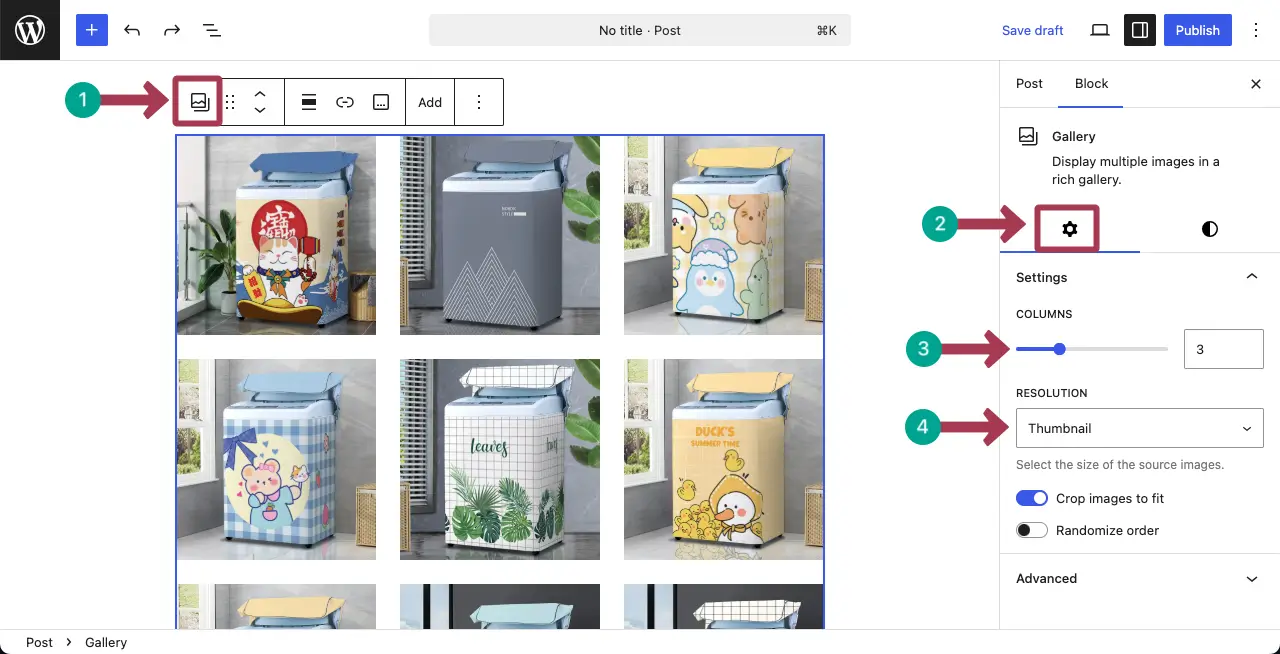
Step 05: Customize the Layout of the Gallery
By clicking the Gallery icon on the toolbar, select the entire gallery. Then, go to the Settings tab on the right sidebar.
You will see the Cloumns option under the tab. Choose the number of columns you want for the block. For this tutorial, we are selecting three columns.
Then, choose a Resolution. This will be applied to all the images in the gallery.
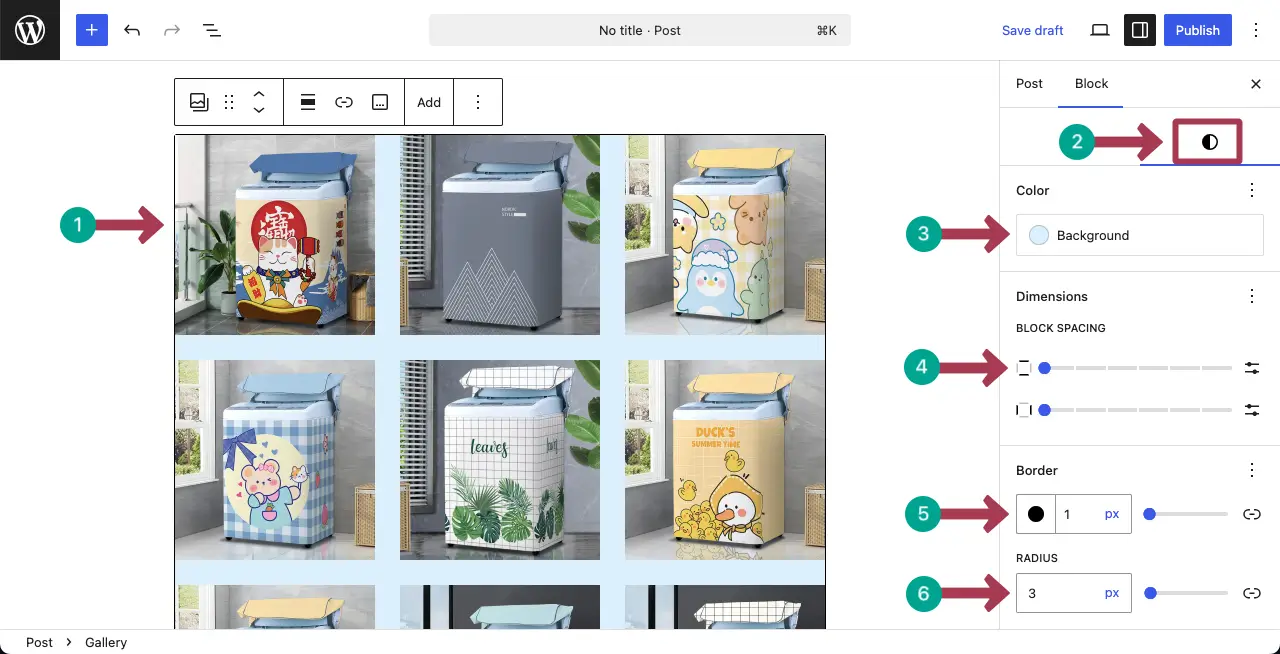
Now, come to the Style tab. You can set a background color, padding, margin, border color, and radius for the entire block. Do it yourself.
Step 06: Preview the Image Gallery
When everything is done, save the gallery and go to the preview page. Hope everything will be fine.

Thus you can create galleries in your WordPress site without using any plugin.
Upgrade Your Gallery Experience with Galleryberg (Optional)
If you’re happy with the default Gallery block, you can absolutely keep using it.
But if you want more layout options, better visual control, and a richer image-viewing experience, Galleryberg is built specifically for that.
Galleryberg is a Gutenberg-native gallery plugin that extends what the default Gallery block can do—without adding bloat or relying on page builders.
Galleryberg is especially useful for:
- 📸 Photography bloggers showcasing photo collections
- 🍔 Food bloggers displaying recipe and food images
- ✈️ Travel bloggers creating trip albums
- 🎨 Portfolio websites presenting work professionally
- 🧑💻 Gutenberg-only users who want advanced galleries without Elementor or other builders
WordPress Gallery Block vs Galleryberg
Here’s a quick comparison to help you decide:
Feature |
Gallery Block |
Galleryberg |
|---|---|---|
Layout Options |
Grid only |
Grid, Masonry, Tiles, Justified |
Lightbox |
❌ |
✅ |
Hover Effects |
❌ |
✅ |
Responsive Control |
Basic |
Advanced |
Gutenberg Native |
✅ |
✅ |
Beginner Friendly |
✅ |
✅ |
Should You Use Galleryberg?
- Use the default Gallery block if you only need a simple image grid.
- Use Galleryberg if images are a key part of your content and you want more control, better layouts, and a more polished presentation—without leaving Gutenberg.
- Galleryberg works alongside the WordPress block editor, so you can upgrade your galleries only when you need to.
Conclusion
So, it’s simeple, isn’t it? This gallery works great for blog posts, portfolios, product showcases, and more. But to get the best results, always use high-quality images that are properly sized for the web.
Keep your gallery layout clean by choosing the right number of columns and adding clear captions where needed. Avoid overcrowding the page with too many images. Stick to a consistent image style and format to make your content look professional.
Leave a Reply