
An event gallery is a collection of photos from a specific event shown in an organized way. It can include images from conferences, weddings, concerts, meetups, or celebrations. It helps capture moments and present them clearly on a website.
It builds trust by showing real moments and real people. It also increases user engagement and keeps visitors on the site longer. Event management companies can use it to show past events. Schools & colleges use it for functions and programs. Businesses use it for product launches, etc.
In this article, we’ll show you a step-by-step guide on how to create an event gallery in WordPress. Hope you’ll enjoy it. Let’s get started right away!
Key Features of a Successful Event Gallery
A successful event gallery does more than show photos. It helps visitors relive the event by displaying the real moments in a clear, engaging way. However, there are some key features essential for event galleries. They are:
1. Clear Event-Based Organization
A successful event gallery groups photos by event name, date, or location. This helps visitors understand the context of each image. It also makes browsing easier, especially when there are many events.
2. Fast Image Loading for Large Albums
Event galleries usually contain many photos. Images should load smoothly without slowing down the page. Fast loading keeps visitors engaged and prevents them from leaving early. Explore the best three image block plugins.
3. Mobile-Friendly Viewing Experience
As many people today love to explore websites on their mobile phones, they may also want to check event photos on their phones. So, ensure that your galleries work well on small screens, making scrolling, tapping, and viewing photos comfortable.
4. Lightbox with Easy Navigation
A lightbox allows users to view images in full size without leaving the page. They can move between photos using arrows or swipe gestures. This creates a smooth and focused viewing experience. Check how to add lightbox effects to galleries.
5. Simple Sharing Options
Event photos are often shared on social media or with friends. So, your gallery must have options to be shared on as many social media platforms as possible. This can get you more visitors and engagement.
How to Create an Event Gallery in WordPress
So far, we have covered the theoretical part. It’s now the time to explain the step-by-step tutorial on how to create an event gallery in WordPress. Keep reading.
Step 01: Install Galleryberg and Ultimate Blocks Plugins
With the default gallery block, it’s impossible to create comprehensive event galleries. So, you definitely need additional plugins to help you create galleries that meet all the feature requirements covered above.
Galleryberg and Ultimate Blocks are two promising Gutenberg-friendly plugins by which you can create comprehensive event galleries in WordPress. Both have a free version available. Get them by clicking the buttons attached below.
Install these plugins on your website. Once they are ready, follow the steps as explained below.
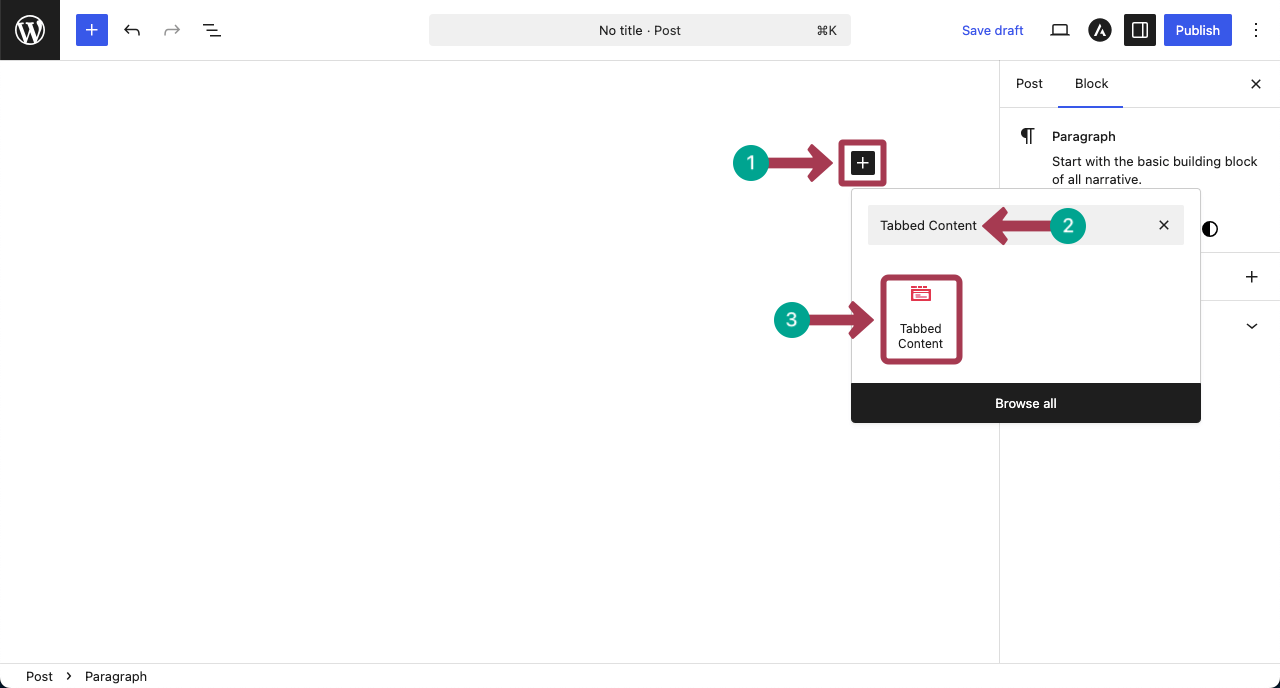
Step 02: Add the Tabbed Content Block to the Editor
Tabbed Content is a block of the Ultimate Blocks plugin. It allows you to create as many tabs as you want in the same block and display different types of content on those tabs. Thus, you can showcase a lot of content in a small space.
Click the plus (+) icon on the editor. Find the Tabbed Content block by typing its name in the search box. Add it to the editor.
Take a look at the best three button block plugins.
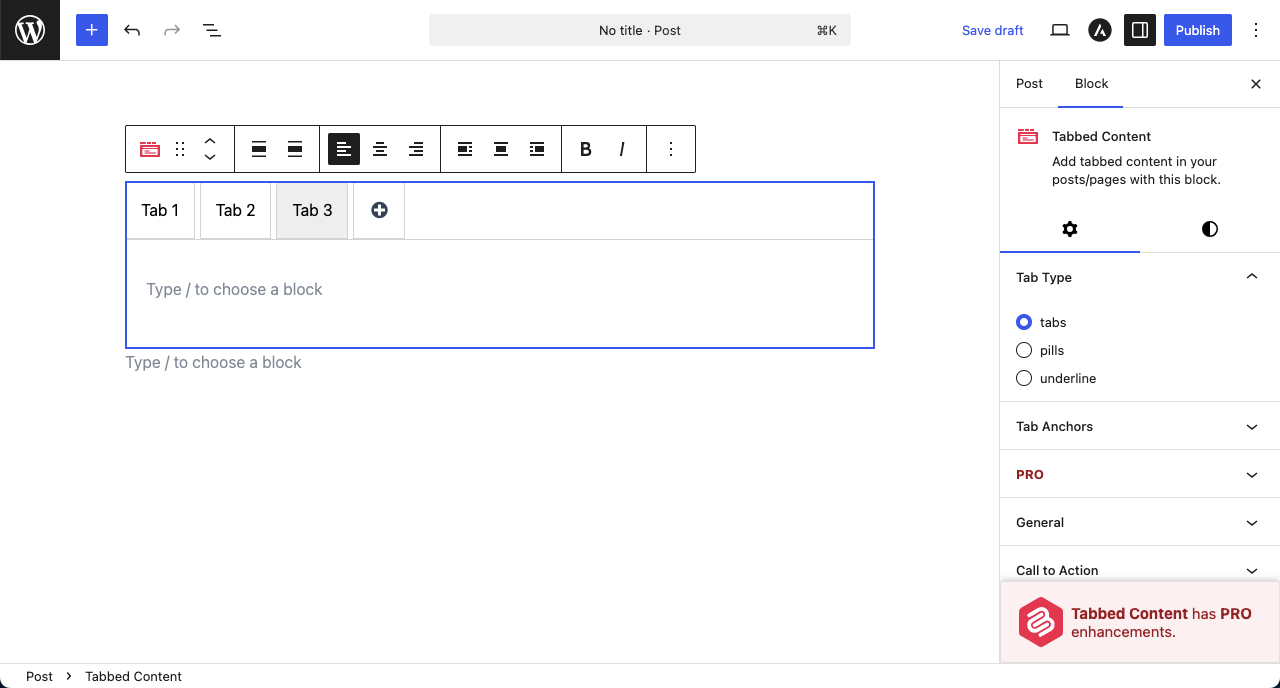
Step 03: Create Tabs as You Want
Once the block is added, by clicking the plus (+) icon, you can create as many tabs as you want for the block. Do this yourself.

For the tutorial post, we have created three tabs. You can see that in the photo attached below.
Step 04: Name the Tabs Based on Your Events
Naming the tabs will also work as categories. This can help you display your galleries based on specific category types.
Just place your cursor on any tab. You’ll get the option to rename them one by one. You can see the process in the video clip attached below.
Explore how to create a travel photo gallery in WordPress.
Step 05: Add the Gallery Block to the Tabs
Galleryberg is a block of the Galleryberg plugin. Using this block, you can create feature-rich galleries. It’s now the time to add the block to the tabs.
Go to a tab, click the Gutenberg plus (+) icon. Find the Galleryberg block and add it to the tab.

Upload images from your local drive and add your favourite ones from the media library.

You can see that we have created a gallery under the Festival tab by adding images. In the same way, add galleries to the other tabs as well.

Step 06: Add Caption to the Images
Captions can help people understand the background of the respective event photo. You have to add captions to the images one by one, not at once.
To do this, select an image. This will open up a field below where you can write a caption for the image.

We have added captions to all images.

Check the best Gutenberg table builder plugin.
Step 07: Configure Settings of the Gallery
Select the entire gallery by clicking the Galleryberg icon on the toolbar. Come to the Settings tab on the right sidebar.
Under Gallery Layout, you’ll find a list of five layout styles. Choose the type of gallery layout you want.

From the column option, you can change the number of columns for the gallery. You can even set the number of columns specifically for different device types to make the gallery mobile responsive.

After that, enable the hover effect and lightbox. This will make your gallery more interactive. Each one comes with additional options that help visitors notice image details and view photos at a larger size without leaving the page.

Scrolling down the tab a bit more, you’ll get these options. The following are the things you can do with them.
- Caption Type: Define where to display the captions, whether below image, full overlay, or bar overlay.
- Caption Visibility: Set when the caption will be visible. You may set it to always visible, show on hover, or hide on hover.
- Caption Alignment: You can position the caption on the left, center, or right.

Step 08: Stylize the Gallery
Come to the Styles tab. From the Color section, you can choose to set the Background, Caption, and Caption Background colors.

From the Dimensions option, you can choose to configure the Block Spacing, Padding, and Margin settings. Select the options you want to configure.

You can see that we have selected the Block Spacing and Padding options.

Finally, you can set a border color, border radius, and image border radius. You can see that we have done that in the screenshot below.

Learn how to create a filterable portfolio in WordPress.
Step 09: Configure Settings of the Tabbed Content Block
Select the entire Tabbed Content block by clicking its icon on the toolbar. Then, go to the Settings tab. You can configure visibility control, animation, general, tab type, call to action, etc., for the block.

For example, expand the Animation section. There are 50+ animation types. Choose the animation you want to add to the block. Leave the section if you aren’t interested in adding animation.

Expanding the General section, you can toggle on to enable secondary text and icon options.
Once you click the icon option on the tabs, a library of icons will be opened up on the right sidebar. From there, you can choose the icons you want for the respective tabs.
Now, come to the Tab Type section. There are three types: tabs, pills, and underline. Choose a type you like for the block.
In the same way, keep exploring the other options from the settings tab and configure the block.
Step 10: Stylize the Tabbed Content Block
Finally, come to the Styles tab. From here, you can select suitable colors for different parts of the tabs.

Come to the Tab Layout by scrolling down the tab. You can display block whether vertically or horizontally.
Thus, explore the other options in the styles tab and complete the customization parts.
Step 11: Preview the Event Gallery
When everything is done, come to the preview page and check if all the galleries work fine on all tabs or not. You can see that our galleries are working fine.
Final Words!
So you have learnt how to create event galleries on WordPress. Now, it’s your turn to create the one you want and keep your event memories alive. But for the best results, always choose the best photos and avoid uploading everything.
Don’t forget to optimize images to keep the gallery fast and smooth. Use clear layouts and add lightbox viewing for better focus. Make sure the gallery works well on mobile devices. Regularly update the gallery so your site stays fresh and relevant.
Explore the best image optimization plugins for WordPress.
Leave a Reply