
Photos can speak more than plain text. So, with a travel photo gallery, you can share your journey with a wide audience globally in a visual way. You can showcase the places, moments, and stories through images. A well-made gallery keeps visitors interested and makes your travel stories more memorable.
WordPress is a great platform for building a travel photo gallery. It offers many flexible plugins to create galleries with less technical hassle. Creating a travel photo gallery is not only about uploading images. It is about layout, speed, and user experience.
Once you know how to set up galleries properly, your photos will load quickly and look good on all devices. In this article, we’ll cover a step-by-step guide on how to create a travel photo gallery in WordPress. Keep reading it to the end.
Key Features of a Great Travel Photo Gallery
Before going into the tutorial, let’s take a quick look at the key features that make a great travel photo gallery. This will certainly grow your knowledge base.
1. High-Quality Image Display
A great travel photo gallery shows images in clear and sharp quality. Photos should look good on all screen sizes without losing details.
2. Fast Loading Speed
Travel photos are often large in size. So, often they tend to load slowly. But a good gallery should load images quickly so that visitors do not leave the page early.
3. Clean and Organized Layout
Images should be arranged in a neat and easy-to-follow layout. This helps visitors explore photos without feeling confused or overwhelmed.
4. Mobile-Friendly Design
As over 50% of traffic today comes from mobile phones, you must ensure that your galleries are mobile responsive. Otherwise, you’ll miss out on a big traffic.
5. Lightbox and Full-View Options
A lightbox allows visitors to see photos in a bigger view without leaving the page. This keeps users focused and improves the viewing experience.
How to Create a Travel Photo Gallery in WordPress
So, the theoretical part is done, it’s now time to cover the tutorial part. Below, we have explained the entire process of how to create a travel photo gallery in WordPress. Hope you’ll enjoy this.
Step 01: Install Ultimate Blocks and Galleryberg Plugins
Ultimate Blocks is a block plugin. It includes 26+ custom blocks by which you can create personalized layouts to present content in appealing ways. We’ll need this for the tutorial. So, install the Ultimate Blocks plugin.

Galleryberg is a comprehensive gallery builder plugin. You can present your photos in different gallery layouts using this plugin. So, install this plugin as well.

Once both these plugins are installed and activated on your site, follow the remaining steps as explained below.
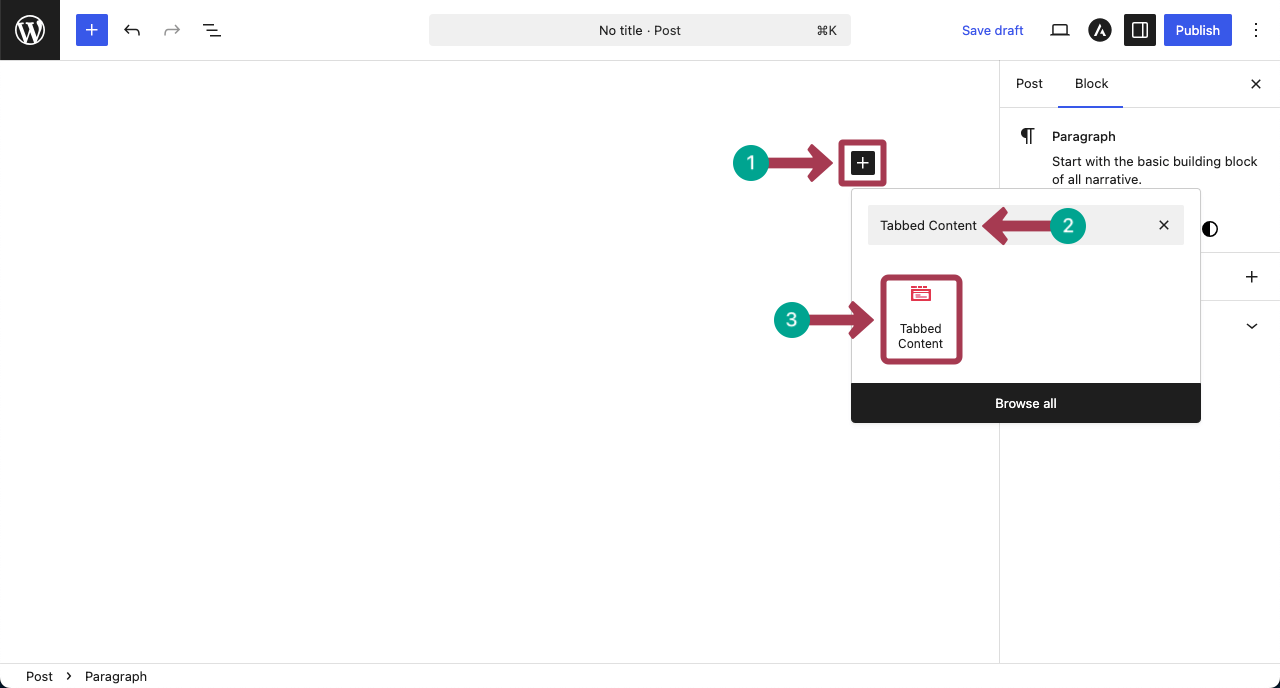
Step 02: Add the Tabbed Content Block
The Ultimate Blocks plugin has the Tabbed Content block. Using this, you can create multiple galleries in the same layout that visitors can explore by navigating between the tabs. So, add the block to the editor.
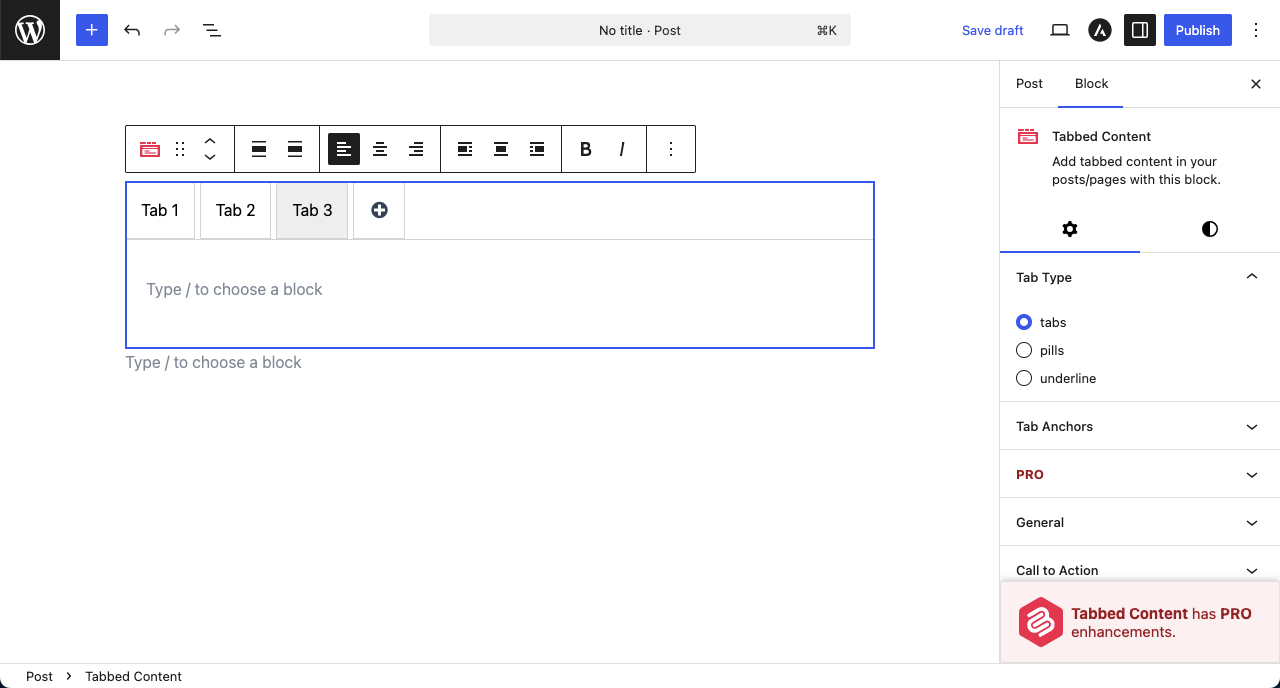
Step 03: Create as Many Tabs as You Want
By clicking the plus (+) icon, you can add as many tabs as you want. Now, create as many tabs as the number of galleries you want to create.

You can see that we have created three tabs.
Check in detail how to use the tabbed content block.
Step 04: Name the Tabs
Just place your cursor on the tabs one by one and rename them as you want. You can see the process in the video clip attached below.
Step 05: Add the Gallery Block to the Tabs
Now, it’s time to add galleries to the tabs. To do this, go to the tabs one by one. Add the Galleryberg to the tab by clicking the plus (+) icon as you do with other blocks.

Now, upload images to the gallery from your local drive or media library.

After images are added, they will instantly be displayed in the gallery.

Also learn, how to create a responsive pricing table in WordPress.
Step 06: Customize the Gallery
Select the entire gallery by clicking the Galleryberg icon. Come to the settings tab. Under the Gallery Layout option, you’ll find a dropdown list. From there, select the type of gallery you want.

Next, you can enable the hover effect and lightbox. This will open up some more options by which you can further customize the hover and lightbox effects.

Come to the Styles tab. You can set a background color, block spacing, and border.

Scroll down the tab a bit. You’ll find options to add a radius to the border. You can see that we have already done that.

Step 07: Customize the Tabs
So far, we have customized and stylized the gallery block. You can even customize the tabs to which you have added the galleries. Let’s first select a tab by placing your cursor on it.
Under the settings tab on the right sidebar, you’ll get options to enable Tab title secondary text and Tab title icons.

You can see that the places for the icon and sub text have been added to the tabs. Now, by clicking the icon option on the tab, you can open a panel on the right sidebar. From here, you can choose your desired icon for the respective.
See that we have added icons to the tabs and subtexts, respectively, as well.
Step 08: Change the Tab Type
Expand the Tab Type section. From there, you can easily change the tab type, whether they should be tabs, pills, or underline. The process has been shown in the video clip attached below.
Learn how to create stunning info box in WordPress editor.
Step 09: Colorize the tabs of Tabbed Content Block
Keeping the entire Tabbed Content block selected, come to the Styles tab on the right sidebar. Then, navigate to the Tab Colors section.
Here, you’ll get options to change the color for various options of the block. Hope you can do these changes yourself.

You can see that we have changed the color of the tabs.

Step 10: Preview the Travel Photo Gallery
So, the gallery design is done. Now, go to the preview page and check by navigating between the tabs to see how the gallery looks.
Final Takeaways!
Hope you enjoyed this simple tutorial post. Now, from onwards, you can create your own travel galleries easily on the Gutenberg editor. You can be one hundred percent sure that the gallery will be super-fast and never slow down your page loading speed, if you have a good hosting in the back.
Besides, for best results from the gallery, always select your best photos instead of uploading everything. Optimize images to keep loading speed fast. Use simple layouts and avoid too many effects. These small practices help create a strong and enjoyable travel photo gallery.
Have a few more minutes to explore the best WordPress hosting for photographers.
Leave a Reply