
Portfolio websites are a must today for any professional, whether you’re a designer, developer, photographer, writer, or else. This not only works as a personal identity but also makes it easier to be found online, so more clients can hire you.
WordPress is one of the easiest platforms for creating portfolio websites. Because its technical aspects and content management systems are easy to handle. It includes a Gallery block that lets you add and arrange multiple images in a single block
It’s a simple but powerful way to highlight your best work. In this post, we’ll show you how to showcase client work using WordPress Gallery blocks.
Note: Suppose you are a photographer. Here, we’ll show you how to showcase the photography projects you’ve done for clients. The process will be the same for other niches and categories as well.
Method One: Using the Simple Gallery Block
This is the method of creating simple galleries. Using the Gallery block plugin, you can create galleries anywhere on your web posts and pages if they are designed with the Gutenberg block editor.
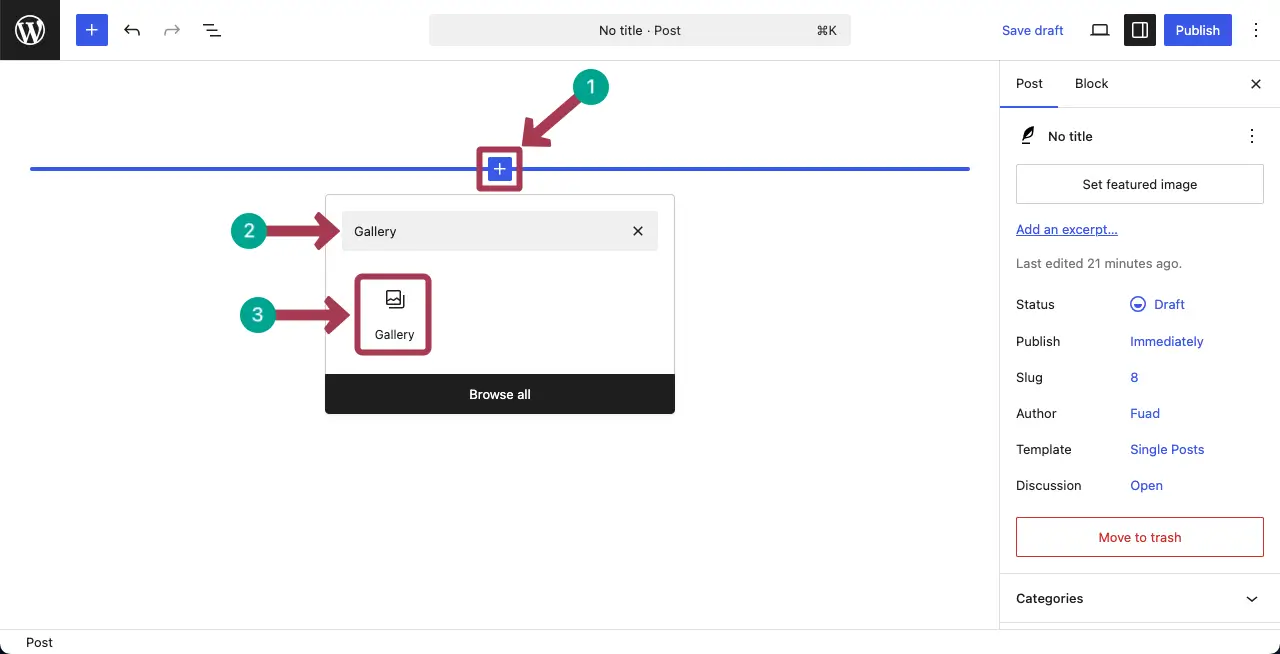
Step 01: Add the Gallery Block to the Editor
First, open a post/page. After that, like any other block, find the Gallery block and add it to the editor.
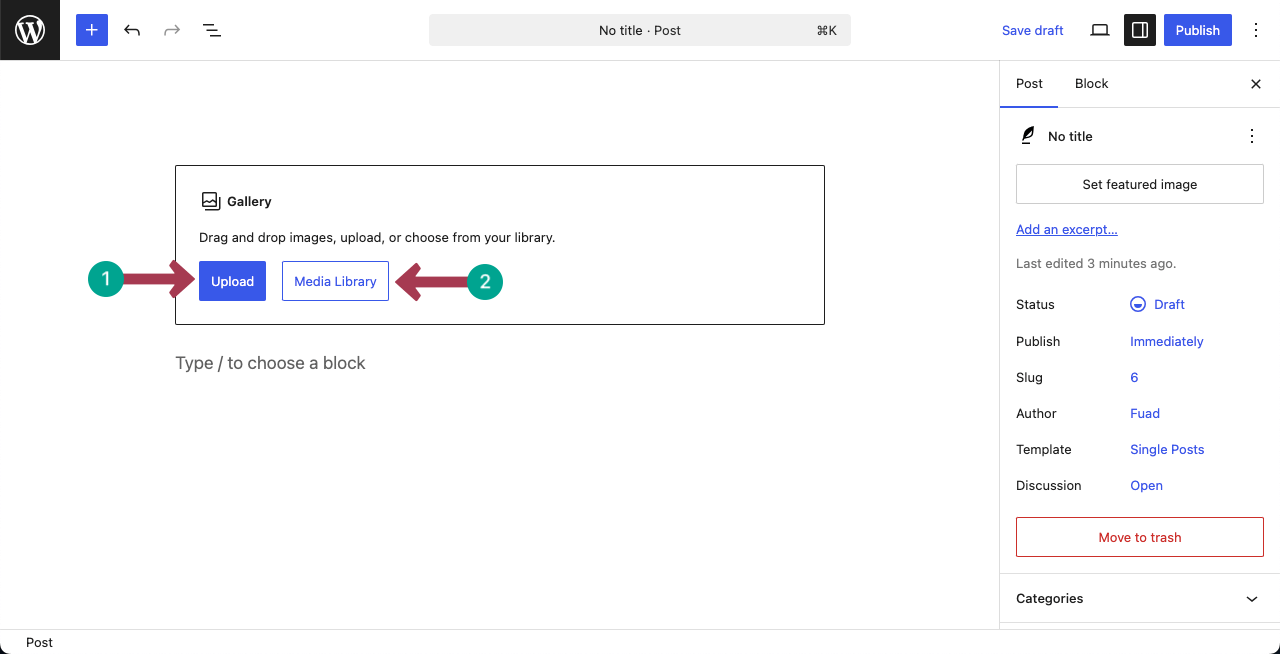
Step 02: Add Images to the Block
After the block is added, insert images to the gallery, whether from your local drive or media library, by selecting a suitable option.
You can see that we have already added several photographs to the gallery.
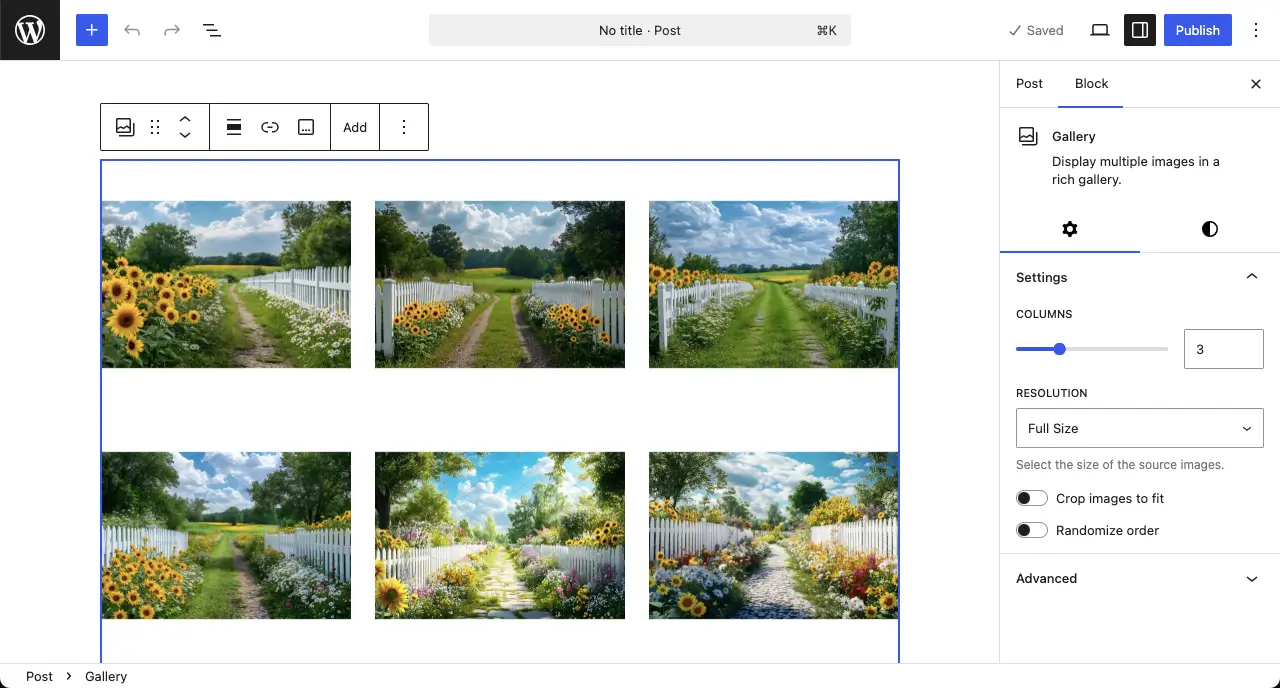
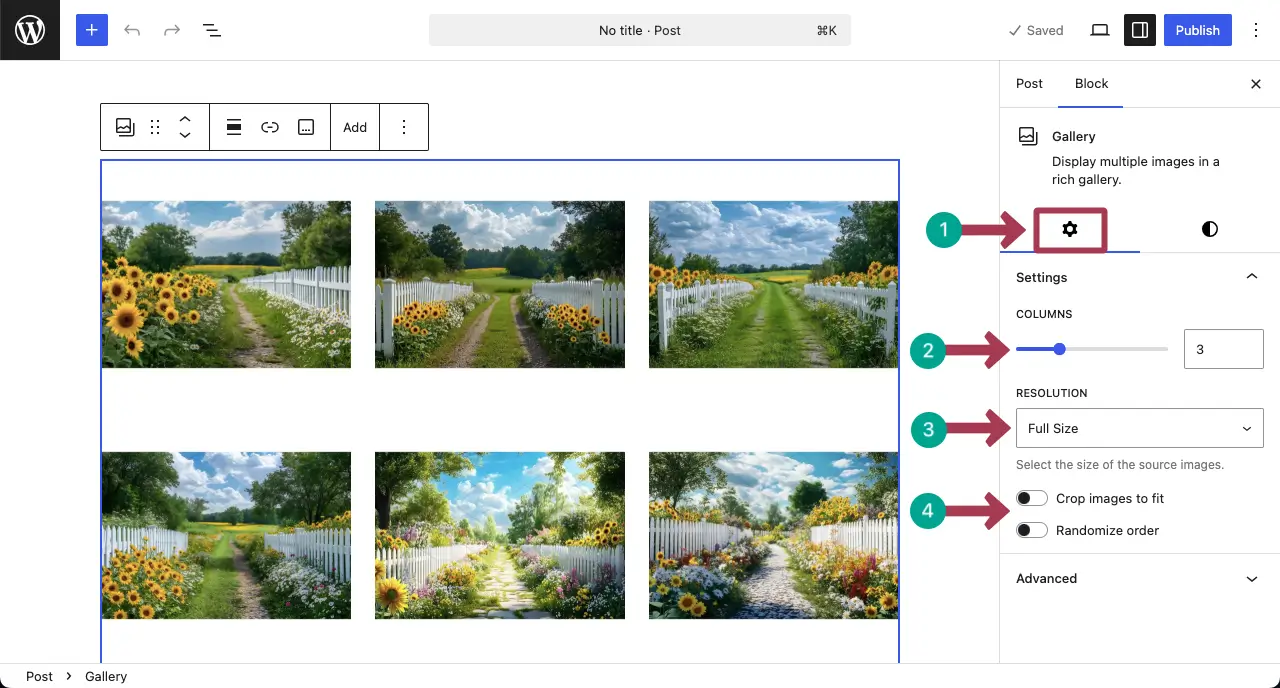
Step 03: Change Settings of the Gallery Block
From the Settings tab, you can change the column number, resolution, crop, and order options for the images.
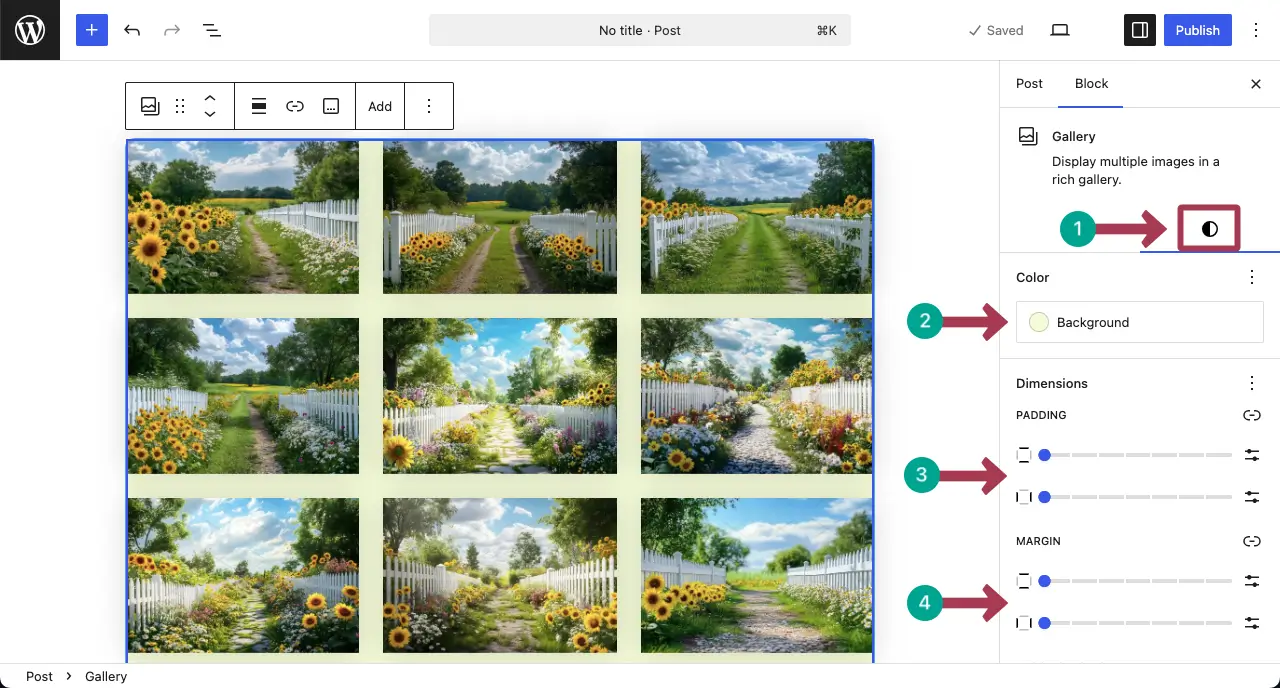
Step 04: Stylize the Gallery Block
Next, from the Styles tab, you can change the background color, padding, margin, border color, and radius for the block.
Thus, you can showcase your photography works using the WordPress gallery block. For more, here’s a detailed guide on how to use the WordPress Gallery block.
Method Two: Using the Galleyberg Block
If you have been using the default gallery block for at least a few days, you must know that it has many limitations. It lacks the lightbox and many important features, which are a must in a professional portfolio plugin.
So, in this case, you need to use an additional plugin. Galleryberg is such a plugin you can use.
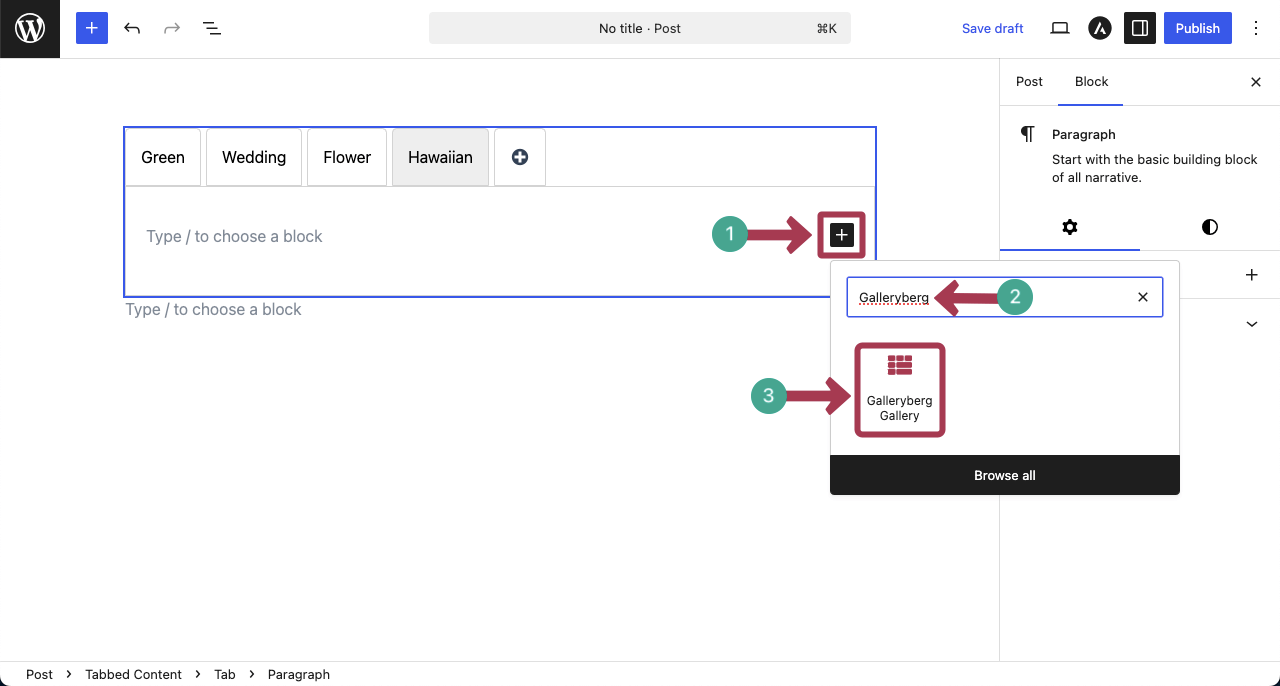
Step 01: Create a Gallery with the Galleryberg Plugin
The initial process of creating galleries with the plugin is completely similar to the default gallery block as described above. The following short video clip explains the process.
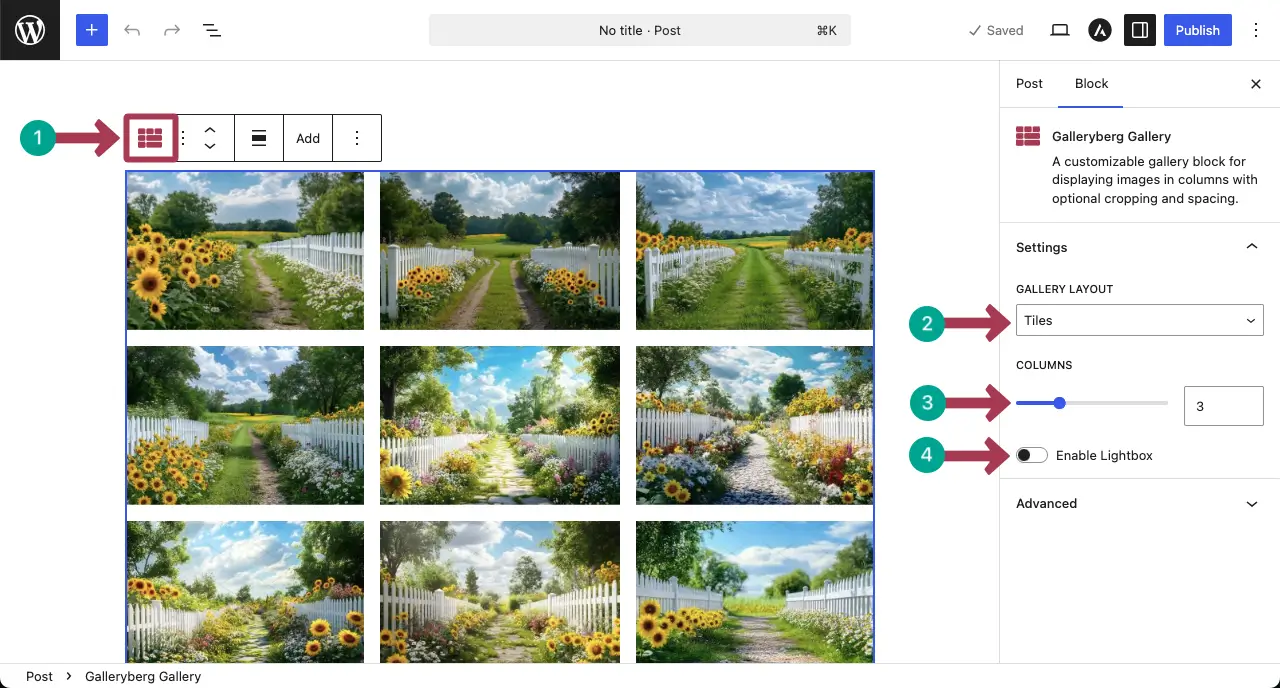
Step 02: Change Layout
After the gallery is created with the plugin, you can change the gallery layout, set column number, and enable the lightbox feature from the right sidebar. (All these options aren’t available in the default gallery block.)
Take a look at the video clip attached below to see how the gallery behaves as you change the layout style.
We are not covering much about the gallery block in this post. Hope you can explore the rest yourself. However, here, you can get a more detailed guide on how to use the Galleryberg plugin.
Method Three: Creating Multiple Galleries with Category Names
You may have done photography for different clients on a variety of subjects. In that case, if you want to showcase all your work, it’s best to create separate galleries for each topic. You can either create individual posts or pages for each subject, or display everything on a single page in a structured order.
However, the most effective way is to use a single block that includes all the galleries, organized by category. This way, visitors can filter the categories and easily browse through your photography work based on different topics.
We’ll show you how to do this for free in this section.
Step 01: Install the Ultimate Blocks Plugin
Like any other plugin, go to Plugins > Add Plugin. Type Ultimate Blocks in the search box. Install and activate the plugin once you see it.

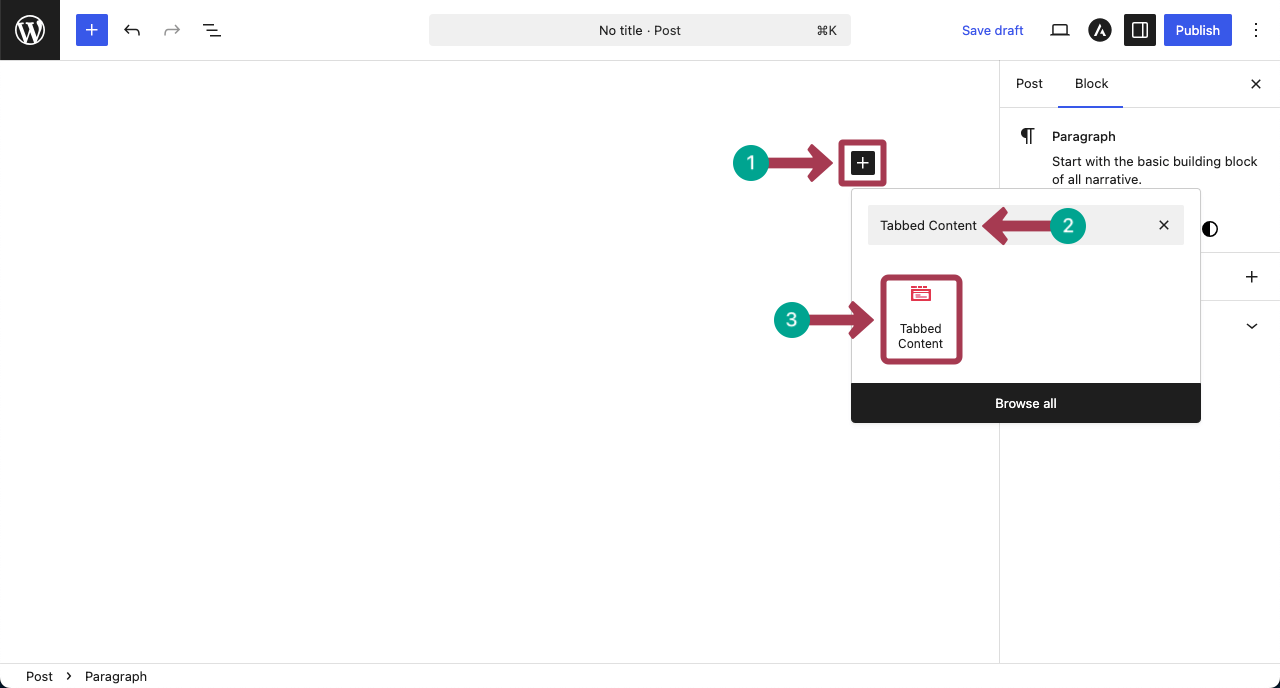
Step 02: Add the Tabbed Content Block to the Editor
The Ultimate Blocks has 25+ custom blocks. Among them, Tabbed Content is a powerful block. It allows you to create as many tabs as you want and add blocks inside each tab.
So, let’s first add the Tabbed Content block to the editor.
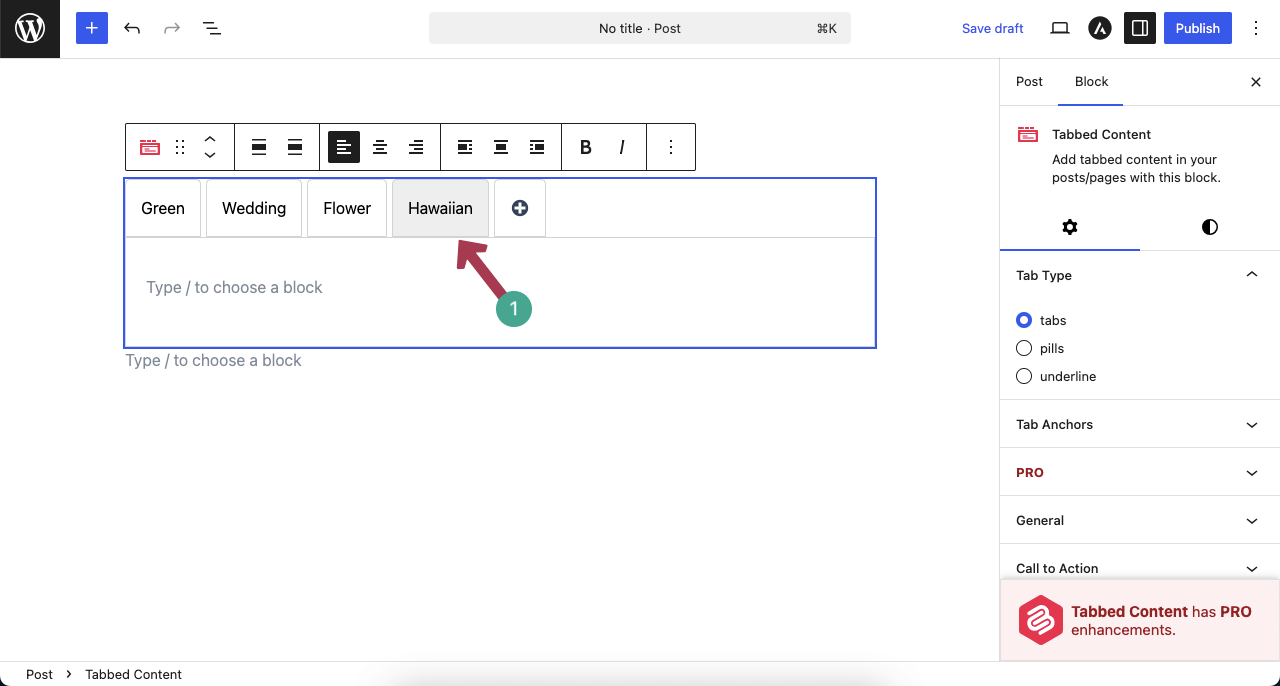
Once the block is added, by clicking the (+) icon, you can add as many tabs as you want. Do it yourself.

Now, rename the tabs. You can rename them as photograph categories. Just place your cursor on the tabs. You will get options to rename them.
Step 03: Add the Gallery Block to Each Tab
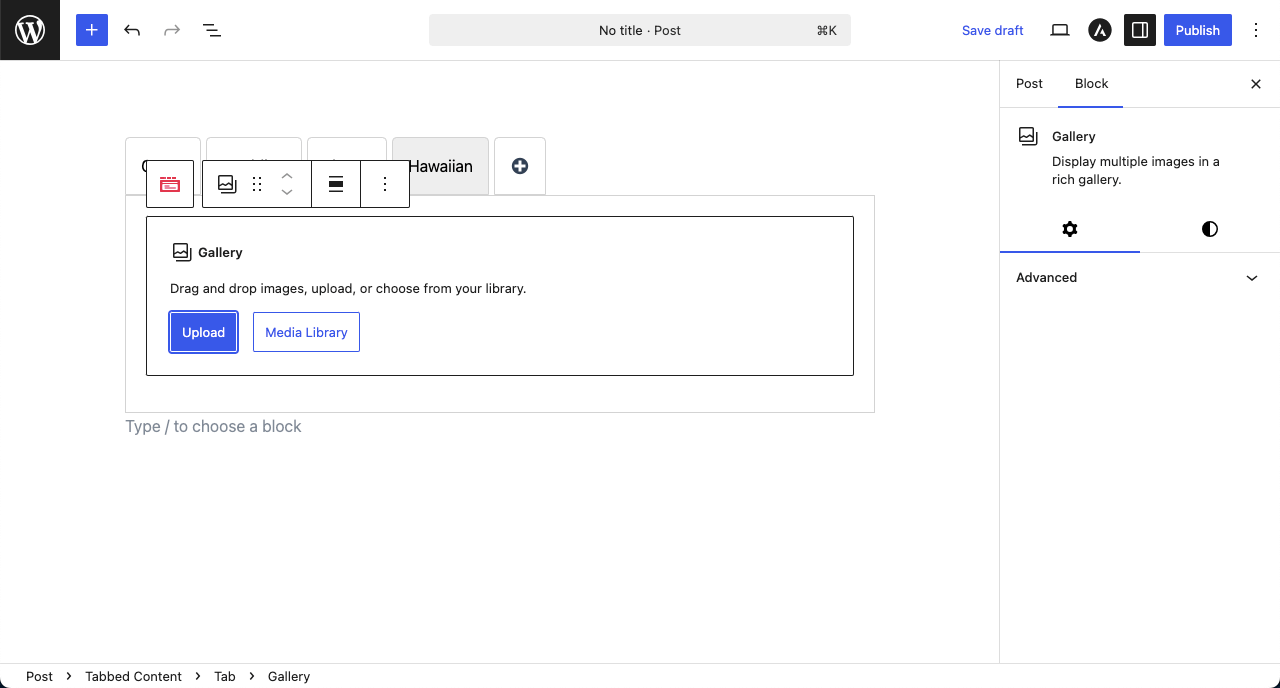
When renaming is done, start adding the gallery block to each tab one by one. The process is as simple as using the Gutenberg block editor.
Upload/add images from your local drive or media library.
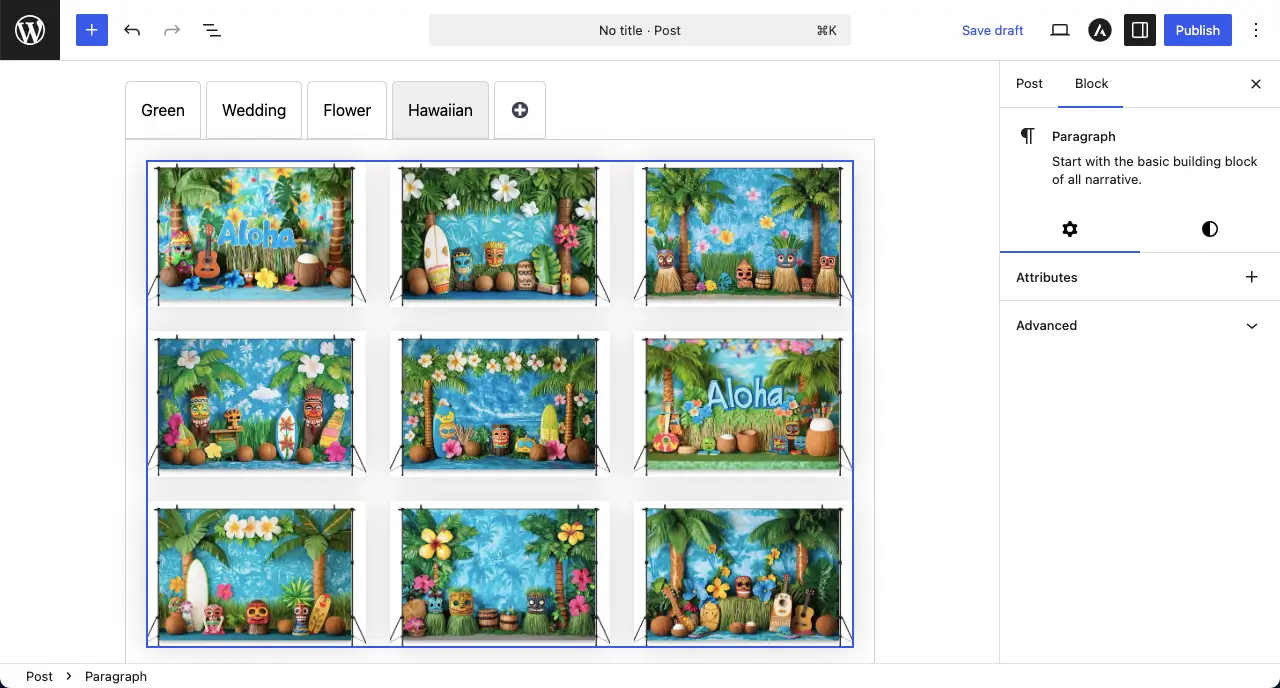
You can see that we have added images to the block’s tab.
Note: In the same way, add the gallery block to all the other tabs of the Tabbed Content block. Here’s a detailed guide on how to use the tabbed content block.
Step 04: Configure Settings of the Tabs
When you have added galleries to all the tabs, you can customize the tabs of the Tabbed Content block.
Keeping a tab selected, go to the Settings tab on the right sidebar. You can customize the Tab Type, Tab Anchors, Call to Action, Animation, and more.

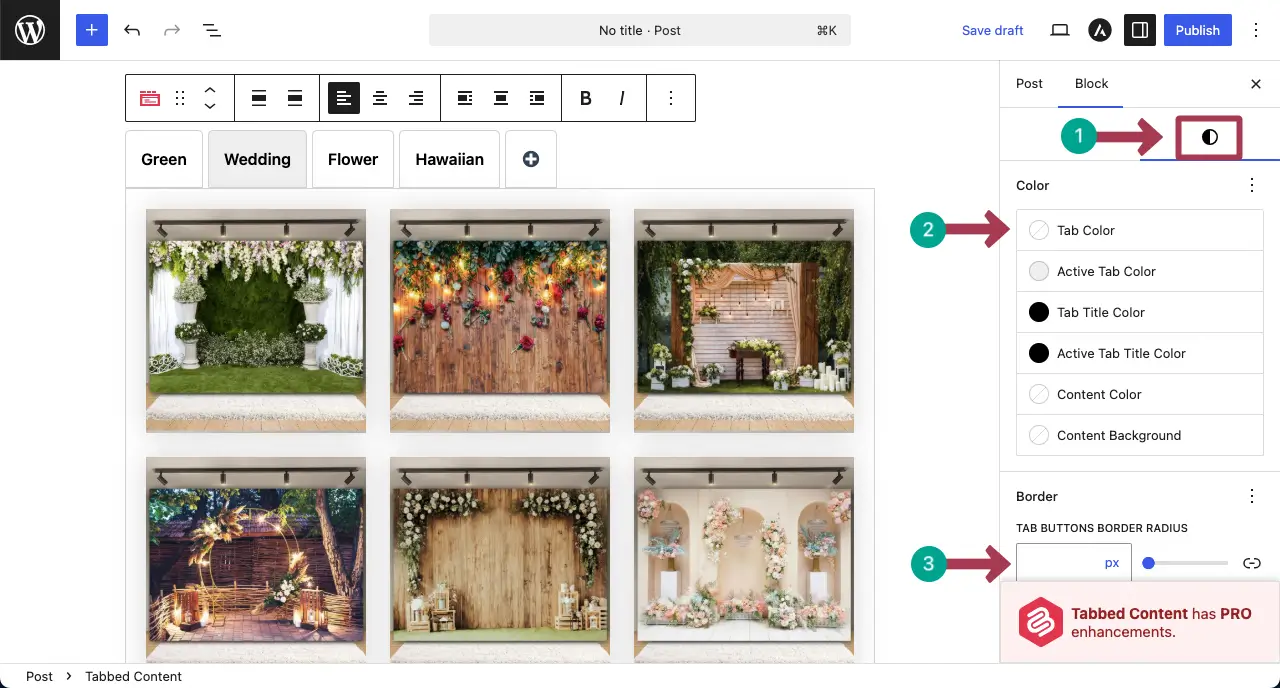
Step 05: Stylize the Tabs Block
Then, from the styles tab, you can change the background color of the block, add a radius, and many more things.
Step 06: Preview Galleries by Categories
Now, go to the preview page. You can explore galleries by clicking the tabs that you created just a while ago.
You can see in the video clip attached below that the tabbed content block, including galleries, is working fine on our end. Hope you it will work on your end as well.
Conclusion
Hope you enjoyed the tutorial. Undoubtedly, showcasing your client work using WordPress Gallery blocks is a smart and simple way to build trust with potential clients. It helps you highlight your skills and show real examples of your past work.
However, while creating your gallery, there are some best practices you must follow. Use high-quality images, but make sure they’re optimized for fast loading. Keep your layout clean and avoid clutter.
Group your work by categories, so visitors can easily find what they’re looking for. And don’t forget to add short captions or project details to give more context. A well-planned gallery can make a strong impression and turn visitors into clients.
Leave a Reply